@dropins/mcp 0.1.0
This diff represents the content of publicly available package versions that have been released to one of the supported registries. The information contained in this diff is provided for informational purposes only and reflects changes between package versions as they appear in their respective public registries.
- package/LICENSE.md +127 -0
- package/README.md +314 -0
- package/dist/common/project-reader.d.ts +55 -0
- package/dist/common/project-reader.js +173 -0
- package/dist/common/registry-loader.d.ts +101 -0
- package/dist/common/registry-loader.js +386 -0
- package/dist/common/response-handling.d.ts +12 -0
- package/dist/common/response-handling.js +21 -0
- package/dist/common/sanitize.d.ts +8 -0
- package/dist/common/sanitize.js +45 -0
- package/dist/common/synonyms.d.ts +9 -0
- package/dist/common/synonyms.js +127 -0
- package/dist/common/telemetry.d.ts +14 -0
- package/dist/common/telemetry.js +54 -0
- package/dist/common/types.d.ts +308 -0
- package/dist/common/types.js +1 -0
- package/dist/common/version.d.ts +2 -0
- package/dist/common/version.js +14 -0
- package/dist/index.d.ts +2 -0
- package/dist/index.js +136 -0
- package/dist/operations/analyze-project.d.ts +13 -0
- package/dist/operations/analyze-project.js +125 -0
- package/dist/operations/check-block-health.d.ts +19 -0
- package/dist/operations/check-block-health.js +1149 -0
- package/dist/operations/check-config.d.ts +13 -0
- package/dist/operations/check-config.js +228 -0
- package/dist/operations/explain-event-flow.d.ts +16 -0
- package/dist/operations/explain-event-flow.js +218 -0
- package/dist/operations/get-upgrade-diff.d.ts +13 -0
- package/dist/operations/get-upgrade-diff.js +144 -0
- package/dist/operations/list-api-functions.d.ts +13 -0
- package/dist/operations/list-api-functions.js +53 -0
- package/dist/operations/list-containers.d.ts +13 -0
- package/dist/operations/list-containers.js +44 -0
- package/dist/operations/list-design-tokens.d.ts +13 -0
- package/dist/operations/list-design-tokens.js +47 -0
- package/dist/operations/list-events.d.ts +16 -0
- package/dist/operations/list-events.js +39 -0
- package/dist/operations/list-graphql-queries.d.ts +19 -0
- package/dist/operations/list-graphql-queries.js +84 -0
- package/dist/operations/list-i18n-keys.d.ts +19 -0
- package/dist/operations/list-i18n-keys.js +105 -0
- package/dist/operations/list-models.d.ts +16 -0
- package/dist/operations/list-models.js +80 -0
- package/dist/operations/list-slots.d.ts +16 -0
- package/dist/operations/list-slots.js +81 -0
- package/dist/operations/scaffold-block.d.ts +31 -0
- package/dist/operations/scaffold-block.js +331 -0
- package/dist/operations/scaffold-extension.d.ts +28 -0
- package/dist/operations/scaffold-extension.js +346 -0
- package/dist/operations/scaffold-slot.d.ts +22 -0
- package/dist/operations/scaffold-slot.js +189 -0
- package/dist/operations/search-commerce-docs.d.ts +16 -0
- package/dist/operations/search-commerce-docs.js +101 -0
- package/dist/operations/search-docs.d.ts +23 -0
- package/dist/operations/search-docs.js +298 -0
- package/dist/operations/suggest-event-handler.d.ts +16 -0
- package/dist/operations/suggest-event-handler.js +175 -0
- package/dist/operations/suggest-slot-implementation.d.ts +19 -0
- package/dist/operations/suggest-slot-implementation.js +183 -0
- package/dist/registry/api-functions.json +3045 -0
- package/dist/registry/block-patterns.json +78 -0
- package/dist/registry/containers.json +2003 -0
- package/dist/registry/design-tokens.json +577 -0
- package/dist/registry/docs/boilerplate.json +55 -0
- package/dist/registry/docs/dropins-all.json +97 -0
- package/dist/registry/docs/dropins-b2b.json +607 -0
- package/dist/registry/docs/dropins-cart.json +163 -0
- package/dist/registry/docs/dropins-checkout.json +193 -0
- package/dist/registry/docs/dropins-order.json +139 -0
- package/dist/registry/docs/dropins-payment-services.json +73 -0
- package/dist/registry/docs/dropins-personalization.json +67 -0
- package/dist/registry/docs/dropins-product-details.json +139 -0
- package/dist/registry/docs/dropins-product-discovery.json +85 -0
- package/dist/registry/docs/dropins-recommendations.json +67 -0
- package/dist/registry/docs/dropins-user-account.json +121 -0
- package/dist/registry/docs/dropins-user-auth.json +103 -0
- package/dist/registry/docs/dropins-wishlist.json +85 -0
- package/dist/registry/docs/get-started.json +85 -0
- package/dist/registry/docs/how-tos.json +19 -0
- package/dist/registry/docs/index.json +139 -0
- package/dist/registry/docs/licensing.json +19 -0
- package/dist/registry/docs/merchants.json +523 -0
- package/dist/registry/docs/resources.json +13 -0
- package/dist/registry/docs/sdk.json +139 -0
- package/dist/registry/docs/setup.json +145 -0
- package/dist/registry/docs/troubleshooting.json +19 -0
- package/dist/registry/events.json +2200 -0
- package/dist/registry/examples/index.json +19 -0
- package/dist/registry/examples/storefront-checkout.json +377 -0
- package/dist/registry/examples/storefront-quote-management.json +49 -0
- package/dist/registry/extensions.json +272 -0
- package/dist/registry/graphql.json +3469 -0
- package/dist/registry/i18n.json +1873 -0
- package/dist/registry/models.json +1001 -0
- package/dist/registry/sdk.json +2357 -0
- package/dist/registry/slots.json +2270 -0
- package/dist/registry/tools-components.json +595 -0
- package/dist/resources/guides.d.ts +7 -0
- package/dist/resources/guides.js +625 -0
- package/dist/resources/handlers.d.ts +31 -0
- package/dist/resources/handlers.js +322 -0
- package/package.json +47 -0
|
@@ -0,0 +1,55 @@
|
|
|
1
|
+
{
|
|
2
|
+
"section": "boilerplate",
|
|
3
|
+
"label": "Boilerplate",
|
|
4
|
+
"pageCount": 8,
|
|
5
|
+
"pages": [
|
|
6
|
+
{
|
|
7
|
+
"path": "boilerplate",
|
|
8
|
+
"title": "Overview",
|
|
9
|
+
"description": "What the Commerce boilerplate is, which GitHub repo to use, and where to go next for setup, blocks, and configuration.",
|
|
10
|
+
"content": "This overview describes the Commerce boilerplate repository and how it fits Edge Delivery Services and drop-ins. Start with the definition below, then follow First steps when you are ready to clone, run locally, or dig into architecture.\n\n## What is the Commerce boilerplate?\n\nThe Commerce boilerplate is Adobe's supported starter/reference codebase for storefronts on Edge Delivery Services (Adobe's hosting and delivery infrastructure that turns authored documents into fast HTML pages served from servers close to the shopper. You push code to GitHub; Edge Delivery Services builds and publishes automatically.) (EDS). You clone it from GitHub, connect your Commerce backend, and customize blocks, scripts, and styles in that repository instead of tying together every Commerce integration yourself. \n\nThe boilerplate repository lives at . EDS hosts and publishes your site from that repo. The boilerplate also bundles Drop-in components (NPM packages that provide core Commerce storefront features such as cart, checkout, product details, and account flows.) for cart, checkout, product listings, and related Commerce flows so you theme and configure shipped UI rather than building those screens from scratch.\n\n> **One supported boilerplate**\n>\n is the only Adobe-supported Commerce starter/reference storefront. Demo storefronts (for example Citisignal) are forks for events or showcases. They often lag behind this repository and are not a safe starting point for your own project.\n\n\n## First steps\n\n\n1. If you still need a site, follow [Create a storefront](https://experienceleague.adobe.com/developer/commerce/storefront/get-started/create-storefront/). When you already have a repo, open [Boilerplate getting started](https://experienceleague.adobe.com/developer/commerce/storefront/boilerplate/getting-started/) to run `npm install` and `npm start`, and explore `blocks/`, `scripts/`, and `styles/`.\n\n1. Read [Storefront Architecture](https://experienceleague.adobe.com/developer/commerce/storefront/get-started/architecture/) when you need the full picture of how authoring, blocks, drop-ins, and Commerce APIs connect.\n\n\n## Other topics in this section\n\nUse these when you already have a project open on disk:\n\n- [Configuration](https://experienceleague.adobe.com/developer/commerce/storefront/boilerplate/configuration/) — Commerce backend endpoints, headers, and storefront settings.\n- [Blocks reference](https://experienceleague.adobe.com/developer/commerce/storefront/boilerplate/blocks-reference/) and [Blocks customization](https://experienceleague.adobe.com/developer/commerce/storefront/boilerplate/customizing-blocks/) — Block behavior and layout.\n- [Universal Editor](https://experienceleague.adobe.com/developer/commerce/storefront/boilerplate/universal-editor/) — Optional authoring path alongside Document Authoring.\n- [Boilerplate updates](https://experienceleague.adobe.com/developer/commerce/storefront/boilerplate/updates/) — Staying current (npm drop-ins first; suite tags are tested snapshots, not fork upgrade targets).\n- [AI agent skills](https://experienceleague.adobe.com/developer/commerce/storefront/boilerplate/ai-agent-skills/) — Optional skills for coding agents.\n\n## Related areas outside this section\n\n- [Commerce configuration](https://experienceleague.adobe.com/developer/commerce/storefront/setup/configuration/commerce-configuration/) — Wire the storefront to your Commerce backend after the boilerplate runs.\n- [Commerce blocks (merchants)](https://experienceleague.adobe.com/developer/commerce/storefront/merchants/blocks/) — How merchants work with blocks in authoring tools.\n- [Drop-ins introduction](https://experienceleague.adobe.com/developer/commerce/storefront/dropins/all/introduction/) — Technical reference for each drop-in.\n\n## Packages and block wiring\n\nWhen you trace `npm` dependencies or debug install issues, open [Getting started](https://experienceleague.adobe.com/developer/commerce/storefront/boilerplate/getting-started/) for the key runtime packages the boilerplate adds. When you need each Commerce block’s drop-ins, GitHub source folder, and merchant-facing topic in one place, open [Blocks reference](https://experienceleague.adobe.com/developer/commerce/storefront/boilerplate/blocks-reference/)."
|
|
11
|
+
},
|
|
12
|
+
{
|
|
13
|
+
"path": "boilerplate/ai-agent-skills",
|
|
14
|
+
"title": "AI agent skills",
|
|
15
|
+
"description": "Learn how to install and use AI agent skills for Adobe Commerce storefront development on Edge Delivery Services with the AEM Commerce Boilerplate.",
|
|
16
|
+
"content": "AI agent skills give your coding agent deep, domain-specific knowledge about Adobe Commerce storefront development. When you install the **AEM Boilerplate Commerce** skill set, your agent understands the boilerplate's architecture, drop-in component patterns, block conventions, and best practices — so you spend less time explaining context and more time building.\n\n## What the skills provide\n\nThe AEM Boilerplate Commerce skill set installs six specialized skills into your coding agent. Each skill covers a focused area of storefront development.\n\n\n| Skill | What it helps you do |\n|-------|----------------------|\n| **Project manager** | Breaks down tasks, guides phased delivery, and keeps development on track before any code is written |\n| **Researcher** | Looks up drop-in component APIs, slot names, event payloads, and TypeScript definitions before implementing |\n| **Block developer** | Builds and customizes Edge Delivery Services blocks using correct DOM patterns and CSS scoping |\n| **Drop-in developer** | Customizes drop-in components using containers, slots, events, and API functions |\n| **Content modeler** | Designs block table structures that are easy for content authors to work with |\n| **Tester** | Verifies implementations in a real browser and checks Core Web Vitals and accessibility |\n\n\nThe skills work together. For every new task, your agent starts with the project manager skill to scope the work, consults the researcher skill before implementing, and delegates to the appropriate developer skill based on what needs to be built.\n\n## Prerequisites\n\nBefore installing the skills, make sure you have the following:\n\n- **Node.js 22 or later** — The Adobe I/O CLI requires Node 22+. Use to manage multiple Node versions.\n- **An AEM Boilerplate Commerce project** — The skills are designed for projects based on the . If you have not created a boilerplate storefront, see [Getting started](https://experienceleague.adobe.com/developer/commerce/storefront/boilerplate/getting-started/) to create one.\n- **Adobe I/O CLI** — Install or update with npm:\n\n ```bash\n npm install -g @adobe/aio-cli\n ```\n\n See the for more details.\n\n > **Authentication**\n>\n You can log in with `aio auth login`. Without authentication, the MCP server will not work.\n \n\n- **Adobe I/O Commerce plugin** — Install the Commerce plugin for the aio CLI:\n\n ```bash\n aio plugins:install https://github.com/adobe-commerce/aio-cli-plugin-commerce\n ```\n\n See the for additional details.\n\n> **Authentication and entitlements**\n>\nYou do not need to log in via the Adobe I/O CLI (IMS), or have any specific org or entitlement, to install the skills. The MCP server that the setup configures — and that the researcher skill uses for documentation search — can use IMS when available. If that service is not available to your agent, the researcher skill falls back to web search instead.\n\n\n## Install the skills\n\nRun the following command from the root of your boilerplate project:\n\n```bash\naio commerce extensibility tools-setup\n```\n\nThe command walks you through a series of two prompts:\n\n\n1. **Select a starter kit** — A starter kit is a starting project template. Choose **AEM Boilerplate Commerce** to tell the installer which skill set and conventions to copy into your project (other starter kits may be added in the future).\n\n1. **Select your coding agent** — Choose your agent from the list of supported agents. This determines where the skill files are installed so your agent can find them (for example, Cursor uses `.cursor/skills/`).\n\n\n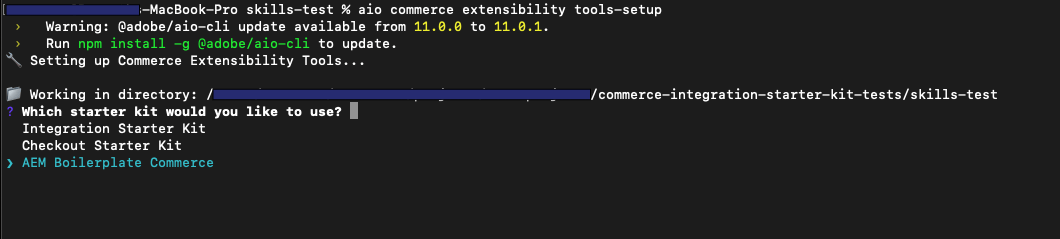\n\nThe command installs the `@adobe-commerce/commerce-extensibility-tools` package as a dev dependency, copies the skill files into your agent's skills directory, and configures MCP (Model Context Protocol) so your agent can access Commerce documentation search tools.\n\n> **Non-interactive install**\n>\nTo install without prompts — for example, in a CI pipeline — pass all flags directly:\n\n```bash\naio commerce extensibility tools-setup \\\n --starter-kit aem-boilerplate-commerce \\\n --agent Cursor \\\n --package-manager npm\n```\n\n\n### Supported agents\n\n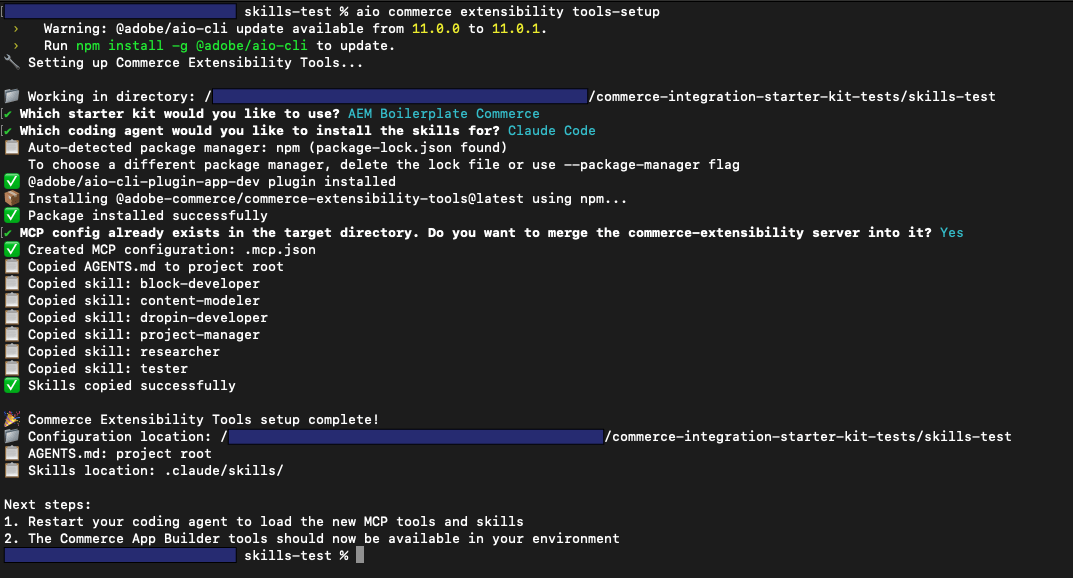\n\nAfter the install completes, restart your coding agent so it picks up the new skills and MCP configuration.\n\nDifferent agents and IDEs expose skills in different ways, so there is no single way to confirm that the skills are installed correctly. Check your agent's or IDE's documentation for how to verify that it has loaded your project's skills. For example, in Cursor you can open the configuration or settings area to see the list of skills it has detected; other agents use different UIs or indicators.\n\n\n| Agent | Skills location |\n|-------|-----------------|\n| Cursor | `.cursor/skills/` |\n| Claude Code | `.claude/skills/` |\n| GitHub Copilot | `.github/skills/` |\n| Windsurf | `.windsurf/skills/` |\n| Gemini CLI | `.gemini/skills/` |\n| OpenAI Codex | `.agents/skills/` |\n| Cline | `.cline/skills/` |\n| Kilo Code | `.kilocode/skills/` |\n| Antigravity | `.agent/skills/` |\n| Other | `./skills/` (project root) |\n\n\n## How to use the skills\n\nOnce installed, the skills are available to your agent automatically. You don't need to reference them by name in every prompt. Here is how the agent uses them:\n\n- **Start every new task by describing what you want to build.** The project manager skill activates first to assess complexity and confirm the plan with you before any code is written.\n- **For drop-in customizations**, the agent uses the researcher skill to look up the correct slot names, event payloads, and API functions from the actual source before writing code — not from assumptions.\n- **For block development**, the agent follows boilerplate conventions: DOM manipulation with `document.createElement()`, CSS selectors scoped to the block name, and checking `/blocks` for existing solutions before creating new ones.\n- **For content structure**, the agent uses the content modeler skill to design block tables that work for both developers and content authors.\n- **After implementation**, the agent uses the tester skill to verify the result in a real browser, not just by reviewing code.\n\n**Example prompt** — You can trigger the planning workflow and developer skills with a single, detailed request. For example:\n\n> Use the planning workflow to add a button to the product pages that allows the user to quickly share the product on social media platforms like Facebook and Twitter. The button should be displayed below the title section on the product detail page.\n\n> **Browser testing**\n>\nThe tester skill requires a running local development server. Use `aem up` to start your local server before asking your agent to verify an implementation.\n\n\n## What gets installed\n\nAfter running the setup command, your project contains:\n\n\n| File or directory | Purpose |\n|-------------------|---------|\n| `AGENTS.md` (project root) | Top-level instructions your agent reads at the start of every session |\n| `<agent-skills-dir>/` | Skill files with domain-specific rules for each development area |\n| MCP config file | Connects your agent to the `commerce-extensibility:search-commerce-docs` tool for live documentation search |\n\n\nThe MCP tool gives your agent access to Adobe Commerce and App Builder documentation directly from within your coding session, which is what the researcher skill uses as its primary information source.\n\n## Related resources\n\n\n| Resource | Description |\n|----------|-------------|\n| [Boilerplate getting started](https://experienceleague.adobe.com/developer/commerce/storefront/boilerplate/getting-started/) | Create and run your storefront locally |\n| [Drop-in components](https://experienceleague.adobe.com/developer/commerce/storefront/dropins/all/introduction/) | Drop-in component API reference |\n| [Blocks reference](https://experienceleague.adobe.com/developer/commerce/storefront/boilerplate/blocks-reference/) | Reference for all available Commerce blocks |\n| | Source and full documentation for the Commerce CLI plugin |"
|
|
17
|
+
},
|
|
18
|
+
{
|
|
19
|
+
"path": "boilerplate/blocks-reference",
|
|
20
|
+
"title": "Blocks reference",
|
|
21
|
+
"description": "Technical reference for all Commerce blocks in the boilerplate, organized by functionality and integration patterns.",
|
|
22
|
+
"content": "This reference provides technical details for all Commerce blocks included in the boilerplate. Each block integrates one or more drop-in components to provide complete Commerce functionality.\n\n## Quick reference by functionality\n\nThe Merchant topic column links to merchant-facing documentation when you need the block title authors use in documents. The Block column links to the GitHub source folder.\n\n{/* Block column: GitHub source. Merchant topic: internal merchant docs when a topic exists. */}\n\n\n| Block | Merchant topic | Primary Drop-ins | Key Features |\n|-------|----------------|------------------|--------------|\n| Shopping Experience | | | |\n| | [Product List Page](https://experienceleague.adobe.com/developer/commerce/storefront/merchants/blocks/product-list-page/) | storefront-product-discovery, tools, storefront-wishlist, storefront-requisition-list, storefront-cart | Search, filtering, sorting, pagination, wishlist integration |\n| | [Product Details](https://experienceleague.adobe.com/developer/commerce/storefront/merchants/blocks/product-details/) | tools, storefront-pdp, storefront-wishlist, storefront-requisition-list | Product options, pricing, add to cart, wishlist toggle |\n| | [Product Recommendations](https://experienceleague.adobe.com/developer/commerce/storefront/merchants/content-customizations/product-recommendations/) | tools, storefront-cart, storefront-recommendations, storefront-wishlist | AI-powered recommendations, multiple page types |\n| | [Commerce Cart](https://experienceleague.adobe.com/developer/commerce/storefront/merchants/blocks/commerce-cart/) | tools, storefront-cart, storefront-wishlist, storefront-quote-management | Item management, coupon codes, gift options, move to wishlist |\n| | [Commerce Mini Cart](https://experienceleague.adobe.com/developer/commerce/storefront/merchants/blocks/commerce-mini-cart/) | storefront-cart, tools | Dropdown cart summary, quick view, checkout navigation |\n| | [Commerce Checkout](https://experienceleague.adobe.com/developer/commerce/storefront/merchants/blocks/commerce-checkout/) | tools, storefront-order, storefront-checkout | Complete checkout flow, shipping, payment, order review |\n| Customer Account | | | |\n| | [Commerce Login](https://experienceleague.adobe.com/developer/commerce/storefront/merchants/blocks/commerce-login/) | storefront-auth | Email/password authentication, redirect handling |\n| | [Commerce Create Account](https://experienceleague.adobe.com/developer/commerce/storefront/merchants/blocks/commerce-create-account/) | storefront-auth | Registration form, validation, account creation |\n| | [Commerce Confirm Account](https://experienceleague.adobe.com/developer/commerce/storefront/merchants/blocks/commerce-confirm-account/) | storefront-auth, tools | Email confirmation landing, account activation |\n| | [Commerce Forgot Password](https://experienceleague.adobe.com/developer/commerce/storefront/merchants/blocks/commerce-forgot-password/) | storefront-auth, tools | Password reset request, email trigger |\n| | [Commerce Create Password](https://experienceleague.adobe.com/developer/commerce/storefront/merchants/blocks/commerce-create-password/) | storefront-auth, tools | Password reset form, token validation |\n| | [Commerce Account Header](https://experienceleague.adobe.com/developer/commerce/storefront/merchants/blocks/commerce-account-header/) | tools | Customer name display, logout functionality |\n| | [Commerce Account Sidebar](https://experienceleague.adobe.com/developer/commerce/storefront/merchants/blocks/commerce-account-sidebar/) | tools, storefront-account | Account navigation menu, active state management |\n| | [Commerce Addresses](https://experienceleague.adobe.com/developer/commerce/storefront/merchants/blocks/commerce-addresses/) | storefront-account | Address CRUD operations, default address management |\n| | [Commerce Customer Information](https://experienceleague.adobe.com/developer/commerce/storefront/merchants/blocks/commerce-customer-information/) | storefront-account | Profile editing, email/name updates |\n| | [Commerce Customer Details](https://experienceleague.adobe.com/developer/commerce/storefront/merchants/blocks/commerce-customer-details/) | storefront-order | Customer info display in order context |\n| Order Management | | | |\n| | [Commerce Orders List](https://experienceleague.adobe.com/developer/commerce/storefront/merchants/blocks/commerce-orders-list/) | storefront-account, tools | Order history, status display, order details navigation |\n| | [Commerce Search Order](https://experienceleague.adobe.com/developer/commerce/storefront/merchants/blocks/commerce-search-order/) | storefront-auth, storefront-order, tools | Guest order lookup, email and order number validation |\n| | [Commerce Order Header](https://experienceleague.adobe.com/developer/commerce/storefront/merchants/blocks/commerce-order-header/) | tools | Order number, date, status badge |\n| | [Commerce Order Status](https://experienceleague.adobe.com/developer/commerce/storefront/merchants/blocks/commerce-order-status/) | storefront-order | Detailed status, tracking info, delivery estimates |\n| | [Commerce Order Product List](https://experienceleague.adobe.com/developer/commerce/storefront/merchants/blocks/commerce-order-product-list/) | storefront-order, storefront-cart, tools | Line items, reorder functionality, product images |\n| | [Commerce Order Cost Summary](https://experienceleague.adobe.com/developer/commerce/storefront/merchants/blocks/commerce-order-cost-summary/) | storefront-order | Subtotal, taxes, shipping, discounts, grand total |\n| | [Commerce Shipping Status](https://experienceleague.adobe.com/developer/commerce/storefront/merchants/blocks/commerce-shipping-status/) | storefront-order, tools | Shipment tracking, carrier info, delivery status |\n| Returns & Exchanges | | | |\n| | [Commerce Returns List](https://experienceleague.adobe.com/developer/commerce/storefront/merchants/blocks/commerce-returns-list/) | storefront-order, tools | Return history, status tracking, return details navigation |\n| | [Commerce Create Return](https://experienceleague.adobe.com/developer/commerce/storefront/merchants/blocks/commerce-create-return/) | storefront-order, tools | Return request form, item selection, reason codes |\n| | [Commerce Order Returns](https://experienceleague.adobe.com/developer/commerce/storefront/merchants/blocks/commerce-order-returns/) | tools, storefront-order | Return details for specific order |\n| | [Commerce Return Header](https://experienceleague.adobe.com/developer/commerce/storefront/merchants/blocks/commerce-return-header/) | tools | Return number, date, status display |\n| Gift Options | | | |\n| | [Commerce Gift Options](https://experienceleague.adobe.com/developer/commerce/storefront/merchants/blocks/commerce-gift-options/) | storefront-cart | Gift messages, gift wrapping, gift receipt options |\n| Wishlist | | | |\n| | [Commerce Wishlist](https://experienceleague.adobe.com/developer/commerce/storefront/merchants/blocks/commerce-wishlist/) | storefront-cart, storefront-pdp, storefront-wishlist, storefront-auth, tools | Saved items, move to cart, item management |\n\n\n## Integration patterns\n\n### Block decoration flow\n\nEvery Commerce block follows this initialization pattern:\n\n1. **Server-side rendering**: Edge Delivery Services transforms the document table into HTML\n2. **Client-side decoration**: The block's JavaScript decorator runs via `decorateBlock()`\n3. **Drop-in initialization**: Drop-in containers are initialized with configuration and providers\n4. **Rendering**: Drop-in components render into the block's DOM\n5. **Event handling**: Event listeners connect to the global event bus\n\n### Common integration patterns\n\n#### Simple drop-in rendering\n\nBlocks like Login and Forgot Password simply render a single drop-in container:\n\n```javascript\nexport default async function decorate(block) {\n const { render } = await import('@dropins/storefront-auth/containers/SignIn.js');\n await render(SignInContainer, {})({});\n}\n```\n\n#### Multi-drop-in coordination\n\nComplex blocks like Cart and Checkout coordinate multiple drop-ins:\n\n```javascript\n// Cart block uses cart + wishlist drop-ins\n\n\n```\n\n#### Configuration from block tables\n\nBlocks read configuration from document authoring tables:\n\n```javascript\nconst config = readBlockConfig(block);\nconst hideHeading = config['hide-heading'] === 'true';\n```\n\n#### Event bus integration\n\nBlocks listen to events from drop-ins and other blocks:\n\n```javascript\nevents.on('cart/updated', () => {\n // React to cart changes\n});\n```\n\n## Implementation details\n\n### Drop-in dependencies\n\nAll drop-ins are loaded via import maps defined in `head.html`:\n\n```json\n{\n \"imports\": {\n \"@dropins/storefront-cart/\": \"/scripts/__dropins__/storefront-cart/\",\n \"@dropins/storefront-checkout/\": \"/scripts/__dropins__/storefront-checkout/\"\n }\n}\n```\n\n### Provider initialization\n\nDrop-ins require providers to be initialized in `scripts/initializers/`:\n\n- **GraphQL provider**: Configures Commerce backend endpoint and headers\n- **Authentication provider**: Manages customer sessions and tokens\n- **Event provider**: Sets up the global event bus\n\nSee [Configuration](https://experienceleague.adobe.com/developer/commerce/storefront/boilerplate/configuration/) for provider setup details.\n\n### Styling\n\nEach block includes:\n\n1. **Base styles**: Block-specific CSS in `blocks/*/block-name.css`\n2. **Drop-in tokens**: Design tokens in `scripts/initializers/dropin-name.js`\n3. **Global tokens**: Shared tokens in `scripts/initializers/`\n\n## Blocks by page type\n\n### Essential implementations\n\nEvery storefront requires these pages:\n\n- **Homepage**: Product Recommendations, Product List Page\n- **Product Page (PDP)**: Product Details, Product Recommendations\n- **Cart Page**: Cart, Product Recommendations\n- **Checkout Page**: Checkout\n- **Account Dashboard**: Account Header, Account Sidebar\n\n### Common additions\n\nEnhance your storefront with:\n\n- **Wishlist Page**: Wishlist\n- **Order Tracking**: Search Order, Order Status, Orders List\n- **Returns Portal**: Create Return, Returns List, Order Returns\n- **Account Management**: Addresses, Customer Information\n\n## Performance considerations\n\nFor storefront-wide guidance see [Performance best practices](https://experienceleague.adobe.com/developer/commerce/storefront/get-started/performance/).\n\n### Lazy loading\n\nCommerce blocks are lazy-loaded automatically:\n\n1. Blocks below the fold are loaded when scrolled into view\n2. Drop-in containers are code-split and loaded on demand\n3. Heavy dependencies (like checkout) are loaded only when needed\n\n### Critical rendering path\n\nFor optimal performance:\n\n1. Keep Mini Cart in header (loads early)\n2. Defer non-critical blocks below the fold\n3. Use Product Recommendations sparingly (loads ML models)\n\n## Development workflow\n\n### Local testing\n\n1. Start the AEM CLI: `aem up`.\n2. Modify block JavaScript in `blocks/commerce-*/`.\n3. Observe changes hot-reload automatically.\n4. Test with demo backend or configure your own in `config.json` (copy from or use the ).\n\n### Adding new blocks\n\nTo create a custom Commerce block:\n\n1. Create a new directory: `blocks/my-custom-block/`\n2. Add decorator: `my-custom-block.js`\n3. Add styles: `my-custom-block.css`\n4. Import and render drop-in containers\n5. Initialize required providers\n\nSee for block creation basics.\n\n## Related resources\n\n- [Boilerplate overview](https://experienceleague.adobe.com/developer/commerce/storefront/boilerplate/) - Complete technical reference\n- [Configuration page](https://experienceleague.adobe.com/developer/commerce/storefront/boilerplate/configuration/) - Setup and provider configuration\n- [Drop-in documentation](https://experienceleague.adobe.com/developer/commerce/storefront/dropins/all/introduction/) - Drop-in technical details\n- [Merchant block reference](https://experienceleague.adobe.com/developer/commerce/storefront/merchants/blocks/) - Business user perspective\n- \n\n## Need help?\n\n- **Block not rendering?** Verify drop-in providers are initialized in `scripts/initializers/`\n- **GraphQL errors?** Check Commerce backend configuration in your `config.json` file\n- **Styling issues?** Review design token configuration in drop-in initializers\n- **Event not firing?** Ensure event bus is initialized and event names match documentation"
|
|
23
|
+
},
|
|
24
|
+
{
|
|
25
|
+
"path": "boilerplate/configuration",
|
|
26
|
+
"title": "Configuration",
|
|
27
|
+
"description": "Learn how to configure the AEM Commerce boilerplate for your storefront.",
|
|
28
|
+
"content": "The AEM Commerce boilerplate requires configuration to connect to your Adobe Commerce instance and customize the storefront behavior.\n\n## Configuration overview\n\nThe boilerplate uses multiple configuration files depending on your deployment stage:\n\n- **Local development** - Copy of the demo configuration for Commerce backend connection\n- **Production deployment** - Configuration Service with template files for site setup\n- **Drop-in initialization** - Initializer files in `scripts/initializers/`\n\n## Endpoints by backend\n\nWhich endpoints you set depends on your Commerce backend:\n\n- **Adobe Commerce as a Cloud Service** — Set only **`commerce-endpoint`** to the GraphQL endpoint URL for that service.\n- **Adobe Commerce Optimizer** — Set **`commerce-endpoint`** to the Adobe Commerce Optimizer GraphQL URL for the catalog, and set **`commerce-core-endpoint`** to your Commerce core endpoint URL (for example, Commerce PaaS or another Adobe Commerce host you manage).\n\nFor full details and examples, see [Storefront configuration](https://experienceleague.adobe.com/developer/commerce/storefront/setup/configuration/commerce-configuration/).\n\n## Demo Configuration (Local Development)\n\nFor local development, you can use the demo configuration for the boilerplate as a starting point. The live demo configuration is available at and connects to the sample Commerce backend for the boilerplate:\n\n```json\n{\n \"public\": {\n \"default\": {\n \"commerce-core-endpoint\": \"https://www.aemshop.net/graphql\",\n \"commerce-endpoint\": \"https://www.aemshop.net/cs-graphql\",\n \"commerce-assets-enabled\": false,\n \"headers\": {\n \"all\": {\n \"Store\": \"default\"\n },\n \"cs\": {\n \"Magento-Store-Code\": \"main_website_store\",\n \"Magento-Store-View-Code\": \"default\",\n \"Magento-Website-Code\": \"base\",\n \"x-api-key\": \"<YOUR_API_KEY>\",\n \"Magento-Environment-Id\": \"<YOUR_ENVIRONMENT_ID>\"\n }\n },\n \"analytics\": {\n \"base-currency-code\": \"USD\",\n \"environment\": \"Testing\",\n \"environment-id\": \"f38a0de0-764b-41fa-bd2c-5bc2f3c7b39a\",\n \"store-code\": \"main_website_store\",\n \"store-id\": 1,\n \"store-name\": \"Main Website Store\",\n \"store-url\": \"https://www.aemshop.net\",\n \"store-view-code\": \"default\",\n \"store-view-id\": 1,\n \"store-view-name\": \"Default Store View\",\n \"website-code\": \"base\",\n \"website-id\": 1,\n \"website-name\": \"Main Website\"\n },\n \"plugins\": {\n \"picker\": {\n \"rootCategory\": \"YOUR_ROOT_CATEGORY_ID\"\n }\n }\n }\n }\n}\n```\n\n### Local vs Production Configuration\n\n#### For local development\n- Save a copy of the demo configuration (from ) as `config.json` in your project root.\n- The AEM CLI will automatically serve `config.json` at runtime.\n- Alternatively, use the to generate a configuration with your backend values (may contain placeholders to fill in).\n- Update the values to connect to your own Commerce backend as needed.\n\n#### For production deployment\n\n- **Configuration Service (Recommended)** - Use the Configuration Service, which stores configuration at `https://admin.hlx.page/config//sites//public.json`. This approach allows configuration updates without code deployments and is the preferred method for all production sites. See the for details.\n\n :::caution\n Do **not** commit `config.json` to the `main` branch if you are using the Configuration Service. A `config.json` present on a code branch takes precedence over the Configuration Service, which means your production config service values will be silently ignored. Reserve `config.json` for local development and branch-based testing only.\n :::\n\n #### If `config.json` is already on `main`\n\n If you previously committed `config.json` to your `main` branch, you must complete these steps before the Configuration Service takes effect. Edge Delivery serves a `config.json` file from the repository before it falls back to the Configuration Service, so copying settings into the service alone is not enough until the repository file is gone.\n\n \n\n 1. Copy all values from the `public` section of your repository `config.json`. That object is what you publish as `public.json` in the Configuration Service.\n\n 1. POST that JSON to `https://admin.hlx.page/config//sites//public.json` using the Configuration Service API. Authenticate the request and set the body as described in the and the .\n\n 1. Delete `config.json` from the repository and merge that change into `main`. After the file no longer exists on `main`, the CDN can resolve configuration from the Configuration Service instead of the repository copy.\n\n 1. When you verify in a browser, clear session storage for your site in Developer Tools (Application → Session storage), then reload. The storefront caches configuration in session storage, so clearing it avoids stale values after you switch sources. For caching behavior and timing, see [Storefront configuration](https://experienceleague.adobe.com/developer/commerce/storefront/setup/configuration/commerce-configuration/).\n\n \n\n- **Repository-based config (local dev and branch testing only)** - A `config.json` file in your repository root is useful for local development and testing on feature branches. Edge Delivery Services will serve this file at `/config.json` and it will override the Configuration Service. Do not use this approach for production — remove or exclude `config.json` from your `main` branch.\n\n## Production Configuration Templates\n\nThe boilerplate includes template configuration files with placeholders for your site setup:\n\n### default-site.json\n\nComprehensive site configuration template for production deployment:\n\n```json\n{\n \"version\": 1,\n \"code\": {\n \"owner\": \"\",\n \"repo\": \"\",\n \"source\": {\n \"type\": \"github\",\n \"url\": \"https://github.com//\"\n }\n },\n \"content\": {\n \"source\": {\n \"url\": \"\",\n \"type\": \"onedrive\"\n }\n },\n \"folders\": {\n \"/products/\": \"/products/default\"\n },\n \"cdn\": {\n \"live\": {\n \"host\": \"main----.aem.live\"\n },\n \"preview\": {\n \"host\": \"main----.aem.page\"\n }\n },\n \"headers\": {},\n \"public\": {\n \"default\": {\n \"commerce-core-endpoint\": \"\",\n \"commerce-endpoint\": \"\",\n \"headers\": {\n \"all\": {\n \"Store\": \"default\"\n },\n \"cs\": {\n \"Magento-Store-Code\": \"\",\n \"Magento-Store-View-Code\": \"\",\n \"Magento-Website-Code\": \"\",\n \"x-api-key\": \"\",\n \"Magento-Environment-Id\": \"\"\n }\n },\n \"analytics\": {\n \"aep-ims-org-id\": \"\",\n \"aep-datastream-id\": \"\",\n \"base-currency-code\": \"USD\",\n \"environment\": \"Production\",\n \"store-id\": \"\",\n \"store-name\": \"Main Website Store\",\n \"store-url\": \"\",\n \"store-view-id\": \"\",\n \"store-view-name\": \"Default Store View\",\n \"website-id\": \"\",\n \"website-name\": \"Main Website\"\n },\n \"plugins\": {\n \"picker\": {\n \"rootCategory\": \"\"\n }\n }\n }\n },\n \"robots\": {\n \"txt\": \"User-agent: *\\nAllow: /\\nDisallow: /drafts/\\nDisallow: /enrichment/\\nDisallow: /tools/\\nDisallow: /plugins/experimentation/\\n\\nSitemap: https:///sitemap-index.xml\"\n },\n \"access\": {\n \"admin\": {\n \"role\": {\n \"config_admin\": [\"\"]\n },\n \"requireAuth\": \"auto\"\n }\n }\n}\n```\n\nReplace the `` values with your actual configuration.\n\n\n### default-query.yaml\n\nContent indexing configuration for generating sitemap and enrichment data:\n\n```yaml\nversion: 1\nindices:\n sitemap:\n target: /sitemap.json\n exclude:\n - 'drafts/**'\n - 'enrichment/**'\n - 'fragments/**'\n - 'products/**'\n properties:\n title:\n select: head > meta[property=\"og:title\"]\n value: |\n attribute(el, 'content')\n image:\n select: head > meta[property=\"og:image\"]\n value: |\n attribute(el, 'content')\n description:\n select: head > meta[name=\"description\"]\n value: |\n attribute(el, 'content')\n template:\n select: head > meta[name=\"template\"]\n value: |\n attribute(el, 'content')\n robots:\n select: head > meta[name=\"robots\"]\n value: |\n attribute(el, 'content')\n lastModified:\n select: none\n value: parseTimestamp(headers[\"last-modified\"], \"ddd, DD MMM YYYY hh:mm:ss GMT\")\n enrichment:\n target: /enrichment/enrichment.json\n include:\n - '**/enrichment/**'\n properties:\n title:\n select: head > meta[property=\"og:title\"]\n value: |\n attribute(el, 'content')\n products:\n select: head > meta[name=\"enrichment-products\"]\n values: |\n match(attribute(el, 'content'), '([^,]+)')\n categories:\n select: head > meta[name=\"enrichment-categories\"]\n values: |\n match(attribute(el, 'content'), '([^,]+)')\n positions:\n select: head > meta[name=\"enrichment-positions\"]\n values: |\n match(attribute(el, 'content'), '([^,]+)')\n```\n\n### default-sitemap.yaml\n\nSitemap generation configuration:\n\n```yaml\nsitemaps:\n default:\n source: /sitemap.json\n destination: /sitemap-content.xml\n lastmod: YYYY-MM-DD\n```\n\nThe sitemap reads from the generated `sitemap.json` (created by `default-query.yaml`) and outputs an XML sitemap.\n\n## Drop-in Initializers\n\nConfigure individual drop-ins in `scripts/initializers/`:\n\n### Example: cart.js\n\n```javascript\n\n\nawait initializeDropin(async () => {\n // Set Fetch GraphQL (Core)\n setEndpoint(CORE_FETCH_GRAPHQL);\n\n // Fetch placeholders\n const labels = await fetchPlaceholders('placeholders/cart.json');\n\n const langDefinitions = {\n default: {\n ...labels,\n },\n };\n\n // Initialize cart\n return initializers.mountImmediately(initialize, { langDefinitions });\n})();\n```\n\n## Environment-Specific Configuration\n\n> **Tip**\n>\nUse different configuration values for different environments:\n\n- **Local**: `config.json` in your project root (copy from or generate with the ).\n- **Preview**: Configure in AEM.page branch settings.\n- **Production**: Configure in AEM.live production settings.\n\n\n## Related Documentation\n\n- [Boilerplate overview](https://experienceleague.adobe.com/developer/commerce/storefront/boilerplate/) - Complete reference\n- [Storefront configuration page](https://experienceleague.adobe.com/developer/commerce/storefront/setup/configuration/commerce-configuration/) - Detailed setup instructions\n- [CORS setup](https://experienceleague.adobe.com/developer/commerce/storefront/setup/configuration/cors-setup/) - Security configuration\n- [Multistore setup](https://experienceleague.adobe.com/developer/commerce/storefront/setup/configuration/multistore-setup/) - Multiple stores/languages"
|
|
29
|
+
},
|
|
30
|
+
{
|
|
31
|
+
"path": "boilerplate/customizing-blocks",
|
|
32
|
+
"title": "Blocks customization",
|
|
33
|
+
"description": "Learn how to customize Commerce block behavior, styling, and drop-in integration in your storefront.",
|
|
34
|
+
"content": "All Commerce blocks in the boilerplate work out of the box, but you can customize them to match your business requirements. This page covers the main customization approaches.\n\n## Ways to customize\n\n<Options>\n<Option>\n\n### CSS styling\n\nModify block styles by editing the CSS file in the block directory:\n\n```css\n/* blocks/commerce-cart/commerce-cart.css */\n.commerce-cart {\n padding: var(--spacing-large) 0;\n position: relative;\n}\n\n.cart__wrapper {\n display: flex;\n flex-direction: column;\n gap: var(--grid-4-gutters);\n}\n```\n\n#### Design tokens\n\nUse CSS variables from your theme for consistent styling:\n\n```css\n/* Common design tokens */\nvar(--spacing-small) /* 16px */\nvar(--spacing-medium) /* 24px */\nvar(--spacing-large) /* 64px */\nvar(--color-brand-500) /* #454545 - Brand color */\nvar(--color-neutral-100) /* #fafafa - Light background */\nvar(--type-body-1-default-font) /* 16px/24px - Body text */\n```\n\n</Option>\n<Option>\n\n### JavaScript behavior\n\nModify block logic by editing the JavaScript file in the block directory:\n\n```javascript\n// blocks/commerce-cart/commerce-cart.js\n\n\nexport default async function decorate(block) {\n // Read configuration from document authoring\n const config = readBlockConfig(block);\n \n // Your custom logic here\n const maxItems = parseInt(config['max-items'], 10) || 10;\n \n // Create container element\n const $list = document.createElement('div');\n $list.className = 'cart__list';\n block.appendChild($list);\n \n // Render drop-in container to the list element\n await provider.render(CartSummaryList, {\n maxItems,\n enableRemoveItem: true,\n })($list);\n}\n```\n\n</Option>\n<Option>\n\n### Drop-in customization\n\nUse drop-in slots and events for advanced customization.\n\n#### Slots\n\nInject custom content into drop-in containers by passing slot functions in the configuration:\n\n```javascript\n// Inside the decorate function for your block\n\n\n// Create container element\nconst $list = document.createElement('div');\n$list.className = 'cart__list';\nblock.appendChild($list);\n\n// Render cart with custom slot\nawait provider.render(CartSummaryList, {\n slots: {\n Footer: (ctx) => {\n // Add custom content to cart item footer\n const customElement = document.createElement('div');\n customElement.className = 'custom-promotion';\n customElement.textContent = 'Free shipping over $50!';\n ctx.appendChild(customElement);\n },\n },\n})($list);\n```\n\n#### Events\n\nListen to and respond to drop-in events using the event bus:\n\n```javascript\n// Inside the decorate function for your block or at the module level\n\nevents.on('cart/data', (cartData) => {\n console.log('Cart updated:', cartData);\n \n // Example: Show notification when cart has items\n if (cartData.totalQuantity > 0) {\n console.log(`You have $ items in your cart`);\n }\n});\n```\n</Option>\n</Options>\n\n## Creating DOM elements\n\nThe boilerplate uses two approaches for creating DOM elements. **The key distinction: use `createContextualFragment` for multiple elements, `createElement()` for single elements.**\n\n### Template literals with `createContextualFragment`\n\nUse this approach when creating **two or more elements** or **complex nested structures**.\n\n```javascript\n// Best for: Complex layout structures with multiple nested elements\nconst fragment = document.createRange().createContextualFragment(`\n \n \n \n \n \n \n \n \n \n`);\n\nconst $list = fragment.querySelector('.cart__list');\nblock.appendChild(fragment);\n```\n\n#### When to use\n\n- Creating **two or more elements** at once.\n- Setting up initial block structure with nested elements.\n- HTML hierarchy visualization improves code readability.\n\n#### Why this approach\n\n- More efficient than multiple `createElement()` calls.\n- Clear visual representation of HTML structure.\n- Easier to maintain complex layouts.\n\n#### Boilerplate examples\n- \n- \n\n### `document.createElement()`\n\nUse this approach when creating **a single element**. This is cleaner and more explicit than template literals for one element.\n\n```javascript\n// Best for: Single elements created dynamically\n// Inside a drop-in slot function\nconst $wishlistToggle = document.createElement('div');\n$wishlistToggle.classList.add('cart__action--wishlist-toggle');\n\nwishlistRender.render(WishlistToggle, {\n product: ctx.item,\n size: 'medium',\n})($wishlistToggle);\n\nctx.appendChild($wishlistToggle);\n```\n\n#### When to use\n\n- Creating **a single element** (most common case).\n- Adding elements inside drop-in slots.\n- Building elements in event handlers or callbacks.\n- Creating elements conditionally.\n\n#### Why this approach\n\n- More explicit and type-safe than template literals.\n- Cleaner for single elements (no unnecessary parsing).\n- Easier to set properties programmatically.\n\n#### Boilerplate examples\n- - Creating wishlist container\n- - Creating edit link container\n\n## Common customization patterns\n\n### Adding block configuration\n\nEnable merchants to configure blocks through document authoring by reading configuration values:\n\n```javascript\n\nexport default async function decorate(block) {\n const {\n 'custom-option': customOption = 'default',\n 'max-items': maxItems = '10',\n 'enable-feature': enableFeature = 'false',\n } = readBlockConfig(block);\n \n // Use configuration values\n if (enableFeature === 'true') {\n // Enable the feature\n }\n}\n```\n\nMerchants can then configure the block in their documents:\n\n| Commerce Cart |\n|---------------|\n| custom-option | premium |\n| max-items | 5 |\n| enable-feature | true |\n\n### Customizing empty states\n\nCustomize what users see when a block has no content:\n\n```javascript\n// Inside the decorate function for your block\nconst $emptyCart = document.querySelector('.cart__empty-cart');\n\n// Create custom empty state\nconst emptyState = document.createElement('div');\nemptyState.className = 'cart__empty-message';\nemptyState.innerHTML = `\n <h3>Your cart is empty</h3>\n <p>Start shopping to add items to your cart.\n <a href=\"/products\" class=\"button\">Browse Products</a>\n`;\n\n$emptyCart.appendChild(emptyState);\n```\n\n### Adding custom analytics\n\nTrack custom events for analytics:\n\n```javascript\n// Add to your block file or scripts/analytics.js\n\nevents.on('cart/data', (cartData) => {\n // Custom analytics tracking\n if (window.dataLayer) {\n window.dataLayer.push({\n event: 'cart_updated',\n cart_total: cartData.totalQuantity,\n cart_value: cartData.total.includingTax.value,\n currency: cartData.total.includingTax.currency,\n });\n }\n});\n```\n\n### Using multiple drop-ins\n\nCombine multiple drop-ins for complex functionality:\n\n```javascript\n\n\nexport default async function decorate(block) {\n // Create container element\n const $list = document.createElement('div');\n $list.className = 'cart__list';\n block.appendChild($list);\n \n // Render cart with wishlist integration\n await provider.render(CartSummaryList, {\n slots: {\n Footer: (ctx) => {\n // Add wishlist toggle to each cart item\n const wishlistContainer = document.createElement('div');\n wishlistContainer.className = 'cart__action--wishlist-toggle';\n \n wishlistRender.render(WishlistToggle, {\n product: ctx.item,\n size: 'medium',\n })(wishlistContainer);\n \n ctx.appendChild(wishlistContainer);\n },\n },\n })($list);\n}\n```\n\n## Block-specific configuration\n\nSome blocks accept configuration options that change their behavior. These are defined in the block README and can be set through document authoring.\n\n### Commerce Cart\n\n\n| Option | Type | Default | Description |\n|--------|------|---------|-------------|\n| `hide-heading` | string | `false` | Controls whether the cart heading is hidden |\n| `max-items` | string | — | Maximum number of items to display in cart |\n| `hide-attributes` | string | `''` | Comma-separated list of product attributes to hide |\n| `enable-item-quantity-update` | string | `false` | Enables quantity update controls for cart items |\n| `enable-item-remove` | string | `true` | Enables remove item functionality |\n| `enable-estimate-shipping` | string | `false` | Enables shipping estimation functionality |\n| `start-shopping-url` | string | `''` | URL for \"Start Shopping\" button when cart is empty |\n| `checkout-url` | string | `''` | URL for checkout button |\n| `enable-updating-product` | string | `false` | Enables product editing via mini-PDP modal |\n| `undo-remove-item` | string | `false` | Enables undo functionality when removing items |\n\n\n### Commerce Checkout\n\nThe Checkout block uses events for customization rather than configuration options.\n\n#### Example: Add custom validation before checkout\n\n```javascript\n// Add to the decorate function for your checkout block\n\nevents.on('checkout/values', (values) => {\n // Custom validation logic\n if (values.email && !values.email.includes('@')) {\n console.error('Invalid email format');\n }\n \n // Log when payment method is selected\n if (values.selectedPaymentMethod) {\n console.log('Payment method:', values.selectedPaymentMethod.code);\n }\n});\n```\n\n### Simple blocks\n\nMany blocks (Login, Create Account, Forgot Password, and other account management blocks) are thin wrappers around drop-ins with no document-based configuration options. These blocks do not use `readBlockConfig()` and cannot be configured through document authoring. Customize these blocks by modifying their JavaScript to change drop-in options, or by using CSS and drop-in slots.\n\n## Real-world examples\n\n<Options label=\"Example\">\n<Option>\n\n### Add promotional banner to cart\n\n```javascript\n// blocks/commerce-cart/commerce-cart.js\n\n\nexport default async function decorate(block) {\n // Read block configuration\n const {\n 'hide-heading': hideHeading = 'false',\n 'max-items': maxItems,\n 'enable-item-quantity-update': enableUpdateItemQuantity = 'false',\n 'enable-item-remove': enableRemoveItem = 'true',\n } = readBlockConfig(block);\n \n // Create cart layout with promotional banner\n const fragment = document.createRange().createContextualFragment(`\n \n <p>🎉 Free shipping on orders over $50!\n \n \n `);\n \n const $list = fragment.querySelector('.cart__list');\n \n // Clear block and append new layout\n block.innerHTML = '';\n block.appendChild(fragment);\n \n // Helper to create product links\n const createProductLink = (product) => getProductLink(product.url.urlKey, product.topLevelSku);\n \n // Render cart with full configuration\n await provider.render(CartSummaryList, {\n hideHeading: hideHeading === 'true',\n routeProduct: createProductLink,\n maxItems: parseInt(maxItems, 10) || undefined,\n enableUpdateItemQuantity: enableUpdateItemQuantity === 'true',\n enableRemoveItem: enableRemoveItem === 'true',\n })($list);\n}\n```\n\n```css\n/* blocks/commerce-cart/commerce-cart.css */\n.cart__promo-banner {\n background: var(--color-positive-200);\n padding: var(--spacing-medium);\n text-align: center;\n border-radius: 4px;\n margin-bottom: var(--spacing-medium);\n}\n```\n</Option>\n<Option>\n\n### Custom checkout success tracking\n\n```javascript\n// Add to blocks/commerce-checkout/commerce-checkout.js\n// Place this event listener in your decorate function\n\n// Listen for order placement\nevents.on('order/placed', (orderData) => {\n // Send purchase event to Google Analytics\n if (window.dataLayer) {\n window.dataLayer.push({\n event: 'purchase',\n transaction_id: orderData.number,\n value: orderData.grandTotal.value,\n currency: orderData.grandTotal.currency,\n items: orderData.items.map(item => ({\n item_id: item.productSku,\n item_name: item.productName,\n quantity: item.quantityOrdered,\n price: item.price.value,\n })),\n });\n }\n \n // Update page title\n document.title = 'Order Confirmation';\n});\n```\n</Option>\n<Option>\n\n### Customize product gallery images\n\n```javascript\n// blocks/product-details/product-details.js\n// Imports (these should already exist at the top of the file)\n\n\n// Inside your decorate function\nexport default async function decorate(block) {\n // Create container element\n const $gallery = document.createElement('div');\n $gallery.className = 'product-details__gallery';\n block.appendChild($gallery);\n \n // Define custom image slot with AEM Assets\n const gallerySlots = {\n CarouselMainImage: (ctx) => {\n // Customize main carousel images\n tryRenderAemAssetsImage(ctx, {\n alias: ctx.data.sku,\n imageProps: ctx.defaultImageProps,\n params: {\n width: ctx.defaultImageProps.width,\n height: ctx.defaultImageProps.height,\n },\n });\n },\n };\n \n // Render gallery with custom slots\n await pdpRendered.render(ProductGallery, {\n controls: 'thumbnailsColumn',\n arrows: true,\n imageParams: {\n width: 960,\n height: 1191,\n },\n slots: gallerySlots,\n })($gallery);\n}\n```\n</Option>\n</Options>\n\n## Next steps\n\n\n1. Browse the to see implementation patterns.\n\n1. Review the [drop-in documentation](https://experienceleague.adobe.com/developer/commerce/storefront/dropins/all/quick-start/) for slots, events, and API functions.\n\n1. Check individual for configuration options and behavior details.\n\n1. Test customizations locally before deploying to production.\n\n\n> **Tip**\n>\nStart with CSS customization for visual changes, then move to JavaScript behavior modification only when necessary. This keeps your customizations maintainable and easier to upgrade when new boilerplate versions are released."
|
|
35
|
+
},
|
|
36
|
+
{
|
|
37
|
+
"path": "boilerplate/getting-started",
|
|
38
|
+
"title": "Getting started",
|
|
39
|
+
"description": "How to run, examine, and customize an Adobe Commerce Storefront that uses the boilerplate.",
|
|
40
|
+
"content": "This page helps you run, examine, and customize a storefront that already uses the Commerce boilerplate (Pre-configured storefront with the components and services you need to get started.). By the end, you'll know where the main files live and which files are safest to customize.\n\n> **Boilerplate overview**\n>\nFor conceptual information about what the boilerplate is and why to use it, see the [Boilerplate overview](https://experienceleague.adobe.com/developer/commerce/storefront/boilerplate/).\n\n\n## Key terms\n\nThe boilerplate uses Drop-in components (NPM packages that provide core Commerce storefront features such as cart, checkout, product details, and account flows.) for shopping features such as cart, checkout, product details, and requisition lists when you serve business buyers. It connects those features to document-authored pages with Commerce blocks (JavaScript blocks that integrate drop-in components into Edge Delivery Services pages to power storefront commerce experiences.). For general content and layout, it uses Content blocks (Edge Delivery Services blocks used for non-commerce page content and layout, such as cards, columns, headers, and footers.) such as cards, columns, headers, and footers.\n\nFor more information about standard Edge Delivery blocks, see the Adobe Experience Manager .\n\n## Running locally\n\nIf you still need to create the GitHub repository, connect Commerce, and initialize Document Author content, follow [Create a storefront](https://experienceleague.adobe.com/developer/commerce/storefront/get-started/create-storefront/) first.\n\nRun the storefront locally so you can preview changes before you push them. If you already ran `git clone` while following [Create a storefront](https://experienceleague.adobe.com/developer/commerce/storefront/get-started/create-storefront/), start with the `npm install` step below. The create-a-storefront topic links here for `npm install` and `npm start` so those instructions stay in one place.\n\n\n1. Install the project dependencies.\n\n ```bash\n npm install\n ```\n\n1. Start the local development server.\n\n ```bash\n npm start\n ```\n\n1. Open `http://localhost:3000` in your browser.\n\n\nYour storefront appears in the browser at `http://localhost:3000`.\n\n> **Tip**\n>\nIf `npm install` fails, confirm that Node.js and npm are installed on your machine. If `npm start` fails, check whether another local server is already using port `3000`.\n\n\n**Optional: **install the `aem` command globally with `npm install -g @adobe/aem-cli` if you want to run the CLI from any directory. The boilerplate already lists `@adobe/aem-cli` as a dev dependency, so after `npm install` the `npm start` script can run without a global install.\n\n### Key runtime packages\n\nAfter `npm install`, `package.json` resolves many dependencies. You do not need to memorize them on day one. Use this table when you trace dependencies or debug install issues.\n\n\n| Package | Purpose |\n|---------|---------|\n| | Shared utilities for all drop-ins (GraphQL client, event bus, initializers, UI components) |\n| | Standardized data layer for event collection and analytics |\n| | Collects Commerce-specific user interaction events |\n| | SDK for sending events to Adobe Commerce for Live Search and Product Recommendations |\n\n\n## Exploring the code\n\nThe tree below shows the main folders plus important files at the repository root. The table links each folder to GitHub so you can open the matching source tree.\n\n```text\naem-boilerplate-commerce/\n├── blocks/ # Commerce blocks, content blocks, and standard AEM blocks\n├── scripts/\n│ ├── scripts.js # page load orchestration (eager, lazy, delayed)\n│ ├── commerce.js # Commerce loading, templates, storefront configuration\n│ └── initializers/ # one initializer file per drop-in (endpoints, labels, and related settings)\n├── styles/ # global CSS, tokens, fonts, deferred styles\n├── tools/ # dev helpers (for example, PDP metadata tooling)\n├── config.json # storefront endpoints, locale, and related settings\n└── package.json # dependencies, scripts, and drop-in install hooks\n```\n\n\n| Directory | Purpose |\n|-----------|---------|\n| | Contains Commerce blocks, content blocks, and standard AEM blocks such as header, footer, and cards. |\n| | Contains drop-in initializers, Commerce utilities, and the Edge Delivery Services runtime. |\n| | Contains global styles, design tokens, fonts, and deferred styles for performance. |\n| | Contains development tools such as the product detail page (PDP) metadata tool. |\n\n\n## Understanding the flow\n\nTo understand how documents become rendered commerce experiences at runtime, see [How a page loads](https://experienceleague.adobe.com/developer/commerce/storefront/get-started/architecture/how-a-page-loads/) in [Storefront architecture](https://experienceleague.adobe.com/developer/commerce/storefront/get-started/architecture/). This overview helps you decide where to customize and where to leave boilerplate files unchanged.\n\n## Customizing your storefront\n\n- Brand styling: edit `styles/styles.css` for design tokens.\n- Block behavior: modify block decorators in `blocks/`.\n- Commerce configuration: update initializers in `scripts/initializers/`.\n- Commerce blocks: use only the blocks your storefront needs.\n\n### Customization strategy\n\nMost files in the boilerplate can be modified. The guidance below helps keep your storefront project easy to maintain as the original boilerplate repository evolves.\n\n### Files to keep unchanged\n\n- `scripts/aem.js`: The core AEM runtime. This file comes from the original . Local edits can conflict with future boilerplate updates.\n- `package.json` lifecycle scripts (`postinstall`, `postupdate`, `install:dropins`): These scripts run during `npm install` to install and configure drop-ins. Changing them can break drop-in installation.\n\nThe table below lists the usual layers you change for branding, blocks, Commerce wiring, page scripts, and build-time queries. Order follows a common path: global styles and blocks first, then initializer and script layers, then `build.mjs` for query shaping.\n\n\n| Layer | Strategy |\n|-------|----------|\n| `styles/` | Change colors, fonts, spacing, and layout here. Tokens in `styles/styles.css` apply across the whole site. |\n| `blocks/` | Edit block appearance and behavior. Keep block folder names unchanged because authors reference them by name in documents. |\n| `scripts/initializers/` | Configure the API endpoint and UI labels for each drop-in. Each drop-in has one initializer file, such as `cart.js` or `checkout.js`. If you remove a drop-in, also remove its initializer file and all imports of it in the codebase. See [Using drop-ins](https://experienceleague.adobe.com/developer/commerce/storefront/dropins/all/quick-start/). |\n| `scripts/commerce.js` | Edit this file to add Commerce-specific logic such as consent handling (`getConsent`) or custom page type detection. It reads your [storefront configuration](https://experienceleague.adobe.com/developer/commerce/storefront/setup/configuration/commerce-configuration/) and sets up Commerce API connections on every page. |\n| `scripts/scripts.js` | Add automatically generated blocks to `buildAutoBlocks` (the boilerplate uses this for the hero block). Load third-party scripts, tag managers, or analytics tools in `scripts/delayed.js`. That file runs 3 seconds after page load so these scripts do not affect the initial page render. |\n| `build.mjs` | Edit this file to customize what data drop-ins fetch from Commerce. For example, you can add a custom product field to the PDP query or skip query fragments your project doesn't need. Use the existing entries as patterns. Changes take effect after running `npm install`. |\n\n\n### When to customize\n\nWhen you customize blocks or initializers, put project-specific code in new files when possible. For example, you can add slot customizations to a new `blocks/commerce-cart/slots.js` file and import it at the top of `commerce-cart.js`. Your customizations stay in a file you own. When a boilerplate update arrives, your changes to the original file stay small.\n\n## Deploying your storefront\n\nEdge Delivery Services creates preview and production URLs when you push changes:\n\n- Preview: `https://<branch>--<repo>--<owner>.aem.page`\n- Production: `https://<branch>--<repo>--<owner>.aem.live`\n\nYou do not run a separate deployment build command for Edge Delivery. The Edge Delivery pipeline handles page delivery and optimization after you push.\n\n## Keeping your storefront current\n\nTrack boilerplate changes in the and [Release notes](https://experienceleague.adobe.com/developer/commerce/storefront/releases/). For guidance on upgrading drop-in components, applying updates, and handling breaking changes, see the [Updates](https://experienceleague.adobe.com/developer/commerce/storefront/boilerplate/updates/) page.\n\n## Related resources\n\n\n| Resource | Description |\n|----------|-------------|\n| [Boilerplate reference](https://experienceleague.adobe.com/developer/commerce/storefront/boilerplate/) | Technical documentation for blocks, configuration options, and file structure. |\n| [Drop-in components](https://experienceleague.adobe.com/developer/commerce/storefront/dropins/all/introduction/) | API reference for each drop-in component. |\n| [Commerce blocks page](https://experienceleague.adobe.com/developer/commerce/storefront/merchants/blocks/) | Business user page for using blocks. |"
|
|
41
|
+
},
|
|
42
|
+
{
|
|
43
|
+
"path": "boilerplate/universal-editor",
|
|
44
|
+
"title": "Universal Editor for developers",
|
|
45
|
+
"description": "Enable Universal Editor for your Commerce storefront. Commerce stores UE JSON files next to each block. Setup and instrumentation details are in the DA.live docs.",
|
|
46
|
+
"content": "The Adobe Commerce boilerplate supports the Universal Editor (UE) for content and Commerce blocks. For setup, instrumentation syntax, and custom block workflow, see the DA.live documentation below.\n\n## Commerce boilerplate structure\n\nCommerce differs from the standard DA.live approach (centralized `ue/models/blocks/` in ): **UE instrumentation JSON files live next to each block** at `blocks/{block-name}/_{block-name}.json`. A pre-commit hook composes these into the root-level `component-*.json` files the UE consumes.\n\n```text\naem-boilerplate-commerce/\n├── component-definition.json ← generated (UE consumes)\n├── component-filters.json ← generated (UE consumes)\n├── component-models.json ← generated (UE consumes)\n├── models/\n│ └── _section.json ← add new blocks to component list\n└── blocks/\n ├── accordion/\n │ └── _accordion.json ← UE instrumentation\n ├── hero/\n │ └── _hero.json\n ├── product-recommendations/\n │ └── _product-recommendations.json\n ├── commerce-cart/\n │ └── _commerce-cart.json\n └── ... ← and other blocks with _*.json\n```\n\n:::tip\nWhile you are developing, open a page in the Universal Editor. Blocks without instrumentation appear as **(no definition)** in the content tree, which is a quick visual signal that a definition file is needed.\n:::\n\n## Documentation\n\n- — **First-time setup:** `editor.path` config, requirements, and behavior\n- — full instrumentation reference\n- — add new blocks to this component list\n- [Using the Universal Editor](https://experienceleague.adobe.com/developer/commerce/storefront/merchants/quick-start/universal-editor/) — for content authors; workflow and authoring docs"
|
|
47
|
+
},
|
|
48
|
+
{
|
|
49
|
+
"path": "boilerplate/updates",
|
|
50
|
+
"title": "Boilerplate updates",
|
|
51
|
+
"description": "Learn how to upgrade your existing Adobe Commerce Storefront to incorporate the latest features, security updates, and performance improvements.",
|
|
52
|
+
"content": "Upgrade your Adobe Commerce Storefront to get the latest features, security updates, and performance improvements from the Commerce Boilerplate.\n\n> **Two distinct update paths**\n>\nYou can keep your storefront current in two ways:\n\n- **Updating drop-in npm packages** (`@dropins/*`, `@adobe/*`) — This is the primary update path for every Commerce boilerplate storefront. Drop-in packages follow semantic versioning: minor and patch releases stay non-breaking by contract. Run `npm outdated` to see available updates, or enable the `update-dropins.yml` GitHub Actions workflow included in the boilerplate to receive automatic weekly pull requests when newer stable versions are available.\n\n- **Merging the upstream Commerce boilerplate into your repository** — This path is optional and advanced. Most teams start from a new GitHub repository generated from the Commerce boilerplate template, then clone that repository locally. You are under no obligation to pull upstream boilerplate changes into your project. Merging upstream can bring in new integration patterns or bug fixes, but expect manual conflict resolution and a careful review of your customizations. Reserve this path when a specific upstream improvement is worth the effort.\n\nSuite releases are tagged snapshots that validate a specific combination of drop-in versions and boilerplate code. They work best as starting points for new implementations, not as recurring upgrade targets for existing storefronts.\n\n\n## Overview\n\nWhen you initially scaffold your Commerce storefront from the Commerce Boilerplate, you create a snapshot of the boilerplate at that point in time. As Adobe continues to improve the boilerplate with new features, bug fixes, and performance optimizations, your existing project won't automatically receive these updates.\n\nThis page shows you how to upgrade your storefront while preserving your customizations.\n\n## Understanding the upgrade landscape\n\nUpgrading is ongoing, not a one-time task. Regular, small updates are generally safer and easier to manage than infrequent, large upgrades.\n\n### What gets updated\n\nMost of your storefront's critical Commerce logic is now delivered through npm packages, making upgrades significantly easier and more reliable. Upgrades typically involve these main areas:\n\n**Drop-in components (NPM packages that provide core Commerce storefront features such as cart, checkout, product details, and account flows.):** npm packages containing the core Commerce functionality, including the following:\n\n- `@dropins/storefront-account`\n- `@dropins/storefront-auth`\n- `@dropins/storefront-cart`\n- `@dropins/storefront-checkout`\n- `@dropins/storefront-order`\n- `@dropins/storefront-payment-services`\n- `@dropins/storefront-pdp`\n- `@dropins/storefront-personalization`\n- `@dropins/storefront-product-discovery`\n- `@dropins/storefront-recommendations`\n- `@dropins/storefront-wishlist`\n- `@dropins/tools`\n\nIf your project serves business buyers, install and upgrade these business-to-business (B2B) packages too:\n\n- `@dropins/storefront-company-management`\n- `@dropins/storefront-company-switcher`\n- `@dropins/storefront-purchase-order`\n- `@dropins/storefront-quote-management`\n- `@dropins/storefront-quick-order`\n- `@dropins/storefront-requisition-list`\n\nThe `*` in `npm list @dropins/storefront-*` and `npm update @dropins/storefront-*` is a wildcard: npm matches every installed package whose name starts with `@dropins/storefront-`, including these B2B packages when they are in your project. For what each drop-in does and how to connect it in your storefront, see [B2B drop-ins overview](https://experienceleague.adobe.com/developer/commerce/storefront/dropins-b2b/).\n\nOn Adobe Commerce as a Cloud Service or Adobe Commerce Optimizer, Adobe manages Storefront Compatibility packages on Commerce for you, so upgrades on this page are mainly npm packages and boilerplate changes—not a separate compatibility install checklist.\n\n> **Commerce PaaS or on-premises**\n>\nIf you deploy Adobe Commerce on cloud infrastructure or on-premises—Commerce PaaS—and your team installs or upgrades Storefront Compatibility packages on Commerce, align those backend upgrades with storefront work. For B2B GraphQL on Commerce PaaS, see [Storefront Compatibility B2B Package](https://experienceleague.adobe.com/developer/commerce/storefront/setup/configuration/storefront-compatibility-b2b/).\n\n\n**Boilerplate integration layer (Storefront-level files that connect drop-ins to your site, including block implementations and initialization scripts.):** storefront-level files that integrate drop-ins\n\n\n| File | Purpose | Update Frequency | Typical Changes |\n|------|---------|------------------|-----------------|\n| `blocks/*` | Block integration folders | Frequent | Drop-in integration JS and CSS. Rare updates to non-drop-in block examples (cards, accordion, and so on) sourced from other boilerplates |\n| `scripts/aem.js` | Core AEM functionality | Very Rare | Core platform improvements |\n| `scripts/commerce.js` | Commerce-specific integration and utilities | Rare | Integration improvements, new utility functions |\n| `scripts/initializers/*` | Drop-in initialization scripts | Moderate | New drop-in integrations, configuration updates |\n| `scripts/scripts.js` | Page loading, block decoration, and global site functionality | Very Rare | Performance optimizations, new global features |\n\n\n### Why upgrades are now easier\n\nThe Commerce Boilerplate team moved most of the complex Commerce logic into npm-distributed drop-in packages, providing key advantages:\n\n- **Most logic is packaged**: Core Commerce functionality, business rules, and complex state management are delivered through npm packages\n- **Simplified storefront code**: Your project primarily contains integration code, styling, and configuration\n- **Standard npm upgrades**: Most updates can be applied using standard `npm install` commands\n- **Reduced conflicts**: Fewer files in your project means fewer merge conflicts when updating\n- **Consistent behavior**: All storefronts benefit from the same tested, optimized Commerce logic\n\n## Upgrade strategies\n\n<Options label=\"Strategy\">\n<Option>\n\n### npm package updates\n\n> **Recommended for most cases**\n>\nMost Commerce logic lives in npm packages, so this approach handles upgrades with minimal risk.\n\n\n1. Update drop-in components\n\n Most of your Commerce functionality improvements come through these package updates:\n\n Check your current versions:\n\n ```bash\n npm list @dropins/storefront-*\n ```\n\n Update individual components:\n\n ```bash\n npm install @dropins/storefront-cart@latest\n npm install @dropins/storefront-checkout@latest\n # Repeat for other components as needed\n ```\n\n Or update all drop-in components at once:\n\n ```bash\n npm update @dropins/storefront-*\n ```\n\n\n1. Test your storefront\n\n Since most logic changes are packaged, testing focuses on integration points:\n\n Start your local development environment:\n\n ```bash\n npm start\n ```\n\n\nTest all Commerce functionality:\n\n- Product detail pages\n- Shopping cart operations\n- Checkout flow\n- User account features\n- Search and navigation\n- B2B flows you ship (for example, company profiles and roles, negotiable quotes, purchase orders, requisition lists, quick order, or company switching), when those packages are in your project\n\nReview the release notes for any integration changes that may affect your implementation.\n\n> **For Major Version Updates**\n>\nWhen upgrading drop-in packages across major versions (for example, from 1.x to 2.x), perform more thorough testing as these updates may include breaking changes (Updates that require code or configuration changes in your project before everything works correctly again.). Pay particular attention to:\n\n- Any custom integrations you've built around the drop-in components\n- API interfaces you're using\n- Configuration settings that may have changed\n- Custom styling or event handlers you've added\n\nTest edge cases and error scenarios in addition to the standard user flows.\n\n\nTo help automate this testing process, consider implementing end-to-end testing in your project using tools like Cypress. These tools can simulate real user interactions across your Commerce flows, automatically catching regressions that manual testing might miss. Focus your automated tests on critical user journeys like product browsing, cart management, and checkout completion.\n\n</Option>\n\n<Option>\n\n### Selective boilerplate updates\n\nWhen you need integration layer improvements or new features that require changes to your storefront's integration code, use selective updates (A workflow where you review upstream changes and merge only the files or commits that are relevant to your project.) to merge changes from the upstream (The original source repository your project forks from, used as the canonical source when reviewing and pulling updates.) boilerplate repository.\n\n\n1. **Set up upstream remote**\n\n Add the boilerplate repository as an upstream remote:\n\n ```bash\n git remote add upstream https://github.com/hlxsites/aem-boilerplate-commerce.git\n git fetch upstream\n ```\n\n1. **Review available updates**\n\n Compare your current branch with the latest boilerplate to understand what changes are available.\n\n For detailed instructions on reviewing upstream changes, see and .\n\n A storefront repo created from the Commerce boilerplate template is not a GitHub fork of the boilerplate, but you can still add an `upstream` remote and merge or cherry-pick using the same Git operations.\n\n Focus your review on key files like `scripts/commerce.js` and the `scripts/initializers/` directory where most Commerce-specific updates occur.\n\n1. **Identify changes to include**\n\n Focus on these integration layer improvements:\n\n **Commerce Integration Layer (`scripts/commerce.js`)**\n - Enhanced drop-in initialization patterns\n - New configuration utilities\n - Performance optimizations\n - Bug fixes in integration logic\n\n **Initializers (`scripts/initializers/`)**\n - Updated drop-in initialization patterns\n - New feature integrations\n - Improved error handling\n\n **Block Integration Updates (`blocks/` directory)**\n - Enhanced drop-in integration patterns\n - Accessibility improvements\n - Bug fixes in block-level integration\n\n > **Tip**\n>\n Each Commerce block now includes a README file that describes the block's purpose and functionality. These README files are particularly helpful when diffing changes, as they provide a summary of what has changed in the block before you examine the code.\n \n\n If you use B2B Commerce blocks and patterns from the Commerce Boilerplate, compare your branch with the upstream repository's `b2b` branch as well as `main`. The `b2b` branch holds B2B-oriented block and integration updates. Adopt the same selective merge or cherry-pick approach so you do not overwrite your customizations.\n\n1. **Apply selected changes**\n\n Create a branch for your upgrade work to isolate changes and test before merging to main. Use a descriptive name indicating the upgrade with a timeframe or version (for example, `upgrade-august-2025` or `upgrade-cart-v2.1.0`).\n\n Once you're on your upgrade branch, you have several options for applying changes from the upstream boilerplate:\n\n - **Selectively merge** individual files or directories that have updates you want to incorporate. This approach works well when you want to adopt specific improvements without bringing in changes that might conflict with your customizations.\n - **Cherry-pick** specific commits from the upstream repository if you want to apply only particular features or fixes. This gives you granular control over what changes to include and helps avoid introducing unwanted modifications.\n\n For each change you apply, commit it with a clear message describing what upstream improvement you're incorporating. This creates a clean history that makes it easy to understand what was updated and why, which will be valuable for future upgrades and troubleshooting.\n\n1. **Resolve integration points and test**\n\n - Resolve any conflicts in integration code, preserving your customizations\n - Test thoroughly in your development environment\n - Run your test suite if available\n - Deploy to a staging environment for comprehensive testing\n\n\n</Option>\n</Options>\n\n## Special considerations for early-adopter projects\n\nIf you scaffolded your project before mid-2025, you may have encountered a major architectural change: Commerce logic moved from `scripts.js` to `scripts/commerce.js`. This shift affects your update scope but uses the same methods above.\n\n### Understanding the architectural change\n\nThe major refactoring (PR #567) reorganized the boilerplate architecture with two significant improvements:\n\n\n1. Separation of AEM and Commerce logic:\n - `scripts/scripts.js` - Core AEM functionality, aligned with the upstream AEM Boilerplate\n - `scripts/commerce.js` - Commerce-specific integration and utility logic\n\n1. Core Commerce logic migration to npm packages:\n\n - Complex Commerce functionality moved to `@dropins/tools` and other drop-in packages\n - Functions previously embedded in your integration code are now abstracted to reusable, versioned, and upgradable libraries\n - The Commerce Boilerplate is now focused on pure integration code that you own\n\n\n**Before the refactoring:** In early versions of the Commerce Boilerplate, all logic lived in `scripts/scripts.js` where Commerce business logic was mixed with integration code. Core Commerce functions were embedded directly in your project files, making it difficult to upgrade Commerce functionality without encountering code conflicts during merges.\n\n**After the refactoring:** The architecture now separates concerns more effectively. Core Commerce logic lives in npm packages that are easily upgradable, while the boilerplate contains minimal integration code that results in fewer merge conflicts. This creates clear boundaries between platform logic and your customizations, allowing future updates to focus on integration patterns rather than business logic.\n\nThis architectural shift means that complex Commerce operations, utility functions, and business rules that you may have seen in your early boilerplate files are now delivered through npm packages, making them upgradable without touching your project code.\n\n### Adapting your update approach\n\nIf you have an early-adopter project, your updates will need a broader scope to account for architectural changes.\n\nWhen reviewing updates, pay attention to the main scripts file (`scripts/scripts.js`) and \nthe Commerce integration layer (`scripts/commerce.js`). Both have changed significantly. Be sure to preserve your custom business logic while adopting the improved structural foundation \nthat the upstream changes provide.\n\nThe migration process requires more careful consideration than typical updates since you're not just incorporating new features, but potentially restructuring how your existing customizations integrate with the boilerplate's core functionality.\n\nDuring Step 4 (apply selective changes), you may need to migrate your customizations:\n\n**Custom functions in the \"old\" `scripts/scripts.js`**\n\n- Commerce-related customizations should move to `scripts/commerce.js`\n- General AEM functionality should remain in `scripts/scripts.js`\n- Many custom functions may now be available as utilities in `@dropins/tools`\n\n**Block import updates**\n\n- Update imports from `../../scripts/scripts.js` to `../../scripts/commerce.js` for Commerce utilities\n- Verify that custom utilities are still available or replace with package utilities\n\n**Integration pattern updates**\n\n- Review if custom functions can be replaced with utilities from `@dropins/tools` package\n- Update integrations to use new patterns for Commerce-specific functionality\n\nDuring Step 5 (testing), pay special attention to:\n\n- Custom blocks that import Commerce utilities\n- Third-party integrations that depend on Commerce functions\n- Custom analytics implementations that hook into Commerce events\n- Any custom business logic that was mixed with platform code\n\n### Benefits of architectural alignment\n\nWhile early-adopter projects require more comprehensive selective updates, aligning with the new architecture provides significant long-term benefits:\n\n- **Future updates simplified**: Once aligned, future updates will be much easier due to reduced code surface area\n- **Better separation of concerns**: Clear boundaries between platform logic and your customizations\n- **Reduced merge conflicts**: Commerce functionality updates through npm packages instead of file merges\n- **Access to latest features**: Full compatibility with new drop-in components and features\n- **Enhanced PDP flexibility**: Container-based PDP architecture provides unprecedented customization control\n\n## Product details page architectural evolution\n\n\n### Previous architecture (slot-based customization)\n\nOlder `@dropins/storefront-pdp` releases used the monolithic `ProductDetails` container (deprecated) with predefined slots. That pattern is deprecated and not a part of the Commerce boilerplate. It should not be used for new work. In that legacy model, teams could only:\n\n- Create custom slot implementations for different sections of the page\n- Work within the constraints of a single-container structure\n- Rearrange or replace PDP sections with limited flexibility\n- Rely on complex styling workarounds to reach custom layouts\n\n### New architecture (container-based composition)\n\nThe latest version breaks down the PDP into independent containers you can compose, style, and replace:\n\n- **ProductHeader** - Product title, SKU, and basic information\n- **ProductPrice** - Pricing display and special price handling\n- **ProductGallery** - Image carousel with flexible configuration\n- **ProductOptions** - Product variants and configuration\n- **ProductQuantity** - Quantity selector\n- **ProductDescription** - Product descriptions and content\n- **ProductAttributes** - Product specifications and metadata\n\nFor detailed information about the container-based architecture and implementation patterns, see the [Product Details Drop-in Documentation](https://experienceleague.adobe.com/developer/commerce/storefront/dropins/product-details/). You can also reference the current product-details block implementation in the Commerce Boilerplate for practical examples of the container-based approach.\n\n### Migration benefits for PDP blocks\n\n- **Complete layout control**: Arrange containers in any order within your block structure\n- **Individual container replacement**: Replace entire sections (like gallery or pricing) with custom implementations\n- **Simplified styling**: Style containers independently without complex CSS overrides\n- **Enhanced functionality**: Each container can be configured independently with specific features\n- **Eliminated slot workarounds**: UI customizations that required appending, prepending, or replacing slot content can now be handled directly in the layout structure or by completely replacing containers\n- **Direct data access**: Product data previously available through slot context is now accessible via the event bus (`pdp/data` and `pdp/values`)\n- **Future-proof architecture**: New PDP features delivered as new containers rather than slot modifications\n\n### PDP block migration process\n\nWhen updating your PDP block from slot-based to container-based:\n\n\n1. Update dependencies\n\n ```javascript\n import { render as pdpRendered } from '@dropins/storefront-pdp/render.js';\n\n // Before: Single container with slots\n import { ProductDetails } from '@dropins/storefront-pdp/containers/ProductDetails.js'; // (deprecated)\n\n // After: multiple independent containers\n import ProductHeader from '@dropins/storefront-pdp/containers/ProductHeader.js';\n import ProductPrice from '@dropins/storefront-pdp/containers/ProductPrice.js';\n import ProductGallery from '@dropins/storefront-pdp/containers/ProductGallery.js';\n // ... other containers\n ```\n\n1. Replace slot implementations\n\n You can often remove custom slot implementations entirely. The new containers provide better configuration.\n\n1. Update block structure\n\n Replace the single container render with multiple container renders:\n\n ```javascript\n // Before: Single render with slot configuration\n await pdpRendered.render(\n ProductDetails, // (deprecated)\n {\n slots: {\n /* custom slot implementations */\n },\n },\n )($pdpRoot);\n\n // After: multiple container renders to layout regions\n await pdpRendered.render(ProductHeader, {})($header);\n await pdpRendered.render(ProductPrice, {})($price);\n await pdpRendered.render(ProductGallery, { controls: 'thumbnailsColumn' })($gallery);\n // ... other containers\n ```\n\n1. Layout restructuring\n\n Create HTML structure that positions containers where you need them:\n\n ```html\n \n \n \n \n <!-- Full control over container placement -->\n \n ```\n\n1. Styling migration\n\n - Remove complex CSS overrides targeting internal slot structures\n - Style containers directly with cleaner, more maintainable CSS\n - Review any potential class name changes between architectures\n - Handle breakpoints and responsive layout at the block level, as this is now the block's responsibility\n\n\n## Tracking updates\n\n### Monitor boilerplate changes\n\nStay informed about boilerplate updates:\n\n- **GitHub watch**: Watch the for releases and important changes\n- **Changelog tracking**: Follow issues tagged with the changelog label\n- **Release notes**: Review drop-in component release notes at the [Release Information](https://experienceleague.adobe.com/developer/commerce/storefront/releases/) page\n\n### Version management best practices\n\n**Document your customizations**\n\n- Document all customizations\n- Write clear commit messages\n- Tag storefront releases\n\n**Establish update cadence**\n\n- Review updates monthly or quarterly\n- Schedule major upgrades for low-traffic periods\n- Test in staging\n\n## Troubleshooting common issues\n\n### Post-install scripts (Scripts that run automatically after package installation to copy and prepare required Commerce integration files.) failures\n\nIf post-install fails:\n\n- Check Node.js and npm version compatibility\n- Clear the npm cache: `npm cache clean --force`\n- Remove and reinstall: `rm -rf node_modules package-lock.json && npm install`\n- Check file permissions\n\n### Merge conflicts\n\nWhen merging updates:\n\n- **Understand the context**: Review both versions\n- **Preserve functionality**: Keep your customizations working\n- **Test thoroughly**: Conflicts signal significant changes\n- **Be selective**: Only merge valuable updates; avoid bringing in features you won't use\n\n### Breaking changes\n\nWhen drop-in updates introduce breaking changes:\n\n- **Review migration pages in release notes**: Check package release notes for migration instructions\n- **Update integrations**: Modify custom code that depends on changed APIs\n- **Test edge cases**: Breaking changes often affect less common use cases\n- **Plan rollback**: Have a rollback plan ready before applying breaking changes\n\n## Best practices\n\n### Development workflow\n\n**Branch strategy**\n\n- Create upgrade branches with descriptive names (for example, `upgrade-cart-v2.1.0`)\n- Merge upgrades through pull requests with thorough reviews\n\n**Testing approach**\n\n- Cover custom functionality with tests\n- Automate testing where possible\n- Test across devices and browsers\n- Use real product data\n\n**Deployment process**\n\n- Use staging environments that mirror production\n- Deploy during low-traffic periods\n- Monitor key metrics post-deployment\n- Have rollback procedures ready\n\n### Long-term maintenance\n\n**Stay current**\n\n- Update regularly, don't let them pile up\n- Apply security patches promptly\n- Plan major upgrades ahead well in advance\n\n**Customize thoughtfully**\n\n- Minimize modifications to core boilerplate files\n- Use configuration and theming approaches when possible\n- Document the business justification for customizations\n\n## Resources\n\n- [Storefront Developer Tutorial](https://experienceleague.adobe.com/developer/commerce/storefront/get-started/create-storefront/): Comprehensive storefront setup page\n- [Storefront Architecture](https://experienceleague.adobe.com/developer/commerce/storefront/get-started/architecture/): Understanding the technical foundation\n- [Drop-in Components Documentation](https://experienceleague.adobe.com/developer/commerce/storefront/dropins/all/introduction/): Detailed component reference pages\n- [B2B drop-ins overview](https://experienceleague.adobe.com/developer/commerce/storefront/dropins-b2b/): B2B packages, containers, and initialization\n- : Core platform documentation\n- : Source code and latest updates\n- [Release Notes](https://experienceleague.adobe.com/developer/commerce/storefront/releases/): Track major changes and updates\n- : GitHub releases and version history"
|
|
53
|
+
}
|
|
54
|
+
]
|
|
55
|
+
}
|