@modern-js/main-doc 2.0.0-beta.3 → 2.0.0-beta.4
This diff represents the content of publicly available package versions that have been released to one of the supported registries. The information contained in this diff is provided for informational purposes only and reflects changes between package versions as they appear in their respective public registries.
- package/.turbo/turbo-build.log +1 -1
- package/en/docusaurus-plugin-content-docs/current/apis/app/commands/inspect.md +0 -4
- package/en/docusaurus-plugin-content-docs/current/components/init-app.md +42 -0
- package/en/docusaurus-plugin-content-docs/current/configure/app/server/routes.md +2 -4
- package/en/docusaurus-plugin-content-docs/current/configure/app/tools/esbuild.md +16 -39
- package/en/docusaurus-plugin-content-docs/current/guides/basic-features/css/css-in-js.md +38 -0
- package/en/docusaurus-plugin-content-docs/current/guides/basic-features/css/css-modules.md +86 -0
- package/en/docusaurus-plugin-content-docs/current/guides/basic-features/css/less-sass.md +17 -0
- package/en/docusaurus-plugin-content-docs/current/guides/basic-features/css/postcss.md +81 -0
- package/en/docusaurus-plugin-content-docs/current/guides/basic-features/css/tailwindcss.md +95 -0
- package/en/docusaurus-plugin-content-docs/current/guides/basic-features/data-fetch.md +66 -0
- package/en/docusaurus-plugin-content-docs/current/guides/basic-features/routes.md +270 -0
- package/en/docusaurus-plugin-content-docs/current/guides/concept/entries.md +116 -0
- package/en/docusaurus-plugin-content-docs/current/guides/concept/lifecycle.md +15 -0
- package/en/docusaurus-plugin-content-docs/current/guides/get-started/quick-start.md +162 -0
- package/en/docusaurus-plugin-content-docs/current/guides/get-started/upgrade.md +78 -0
- package/{zh/tutorials/first-app → en/docusaurus-plugin-content-docs/current/guides}/overview.md +4 -4
- package/en/docusaurus-plugin-content-docs/current/tutorials/foundations/introduction.md +1 -1
- package/en/docusaurus-plugin-content-docs/current.json +11 -11
- package/package.json +3 -3
- package/zh/apis/app/commands/inspect.md +0 -4
- package/zh/apis/app/commands/new.md +1 -1
- package/zh/apis/app/hooks/src/index_.md +6 -5
- package/zh/components/debug-app.md +18 -0
- package/zh/components/global-proxy.md +28 -0
- package/zh/components/init-app.md +44 -0
- package/zh/components/prerequisites.md +19 -0
- package/zh/configure/app/server/routes.md +2 -4
- package/zh/configure/app/tools/esbuild.md +16 -39
- package/zh/guides/advanced-features/bff/bff-proxy.md +1 -1
- package/zh/guides/advanced-features/compatibility.md +2 -38
- package/zh/guides/advanced-features/custom-app.md +15 -17
- package/zh/guides/advanced-features/ssg.md +6 -6
- package/zh/guides/advanced-features/ssr.md +94 -51
- package/zh/guides/advanced-features/testing.md +33 -1
- package/zh/guides/advanced-features/web-server.md +2 -2
- package/zh/guides/basic-features/css/tailwindcss.md +2 -6
- package/zh/guides/basic-features/html.md +182 -0
- package/zh/guides/basic-features/mock.md +3 -9
- package/zh/guides/basic-features/proxy.md +2 -27
- package/zh/guides/concept/entries.md +4 -5
- package/zh/guides/get-started/quick-start.md +6 -78
- package/zh/guides/get-started/upgrade.md +8 -8
- package/zh/guides/topic-detail/model/quick-start.md +1 -1
- package/zh/guides/topic-detail/model/test-model.md +2 -2
- package/zh/guides/topic-detail/monorepo/intro.md +1 -1
- package/zh/guides/troubleshooting/dependencies.md +0 -69
- package/zh/tutorials/first-app/_category_.json +1 -1
- package/zh/tutorials/first-app/c01-start.md +94 -0
- package/zh/tutorials/first-app/{c05-component/5.1-use-ui-library.md → c02-component.md} +13 -15
- package/zh/tutorials/first-app/c03-css.md +305 -0
- package/zh/tutorials/first-app/{c08-client-side-routing/8.1-code-based-routing.md → c04-routes.md} +52 -39
- package/zh/tutorials/first-app/c05-loader.md +82 -0
- package/zh/tutorials/first-app/c06-model.md +256 -0
- package/zh/tutorials/first-app/c07-container.md +268 -0
- package/zh/tutorials/first-app/c08-entries.md +134 -0
- package/zh/tutorials/foundations/introduction.md +1 -1
- package/en/docusaurus-plugin-content-docs/current/configure/app/output/enable-modern-mode.md +0 -34
- package/zh/apis/generator/overview.md +0 -32
- package/zh/configure/app/output/enable-modern-mode.md +0 -34
- package/zh/guides/topic-detail/monorepo/deploy.md +0 -43
- package/zh/tutorials/first-app/c01-getting-started/1.1-prerequisites.md +0 -25
- package/zh/tutorials/first-app/c01-getting-started/1.2-minimal-mwa.md +0 -118
- package/zh/tutorials/first-app/c01-getting-started/1.3-dev-command.md +0 -29
- package/zh/tutorials/first-app/c01-getting-started/1.4-enable-ssr.md +0 -47
- package/zh/tutorials/first-app/c01-getting-started/1.5-start-command.md +0 -18
- package/zh/tutorials/first-app/c01-getting-started/1.6-create-repo.md +0 -31
- package/zh/tutorials/first-app/c01-getting-started/_category_.json +0 -3
- package/zh/tutorials/first-app/c02-generator-and-studio/2.1-generator.md +0 -79
- package/zh/tutorials/first-app/c02-generator-and-studio/2.2-boilerplates.md +0 -34
- package/zh/tutorials/first-app/c02-generator-and-studio/2.3-configuration.md +0 -19
- package/zh/tutorials/first-app/c02-generator-and-studio/_category_.json +0 -3
- package/zh/tutorials/first-app/c03-ide/3.1-setting-up.md +0 -55
- package/zh/tutorials/first-app/c03-ide/3.2-hints-in-ide.md +0 -60
- package/zh/tutorials/first-app/c03-ide/3.3-autofix-in-ide.md +0 -11
- package/zh/tutorials/first-app/c03-ide/3.4-autofix-in-cli.md +0 -63
- package/zh/tutorials/first-app/c03-ide/_category_.json +0 -3
- package/zh/tutorials/first-app/c04-es6-plus-and-ts/4.1-use-es6-plus.md +0 -54
- package/zh/tutorials/first-app/c04-es6-plus-and-ts/4.2-use-typescript.md +0 -135
- package/zh/tutorials/first-app/c04-es6-plus-and-ts/4.3-compatibility.md +0 -67
- package/zh/tutorials/first-app/c04-es6-plus-and-ts/_category_.json +0 -3
- package/zh/tutorials/first-app/c05-component/5.2-use-standalone-component.md +0 -72
- package/zh/tutorials/first-app/c05-component/_category_.json +0 -3
- package/zh/tutorials/first-app/c06-css-and-component/6.1-css-in-js.md +0 -110
- package/zh/tutorials/first-app/c06-css-and-component/6.2-utility-class.md +0 -143
- package/zh/tutorials/first-app/c06-css-and-component/6.3-postcss.md +0 -84
- package/zh/tutorials/first-app/c06-css-and-component/6.4-design-system.md +0 -83
- package/zh/tutorials/first-app/c06-css-and-component/6.5-storybook.md +0 -77
- package/zh/tutorials/first-app/c06-css-and-component/6.6-testing.md +0 -104
- package/zh/tutorials/first-app/c06-css-and-component/_category_.json +0 -3
- package/zh/tutorials/first-app/c07-app-entry/7.1-intro.md +0 -69
- package/zh/tutorials/first-app/c07-app-entry/7.2-add-entry-in-cli.md +0 -100
- package/zh/tutorials/first-app/c07-app-entry/7.3-manage-entries-by-hand.md +0 -69
- package/zh/tutorials/first-app/c07-app-entry/_category_.json +0 -3
- package/zh/tutorials/first-app/c08-client-side-routing/_category_.json +0 -3
- package/zh/tutorials/first-app/c09-bff/9.1-serverless.md +0 -30
- package/zh/tutorials/first-app/c09-bff/9.2-enable-bff.md +0 -95
- package/zh/tutorials/first-app/c09-bff/9.3-fetch-bff.md +0 -131
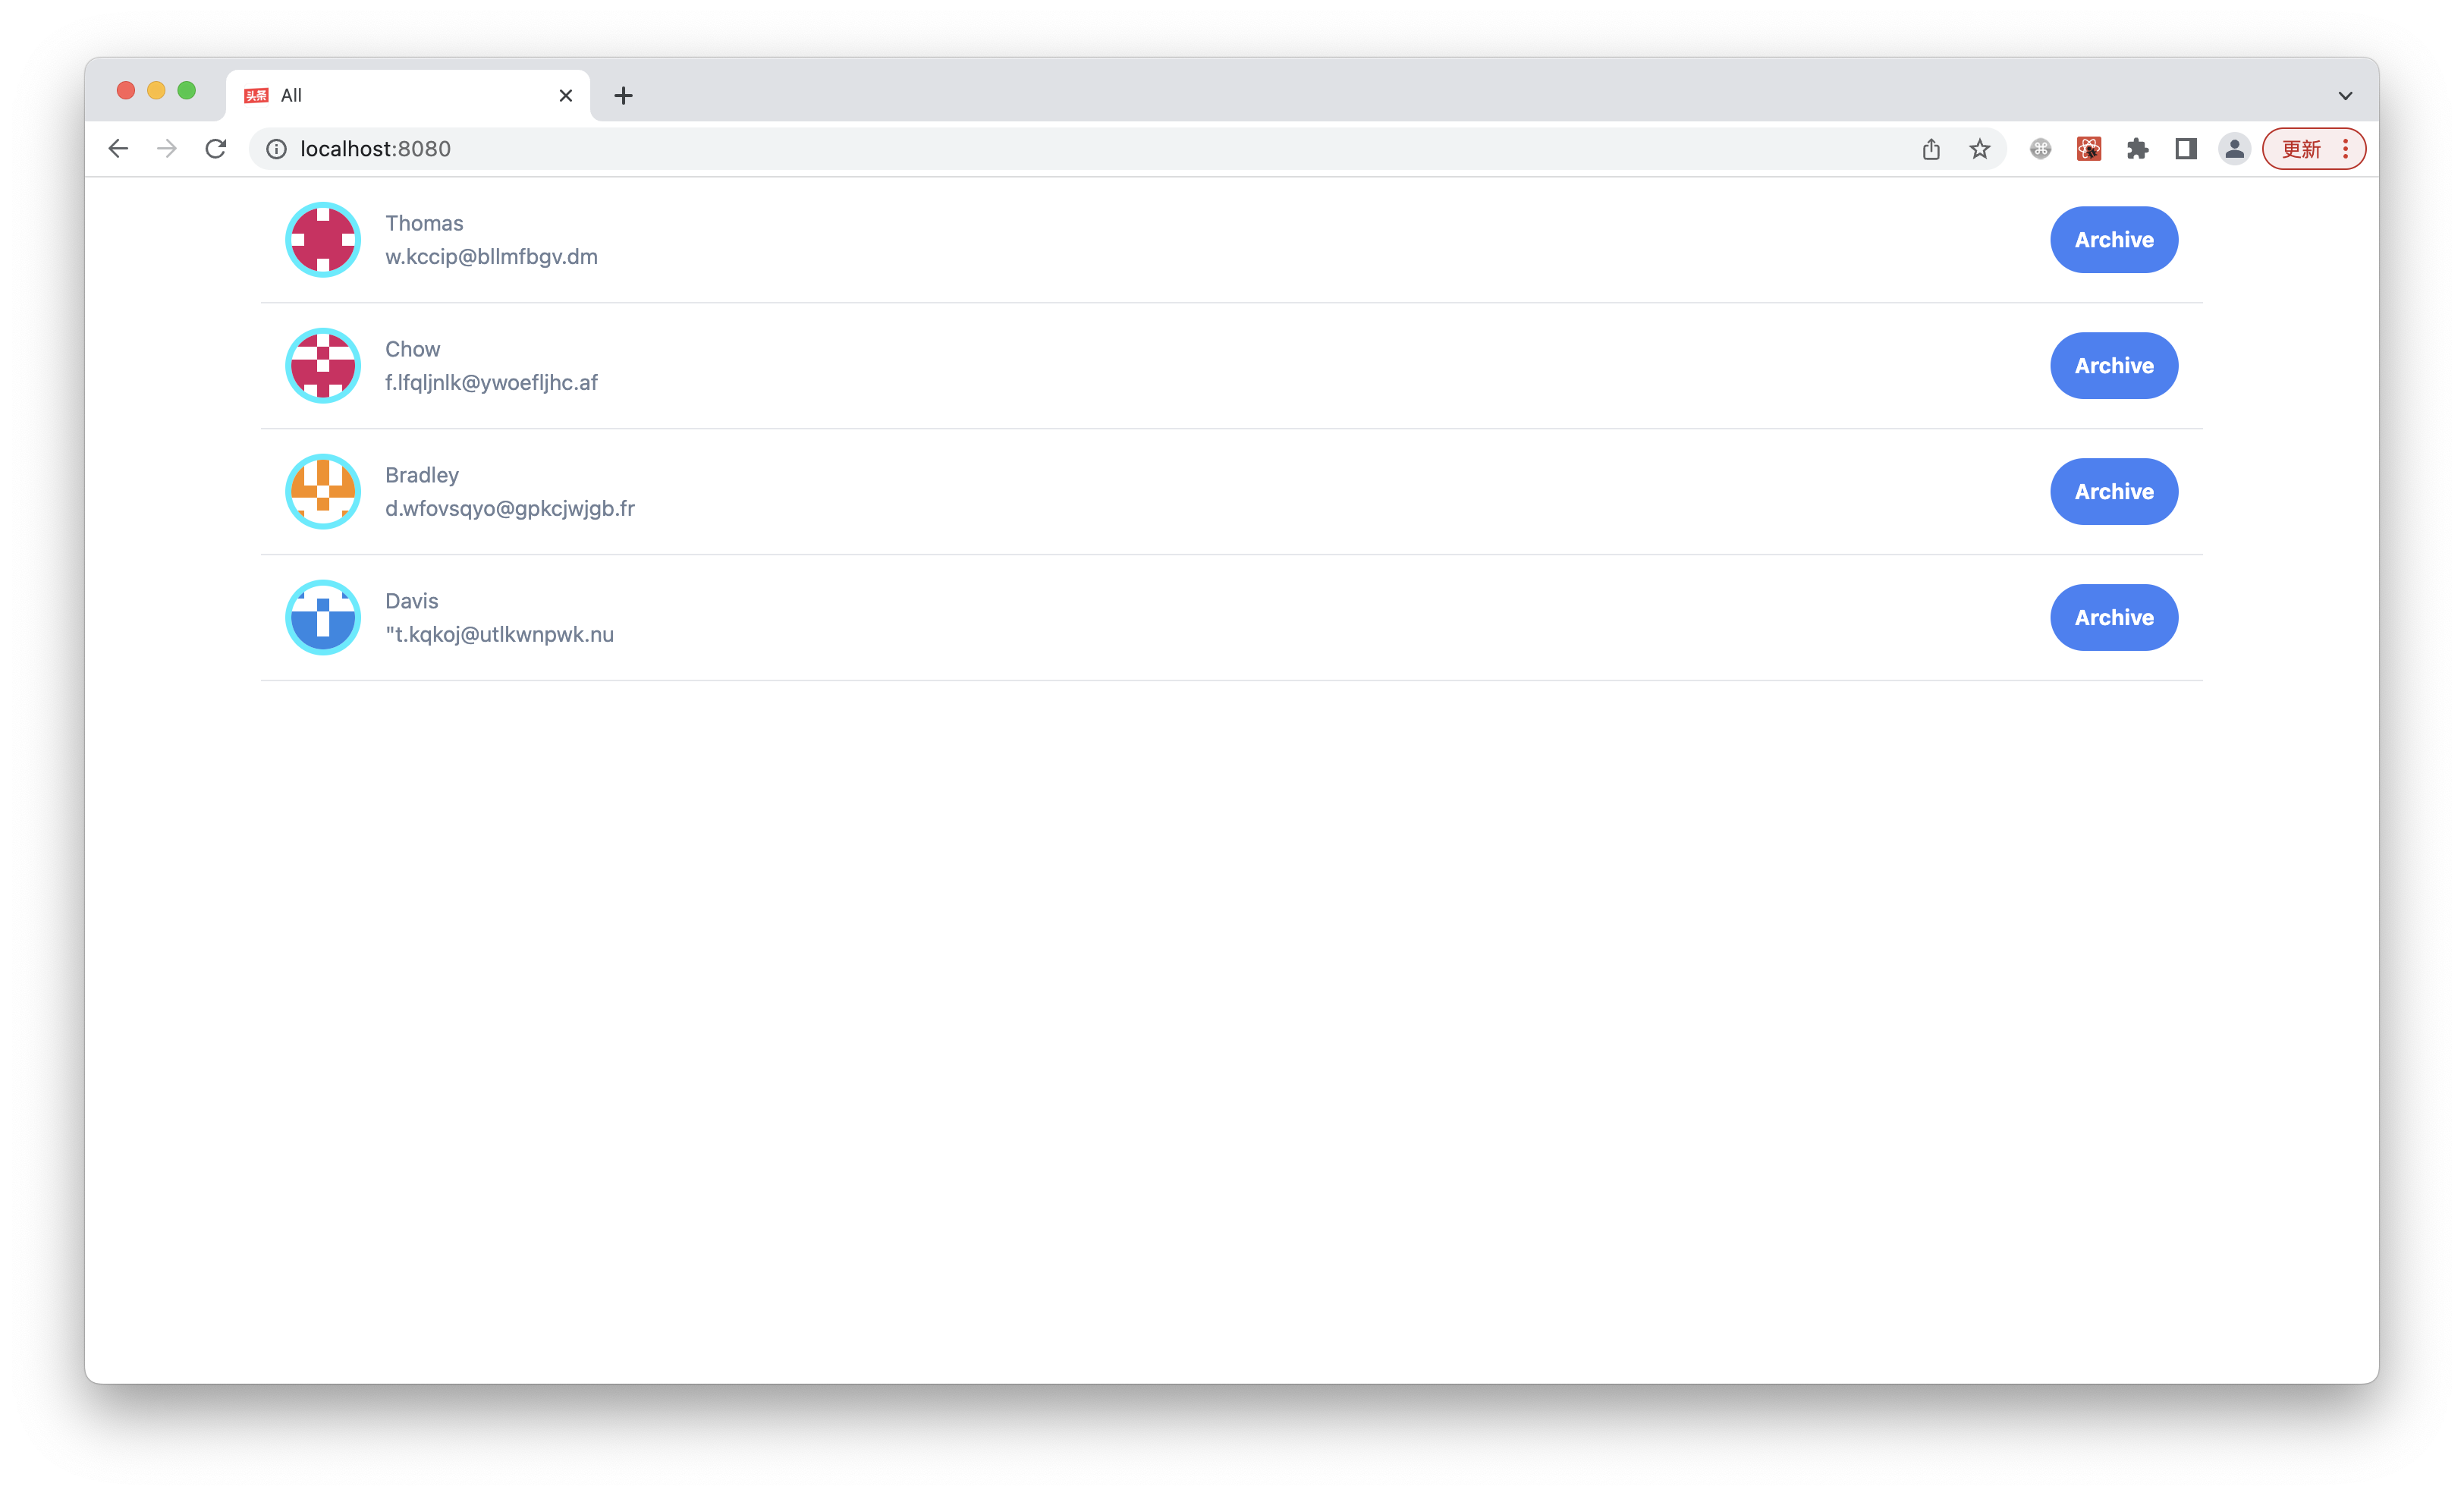
- package/zh/tutorials/first-app/c09-bff/_category_.json +0 -3
- package/zh/tutorials/first-app/c10-model/10.1-application-architecture.md +0 -21
- package/zh/tutorials/first-app/c10-model/10.2-add-model.md +0 -185
- package/zh/tutorials/first-app/c10-model/10.3-use-model.md +0 -55
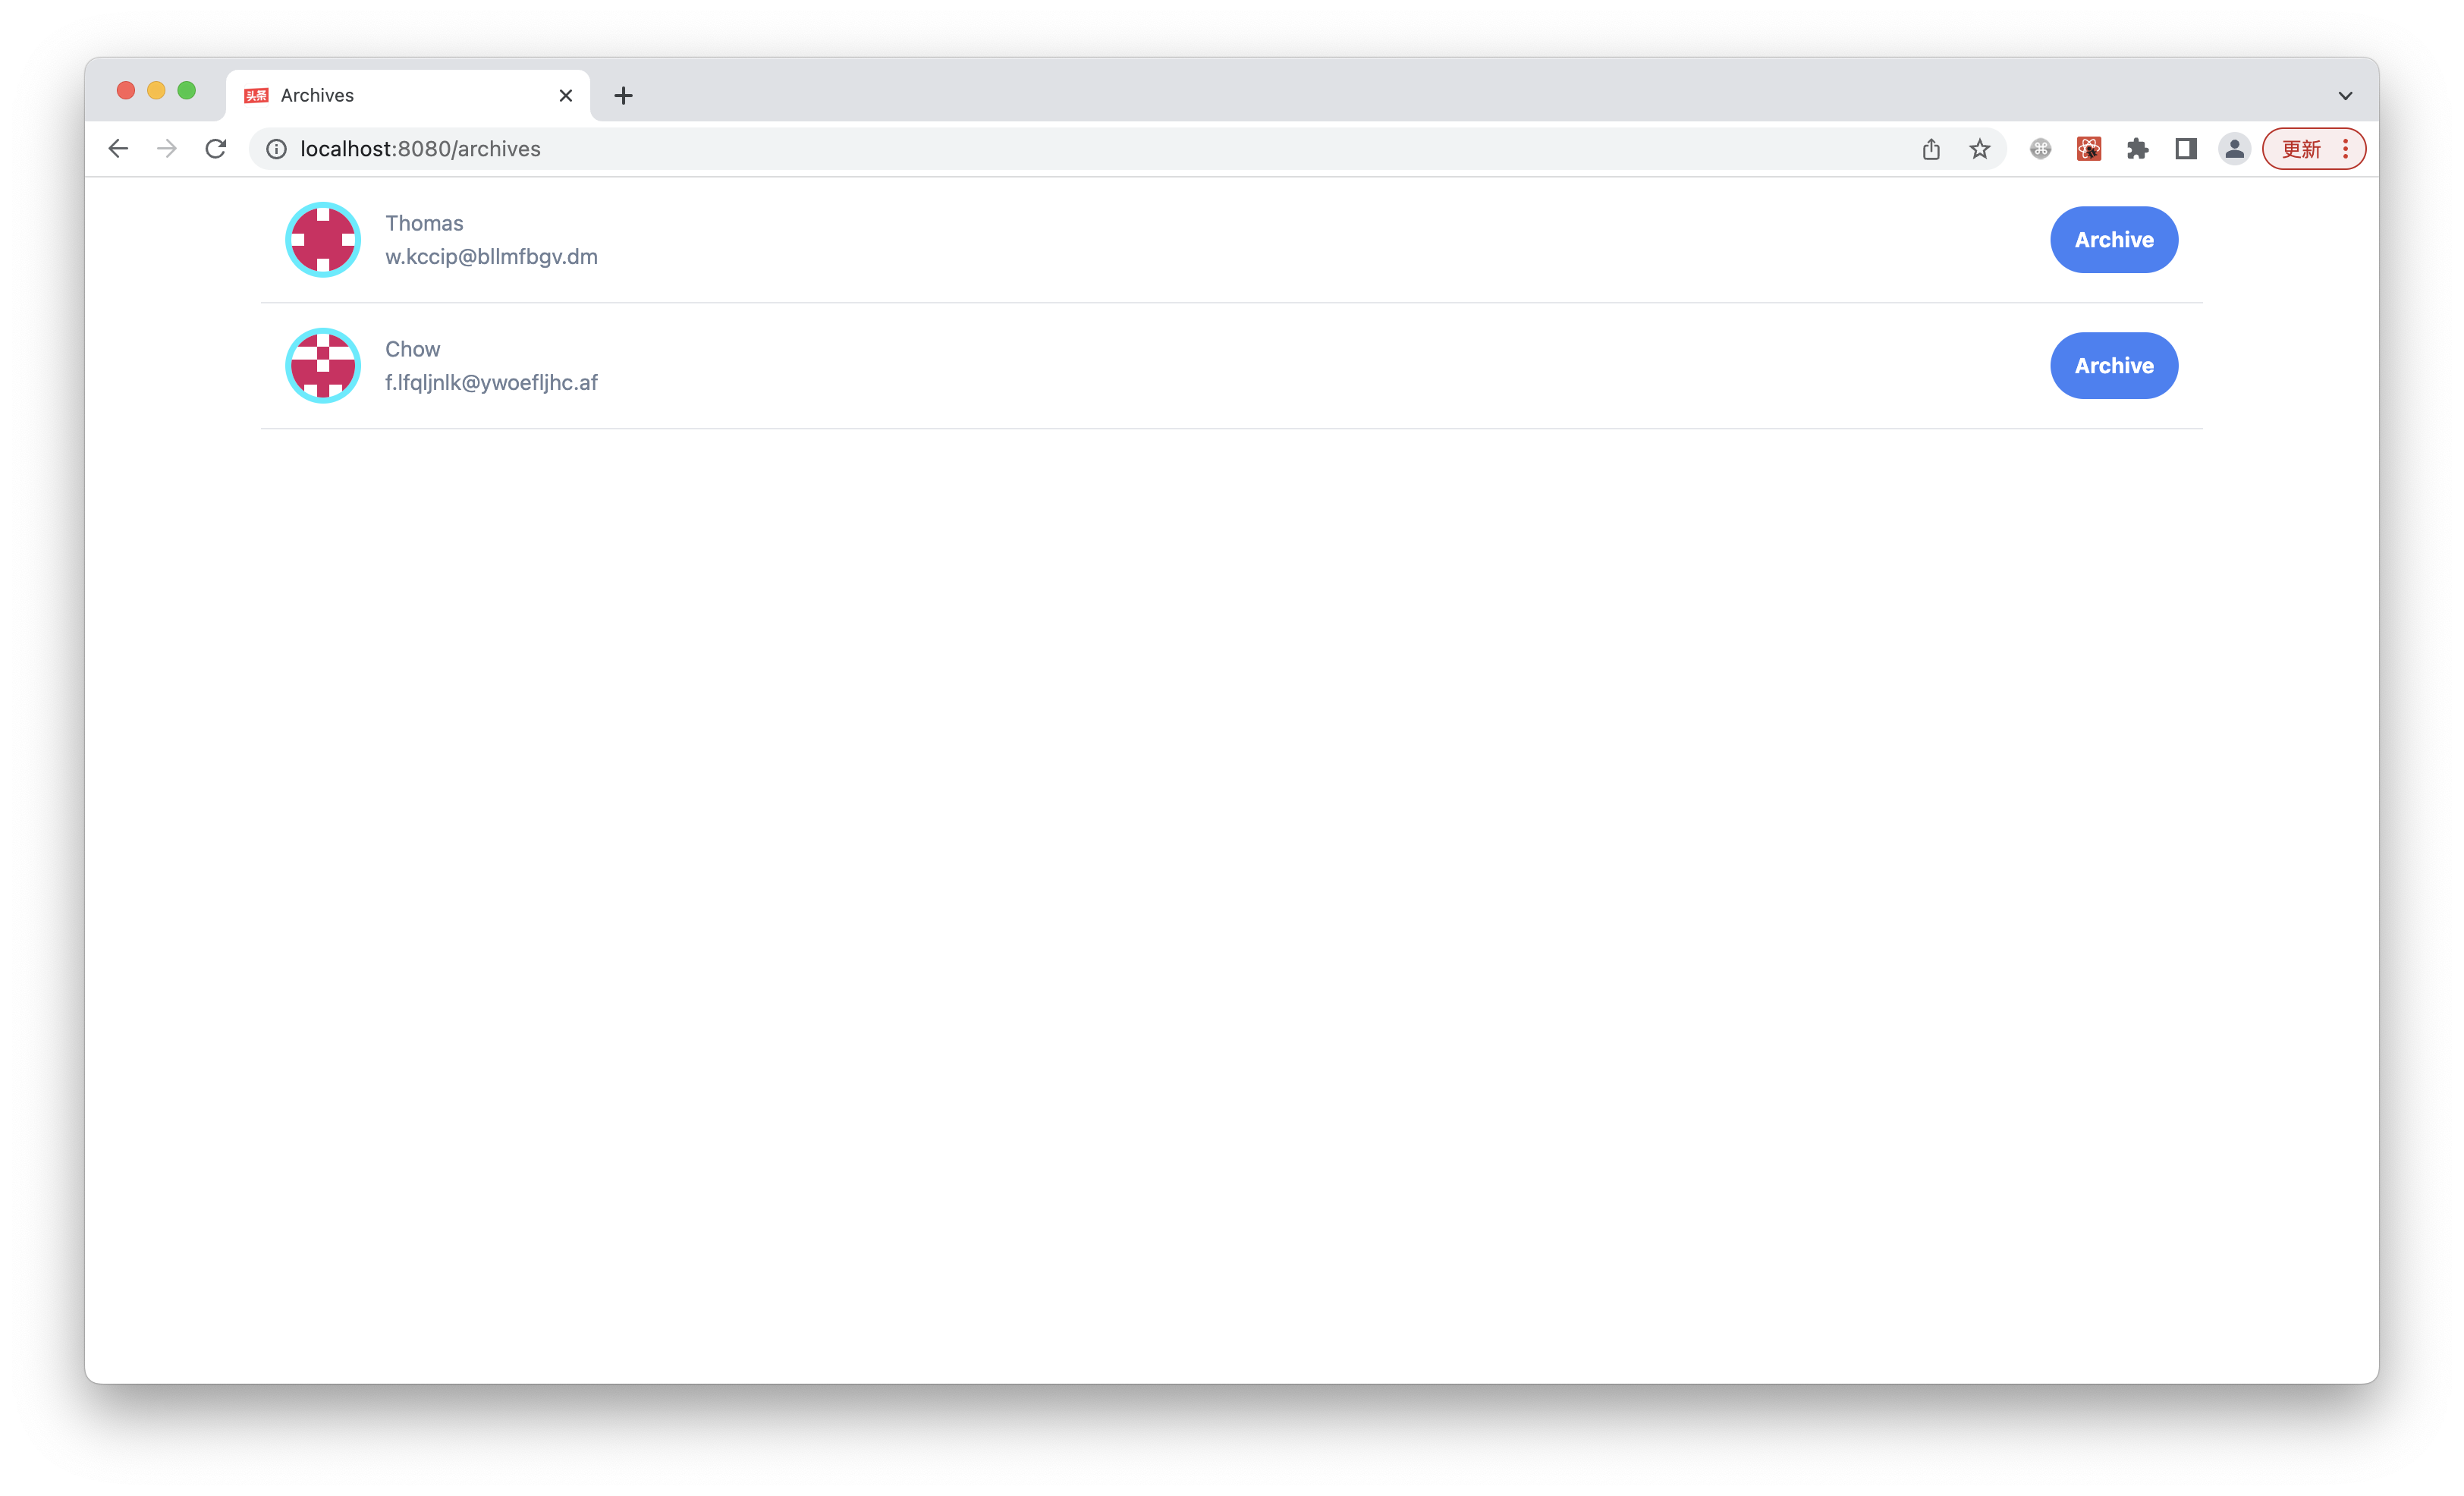
- package/zh/tutorials/first-app/c10-model/10.4-testing.md +0 -69
- package/zh/tutorials/first-app/c10-model/_category_.json +0 -3
- package/zh/tutorials/first-app/c11-container/11.1-use-model-with-app-state.md +0 -240
- package/zh/tutorials/first-app/c11-container/11.2-add-container.md +0 -109
- package/zh/tutorials/first-app/c11-container/11.3-use-loader.md +0 -63
- package/zh/tutorials/first-app/c11-container/11.4-testing.md +0 -56
- package/zh/tutorials/first-app/c11-container/_category_.json +0 -3
|
@@ -0,0 +1,305 @@
|
|
|
1
|
+
---
|
|
2
|
+
title: 添加样式
|
|
3
|
+
---
|
|
4
|
+
|
|
5
|
+
import Tabs from '@theme/Tabs';
|
|
6
|
+
import TabItem from '@theme/TabItem';
|
|
7
|
+
|
|
8
|
+
上一章节中,我们学习了如何使用使用三方库中的组件。
|
|
9
|
+
|
|
10
|
+
这一章节中,我们将学习如何实现 UI 组件。
|
|
11
|
+
|
|
12
|
+
## 使用 CSS 写 JS 组件
|
|
13
|
+
|
|
14
|
+
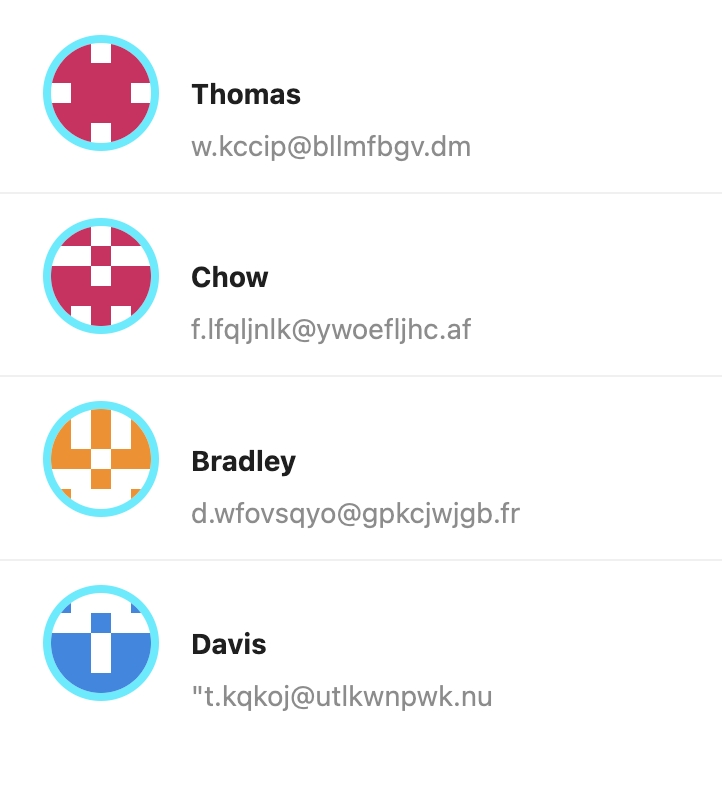
首先我们希望自己控制联系人头像的展示,实现这种设计稿:
|
|
15
|
+
|
|
16
|
+
|
|
17
|
+
|
|
18
|
+
假设没有现成的组件可以实现,那就需要自己写些 CSS 了,这里我们使用 [styled-components](https://styled-components.com/),来实现类似的需求。Modern.js 开箱即用的支持 styled-components,既不需要安装依赖,也不需要做任何配置。
|
|
19
|
+
|
|
20
|
+
styled-components 通过模块化的方式,避免了传统 CSS 写法上的诸多问题。例如直接在元素的 style 属性上写样式,UI 视觉上的细节也会跟 UI 结构上的细节和业务逻辑混在一起。或是 classname 需要避免全局空间重名,需要用到命名规范的问题。
|
|
21
|
+
|
|
22
|
+
在 `src/routes/page.tsx` 里修改顶部的代码:
|
|
23
|
+
|
|
24
|
+
```js
|
|
25
|
+
import styled from '@modern-js/runtime/styled';
|
|
26
|
+
```
|
|
27
|
+
|
|
28
|
+
添加以下代码:
|
|
29
|
+
|
|
30
|
+
```js
|
|
31
|
+
const Avatar = styled.img`
|
|
32
|
+
width: 50px;
|
|
33
|
+
height: 50px;
|
|
34
|
+
border: 4px solid #0ef;
|
|
35
|
+
border-radius: 50%;
|
|
36
|
+
`;
|
|
37
|
+
```
|
|
38
|
+
|
|
39
|
+
修改 `List.Item.Meta` 的代码:
|
|
40
|
+
|
|
41
|
+
```tsx
|
|
42
|
+
<List.Item.Meta
|
|
43
|
+
avatar={<Avatar src={avatar} />}
|
|
44
|
+
title={name}
|
|
45
|
+
description={email}
|
|
46
|
+
/>
|
|
47
|
+
```
|
|
48
|
+
|
|
49
|
+
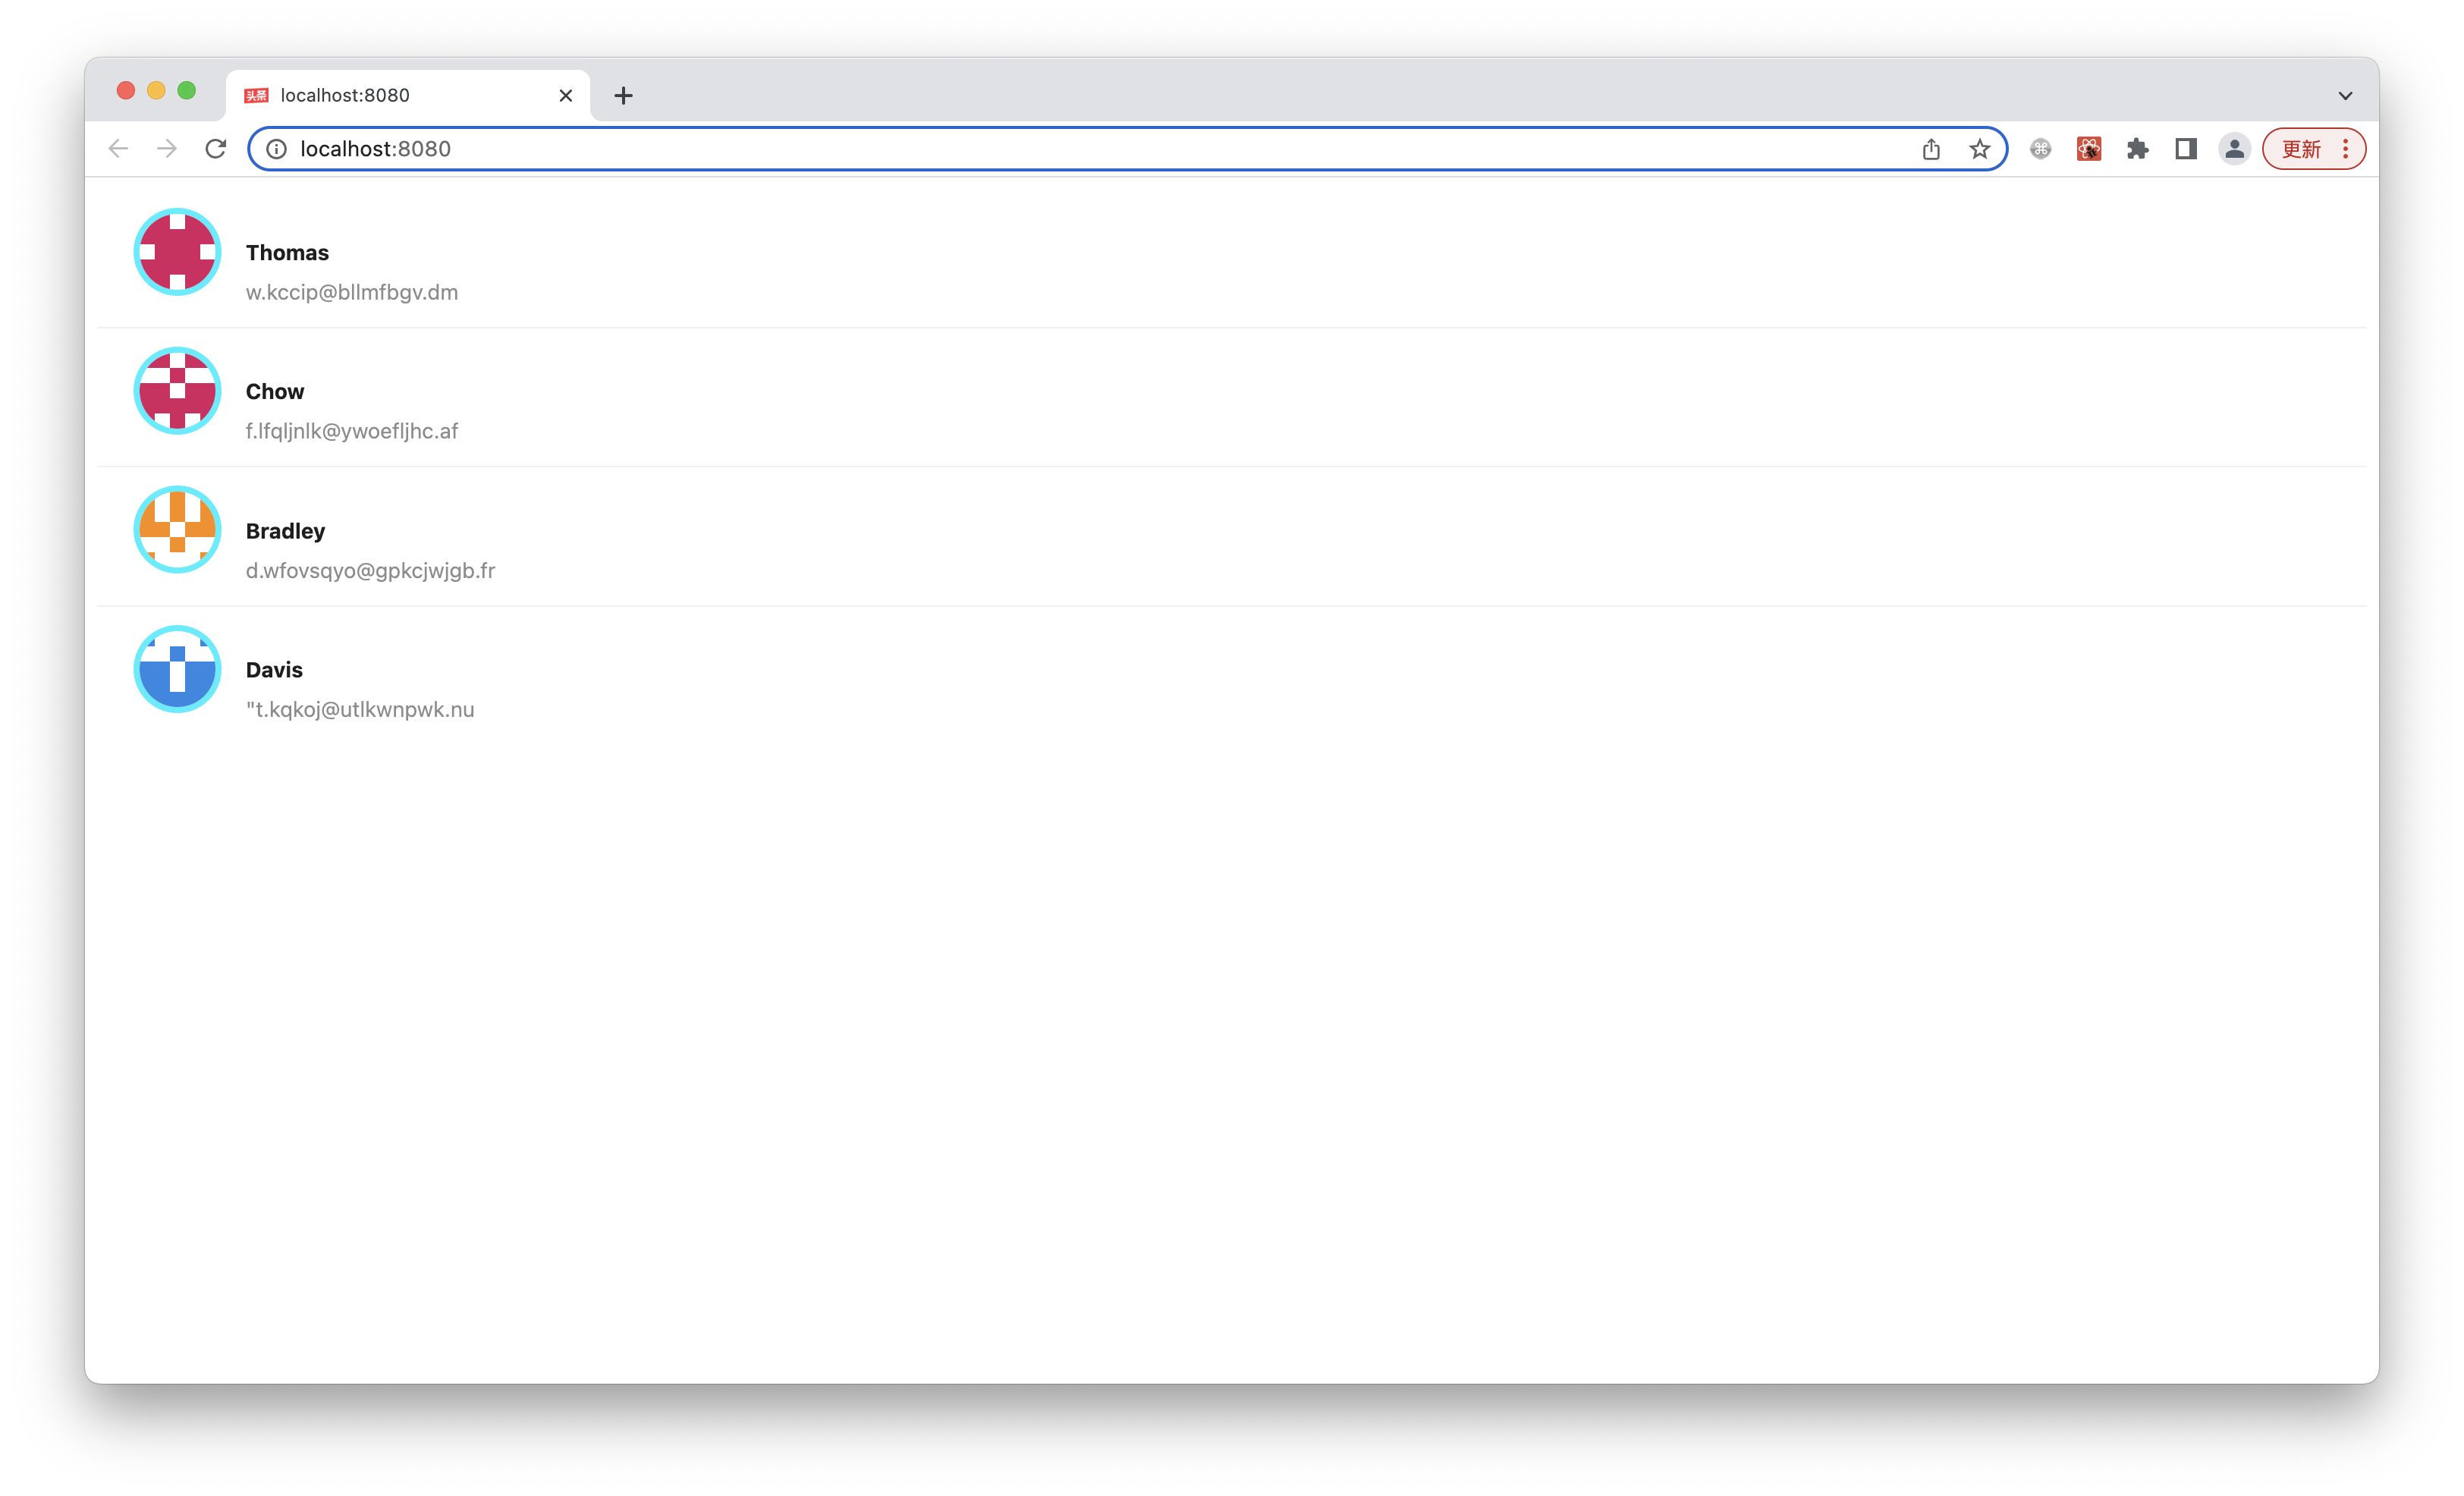
执行 `pnpm run dev`,可以看到预期的运行结果:
|
|
50
|
+
|
|
51
|
+
|
|
52
|
+
|
|
53
|
+
接下来我们做一点重构,为了增强可读性,让代码更容易维护,可以把 Avatar 组件拆分出去。我们在终端执行以下命令,创建新的文件:
|
|
54
|
+
|
|
55
|
+
<Tabs>
|
|
56
|
+
<TabItem value="macOS" label="macOS" default>
|
|
57
|
+
|
|
58
|
+
```bash
|
|
59
|
+
mkdir -p src/components/Avatar
|
|
60
|
+
touch src/components/Avatar/index.tsx
|
|
61
|
+
```
|
|
62
|
+
|
|
63
|
+
</TabItem>
|
|
64
|
+
<TabItem value="Windows" label="Windows">
|
|
65
|
+
|
|
66
|
+
```powershell
|
|
67
|
+
mkdir -p src/components/Avatar
|
|
68
|
+
ni src/components/Avatar/index.tsx
|
|
69
|
+
```
|
|
70
|
+
|
|
71
|
+
</TabItem>
|
|
72
|
+
</Tabs>
|
|
73
|
+
|
|
74
|
+
把 `src/routes/page.tsx` 里的 `<Avatar>` 实现删掉,修改为:
|
|
75
|
+
|
|
76
|
+
```ts
|
|
77
|
+
import Avatar from '../components/Avatar';
|
|
78
|
+
```
|
|
79
|
+
|
|
80
|
+
`src/components/Avatar/index.tsx` 的内容,修改为:
|
|
81
|
+
|
|
82
|
+
```ts
|
|
83
|
+
import styled from '@modern-js/runtime/styled';
|
|
84
|
+
|
|
85
|
+
const Avatar = styled.img`
|
|
86
|
+
width: 50px;
|
|
87
|
+
height: 50px;
|
|
88
|
+
border: 4px solid #0ef;
|
|
89
|
+
border-radius: 50%;
|
|
90
|
+
`;
|
|
91
|
+
|
|
92
|
+
export default Avatar;
|
|
93
|
+
```
|
|
94
|
+
|
|
95
|
+
执行 `pnpm run dev`,运行结果应该是一样的。
|
|
96
|
+
|
|
97
|
+
:::info 注
|
|
98
|
+
采用目录形式 `Avatar/index.tsx` 而不是单文件形式 `Avatar.tsx` 的原因是,之后可以方便的在目录内部增加子文件,包括专用的资源(图片等)、专用子组件、CSS 文件等。
|
|
99
|
+
:::
|
|
100
|
+
|
|
101
|
+
|
|
102
|
+
## 使用 Utility
|
|
103
|
+
|
|
104
|
+
我们已经使用 style-components 实现 `<Avatar>` 组件,但当前的 UI 仍然不能让人满意,缺乏专业感,例如列表项内部的布局有点粗糙,很多地方没对齐。
|
|
105
|
+
|
|
106
|
+
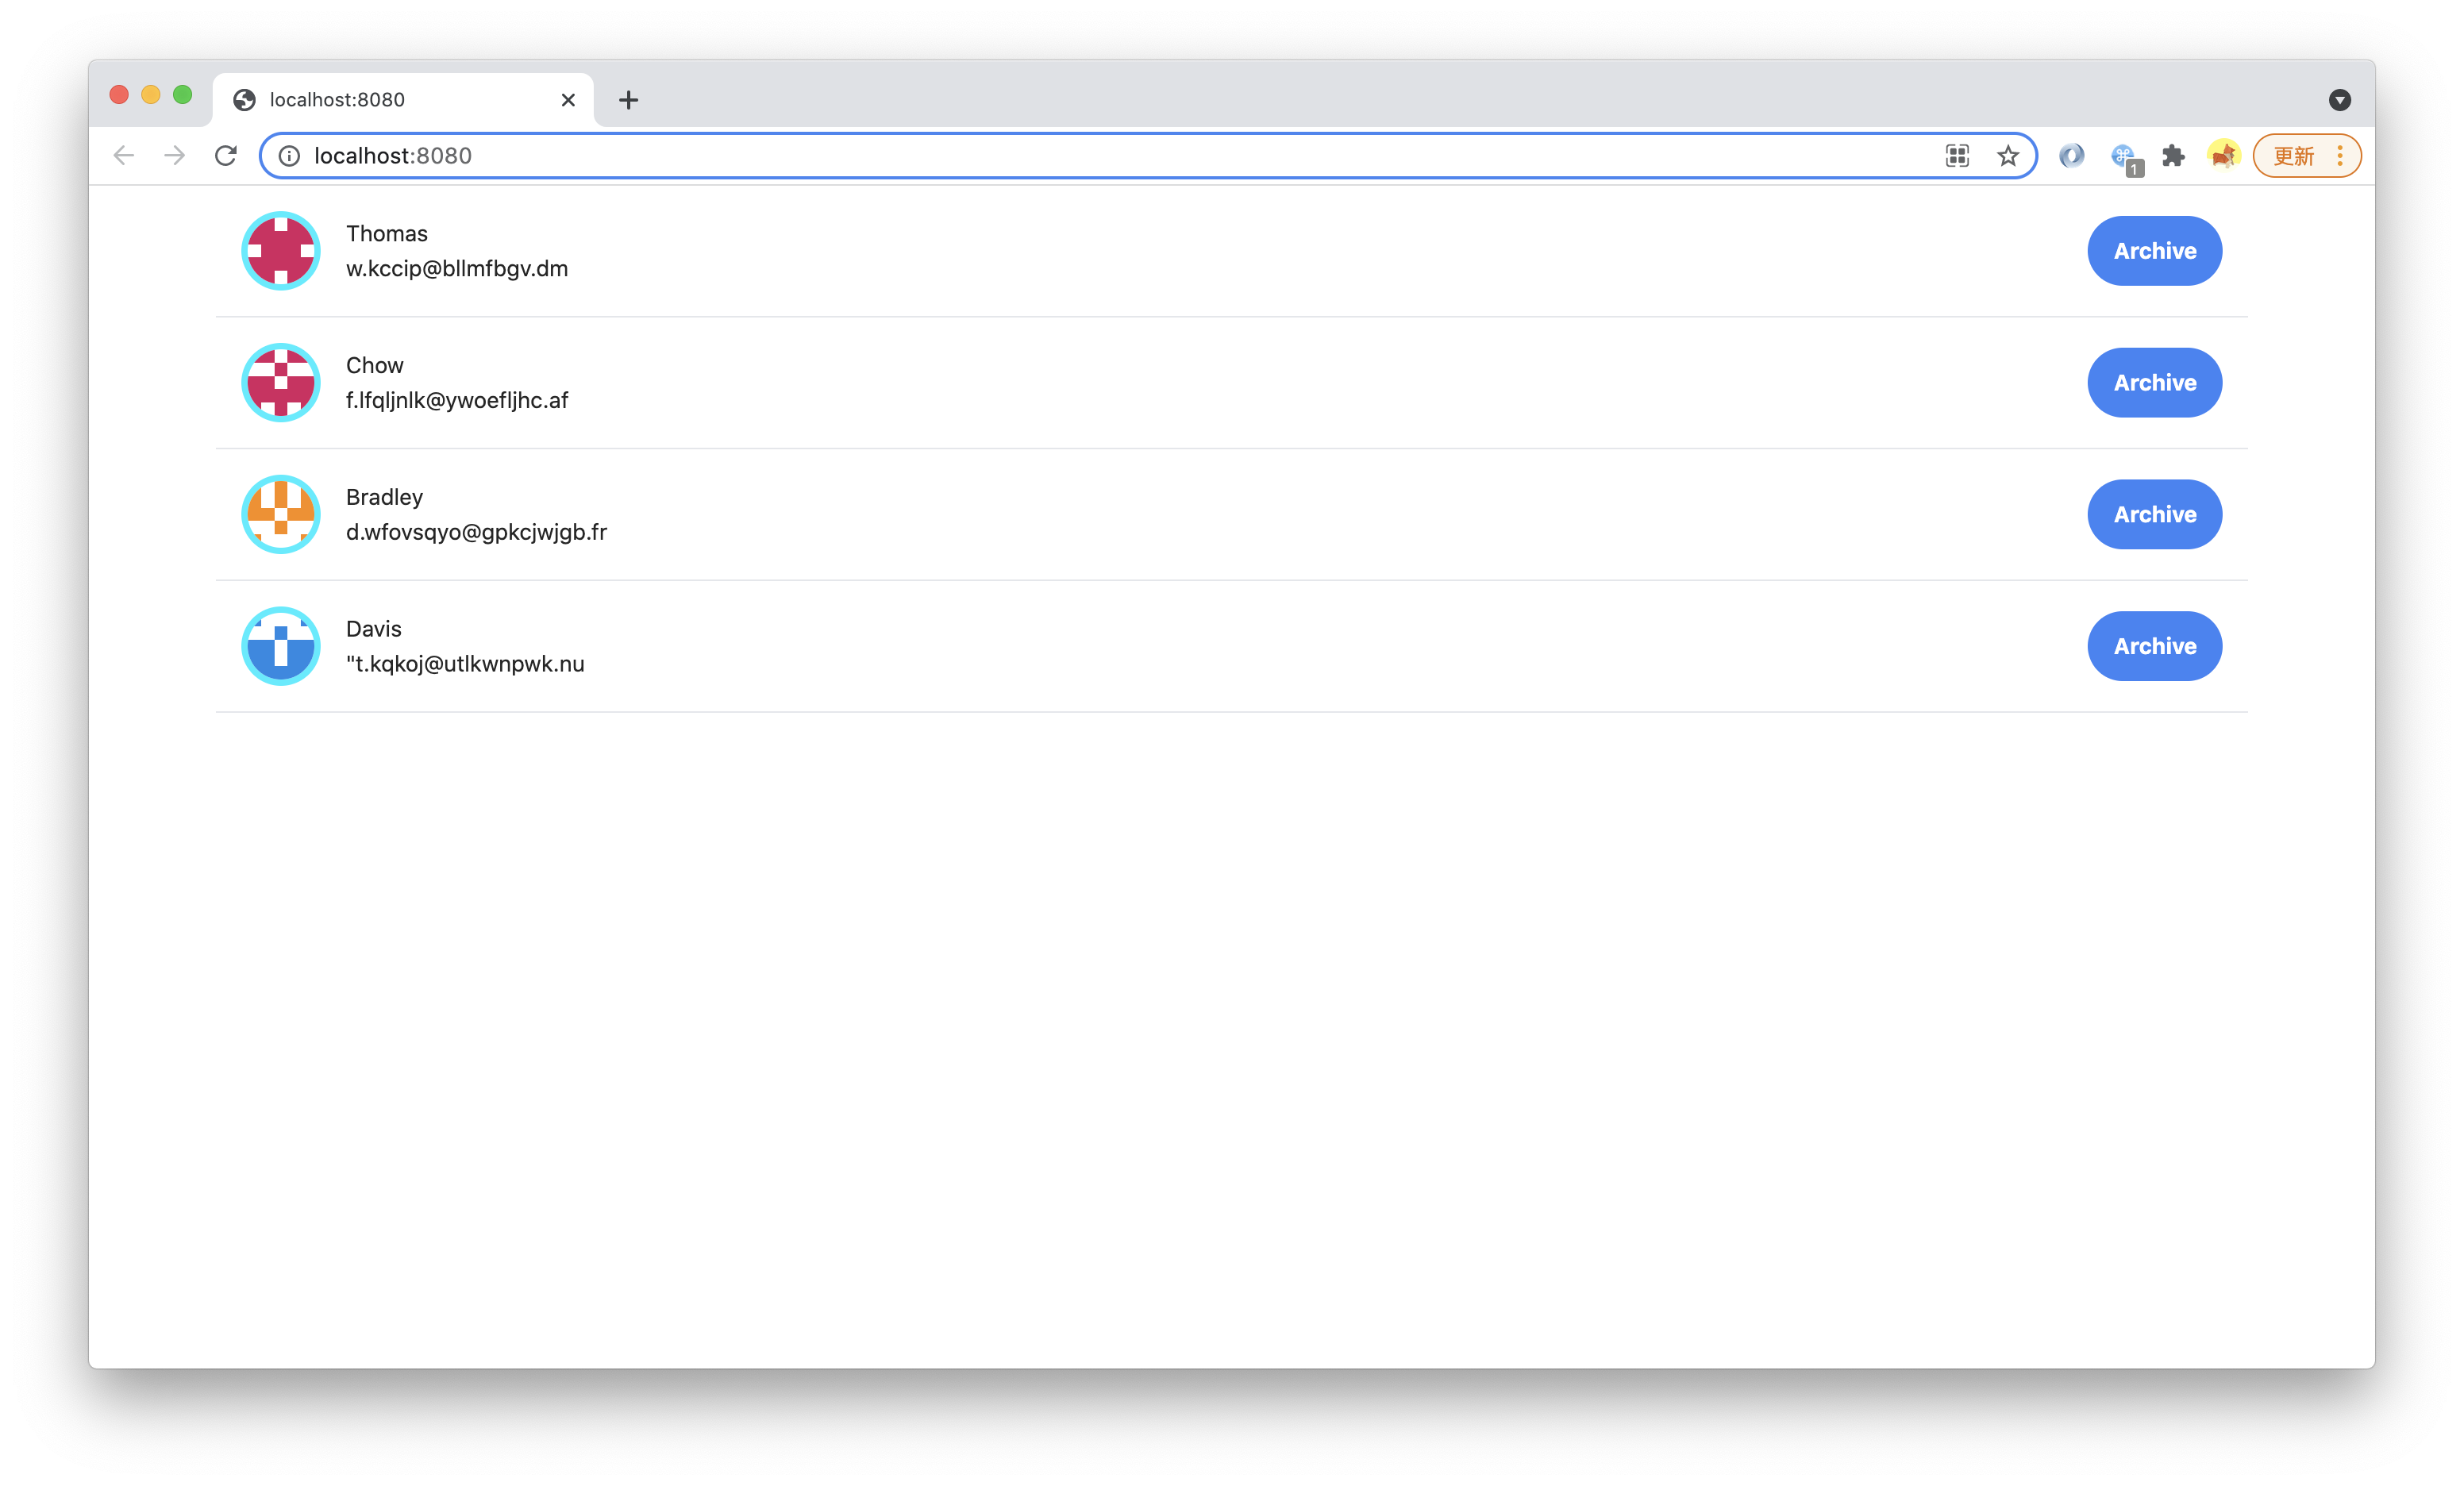
现在,我们自己来实现一个更好的 `Item` 组件,实现这样的设计稿:
|
|
107
|
+
|
|
108
|
+

|
|
109
|
+
|
|
110
|
+
这次要实现的 UI 更复杂,有内部结构,但另一方面,并没有 `<Avatar>` 组件的**很粗的亮蓝色边框**这样很特殊的 UI,都是很常规的水平垂直布局、居中、字体样式等。这种情况下,其实根本没必要写 CSS,有更高效的、跟 styled-components 互补的实现方式:**Utility Class**。
|
|
111
|
+
|
|
112
|
+
Modern.js 集成了主流、轻量、通用的 Utility Class 工具库 [Tailwind CSS](https://tailwindcss.com/)。
|
|
113
|
+
|
|
114
|
+
执行 `pnpm run new`,进行如下选择,开启 Tailwind CSS:
|
|
115
|
+
|
|
116
|
+
```bash
|
|
117
|
+
? 请选择你想要的操作 启用可选功能
|
|
118
|
+
? 启用可选功能 启用 Tailwind CSS 支持
|
|
119
|
+
```
|
|
120
|
+
|
|
121
|
+
在 `src/routes/page.tsx` 顶部引入 Tailwind CSS 的 css 文件,就可以开始快速实现专业的 UI:
|
|
122
|
+
|
|
123
|
+
```js
|
|
124
|
+
import 'tailwindcss/base.css';
|
|
125
|
+
import 'tailwindcss/components.css';
|
|
126
|
+
import 'tailwindcss/utilities.css';
|
|
127
|
+
```
|
|
128
|
+
|
|
129
|
+
先创建 Item 组件:
|
|
130
|
+
|
|
131
|
+
<Tabs>
|
|
132
|
+
<TabItem value="macOS" label="macOS" default>
|
|
133
|
+
|
|
134
|
+
```bash
|
|
135
|
+
mkdir -p src/components/Item
|
|
136
|
+
touch src/components/Item/index.tsx
|
|
137
|
+
```
|
|
138
|
+
|
|
139
|
+
</TabItem>
|
|
140
|
+
<TabItem value="Windows" label="Windows">
|
|
141
|
+
|
|
142
|
+
```powershell
|
|
143
|
+
mkdir -p src/components/Item
|
|
144
|
+
ni src/components/Item/index.tsx
|
|
145
|
+
```
|
|
146
|
+
|
|
147
|
+
</TabItem>
|
|
148
|
+
</Tabs>
|
|
149
|
+
|
|
150
|
+
修改 `src/routes/page.tsx`,把 `List` 的 `render` 实现交给 `Item` 组件:
|
|
151
|
+
|
|
152
|
+
```js
|
|
153
|
+
import { List } from 'antd';
|
|
154
|
+
import 'tailwindcss/base.css';
|
|
155
|
+
import 'tailwindcss/components.css';
|
|
156
|
+
import 'tailwindcss/utilities.css';
|
|
157
|
+
import Item from '../components/Item';
|
|
158
|
+
|
|
159
|
+
const getAvatar = (users: Array<{ name: string; email: string }>) =>
|
|
160
|
+
users.map(user => ({
|
|
161
|
+
...user,
|
|
162
|
+
avatar: `https://avatars.dicebear.com/v2/identicon/${user.name}.svg`,
|
|
163
|
+
}));
|
|
164
|
+
|
|
165
|
+
const mockData = getAvatar([
|
|
166
|
+
{ name: 'Thomas', email: 'w.kccip@bllmfbgv.dm' },
|
|
167
|
+
{ name: 'Chow', email: 'f.lfqljnlk@ywoefljhc.af' },
|
|
168
|
+
{ name: 'Bradley', email: 'd.wfovsqyo@gpkcjwjgb.fr' },
|
|
169
|
+
{ name: 'Davis', email: '"t.kqkoj@utlkwnpwk.nu' },
|
|
170
|
+
]);
|
|
171
|
+
|
|
172
|
+
function Index() {
|
|
173
|
+
return (
|
|
174
|
+
<div className="container lg mx-auto">
|
|
175
|
+
<List
|
|
176
|
+
dataSource={mockData}
|
|
177
|
+
renderItem={info => <Item key={info.name} info={info} />}
|
|
178
|
+
/>
|
|
179
|
+
</div>
|
|
180
|
+
);
|
|
181
|
+
}
|
|
182
|
+
|
|
183
|
+
export default Index;
|
|
184
|
+
```
|
|
185
|
+
|
|
186
|
+
在父容器的上使用了 [Utility Class](https://tailwindcss.com/docs/container) ,快速实现了最基本的最大宽度、居中等样式。
|
|
187
|
+
|
|
188
|
+
接下来实现 `src/components/Item/index.tsx`:
|
|
189
|
+
|
|
190
|
+
```tsx
|
|
191
|
+
import Avatar from '../Avatar';
|
|
192
|
+
|
|
193
|
+
type InfoProps = {
|
|
194
|
+
avatar: string;
|
|
195
|
+
name: string;
|
|
196
|
+
email: string;
|
|
197
|
+
archived?: boolean;
|
|
198
|
+
};
|
|
199
|
+
|
|
200
|
+
const Item = ({ info }: { info: InfoProps }) => {
|
|
201
|
+
const { avatar, name, email, archived } = info;
|
|
202
|
+
return (
|
|
203
|
+
<div className="flex p-4 items-center border-gray-200 border-b">
|
|
204
|
+
<Avatar src={avatar} />
|
|
205
|
+
<div className="ml-4 flex-1 flex justify-between">
|
|
206
|
+
<div className="flex-1">
|
|
207
|
+
<p>{name}</p>
|
|
208
|
+
<p>{email}</p>
|
|
209
|
+
</div>
|
|
210
|
+
<button
|
|
211
|
+
type="button"
|
|
212
|
+
disabled={archived}
|
|
213
|
+
className={`bg-blue-500 text-white font-bold
|
|
214
|
+
py-2 px-4 rounded-full hover:bg-blue-700`}
|
|
215
|
+
>
|
|
216
|
+
Archive
|
|
217
|
+
</button>
|
|
218
|
+
</div>
|
|
219
|
+
</div>
|
|
220
|
+
);
|
|
221
|
+
};
|
|
222
|
+
|
|
223
|
+
export default Item;
|
|
224
|
+
```
|
|
225
|
+
|
|
226
|
+
执行 `pnpm run dev`,可以看到预期的运行结果:
|
|
227
|
+
|
|
228
|
+
|
|
229
|
+
|
|
230
|
+
我们只使用了少量 Utility Class,比如 [Flex](https://tailwindcss.com/docs/display/)、[Padding](https://tailwindcss.com/docs/padding/)、[Margin](https://tailwindcss.com/docs/margin/)、[Text](https://tailwindcss.com/docs/text-color/)、[Font](https://tailwindcss.com/docs/font-weight/)、[Border](https://tailwindcss.com/docs/border-width),不写一行 CSS 就实现了符合设计稿的专业 UI。
|
|
231
|
+
|
|
232
|
+
|
|
233
|
+
## 自定义 Utility Class
|
|
234
|
+
|
|
235
|
+
我们也可以自己实现新的 Utility Class,方便在代码间复用。
|
|
236
|
+
|
|
237
|
+
Utility Class 本身也是一种**面向组件**的技术(将不同 class 用在一个组件上,等价于给这个组件设置了一些来自基类的属性),但 Utility Class 的 classname 是全局的(因为要用在任意组件/元素上),很适合用独立 CSS 文件来实现。
|
|
238
|
+
|
|
239
|
+
创建一个新的 CSS 文件:
|
|
240
|
+
|
|
241
|
+
<Tabs>
|
|
242
|
+
<TabItem value="macOS" label="macOS" default>
|
|
243
|
+
|
|
244
|
+
```bash
|
|
245
|
+
mkdir -p src/styles
|
|
246
|
+
touch src/styles/utils.css
|
|
247
|
+
```
|
|
248
|
+
|
|
249
|
+
</TabItem>
|
|
250
|
+
<TabItem value="Windows" label="Windows">
|
|
251
|
+
|
|
252
|
+
```powershell
|
|
253
|
+
mkdir -p src/styles
|
|
254
|
+
ni src/styles/utils.css
|
|
255
|
+
```
|
|
256
|
+
|
|
257
|
+
</TabItem>
|
|
258
|
+
</Tabs>
|
|
259
|
+
|
|
260
|
+
在 `src/routes/page.tsx` 里导入 `utils.css`:
|
|
261
|
+
|
|
262
|
+
```js
|
|
263
|
+
import '../styles/utils.css';
|
|
264
|
+
```
|
|
265
|
+
|
|
266
|
+
在 `src/routes/styles/utils.css` 里实现一个名为 `custom-text-gray` 的 Utility Class。
|
|
267
|
+
|
|
268
|
+
```css
|
|
269
|
+
:root {
|
|
270
|
+
--custom-text-color:rgb(113, 128, 150);
|
|
271
|
+
}
|
|
272
|
+
|
|
273
|
+
.custom-text-gray {
|
|
274
|
+
color: var(--custom-text-color);
|
|
275
|
+
}
|
|
276
|
+
```
|
|
277
|
+
|
|
278
|
+
:::info 注
|
|
279
|
+
Modern.js 集成了 [PostCSS](/docs/guides/basic-features/css/postcss),支持现代 CSS 语法特性,比如 [custom properties](https://developer.mozilla.org/en-US/docs/Web/CSS/--*)。
|
|
280
|
+
:::
|
|
281
|
+
|
|
282
|
+
在 `src/routes/components/Item/index.tsx` 里使用,把:
|
|
283
|
+
|
|
284
|
+
```js
|
|
285
|
+
<div className="ml-4 flex-1 flex justify-between">
|
|
286
|
+
```
|
|
287
|
+
|
|
288
|
+
改成:
|
|
289
|
+
|
|
290
|
+
```js
|
|
291
|
+
<div className="ml-4 custom-text-gray flex-1 flex justify-between">
|
|
292
|
+
```
|
|
293
|
+
|
|
294
|
+
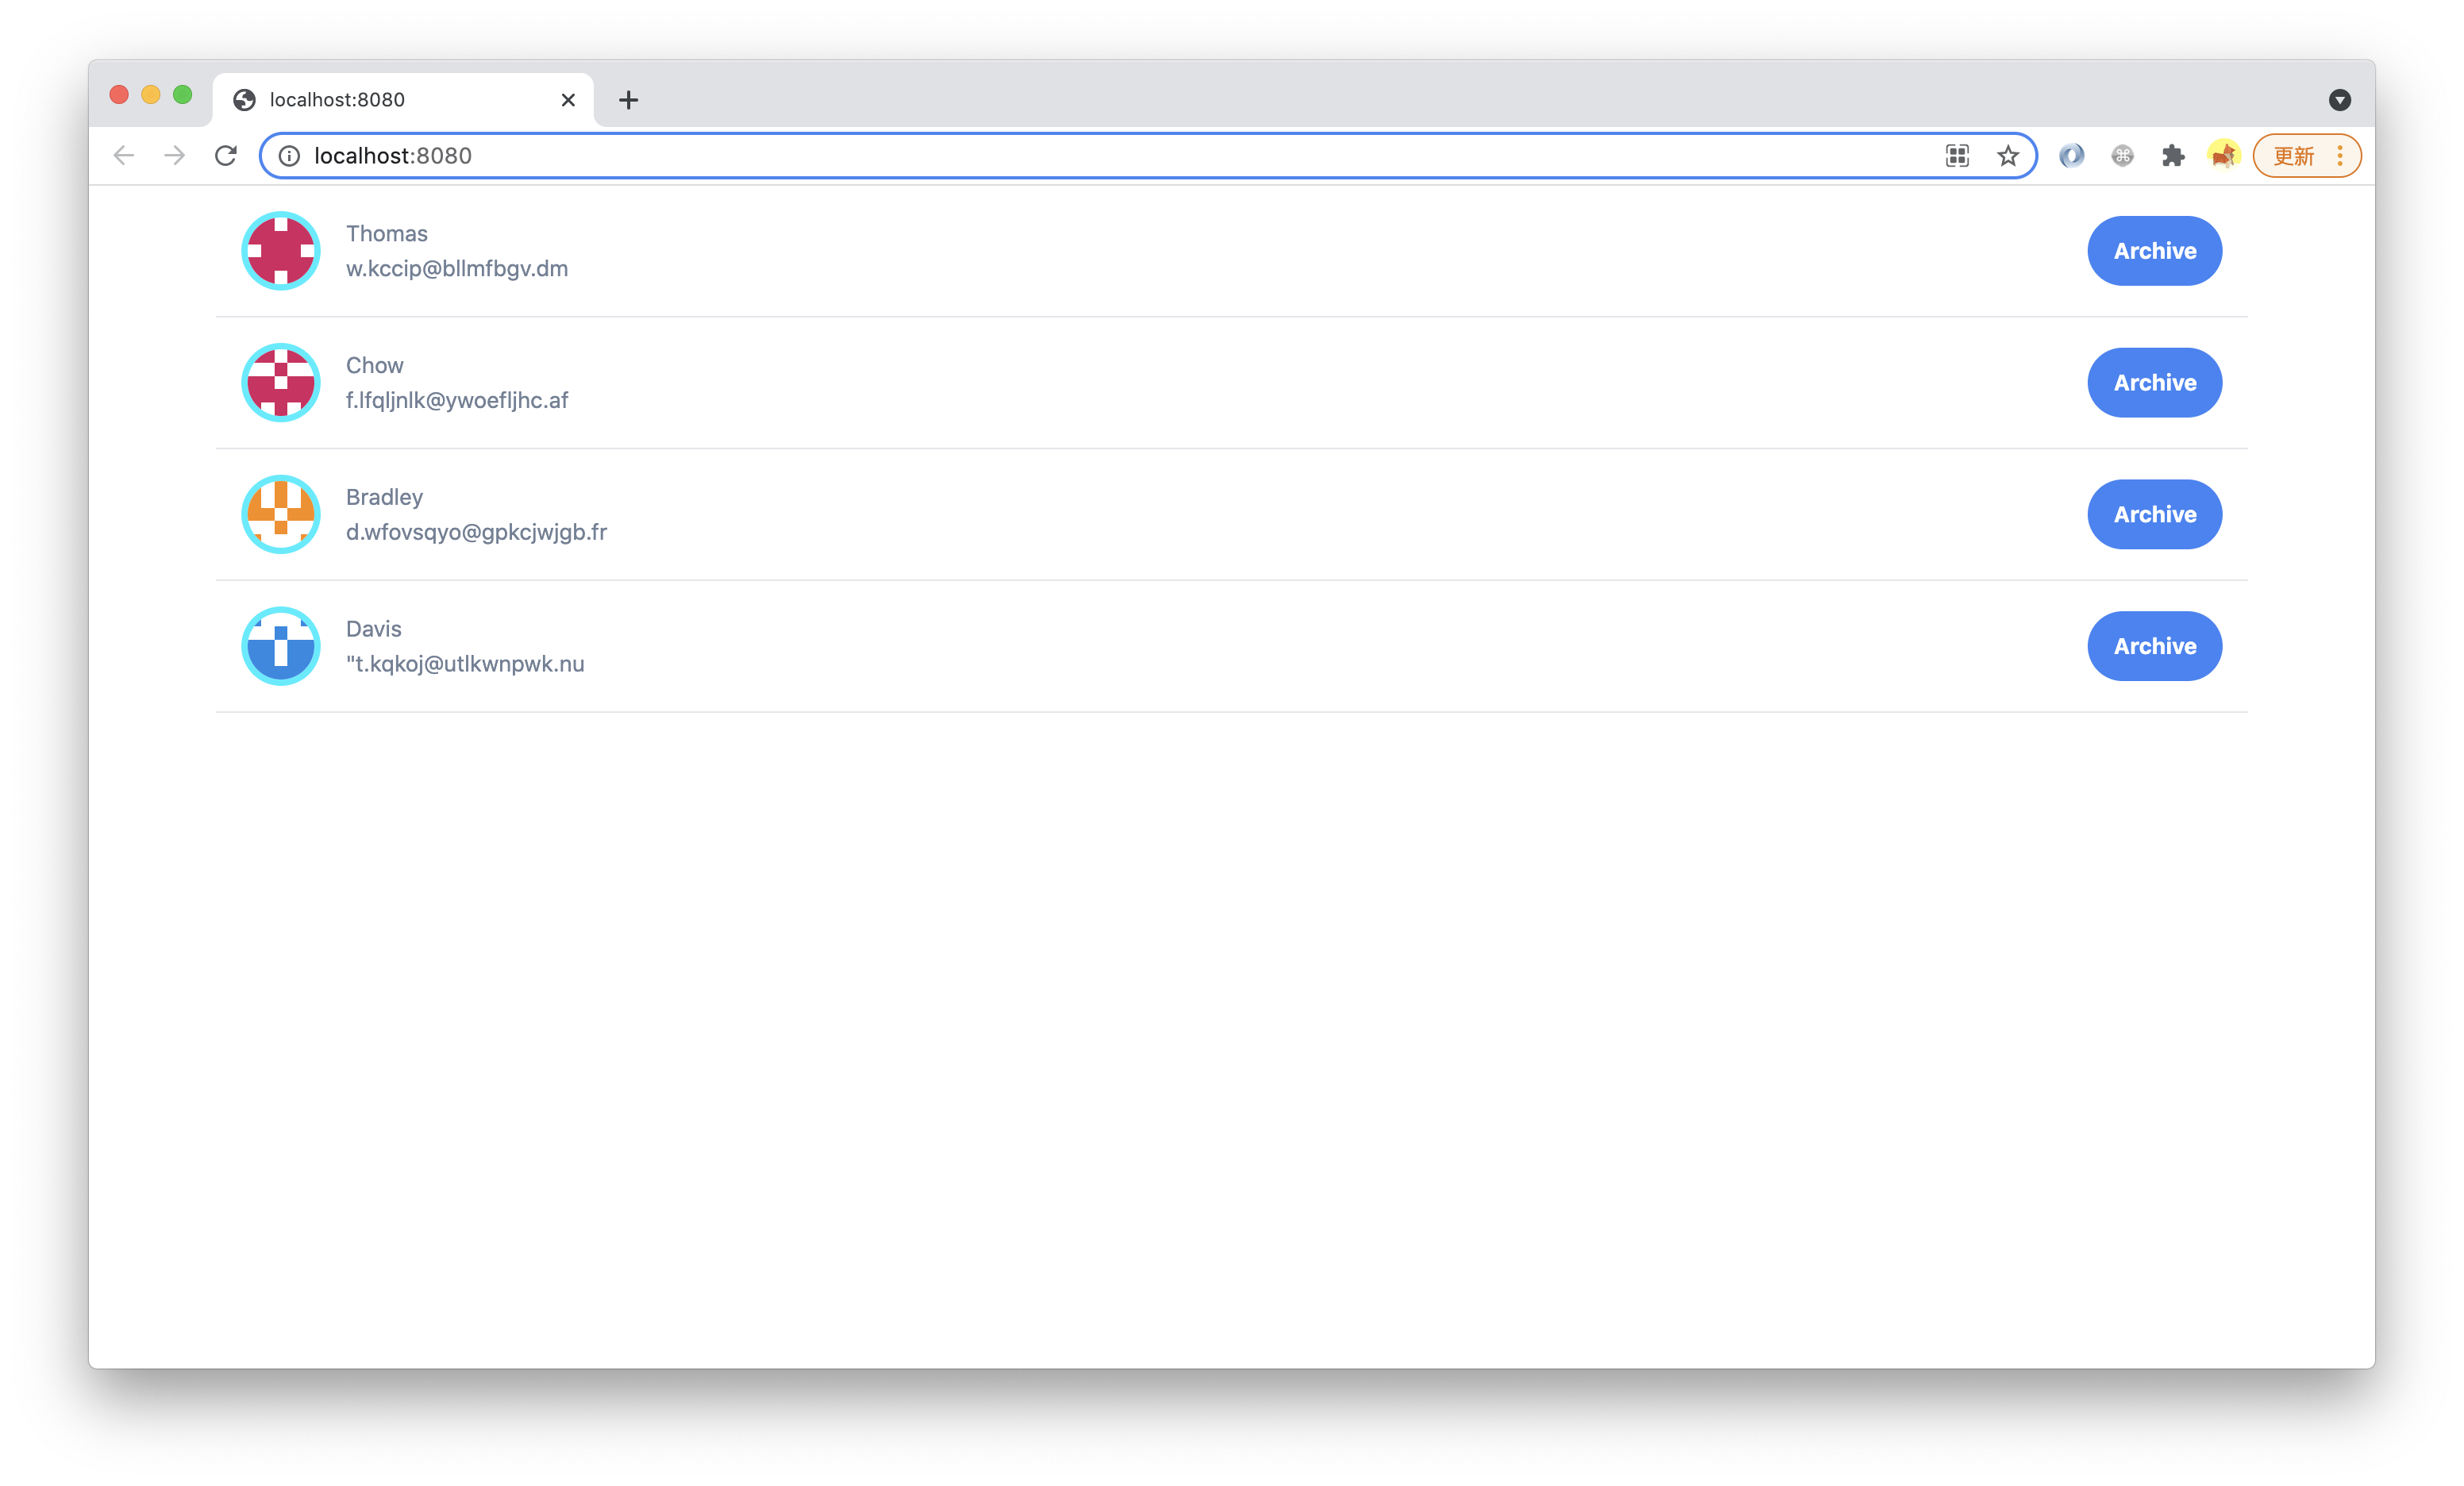
执行 `pnpm run dev`,可以看到字体颜色改变了:
|
|
295
|
+
|
|
296
|
+
|
|
297
|
+
|
|
298
|
+
:::info 注
|
|
299
|
+
此处只是为了演示 Utility Class 用法。真实项目中,在有 Tailwind CSS 的情况下,这种 Utility Class 没什么价值,应该通过配置 Design System 的 [**theme**](https://tailwindcss.com/docs/customizing-colors) 来增加字体颜色。
|
|
300
|
+
|
|
301
|
+
`utils.css` 也可以写成 `utils.scss` 或 `utils.less`,Modern.js 对 SCSS 和 Less 同样提供开箱即用的支持。
|
|
302
|
+
|
|
303
|
+
不过在 PostCSS 的支持下,现代 CSS 应该足以满足这些开发需求,性能相较于预处理器也更好,建议优先用 .css 文件。
|
|
304
|
+
:::
|
|
305
|
+
|
package/zh/tutorials/first-app/{c08-client-side-routing/8.1-code-based-routing.md → c04-routes.md}
RENAMED
|
@@ -1,32 +1,43 @@
|
|
|
1
1
|
---
|
|
2
|
-
title:
|
|
2
|
+
title: 添加客户端路由
|
|
3
3
|
---
|
|
4
4
|
|
|
5
|
-
|
|
5
|
+
import Tabs from '@theme/Tabs';
|
|
6
|
+
import TabItem from '@theme/TabItem';
|
|
6
7
|
|
|
7
|
-
|
|
8
|
+
上一章节中,我们学习了如何为创建 UI 组件,并添加样式。
|
|
8
9
|
|
|
9
|
-
|
|
10
|
+
这一章节中,我们将会学习如何添加**客户端路由**。
|
|
10
11
|
|
|
11
|
-
|
|
12
|
+
之前我们已经为联系人列表增加了 Archive 按钮,接下来我们添加一个客户端路由 `/archives`,访问这个路由时,只显示已存档的联系人,而原有的 `/` 继续显示所有联系人。
|
|
13
|
+
|
|
14
|
+
新建 `src/routes/archives/page.tsx` 文件:
|
|
15
|
+
|
|
16
|
+
<Tabs>
|
|
17
|
+
<TabItem value="macOS" label="macOS" default>
|
|
12
18
|
|
|
13
|
-
```
|
|
14
|
-
|
|
15
|
-
|
|
16
|
-
router: true,
|
|
17
|
-
state: true,
|
|
18
|
-
},
|
|
19
|
-
});
|
|
19
|
+
```bash
|
|
20
|
+
mkdir -p src/routes/archives
|
|
21
|
+
touch src/routes/archives/page.tsx
|
|
20
22
|
```
|
|
21
23
|
|
|
22
|
-
|
|
24
|
+
</TabItem>
|
|
25
|
+
<TabItem value="Windows" label="Windows">
|
|
23
26
|
|
|
24
|
-
|
|
27
|
+
```powershell
|
|
28
|
+
mkdir -p src/routes/archives
|
|
29
|
+
ni src/routes/archives/page.tsx
|
|
30
|
+
```
|
|
25
31
|
|
|
26
|
-
|
|
32
|
+
</TabItem>
|
|
33
|
+
</Tabs>
|
|
34
|
+
|
|
35
|
+
添加如下代码:
|
|
36
|
+
|
|
37
|
+
```tsx
|
|
27
38
|
import { List } from 'antd';
|
|
28
39
|
import { Helmet } from '@modern-js/runtime/head';
|
|
29
|
-
import Item from '
|
|
40
|
+
import Item from '../../components/Item';
|
|
30
41
|
|
|
31
42
|
const getAvatar = (users: Array<{ name: string; email: string }>) =>
|
|
32
43
|
users.map(user => ({
|
|
@@ -56,12 +67,12 @@ function Index() {
|
|
|
56
67
|
export default Index;
|
|
57
68
|
```
|
|
58
69
|
|
|
59
|
-
这里使用了 [React Helmet](https://github.com/nfl/react-helmet) 的 `Helmet` 组件,在 `src/
|
|
70
|
+
这里使用了 [React Helmet](https://github.com/nfl/react-helmet) 的 `Helmet` 组件,在 `src/routes/page.tsx` 中也添加 Helmet 组件:
|
|
60
71
|
|
|
61
72
|
```tsx
|
|
62
73
|
import { Helmet } from '@modern-js/runtime/head';
|
|
63
74
|
|
|
64
|
-
function
|
|
75
|
+
function Index() {
|
|
65
76
|
return (
|
|
66
77
|
<div className="container lg mx-auto">
|
|
67
78
|
<Helmet>
|
|
@@ -74,30 +85,39 @@ function App() {
|
|
|
74
85
|
```
|
|
75
86
|
|
|
76
87
|
:::info 注
|
|
77
|
-
Modern.js 默认集成了 react-helmet
|
|
88
|
+
Modern.js 默认集成了 react-helmet,也可以结合 SSR 使用,满足 SEO 需求。
|
|
78
89
|
:::
|
|
79
90
|
|
|
80
|
-
|
|
91
|
+
因为现在有多个页面,都需要用到前面的 Utility Class,因此我们需要把样式文件移动到 `src/routes/layout.tsx`:
|
|
81
92
|
|
|
82
|
-
|
|
93
|
+
```tsx
|
|
94
|
+
import 'tailwindcss/base.css';
|
|
95
|
+
import 'tailwindcss/components.css';
|
|
96
|
+
import 'tailwindcss/utilities.css';
|
|
97
|
+
import "../styles/utils.css";
|
|
98
|
+
```
|
|
99
|
+
|
|
100
|
+
执行 `pnpm run dev`,访问 `http://localhost:8080`,可以看到完整的联系人,页面的标题是 All:
|
|
83
101
|
|
|
84
|
-
|
|
102
|
+
|
|
85
103
|
|
|
86
|
-
|
|
104
|
+
访问 `http://localhost:8080/archives`,只会看到已存档的联系人,页面的标题是 Archives:
|
|
105
|
+
|
|
106
|
+
|
|
87
107
|
|
|
88
108
|
查看页面 HTML 源码,可以看到两个页面的内容是一样,是在客户端针对不同 URL 渲染不同内容。
|
|
89
109
|
|
|
90
110
|
**接下来我们增加一个简单的导航栏,让用户能在两个列表之间切换**。
|
|
91
111
|
|
|
92
|
-
打开 `src/
|
|
112
|
+
打开 `src/routes/layout.tsx`,在顶部导入 Radio 组件:
|
|
93
113
|
|
|
94
114
|
```tsx
|
|
95
|
-
import {
|
|
115
|
+
import { Radio } from 'antd';
|
|
96
116
|
```
|
|
97
117
|
|
|
98
118
|
然后将 UI 最顶部进行修改,增加一组单选框
|
|
99
119
|
|
|
100
|
-
```tsx {
|
|
120
|
+
```tsx {4-9}
|
|
101
121
|
export default function Layout() {
|
|
102
122
|
return (
|
|
103
123
|
<div>
|
|
@@ -111,7 +131,6 @@ export default function Layout() {
|
|
|
111
131
|
</div>
|
|
112
132
|
);
|
|
113
133
|
}
|
|
114
|
-
|
|
115
134
|
```
|
|
116
135
|
|
|
117
136
|
然后我们来实现 `currentList` 和 `handleSetList`。
|
|
@@ -121,16 +140,16 @@ export default function Layout() {
|
|
|
121
140
|
```js
|
|
122
141
|
import { useState } from 'react';
|
|
123
142
|
import { Radio, RadioChangeEvent } from 'antd';
|
|
124
|
-
import { Outlet,
|
|
143
|
+
import { Outlet, useLocation, useNavigate } from "@modern-js/runtime/router";
|
|
125
144
|
```
|
|
126
145
|
|
|
127
146
|
最后在 Layout 组件里增加局部状态和相关逻辑:
|
|
128
147
|
|
|
129
|
-
```
|
|
148
|
+
```tsx {2-9}
|
|
130
149
|
export default function Layout() {
|
|
131
150
|
const navigate = useNavigate();
|
|
132
|
-
const
|
|
133
|
-
const [currentList, setList] = useState(
|
|
151
|
+
const location = useLocation();
|
|
152
|
+
const [currentList, setList] = useState(location.pathname || '/');
|
|
134
153
|
const handleSetList = (e: RadioChangeEvent) => {
|
|
135
154
|
const { value } = e.target;
|
|
136
155
|
setList(value);
|
|
@@ -143,14 +162,8 @@ export default function Layout() {
|
|
|
143
162
|
|
|
144
163
|
到这里就已经完成了页面导航栏实现,执行 `pnpm run dev` 查看效果:
|
|
145
164
|
|
|
146
|
-

|
|
147
166
|
|
|
148
167
|
点击导航栏中 Archives,可以看到单选框的选中状态和 URL 都会变化,页面没有刷新,只发生了 CSR。
|
|
149
168
|
|
|
150
|
-
|
|
151
|
-
|
|
152
|
-
访问 `http://localhost:8080/contacts/archives`,点击顶部单选框,可以看到在有 SSR 的情况下,CSR 不受影响,跟开启 SSR 之前的效果一致,实现了 UX 的最大化(首屏 SSR,后续交互 CSR)。
|
|
153
|
-
|
|
154
|
-
---
|
|
155
|
-
|
|
156
|
-
> 本小节的代码可以在[这里查看](https://github.com/modern-js-dev/modern-js-examples/tree/main/tutorials/c08/hello-modern)。
|
|
169
|
+
通过 URL 访问两个页面,可以看到 HTML 内容是不同的,这是因为在 SSR 阶段页面就执行了客户端路由的逻辑,HTML 里已经包含了最终的渲染结果。
|
|
@@ -0,0 +1,82 @@
|
|
|
1
|
+
---
|
|
2
|
+
title: 添加 Loader
|
|
3
|
+
---
|
|
4
|
+
|
|
5
|
+
上一章节中,我们学习了如何添加客户端路由。
|
|
6
|
+
|
|
7
|
+
这一章节中,我们将会学习如何**为路由组件添加 Loader**。
|
|
8
|
+
|
|
9
|
+
到目前为止,我们都是通过硬编码的方式,为组件提供数据。如果要从远端获取数据,通常情况下会使用 `useEffect` 来做。但在启用 SSR 的情况下,`useEffect` 是不会在服务端执行的,所以这种 SSR 只能渲染很有限的 UI。
|
|
10
|
+
|
|
11
|
+
Modern.js 为提供了 Data Loader 的能力,支持同构的在组件中获取数据,让 SSR 的价值最大化。
|
|
12
|
+
|
|
13
|
+
下面我们演示如何为路由组件添加 Data Loader,并模拟远端数据获取。我们使用 faker 来 mock 需要的数据,首先安装依赖:
|
|
14
|
+
|
|
15
|
+
```bash
|
|
16
|
+
pnpm add faker@5
|
|
17
|
+
pnpm add @types/faker@5 -D
|
|
18
|
+
```
|
|
19
|
+
|
|
20
|
+
修改 `src/routes/page.tsx`:
|
|
21
|
+
|
|
22
|
+
```tsx
|
|
23
|
+
import { name, internet } from "faker";
|
|
24
|
+
|
|
25
|
+
type LoaderData = {
|
|
26
|
+
code: number;
|
|
27
|
+
data: {
|
|
28
|
+
name: string;
|
|
29
|
+
avatar: string;
|
|
30
|
+
email: string;
|
|
31
|
+
}[];
|
|
32
|
+
};
|
|
33
|
+
|
|
34
|
+
export const loader = async (): Promise<LoaderData> => {
|
|
35
|
+
const data = new Array(20).fill(0).map(() => {
|
|
36
|
+
const firstName = name.firstName();
|
|
37
|
+
return {
|
|
38
|
+
name: firstName,
|
|
39
|
+
avatar: `https://avatars.dicebear.com/api/identicon/${firstName}.svg`,
|
|
40
|
+
email: internet.email(),
|
|
41
|
+
};
|
|
42
|
+
});
|
|
43
|
+
|
|
44
|
+
return {
|
|
45
|
+
code: 200,
|
|
46
|
+
data,
|
|
47
|
+
};
|
|
48
|
+
};
|
|
49
|
+
```
|
|
50
|
+
|
|
51
|
+
:::note
|
|
52
|
+
Data Loader 并非只为 SSR 工作。在 CSR 项目中,Data Loader 也可以避免数据获取依赖 UI 渲染,解决请求瀑布流的问题。未来,Modern.js 也会为这一特性添加更多能力,例如预获取、数据缓存等。
|
|
53
|
+
:::
|
|
54
|
+
|
|
55
|
+
Modern.js 也提供了一个叫 `useLoaderData` 的 hooks API,我们修改 `src/routes/page.tsx` 导出的组件:
|
|
56
|
+
|
|
57
|
+
```tsx {1,4,13}
|
|
58
|
+
import { useLoaderData } from "@modern-js/runtime/router";
|
|
59
|
+
|
|
60
|
+
function Index() {
|
|
61
|
+
const { data } = useLoaderData() as LoaderData;
|
|
62
|
+
|
|
63
|
+
return (
|
|
64
|
+
<div className="container lg mx-auto">
|
|
65
|
+
<Helmet>
|
|
66
|
+
<title>All</title>
|
|
67
|
+
</Helmet>
|
|
68
|
+
<List
|
|
69
|
+
dataSource={data}
|
|
70
|
+
renderItem={(info) => <Item key={info.name} info={info} />}
|
|
71
|
+
/>
|
|
72
|
+
</div>
|
|
73
|
+
);
|
|
74
|
+
}
|
|
75
|
+
|
|
76
|
+
export default Index;
|
|
77
|
+
```
|
|
78
|
+
|
|
79
|
+
<!-- Todo 重新截图,SSR 内容 -->
|
|
80
|
+
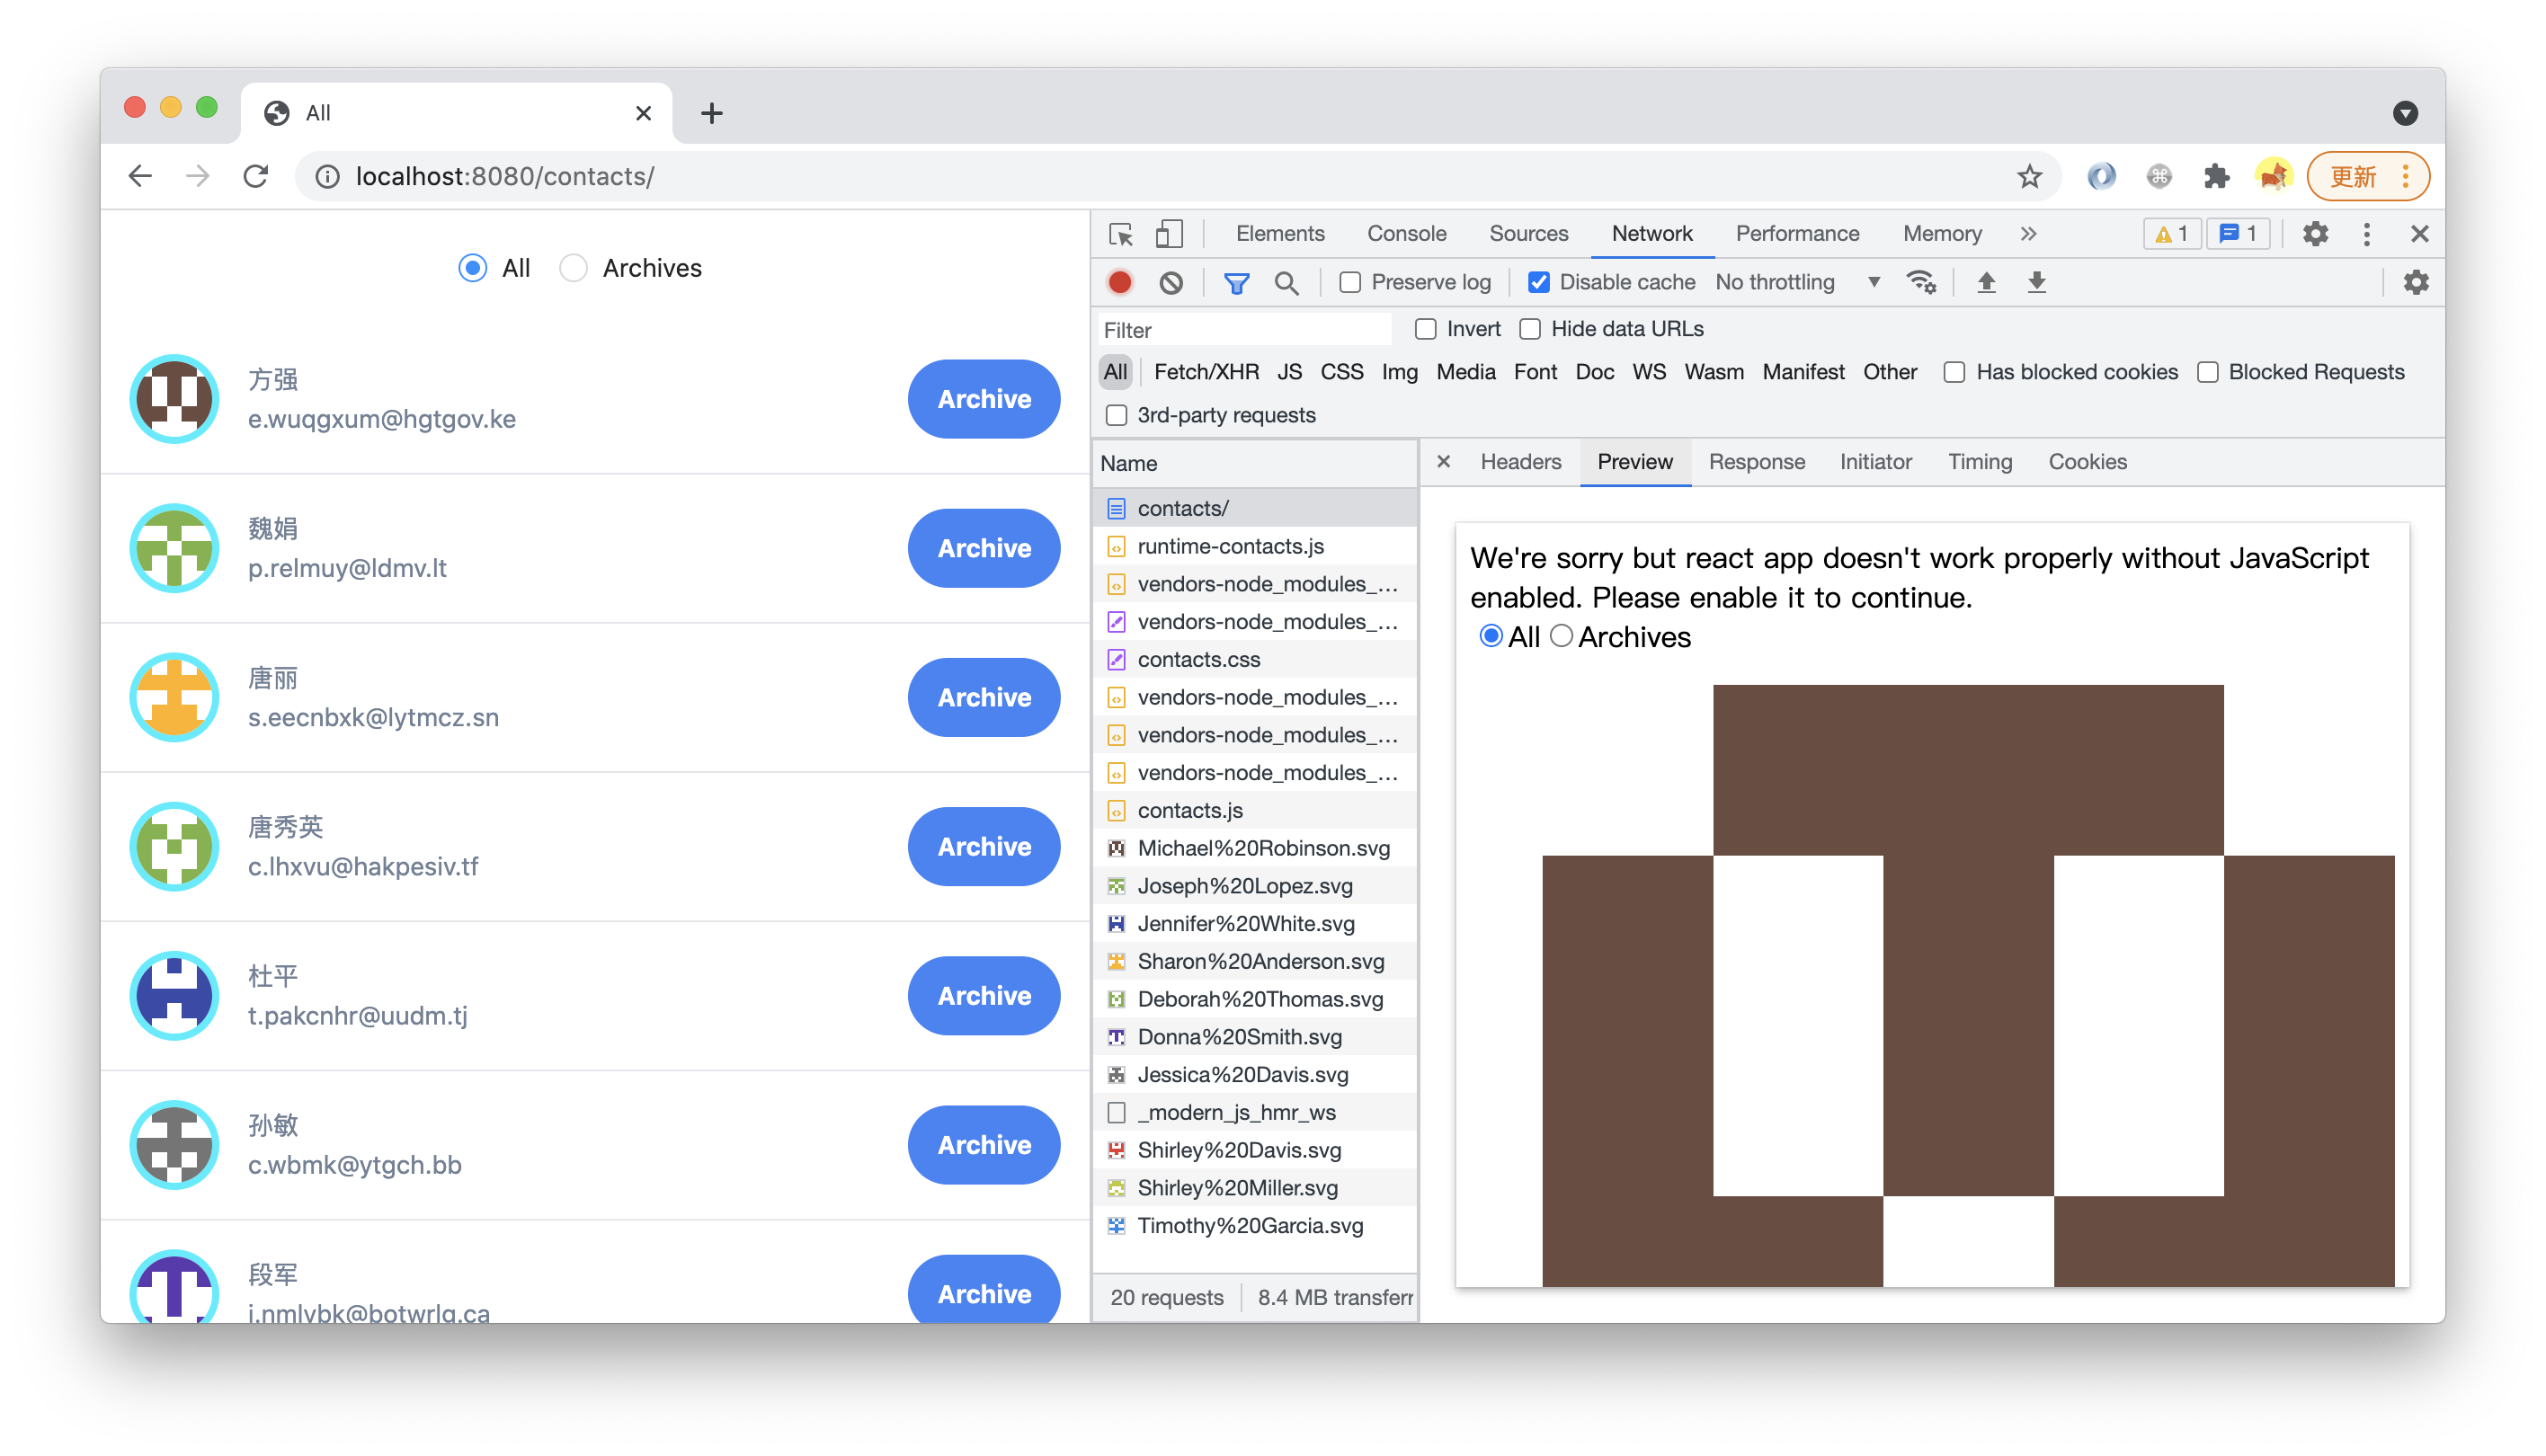
重新执行 `pnpm run dev`,查看 `view-source:http://localhost:8080/`,或在 devtools 的 Network 面板里查看 HTML 请求的「 Preview 」,可以看到 SSR 渲染出来的 HTML 已经包含完整的 UI:
|
|
81
|
+
|
|
82
|
+
|