flashduty-knowledge-base 1.3.3 → 1.3.5
This diff represents the content of publicly available package versions that have been released to one of the supported registries. The information contained in this diff is provided for informational purposes only and reflects changes between package versions as they appear in their respective public registries.
- package/README.md +33 -1
- package/dist/en.d.ts +2 -0
- package/dist/esm/en.js +842 -378
- package/dist/esm/zh.js +849 -368
- package/dist/iife/en.js +823 -359
- package/dist/iife/zh.js +821 -340
- package/dist/zh.d.ts +2 -0
- package/package.json +1 -1
package/dist/esm/en.js
CHANGED
|
@@ -1594,7 +1594,7 @@ Alibaba Cloud SLS monitoring to Flashduty alert severity mapping:
|
|
|
1594
1594
|
| 2 | Info | Info |
|
|
1595
1595
|
|
|
1596
1596
|
</div>
|
|
1597
|
-
`,
|
|
1597
|
+
`,h=`---
|
|
1598
1598
|
title: "AWS CloudWatch Integration"
|
|
1599
1599
|
description: "Sync AWS CloudWatch alert events to Flashduty via webhook to achieve automated alert noise reduction"
|
|
1600
1600
|
date: "2025-05-19T10:00:00+08:00"
|
|
@@ -1673,7 +1673,7 @@ Choose this method when you need to route alerts to different channels based on
|
|
|
1673
1673
|
All CloudWatch metric alarms correspond to Flashduty "warning" severity level alerts.
|
|
1674
1674
|
|
|
1675
1675
|
</div>
|
|
1676
|
-
`,
|
|
1676
|
+
`,u=`---
|
|
1677
1677
|
title: "Baidu Cloud BCM Integration"
|
|
1678
1678
|
description: "Sync Baidu Cloud BCM alerts to Flashduty via webhook for automated alert noise reduction"
|
|
1679
1679
|
date: "2025-05-19T10:00:00+08:00"
|
|
@@ -3164,7 +3164,7 @@ Choose this option when you need to route alerts to different channels based on
|
|
|
3164
3164
|
|2|Info|Info|
|
|
3165
3165
|
|
|
3166
3166
|
</div>
|
|
3167
|
-
`,
|
|
3167
|
+
`,F=`---
|
|
3168
3168
|
title: "AWS EventBridge Alert Events"
|
|
3169
3169
|
description: "Sync AWS EventBridge alert events to Flashduty via webhook for automated alert noise reduction"
|
|
3170
3170
|
date: "2024-08-20T10:00:00+08:00"
|
|
@@ -3266,7 +3266,7 @@ Choose this option when you need to route alerts to different channels based on
|
|
|
3266
3266
|
|
|
3267
3267
|
</div>
|
|
3268
3268
|
|
|
3269
|
-
`,
|
|
3269
|
+
`,x=`---
|
|
3270
3270
|
title: "Dynatrace Alert Events"
|
|
3271
3271
|
description: "Sync Dynatrace alert events to Flashduty via webhook to achieve automated alert noise reduction."
|
|
3272
3272
|
date: "2024-08-20T10:00:00+08:00"
|
|
@@ -3373,7 +3373,7 @@ Choose this option when you need to route alerts to different channels based on
|
|
|
3373
3373
|
|CUSTOM_ALERT|Info|info|
|
|
3374
3374
|
|
|
3375
3375
|
</div>
|
|
3376
|
-
`,
|
|
3376
|
+
`,L=`---
|
|
3377
3377
|
title: "Huawei Cloud LTS Alert Events"
|
|
3378
3378
|
description: "Sync Huawei Cloud Log Tank Service (LTS) alert events to Flashduty via webhook for automated alert noise reduction."
|
|
3379
3379
|
date: "2024-08-20T10:00:00+08:00"
|
|
@@ -3812,7 +3812,7 @@ If you need to configure \`Custom Templating Variables\`, you can refer to the f
|
|
|
3812
3812
|
|INFO|Info|Info|
|
|
3813
3813
|
|
|
3814
3814
|
</div>
|
|
3815
|
-
`,
|
|
3815
|
+
`,D=`---
|
|
3816
3816
|
title: "SolarWinds Alert Events"
|
|
3817
3817
|
description: "Sync SolarWinds alert events to Flashduty via webhook for automated alert noise reduction"
|
|
3818
3818
|
date: "2024-08-20T10:00:00+08:00"
|
|
@@ -3915,7 +3915,7 @@ Choose this option when you need to route alerts to different channels based on
|
|
|
3915
3915
|
|Info|Info|Info|
|
|
3916
3916
|
|
|
3917
3917
|
</div>
|
|
3918
|
-
`,
|
|
3918
|
+
`,U=`---
|
|
3919
3919
|
title: "Volcengine Cloud Monitor Alert Events"
|
|
3920
3920
|
description: "Sync Volcengine Cloud Monitor alert events to Flashduty via webhook for automated alert noise reduction"
|
|
3921
3921
|
date: "2024-08-20T10:00:00+08:00"
|
|
@@ -4228,7 +4228,7 @@ Choose this method when you need to route alerts to different channels based on
|
|
|
4228
4228
|
</div>
|
|
4229
4229
|
|
|
4230
4230
|
</div>
|
|
4231
|
-
`,
|
|
4231
|
+
`,P=`---
|
|
4232
4232
|
title: "OpManager Alert Events"
|
|
4233
4233
|
description: "Sync OpManager alert events to Flashduty via webhook for automated alert noise reduction"
|
|
4234
4234
|
date: "2024-07-05T10:00:00+08:00"
|
|
@@ -4362,7 +4362,7 @@ Choose this method when you need to route alerts to different channels based on
|
|
|
4362
4362
|
| Attention | Info | Info |
|
|
4363
4363
|
|
|
4364
4364
|
</div>
|
|
4365
|
-
`,
|
|
4365
|
+
`,M=`---
|
|
4366
4366
|
title: "Meraki Alert Events"
|
|
4367
4367
|
description: "Sync Meraki alert events to Flashduty via webhook for automated alert noise reduction"
|
|
4368
4368
|
date: "2024-07-05T10:00:00+08:00"
|
|
@@ -4785,7 +4785,7 @@ When you need to route alerts to different channels based on alert payload infor
|
|
|
4785
4785
|
|
|
4786
4786
|
</div>
|
|
4787
4787
|
|
|
4788
|
-
|
|
4788
|
+
`,$=`---
|
|
4789
4789
|
title: "zstack integration"
|
|
4790
4790
|
description: "Push ZStack alerts to Flashduty via webhook, to achieve automatic alert noise reduction."
|
|
4791
4791
|
date: "2024-07-05T10:00:00+08:00"
|
|
@@ -4873,7 +4873,7 @@ Choose this method when you need to route alerts to different channels based on
|
|
|
4873
4873
|
|
|
4874
4874
|
</div>
|
|
4875
4875
|
|
|
4876
|
-
`,
|
|
4876
|
+
`,j=`---
|
|
4877
4877
|
title: "Keep Alert Integration Guide"
|
|
4878
4878
|
description: "Push alert events to Flashduty through Keep's Provider to achieve automated alert noise reduction."
|
|
4879
4879
|
date: "2025-05-19T10:00:00+08:00"
|
|
@@ -4954,7 +4954,7 @@ Field|Required|Type|Definition
|
|
|
4954
4954
|
|
|
4955
4955
|
<img alt="drawing" width="600" src="https://download.flashcat.cloud/flashduty/doc/en/fd/keep-2.png" />
|
|
4956
4956
|
|
|
4957
|
-
`,
|
|
4957
|
+
`,H=`---
|
|
4958
4958
|
title: "ElastAlert2 Alert Integration Guide"
|
|
4959
4959
|
description: "Push alert events to Flashduty through ElastAlert2's Provider to achieve automated alert noise reduction."
|
|
4960
4960
|
date: "2025-05-19T10:00:00+08:00"
|
|
@@ -5075,7 +5075,7 @@ flashduty_env: "dev"
|
|
|
5075
5075
|
# ------- FlashDuty ----------------
|
|
5076
5076
|
\`\`\`
|
|
5077
5077
|
|
|
5078
|
-
5. Restart ElastAlert and wait for the alert to trigger
|
|
5078
|
+
5. Restart ElastAlert and wait for the alert to trigger.`,Y=`---
|
|
5079
5079
|
title: "Dingtalk Alert Integration"
|
|
5080
5080
|
description: "Generate a unique Dingtalk robot address in Flashduty, and synchronize the occurrence and recovery of alerts through Dingtalk"
|
|
5081
5081
|
date: "2025-05-19T10:00:00+08:00"
|
|
@@ -5157,7 +5157,7 @@ By default, the system always creates new alerts for each message, but you can s
|
|
|
5157
5157
|
---
|
|
5158
5158
|
|
|
5159
5159
|
Currently, all alerts pushed to Flashduty through the Dingtalk integration are set to Warning severity. However, you can customize the severity using the [alert pipeline](https://docs.flashcat.cloud/en/flashduty/alert-pipelines).
|
|
5160
|
-
`,
|
|
5160
|
+
`,z=`---
|
|
5161
5161
|
title: "Feishu Alert Integration"
|
|
5162
5162
|
description: "Generate a unique Feishu robot address in Flashduty, and synchronize the occurrence and recovery of alerts through Feishu"
|
|
5163
5163
|
date: "2025-05-19T10:00:00+08:00"
|
|
@@ -5321,7 +5321,7 @@ Choose this method when you need to route alerts to different channels based on
|
|
|
5321
5321
|
|
|
5322
5322
|
</div>
|
|
5323
5323
|
|
|
5324
|
-
`,
|
|
5324
|
+
`,V=`---
|
|
5325
5325
|
title: "Monit Alert Integration"
|
|
5326
5326
|
description: "Flashduty Monit alert integration, Monit service reports alerts through this integration"
|
|
5327
5327
|
date: "2025-05-19T10:00:00+08:00"
|
|
@@ -5433,6 +5433,86 @@ Currently, all alerts pushed to Flashduty through the Cloudflare integration are
|
|
|
5433
5433
|
</div>
|
|
5434
5434
|
|
|
5435
5435
|
`,Z=`---
|
|
5436
|
+
title: "Wecom Alert Integration"
|
|
5437
|
+
description: "Generate a unique Wecom robot address in Flashduty, and synchronize the occurrence and recovery of alerts through Wecom"
|
|
5438
|
+
date: "2025-05-19T10:00:00+08:00"
|
|
5439
|
+
url: "https://docs.flashcat.cloud/en/flashduty/Wecom-alert-integration-guide"
|
|
5440
|
+
---
|
|
5441
|
+
|
|
5442
|
+
Generate a unique Wecom robot address in Flashduty, and synchronize the occurrence and recovery of alerts through Wecom.
|
|
5443
|
+
|
|
5444
|
+
<div class="hide">
|
|
5445
|
+
|
|
5446
|
+
## Operation Steps
|
|
5447
|
+
---
|
|
5448
|
+
|
|
5449
|
+
### Create Wecom Alert Integration
|
|
5450
|
+
|
|
5451
|
+
You can obtain a Wecom alert integration address through either of these two methods:
|
|
5452
|
+
|
|
5453
|
+
#### Using Dedicated Integration
|
|
5454
|
+
|
|
5455
|
+
Choose this method when you don't need to route alert events to different channels. It's simpler and recommended.
|
|
5456
|
+
|
|
5457
|
+
<details>
|
|
5458
|
+
<summary>Expand</summary>
|
|
5459
|
+
|
|
5460
|
+
1. Go to the Flashduty console, select **Channel**, and enter a specific channel's details page
|
|
5461
|
+
2. Select the **Integration** tab, click **Add Integration** to enter the integration page
|
|
5462
|
+
3. Choose **Wecom Alert** integration and click **Save** to generate a card
|
|
5463
|
+
4. Click the generated card to view the **Wecom Alert Integration URL**, copy it for later use, and you're done
|
|
5464
|
+
|
|
5465
|
+
</details>
|
|
5466
|
+
|
|
5467
|
+
#### Using Shared Integration
|
|
5468
|
+
|
|
5469
|
+
Choose this method when you need to route alerts to different channels based on the alert event's payload information.
|
|
5470
|
+
|
|
5471
|
+
<details>
|
|
5472
|
+
<summary>Expand</summary>
|
|
5473
|
+
|
|
5474
|
+
1. Go to the Flashduty console, select **Integration Center => Alert Events** to enter the integration selection page
|
|
5475
|
+
2. Select **Wecom Alert** integration:
|
|
5476
|
+
- **Integration Name**: Define a name for the current integration
|
|
5477
|
+
- **Message Type**: Select Wecom alert message type, currently only Text and Markdown are supported
|
|
5478
|
+
- **Push Mode**: Choose when to trigger or recover alerts for Wecom notifications
|
|
5479
|
+
3. Copy the **Wecom Alert Integration URL** for later use
|
|
5480
|
+
4. Configure the default route and select the corresponding channel (after integration creation, you can go to \`Routes\` to configure more routing rules)
|
|
5481
|
+
5. Done
|
|
5482
|
+
|
|
5483
|
+
</details>
|
|
5484
|
+
</div>
|
|
5485
|
+
|
|
5486
|
+
### Customize Wecom Alert Integration
|
|
5487
|
+
|
|
5488
|
+
#### Wecom Alert Integration URL
|
|
5489
|
+
|
|
5490
|
+
The system will generate a unique Wecom alert integration URL for you. This URL is compatible with Wecom robot message protocol. When platforms only support Wecom robot channels, you can use this URL to receive corresponding messages.
|
|
5491
|
+
|
|
5492
|
+
#### Push Mode
|
|
5493
|
+
|
|
5494
|
+
By default, the system always creates new alerts for each message, but you can switch to these modes:
|
|
5495
|
+
|
|
5496
|
+
**Trigger or Close Alert Based on Rules**: In this mode, when receiving a new message, the system matches messages according to your rules and triggers new alerts or closes existing alerts based on the matching results.
|
|
5497
|
+
|
|
5498
|
+
- You need to fill in at least one **trigger** rule
|
|
5499
|
+
- You must set up regex extraction rules for Alert Key. The system uses this field to find historical alerts for updates or closure. **If regex extraction fails, the system will use the random to generate an Alert Key** to ensure alerts won't be lost due to configuration errors
|
|
5500
|
+
- You can choose whether to discard messages when none of the rules match
|
|
5501
|
+
|
|
5502
|
+
Configuration example:
|
|
5503
|
+
|
|
5504
|
+
- Receive all messages, close the alert when the message content contains **RESOLVED**, otherwise trigger a new alert
|
|
5505
|
+
- Extract Alert Key from messages using the rule **/(.*)/**.
|
|
5506
|
+
|
|
5507
|
+
|
|
5508
|
+
### Notes
|
|
5509
|
+
- Wecom alert integration URL only supports Text and Markdown message types; other message types cannot be received
|
|
5510
|
+
- Flashduty will generate a default alert title: "Wecom robot Alert , If you need to change the title, you can customize it using the [alert pipeline](https://docs.flashcat.cloud/en/flashduty/alert-pipelines)"
|
|
5511
|
+
|
|
5512
|
+
## Severity Mapping
|
|
5513
|
+
---
|
|
5514
|
+
|
|
5515
|
+
Currently, all alerts pushed to Flashduty through the Wecom integration are set to Warning severity. However, you can customize the severity using the [alert pipeline](https://docs.flashcat.cloud/en/flashduty/alert-pipelines).`,Q=`---
|
|
5436
5516
|
title: "Custom Change Event Integration Guide"
|
|
5437
5517
|
description: "Push change events from your own systems to Flashduty using standard protocols. Most incidents are caused by changes, and the correlation between changes and alerts helps quickly identify incident causes."
|
|
5438
5518
|
date: "2025-05-19T10:00:00+08:00"
|
|
@@ -5489,7 +5569,7 @@ Labels are descriptions of events. You should enrich label content as much as po
|
|
|
5489
5569
|
|
|
5490
5570
|
</details>
|
|
5491
5571
|
|
|
5492
|
-
`,
|
|
5572
|
+
`,X=`---
|
|
5493
5573
|
title: "Jira Issue Events"
|
|
5494
5574
|
description: "Sync Jira Issue events to Flashduty via webhooks to collect change events."
|
|
5495
5575
|
date: "2025-05-19T10:00:00+08:00"
|
|
@@ -5563,559 +5643,674 @@ Flashduty extracts the status.name information from the webhook payload by defau
|
|
|
5563
5643
|
Please contact Flashduty if you wish to modify this mapping.
|
|
5564
5644
|
|
|
5565
5645
|
</div>
|
|
5566
|
-
`,
|
|
5567
|
-
title:
|
|
5568
|
-
description:
|
|
5569
|
-
|
|
5646
|
+
`,ee=`---
|
|
5647
|
+
title: "Feishu/Lark Integration"
|
|
5648
|
+
description: "By integrating a custom Feishu/Lark application, you can receive and respond to alerts within Feishu/Lark."
|
|
5649
|
+
date: "2025-05-19T10:00:00+08:00"
|
|
5650
|
+
url: "https://docs.flashcat.cloud/en/flashduty/lark-integration-guide?nav=01JCQ7A4N4WRWNXW8EWEHXCMF5"
|
|
5570
5651
|
---
|
|
5652
|
+
By integrating a custom Feishu/Lark application, you can receive and respond to alerts within Feishu/Lark.
|
|
5571
5653
|
|
|
5572
|
-
|
|
5573
|
-
|
|
5574
|
-
<!--
|
|
5575
|
-
## Video Tutorial
|
|
5654
|
+
## 1. Create Feishu/Lark application
|
|
5576
5655
|
---
|
|
5577
|
-
<Video src="https://download.flashcat.cloud/flashduty/video/feishu.mp4"></Video>
|
|
5578
|
-
-->
|
|
5579
5656
|
|
|
5580
|
-
|
|
5581
|
-
---
|
|
5657
|
+
### 1. Create a custom application
|
|
5582
5658
|
|
|
5583
|
-
|
|
5659
|
+
Visit [Feishu/Lark Developer Console](https://open.feishu.cn/app) and create an internal custom application. You can use the [official Flashduty icon](https://download.flashcat.cloud/flashcat_logo_circular.png) for the application icon.
|
|
5584
5660
|
|
|
5585
|
-
|
|
5661
|
+
For details, see the Feishu/Lark development documentation [Create an internal custom application](https://open.feishu.cn/document/uYjL24iN/uMTMuMTMuMTM/development-guide/step1#132c1aac).
|
|
5586
5662
|
|
|
5587
|
-
|
|
5663
|
+
|
|
5664
|
+
### 2. Copy credential information
|
|
5588
5665
|
|
|
5589
|
-
|
|
5666
|
+
Go to the **Credentials and Basic Information** page and copy the \`App ID\` and \`App Secret\` for later use.
|
|
5590
5667
|
|
|
5591
|
-
### 2. Copy Credentials
|
|
5592
5668
|
|
|
5593
|
-
|
|
5669
|
+
|
|
5594
5670
|
|
|
5595
|
-
|
|
5671
|
+
### 3. Copy the event callback Token information
|
|
5596
5672
|
|
|
5597
|
-
|
|
5673
|
+
Go to Development Configuration → Events & Callbacks → **Encryption Strategy** page, generate and copy the \`Encrypt Key\` (recommended for better security) and \`Verification Token\` for later use.
|
|
5598
5674
|
|
|
5599
|
-
|
|
5675
|
+
|
|
5600
5676
|
|
|
5601
|
-
|
|
5677
|
+
## 2. Add Feishu/Lark integration
|
|
5678
|
+
---
|
|
5602
5679
|
|
|
5603
|
-
|
|
5680
|
+
Return to the Flashduty **Integration Center** page, select IM → **Feishu/Lark**, fill in the \`Name\` and the \`App ID\`, \`App Secret\`, \`Verification Token\`, and \`Encrypt Key\` copied in the previous step, then click **Save** to complete the creation.
|
|
5681
|
+
|
|
5682
|
+
After successful creation, you will see the added Feishu/Lark integration in the list. Click its name to enter the details page, where you can view the **Web Configuration** address, **Redirect URL**, and **Message Card Request URL**, which will be used in subsequent steps.
|
|
5683
|
+
|
|
5684
|
+
|
|
5685
|
+
|
|
5686
|
+
## 3. Configure Feishu/Lark application
|
|
5604
5687
|
---
|
|
5605
5688
|
|
|
5606
|
-
|
|
5689
|
+
### 1. Enable and configure application capabilities
|
|
5607
5690
|
|
|
5608
|
-
|
|
5691
|
+
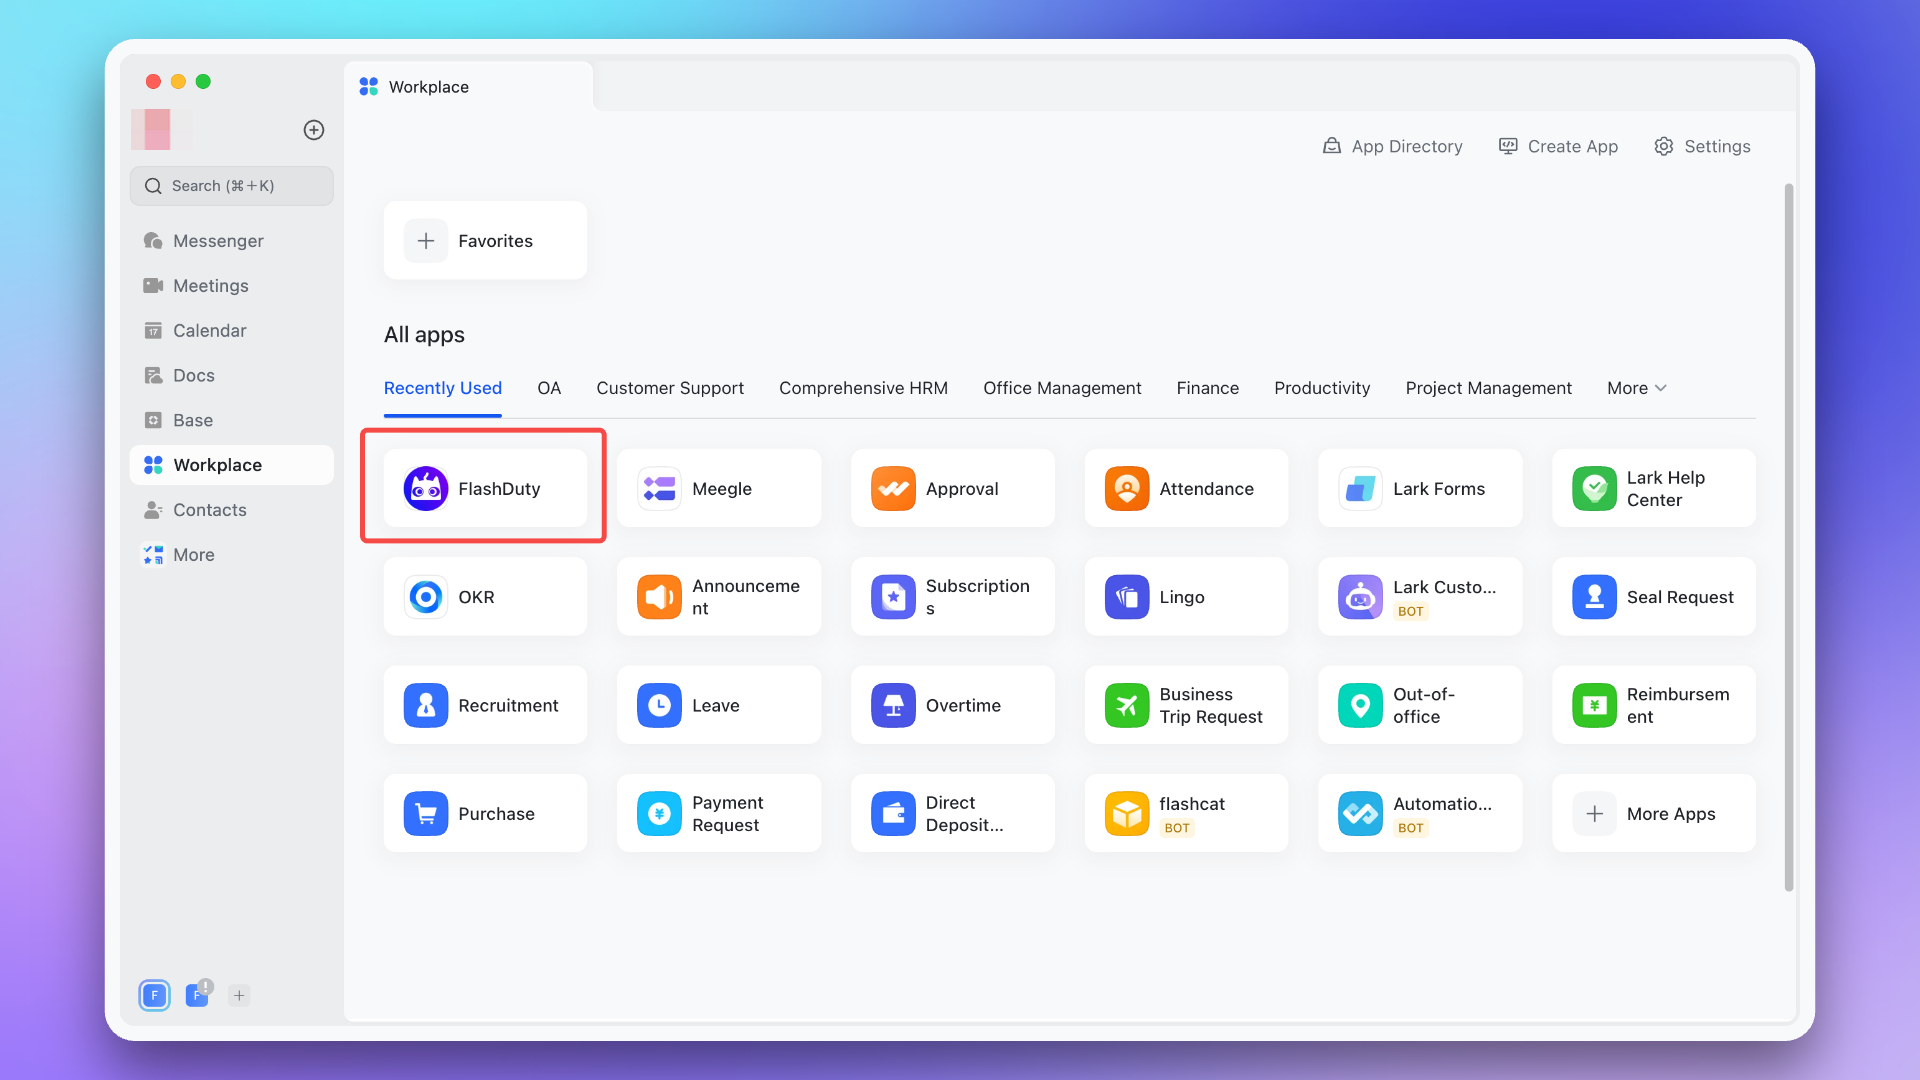
1. Return to the Feishu/Lark Developer Console, enter the created Feishu/Lark application, go to Add Application Capabilities → **Add by Capability** page, and enable both **Web Application** and **Bot** capabilities.
|
|
5609
5692
|
|
|
5610
|
-
|
|
5693
|
+
|
|
5611
5694
|
|
|
5612
|
-
|
|
5695
|
+
2. Go to the **Web app** page and configure the \`Desktop Homepage\` and \`Mobile Homepage\`, both using the **Web configuration** address from the integration details.
|
|
5613
5696
|
|
|
5614
|
-
|
|
5615
|
-
---
|
|
5697
|
+
For details, see the Feishu/Lark development documentation [Configure application homepage address](https://open.feishu.cn/document/uYjL24iN/uMTMuMTMuMTM/development-guide/step1#8366b844).
|
|
5616
5698
|
|
|
5617
|
-
|
|
5699
|
+
|
|
5618
5700
|
|
|
5619
|
-
|
|
5701
|
+
3. Go to Event Callbacks → **Event Configuration** page, configure the \`Request URL\` (using the **Message Card Request URL** from the integration details). Then, add the following two events:
|
|
5620
5702
|
|
|
5621
|
-
|
|
5703
|
+
- \`im.chat.disbanded_v1\`
|
|
5704
|
+
- \`im.message.receive_v1\`
|
|
5622
5705
|
|
|
5623
|
-
|
|
5706
|
+

|
|
5624
5707
|
|
|
5625
|
-
|
|
5708
|
+
4. Go to Event Callbacks → **Callback Configuration** page, configure the \`Request URL\` (using the **Message Card Request URL** from the integration details). Then, subscribe to the following two callbacks:
|
|
5626
5709
|
|
|
5627
|
-
|
|
5710
|
+
- \`card.action.trigger\`
|
|
5711
|
+
- \`card.action.trigger_v1\`
|
|
5628
5712
|
|
|
5629
|
-
|
|
5713
|
+
|
|
5630
5714
|
|
|
5631
|
-
|
|
5632
|
-
<img src="https://download.flashcat.cloud/flashduty/doc/en/feishu/feishu-9.png" alt="drawing" width="800"/>
|
|
5715
|
+
### 2. Add redirect URL to Feishu/Lark application
|
|
5633
5716
|
|
|
5634
|
-
|
|
5717
|
+
Go to the **Security Settings** page and configure the \`Redirect URL\` using the **Redirect URL** from the integration details.
|
|
5635
5718
|
|
|
5636
|
-
|
|
5719
|
+
For details, see the Feishu/Lark development documentation [Configure redirect URL](https://open.feishu.cn/document/uYjL24iN/uYjN3QjL2YzN04iN2cDN?lang=zh-CN#c863e533).
|
|
5637
5720
|
|
|
5638
|
-
|
|
5721
|
+
|
|
5639
5722
|
|
|
5640
|
-
|
|
5723
|
+
### 3. Apply for application permissions
|
|
5641
5724
|
|
|
5642
|
-
|
|
5725
|
+
Go to the **Permission Management** page and apply for the following permissions for the group application created in the previous steps:
|
|
5643
5726
|
|
|
5644
|
-
|
|
5727
|
+
- \`im:chat\`: Get and update group information
|
|
5728
|
+
- \`im:message\`: Get and send single chat and group messages
|
|
5729
|
+
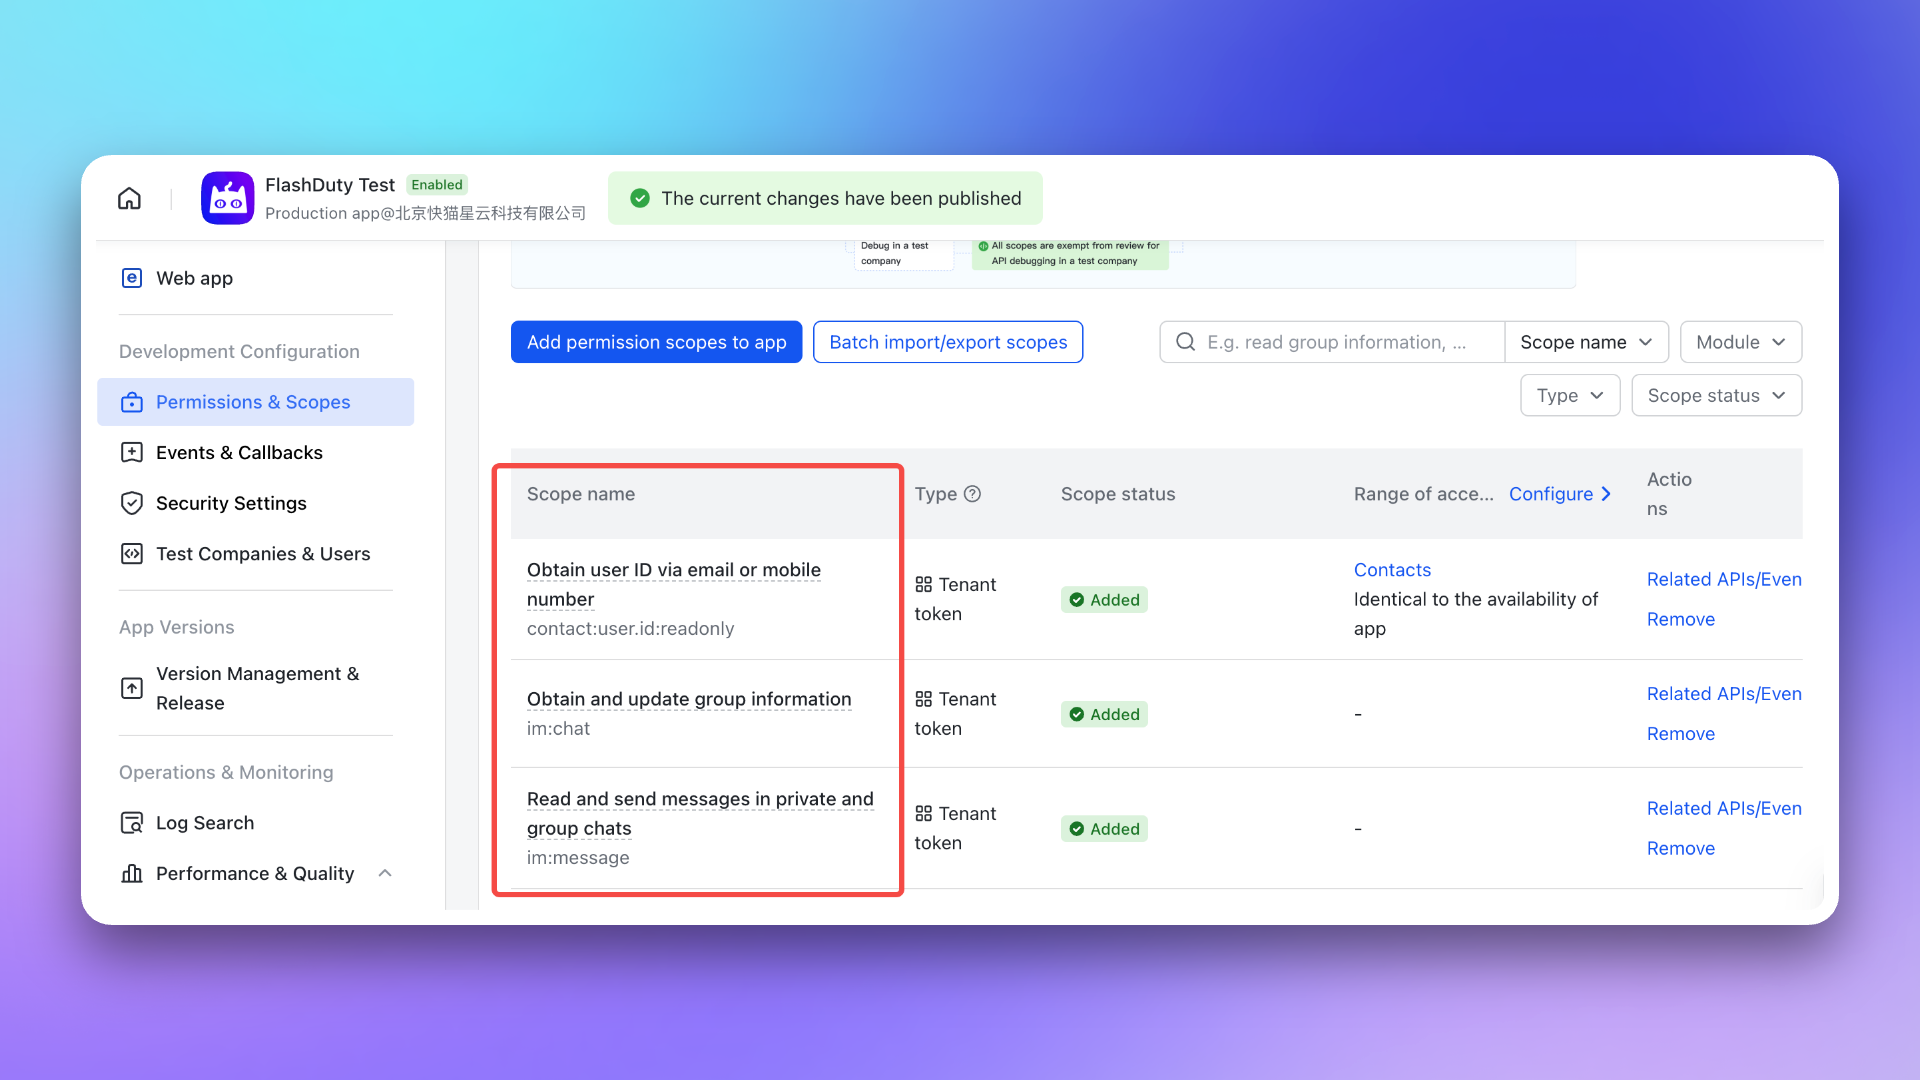
- \`contact:user.id:readonly\`: Get user ID by phone number or email <span id="war-room-scope"></span>
|
|
5645
5730
|
|
|
5646
|
-
|
|
5731
|
+
|
|
5647
5732
|
|
|
5648
|
-
##
|
|
5733
|
+
## 4. Application release
|
|
5649
5734
|
---
|
|
5650
5735
|
|
|
5651
|
-
After completing the above
|
|
5652
|
-
Note: **Available Range** needs special configuration, recommended for **All Employees**.
|
|
5736
|
+
After completing all the above configurations, please release the application. It can be used after administrator approval.
|
|
5653
5737
|
|
|
5654
|
-
|
|
5738
|
+
For details, see the Feishu/Lark development documentation [Application release and usage](https://open.feishu.cn/document/uYjL24iN/uMTMuMTMuMTM/development-guide/step-4).
|
|
5655
5739
|
|
|
5656
|
-
|
|
5740
|
+
> To ensure that everyone can use the application, adjust the application **visibility** to all employees before releasing the application.
|
|
5657
5741
|
|
|
5658
|
-
|
|
5742
|
+

|
|
5659
5743
|
|
|
5660
|
-
1. Mobile: Access the web application through Feishu/Lark > Workspace > Search application name > Open application.
|
|
5661
|
-
2. PC: Access the web application through Feishu/Lark > Workspace > Search application name > Open application.
|
|
5662
5744
|
|
|
5663
|
-
|
|
5664
|
-
---
|
|
5665
|
-
|
|
5666
|
-
1. **Unable to deliver messages to individuals**, operation record shows \`Application Not Associated\`?
|
|
5745
|
+
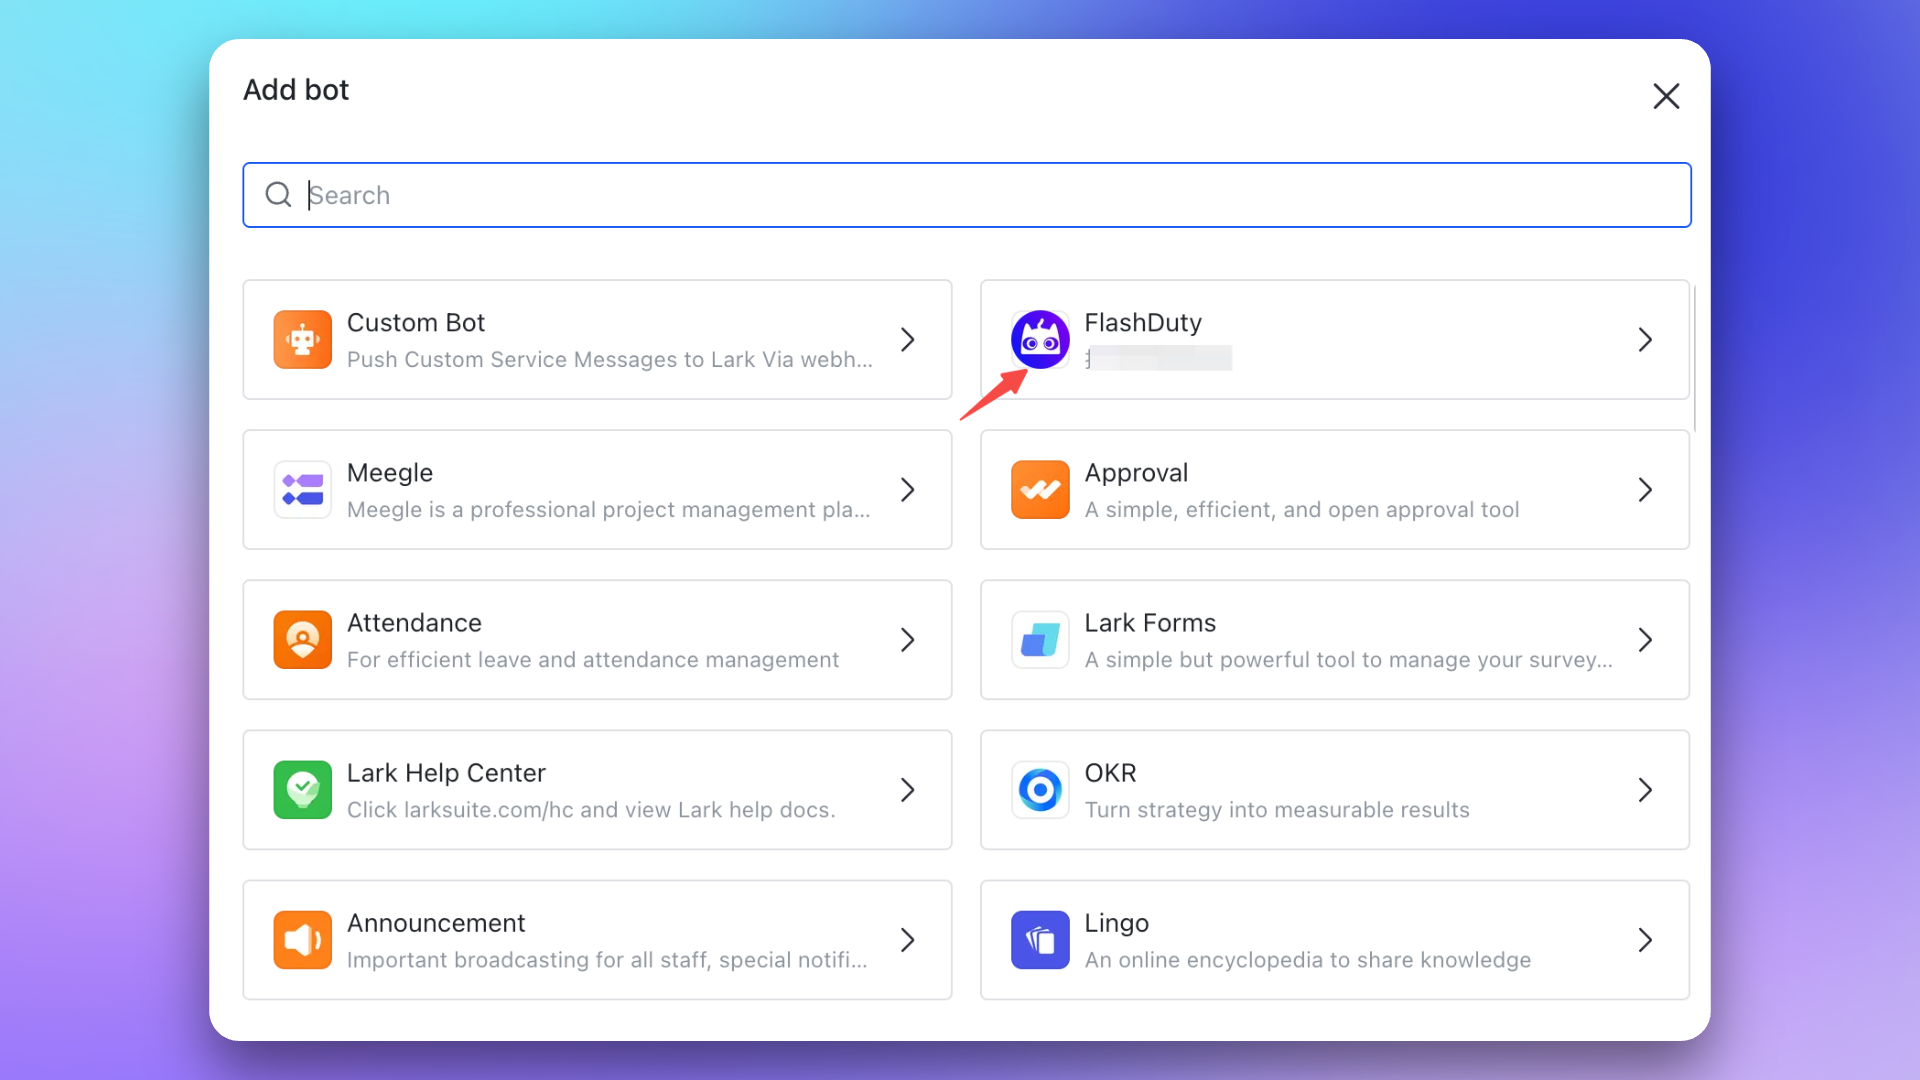
After the application is released, you can access it via **mobile** or **PC**. The first access requires login to link your Feishu/Lark and Flashduty accounts. Subsequent access will be login-free.
|
|
5667
5746
|
|
|
5668
|
-
|
|
5747
|
+
- **Mobile**: Access via Feishu/Lark → Workplace → Search for application name → **Open Application** to use the web application.
|
|
5748
|
+
- **PC**: Access via Feishu/Lark → Workplace → Search for application name → **Open Application** to use the web application.
|
|
5669
5749
|
|
|
5670
|
-
|
|
5750
|
+
|
|
5671
5751
|
|
|
5672
|
-
|
|
5673
|
-
- Ensure sufficient licenses are purchased. You can check license usage in Console > Billing Center
|
|
5752
|
+
## 5. Configure war room
|
|
5674
5753
|
|
|
5675
|
-
|
|
5754
|
+
> Ensure the application has been authorized with the [additional permissions](#war-room-scope) required for the war room feature.
|
|
5676
5755
|
|
|
5677
|
-
|
|
5678
|
-
- Return to the escalation rule configuration page, refresh and reselect the group chat list
|
|
5756
|
+
After completing the previous steps, in the **Enhanced Features** module of the Flashduty integration configuration page, check **Enable War Room** to enable this feature without additional configuration.
|
|
5679
5757
|
|
|
5680
|
-
|
|
5681
|
-
|
|
5758
|
+
## 6. FAQ
|
|
5759
|
+
---
|
|
5682
5760
|
|
|
5683
|
-
|
|
5761
|
+
1. **Messages cannot be delivered to individuals, and the operation log shows \`app not linked\`?**
|
|
5762
|
+
- Go to Feishu/Lark → Workplace → Search for application name → **Open Application**, complete login once to link your Feishu/Lark and Flashduty accounts, so the system can obtain user identity for message push.
|
|
5763
|
+
2. **Message card buttons are unresponsive or show errors?**
|
|
5764
|
+
- Ensure the account has been linked. You can go to Feishu/Lark → Workplace → Search for application name → **Open Application** to complete login once. If you have already logged in, try clicking the menu in the upper right corner, switch accounts, and log in again to bind the account.
|
|
5765
|
+
- Ensure you have purchased sufficient licenses. You can check the license usage in Console → **Billing Center**.
|
|
5766
|
+
3. **The Feishu/Lark group chat list in escalation rules is empty?**
|
|
5767
|
+
- Go to Feishu/Lark and add the created Flashduty bot to the specified group chat.
|
|
5768
|
+
- Return to the escalation rule configuration page, refresh and reselect the group chat list.
|
|
5684
5769
|
|
|
5685
|
-
|
|
5770
|
+
|
|
5686
5771
|
|
|
5687
|
-
|
|
5688
|
-
|
|
5689
|
-
|Basic Free Version|10,000 calls|1st of each month|
|
|
5690
|
-
|Other Versions|Unlimited|-|
|
|
5772
|
+
4. **Feishu/Lark custom application API limits?**
|
|
5773
|
+
- **Call volume limits:**
|
|
5691
5774
|
|
|
5692
|
-
|
|
5775
|
+
| **Feishu/Lark Version** | **Total Calls/Month** | **Refresh Time** |
|
|
5776
|
+
| :---: | :---: | :---: |
|
|
5777
|
+
| Basic Free | 10,000 | 1st of each month |
|
|
5778
|
+
| Other Versions | Unlimited | - |
|
|
5693
5779
|
|
|
5694
|
-
|
|
5695
|
-
| :----------: | :--: |
|
|
5696
|
-
|All APIs|Maximum 50 calls/second per application|
|
|
5697
|
-
|Message Sending API|Maximum 1000 calls/minute per application|
|
|
5698
|
-
|Group Bot Webhook|Maximum 100 calls/minute|
|
|
5699
|
-
|Sending messages to the same user or group|Maximum 5 calls/second|
|
|
5780
|
+
- **Rate limits:**
|
|
5700
5781
|
|
|
5701
|
-
|
|
5782
|
+
| **Scenario** | **Limit** |
|
|
5783
|
+
| :---: | :--- |
|
|
5784
|
+
| All APIs | Max 50 calls/second per app |
|
|
5785
|
+
| Send message APIs | Max 1000 calls/minute per app |
|
|
5786
|
+
| Group bot webhook | Max 100 calls/minute |
|
|
5787
|
+
| Send to same user or group | Max 5 calls/second |
|
|
5788
|
+
|
|
5789
|
+
> After exceeding API call limits, the Feishu/Lark application will not be able to push messages normally. It is recommended to use notification channels reasonably. See [Feishu/Lark official documentation](https://open.feishu.cn/document/uAjLw4CM/ugTN1YjL4UTN24CO1UjN/platform-updates-/custom-app-api-call-limit) for details.
|
|
5790
|
+
5. **Why is the war room feature not working as expected?**
|
|
5791
|
+
- Please check again whether you have configured the [required permissions](#war-room-scope) for the war room feature.
|
|
5792
|
+
- Please refer to the **FAQ** section of the Flashduty [War Room Introduction](https://docs.flashcat.cloud/en/flashduty/war-room?nav=01JCQ7A4N4WRWNXW8EWEHXCMF5).`,ne=`---
|
|
5702
5793
|
title: "Dingtalk Integration"
|
|
5703
|
-
description: "
|
|
5794
|
+
description: "By integrating a custom Dingtalk application, you can receive and respond to alerts within Dingtalk."
|
|
5704
5795
|
date: "2025-05-19T10:00:00+08:00"
|
|
5705
|
-
url: "https://docs.flashcat.cloud/en/flashduty/dingtalk-integration-guide"
|
|
5796
|
+
url: "https://docs.flashcat.cloud/en/flashduty/dingtalk-integration-guide?nav=01JCQ7A4N4WRWNXW8EWEHXCMF5"
|
|
5706
5797
|
---
|
|
5707
5798
|
|
|
5708
|
-
|
|
5799
|
+
By integrating a custom Dingtalk application, you can receive and respond to alerts within Dingtalk.
|
|
5800
|
+
|
|
5801
|
+
> This document uses the new version of the Dingtalk Open Platform as an example.
|
|
5802
|
+
|
|
5803
|
+
|
|
5804
|
+
## I. Create Dingtalk Application and Add Dingtalk Integration
|
|
5709
5805
|
|
|
5710
|
-
**(This guide uses the new version of Dingtalk Open Platform as an example)**
|
|
5711
|
-
<!--
|
|
5712
|
-
## Video Tutorial
|
|
5713
|
-
---
|
|
5714
|
-
<Video src="https://download.flashcat.cloud/flashduty/video/dingding.mp4"></Video>
|
|
5715
|
-
-->
|
|
5716
|
-
## I. Create Dingtalk Application
|
|
5717
5806
|
---
|
|
5718
5807
|
|
|
5719
|
-
### 1. Create Custom Application
|
|
5808
|
+
### 1. Create a Custom Application
|
|
5809
|
+
|
|
5810
|
+
Visit the [Dingtalk Developer Console](https://open-dev.dingtalk.com/fe/app) → Application Development → **Internal Enterprise Development** to create an application.
|
|
5811
|
+
|
|
5812
|
+
For details, please refer to the Dingtalk development documentation [Create an in-house application-H5 micro-application](https://open.dingtalk.com/document/orgapp/microapplication-creation-and-release-process#title-ovn-666-1ty).
|
|
5813
|
+
|
|
5814
|
+
|
|
5720
5815
|
|
|
5721
|
-
|
|
5816
|
+
You can use the [Flashduty official icon](https://download.flashcat.cloud/flashcat_logo_circular.png) for the application icon.
|
|
5722
5817
|
|
|
5723
|
-
|
|
5818
|
+
### 2. Copy the Enterprise \`CorpId\`
|
|
5724
5819
|
|
|
5725
|
-
|
|
5820
|
+
Click on the enterprise avatar in the top right corner of the page and copy the \`CorpId\` from the dropdown menu.
|
|
5726
5821
|
|
|
5727
|
-
|
|
5822
|
+
|
|
5728
5823
|
|
|
5729
|
-
|
|
5824
|
+
Return to the Flashduty integration configuration page and fill in the corresponding \`CorpId\` in the form.
|
|
5730
5825
|
|
|
5731
|
-
|
|
5826
|
+
### 3. Copy Application Credential Information
|
|
5732
5827
|
|
|
5733
|
-
|
|
5828
|
+
Enter the application details interface you created, go to the Application Capability → **Credentials and Basic Information** page via the left menu bar, and copy the \`AgentId\`, \`Client ID\`, and \`Client Secret\`.
|
|
5734
5829
|
|
|
5735
|
-
|
|
5830
|
+
|
|
5736
5831
|
|
|
5737
|
-
|
|
5832
|
+
Return to the Flashduty integration configuration page and fill in the corresponding \`AgentId\`, \`Client ID\`, and \`Client Secret\` in the form.
|
|
5738
5833
|
|
|
5739
5834
|
### 4. Copy Event Subscription Information
|
|
5740
5835
|
|
|
5741
|
-
Go to
|
|
5836
|
+
Go to Development Configuration → **Events and Callbacks** page. Set the push method to \`HTTP Push\`, then click the button to generate an \`Encryption aes_key\` and a \`Signature Token\`, and copy them.
|
|
5742
5837
|
|
|
5743
|
-
|
|
5838
|
+
|
|
5744
5839
|
|
|
5745
|
-
|
|
5840
|
+
Return to the Flashduty integration configuration page, fill in the corresponding \`Encryption aes_key\` and \`Signature Token\` in the form, and click the **Save** button.
|
|
5746
5841
|
|
|
5747
|
-
|
|
5842
|
+
### 5. Configure Event Subscription
|
|
5748
5843
|
|
|
5749
|
-
|
|
5750
|
-
---
|
|
5844
|
+
Go to the Development Configuration → **Event Subscription** page.
|
|
5751
5845
|
|
|
5752
|
-
|
|
5846
|
+
Configure the **Event Subscription Request URL** using the \`Event Subscription Request URL\` from the Flashduty integration details. **Save** after configuration.
|
|
5753
5847
|
|
|
5754
|
-
|
|
5848
|
+
|
|
5755
5849
|
|
|
5756
|
-
|
|
5850
|
+
Below the **Save** button, select the three group session events: \`Group chat name is changed\`, \`Install the cool application in the group\`, and \`Uninstall the cool application in the group\`. Click **Save** after configuration.
|
|
5757
5851
|
|
|
5758
|
-
|
|
5852
|
+
|
|
5759
5853
|
|
|
5760
|
-
|
|
5761
|
-
---
|
|
5854
|
+
### 6. Add Application Capabilities
|
|
5762
5855
|
|
|
5763
|
-
|
|
5764
|
-
<img src="https://download.flashcat.cloud/flashduty/doc/en/ding/ding-7.png" alt="drawing" width="500"/>
|
|
5856
|
+
Create a Cool App. Go to Development Configuration → Add Application Capability → Cool App → **Cool App List** page, click the **Create Cool App** button, and select **Extend to group sessions**.
|
|
5765
5857
|
|
|
5766
|
-
|
|
5858
|
+
Enter the **Edit Cool App** page and complete the following steps:
|
|
5767
5859
|
|
|
5768
|
-
|
|
5860
|
+
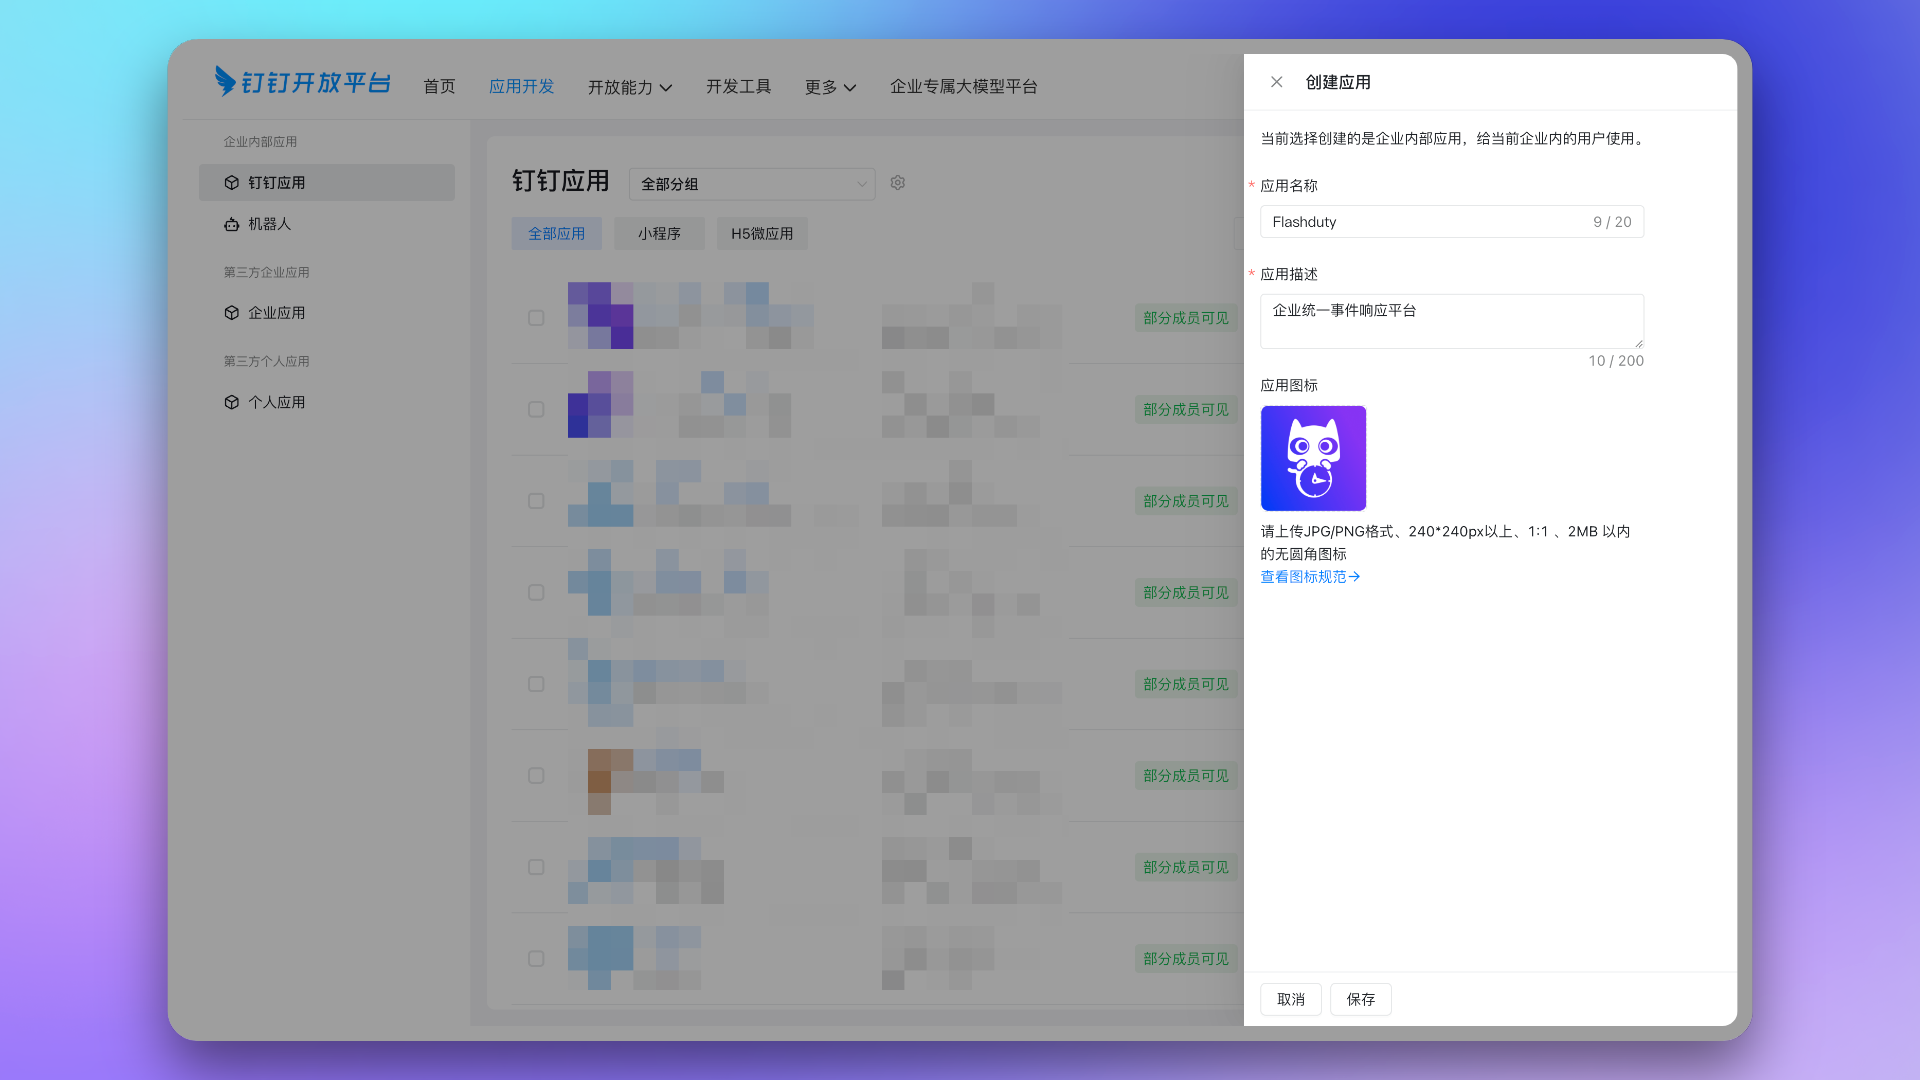
1. Fill in the basic information. You can use the [Flashduty official icon](https://download.flashcat.cloud/flashcat_logo_circular.png) for the icon.
|
|
5769
5861
|
|
|
5770
|
-
|
|
5862
|
+
|
|
5771
5863
|
|
|
5772
|
-
2.
|
|
5864
|
+
2. Configure the functional design. Select **Group Quick Access** and **Message Card** on the left. You can use the [Flashduty official icon](https://download.flashcat.cloud/flashcat_logo_circular.png) for the group quick access icon. For the desktop and mobile access addresses, please copy the **Cool App Web URL** from the integration details.
|
|
5773
5865
|
|
|
5774
|
-
|
|
5866
|
+

|
|
5775
5867
|
|
|
5776
|
-
|
|
5868
|
+
3. Skip the third step of functional development, proceed to the fourth step **Preview & Release**, click the **Release** button and confirm.
|
|
5777
5869
|
|
|
5778
|
-
|
|
5870
|
+
### 7. Configure Bot and Message Push
|
|
5779
5871
|
|
|
5780
|
-
|
|
5872
|
+
Go to the Application Capability → **Bot** page, enable the bot configuration, fill in the name and upload an icon, then click **Save**. You can use the [Flashduty official icon](https://download.flashcat.cloud/flashcat_logo_circular.png) for the icon.
|
|
5781
5873
|
|
|
5782
|
-
|
|
5874
|
+

|
|
5783
5875
|
|
|
5784
|
-
|
|
5876
|
+
### 8. Configure Application URLs
|
|
5785
5877
|
|
|
5786
|
-
|
|
5878
|
+
Go to the Application Capability → **Web Application** page.
|
|
5787
5879
|
|
|
5788
|
-
|
|
5880
|
+
Configure the **Application Homepage URL** and **PC Homepage URL** with the \`Application Homepage URL\` and \`PC Homepage URL\` from the Flashduty integration details. Click **Save** when done.
|
|
5789
5881
|
|
|
5790
|
-
|
|
5882
|
+
|
|
5791
5883
|
|
|
5792
|
-
|
|
5884
|
+
### 9. Apply for Application Permissions
|
|
5793
5885
|
|
|
5794
|
-
|
|
5886
|
+
Go to the Development Configuration → **Permissions** page and apply for the following permissions for the group application created in the previous steps:
|
|
5795
5887
|
|
|
5796
|
-
|
|
5888
|
+
- \`qyapi_chat_manage\`: Get group chat information
|
|
5889
|
+
- \`qyapi_robot_sendmsg\`: Send messages to group chats or individuals
|
|
5797
5890
|
|
|
5798
|
-
|
|
5891
|
+
|
|
5799
5892
|
|
|
5800
|
-
|
|
5893
|
+
## II. Configure War Room
|
|
5801
5894
|
|
|
5802
|
-
|
|
5895
|
+
> If you do not need to configure the War Room feature, you can skip this step and proceed directly to [**Application Release and Usage**](#publish).
|
|
5803
5896
|
|
|
5804
|
-
|
|
5897
|
+
<span id="war-room-scope"></span>
|
|
5805
5898
|
|
|
5806
|
-
|
|
5899
|
+
### 1. Apply for Application Permissions
|
|
5807
5900
|
|
|
5808
|
-
|
|
5901
|
+
Go to the Development Configuration → **Permissions** page and apply for the following permissions for the group application created in the previous steps:
|
|
5809
5902
|
|
|
5810
|
-
|
|
5903
|
+
- \`qyapi_chat_read\`: Get group chat information
|
|
5904
|
+
- \`qyapi_chat_base_read\`: Get group chat information
|
|
5905
|
+
- \`qyapi_get_member_by_mobile\`: Allows the current application to get Dingtalk user information based on mobile numbers to invite users to join group chats
|
|
5811
5906
|
|
|
5812
|
-
|
|
5907
|
+
|
|
5813
5908
|
|
|
5814
|
-
|
|
5815
|
-
|
|
5909
|
+
### 2. Configure Group Template
|
|
5910
|
+
|
|
5911
|
+
Go to Open Capability → **Scene Group** from the top menu bar of the Dingtalk Open Platform.
|
|
5912
|
+
|
|
5913
|
+
1. Configure **Group Bot**. Select **Bot** from the left menu bar, then click **Create group bot**.
|
|
5914
|
+
|
|
5915
|
+
> The **Group Bot** configured in this step and the **Application Bot** are two different concepts. The group bot is used to automatically create a group bot when a group chat is generated. The group bot and the application bot have different **Bot IDs**. To enable the War Room feature for Dingtalk, you must configure an additional **Group Bot**.
|
|
5916
|
+
|
|
5917
|
+
Fill in the group bot configuration. The **Message Callback URL**, **Message Callback Token**, and **Information Source Website** configurations have no practical effect in Flashduty's application scenario; you can configure them with any values that meet the requirements.
|
|
5918
|
+
|
|
5919
|
+
**Example Configuration**:
|
|
5920
|
+
|
|
5921
|
+
| **Configuration Item** | **Value** |
|
|
5922
|
+
| -------------- | --------------------------------------------------------------------------------- |
|
|
5923
|
+
| Bot Name | Flashduty |
|
|
5924
|
+
| Bot Avatar | [Flashduty official icon](https://download.flashcat.cloud/flashcat_logo_circular.png) |
|
|
5925
|
+
| Introduction | Flashduty |
|
|
5926
|
+
| Message Preview Image | [Flashduty official icon](https://download.flashcat.cloud/flashcat_logo_circular.png) |
|
|
5927
|
+
| Detailed Description | Flashduty message push bot. |
|
|
5928
|
+
| Message Callback URL | \`https://flashcat.cloud/\` |
|
|
5929
|
+
| Message Callback Token | \`token\` |
|
|
5930
|
+
| Information Source Website | \`https://flashcat.cloud/\` |
|
|
5931
|
+
|
|
5932
|
+
After completing the configuration, click **Create**, then click **Approve**. After the "Submission successful" pop-up appears in the top right corner, Dingtalk has automatically completed the approval of the group bot.
|
|
5933
|
+
|
|
5934
|
+
|
|
5935
|
+
|
|
5936
|
+
2. Configure **Group Template**. Select **Group Template** from the left menu bar, and click **Create group template**.
|
|
5937
|
+
|
|
5938
|
+
Set the **Enterprise Type** to \`Internal Enterprise\` and the **Optional Application** to the custom application created in the previous steps. Then, fill in the template information in the next step.
|
|
5816
5939
|
|
|
5817
|
-
|
|
5940
|
+
Introductory information such as **Template Name**, **Icon**, **Description**, **Copywriting Introduction**, **Template Description**, and **Image Introduction** will not affect the use of the group template feature; you can configure them with any values that meet the requirements.
|
|
5818
5941
|
|
|
5819
|
-
|
|
5820
|
-
<img src="https://download.flashcat.cloud/flashduty/doc/en/ding/ding-17.png" alt="drawing" width="500"/>
|
|
5942
|
+
**Example Configuration**:
|
|
5821
5943
|
|
|
5822
|
-
|
|
5944
|
+
| **Configuration Item** | **Value** |
|
|
5945
|
+
| ---------- | --------------------------------------------------------------------------------- |
|
|
5946
|
+
| Template Name | Flashduty War Room |
|
|
5947
|
+
| Icon | [Flashduty official icon](https://download.flashcat.cloud/flashcat_logo_circular.png) |
|
|
5948
|
+
| Description | Create a war room for active incidents with one click. |
|
|
5949
|
+
| Copywriting Introduction | Create a war room for active incidents with one click. |
|
|
5950
|
+
| Template Description | Create a war room for active incidents with one click. |
|
|
5951
|
+
| Image Introduction | [Flashduty official icon](https://download.flashcat.cloud/flashcat_logo_circular.png) |
|
|
5823
5952
|
|
|
5824
|
-
|
|
5825
|
-
|
|
5953
|
+
In the **Select Bot** configuration item, click **Select created bot** and choose the group bot created in the previous step. Keep other configuration items at their default settings. Finally, click **Save Edit**.
|
|
5954
|
+
|
|
5955
|
+
|
|
5956
|
+
|
|
5957
|
+
|
|
5958
|
+
In the **Fill in grayscale group** step, click **Create grayscale group**, then click **Publish grayscale**.
|
|
5959
|
+
|
|
5960
|
+
Finally, click **Group Template** in the left menu bar again, then click to enter the group template you just created. Click **Submit for Review**, and after Dingtalk automatically approves it, finally click **Publish**.
|
|
5961
|
+
|
|
5962
|
+
3. In the published group template details page, copy the **Template ID** and **Bot ID**.
|
|
5963
|
+
|
|
5964
|
+
|
|
5965
|
+
|
|
5966
|
+
Return to the Flashduty integration configuration page, fill in the corresponding \`Template ID\` and \`Bot ID\` in the form, and click the **Save** button.
|
|
5967
|
+
|
|
5968
|
+
<span id="publish"></span>
|
|
5969
|
+
|
|
5970
|
+
## III. Application Release and Usage
|
|
5826
5971
|
|
|
5827
|
-
## V. Common Issues
|
|
5828
5972
|
---
|
|
5829
|
-
1. **Cannot deliver messages to individuals**, operation record shows \`Application Not Associated\`?
|
|
5830
5973
|
|
|
5831
|
-
|
|
5974
|
+
After completing the above steps, go to Application Release → **Version Management and Release**, create a new version, and publish it.
|
|
5832
5975
|
|
|
5833
|
-
|
|
5976
|
+
> To ensure that everyone can use the application, you need to adjust the **Visible Scope** of the application to all employees before publishing.
|
|
5834
5977
|
|
|
5835
|
-
|
|
5836
|
-
- Ensure you have purchased sufficient licenses. You can check license usage in Console > Billing Center
|
|
5978
|
+
|
|
5837
5979
|
|
|
5838
|
-
|
|
5980
|
+
After the application is published, you can access it via the **mobile client** or **PC client**. The first time you access it, you need to log in and associate your Dingtalk and Flashduty accounts. Subsequent uses will be login-free.
|
|
5839
5981
|
|
|
5840
|
-
|
|
5841
|
-
|
|
5842
|
-
- If still unable to get the group chat list, try uninstalling the Cool App from the group and repeat the above steps. If it still doesn't work, please contact customer or dedicated technical support
|
|
5982
|
+
- **Mobile Client**: Access the web application through Dingtalk → Workbench → Search for application name → **Open Application**.
|
|
5983
|
+
- **PC Client**: Access the web application through Dingtalk → Workbench → Search for application name → **Open Application**.
|
|
5843
5984
|
|
|
5844
|
-
|
|
5985
|
+
## IV. FAQ
|
|
5845
5986
|
|
|
5846
|
-
|
|
5987
|
+
---
|
|
5988
|
+
|
|
5989
|
+
1. **Why can't messages be delivered to individuals, and the operation record shows \`app not linked\`?**
|
|
5990
|
+
- Go to Dingtalk → Workbench → Search for application name → **Open Application**, and complete a login to associate your Dingtalk and Flashduty accounts. The system needs to obtain your user identity to push messages.
|
|
5991
|
+
2. **Why are the message card buttons not working or showing an error?**
|
|
5992
|
+
- Go to Dingtalk → Workbench → Search for application name → **Open Application**, and complete a login to associate your Dingtalk and Flashduty accounts. If you have already logged in, try clicking the menu in the upper right corner, switching accounts, and logging in again to bind your account.
|
|
5993
|
+
- Ensure you have purchased enough licenses. You can check your used license status in Console → [**Billing Center**](https://console.flashcat.cloud/wallet).
|
|
5994
|
+
3. **Why is the Dingtalk group chat list in the escalation rule empty?**
|
|
5995
|
+
- Go to Dingtalk, select a group chat session, and install the Cool App. Otherwise, the group chat list cannot be obtained.
|
|
5996
|
+
|
|
5997
|
+
|
|
5998
|
+
|
|
5999
|
+
|
|
6000
|
+
- Return to the escalation rule configuration page, refresh, and reselect the group chat list.
|
|
6001
|
+
- If you still cannot get the group chat list, try uninstalling the Cool App in the group and then repeating the above steps. If the problem persists, please contact customer or dedicated technical support.
|
|
5847
6002
|
|
|
5848
|
-
4. **
|
|
6003
|
+
4. **Why is the War Room feature not working as expected?**
|
|
6004
|
+
- Please double-check if you have configured the [required permissions](#war-room-scope) for the application's War Room feature.
|
|
6005
|
+
- Please refer to the **FAQ** section of the Flashduty [War Room Introduction](https://docs.flashcat.cloud/en/flashduty/war-room?nav=01JCQ7A4N4WRWNXW8EWEHXCMF5) document.
|
|
5849
6006
|
|
|
5850
|
-
|
|
5851
|
-
| :----------: | :--: | :----: | :----:|
|
|
5852
|
-
|Standard|10,000|20|1st of each month|
|
|
5853
|
-
|Professional|500,000|40|1st of each month|
|
|
5854
|
-
|Enterprise|5,500,000|60|1st of each month|
|
|
6007
|
+
5. **Dingtalk Custom Application API Call Limits**
|
|
5855
6008
|
|
|
5856
|
-
**
|
|
5857
|
-
|
|
6009
|
+
| **Dingtalk Version** | **Total Calls/Month** | **QPS** | **Refresh Time** |
|
|
6010
|
+
| :----------: | :-------------: | :-----: | :----------: |
|
|
6011
|
+
| Standard | 10,000 | 20 | 1st of each month |
|
|
6012
|
+
| Professional | 500,000 | 40 | 1st of each month |
|
|
6013
|
+
| Exclusive | 5,500,000 | 60 | 1st of each month |
|
|
6014
|
+
|
|
6015
|
+
> After exceeding the API call limit, the Dingtalk application will not be able to push messages normally. It is recommended to use notification channels reasonably. For details, see the [official Dingtalk documentation](https://open.dingtalk.com/document/orgapp/descriptions-about-adjusting-limit-and-frequency-of-api-calls?spm=ding_open_doc.document.0.0.6f6b21d9WtkxJI).`,te=`---
|
|
5858
6016
|
title: "WeCom Integration"
|
|
5859
|
-
description: "
|
|
6017
|
+
description: "By integrating a WeCom application, you can receive and respond to alerts within WeCom."
|
|
5860
6018
|
date: "2025-05-19T10:00:00+08:00"
|
|
5861
|
-
url: "https://docs.flashcat.cloud/en/flashduty/wecom-integration-guide"
|
|
6019
|
+
url: "https://docs.flashcat.cloud/en/flashduty/wecom-integration-guide?nav=01JCQ7A4N4WRWNXW8EWEHXCMF5"
|
|
5862
6020
|
---
|
|
5863
6021
|
|
|
5864
|
-
|
|
6022
|
+
By integrating a WeCom application, you can receive and respond to alerts within WeCom.
|
|
5865
6023
|
|
|
5866
|
-
|
|
5867
|
-
## Video Guide
|
|
5868
|
-
---
|
|
5869
|
-
<Video src="https://download.flashcat.cloud/flashduty/video/wechat.mp4"></Video>
|
|
5870
|
-
-->
|
|
6024
|
+
This document supports both [integrating third-party applications](#third-party) and [integrating custom enterprise applications](#self).
|
|
5871
6025
|
|
|
5872
|
-
## I. Install the Application
|
|
5873
|
-
---
|
|
5874
6026
|
|
|
5875
|
-
|
|
6027
|
+
> You only need to configure one of the two methods: **Integrate third-party application** or **Integrate custom application**.
|
|
5876
6028
|
|
|
5877
|
-
<
|
|
6029
|
+
<span id="third-party"></span>
|
|
5878
6030
|
|
|
5879
|
-
|
|
6031
|
+
## 1. Integrate third-party application
|
|
5880
6032
|
|
|
5881
|
-
|
|
6033
|
+
---
|
|
5882
6034
|
|
|
5883
|
-
|
|
6035
|
+
> As a WeCom service provider, Flashduty offers a long-term free version of the Flashduty application. This application requires WeCom API permissions to function (passwordless login + message sending).
|
|
6036
|
+
>
|
|
6037
|
+
> This license currently supports **up to 60 days** free of charge. After exceeding this usage period, Flashduty needs to purchase a WeCom license for you to continue using it.
|
|
5884
6038
|
|
|
5885
|
-
|
|
6039
|
+
1. Visit [WeCom Admin Console](https://work.weixin.qq.com/wework_admin/frame#apps), go to Application Management → **Applications** page, and click **Add Third-party Application**.
|
|
5886
6040
|
|
|
5887
|
-
|
|
6041
|
+
|
|
5888
6042
|
|
|
5889
|
-
|
|
6043
|
+
2. Enter \`Flashduty\` in the search bar, and click the **Add** button after finding the application.
|
|
5890
6044
|
|
|
5891
|
-
|
|
6045
|
+
|
|
5892
6046
|
|
|
5893
|
-
|
|
5894
|
-
---
|
|
6047
|
+
3. Modify the application **visibility range**. It is recommended to select all employees or specific department nodes to avoid needing to modify when new enterprise members are added. Then click **Agree to the above authorization and add** to complete the installation.
|
|
5895
6048
|
|
|
5896
|
-
|
|
6049
|
+
|
|
5897
6050
|
|
|
5898
|
-
|
|
5899
|
-
- Verify if you've correctly configured the \`Corp ID\`
|
|
6051
|
+
4. Visit [WeCom Admin Console](https://work.weixin.qq.com/wework_admin/frame#apps), go to **My Enterprise** page, and obtain the \`Enterprise ID\`.
|
|
5900
6052
|
|
|
5901
|
-
|
|
6053
|
+
|
|
5902
6054
|
|
|
5903
|
-
|
|
5904
|
-
- First-time access requires login, choose member account - password or SSO, successful login completes account linking between \`Flashduty\` and \`WeCom\`
|
|
5905
|
-
- Subsequent access will be passwordless
|
|
6055
|
+
5. Return to the Flashduty integration configuration page, fill in the \`Enterprise ID\` obtained in the previous step, and click **Save** to complete the integration.
|
|
5906
6056
|
|
|
5907
|
-
|
|
6057
|
+
<span id="self"></span>
|
|
5908
6058
|
|
|
5909
|
-
|
|
5910
|
-
- Go to channel details page - escalation rule, select WeCom integration in personal channels to complete notification setup
|
|
5911
|
-
- Supports customizing WeCom notification content through template management page. Note: **Custom area supports maximum 8 lines**, excess content will be truncated by WeCom
|
|
6059
|
+
## 2. Integrate custom enterprise application
|
|
5912
6060
|
|
|
5913
|
-
|
|
6061
|
+
---
|
|
5914
6062
|
|
|
5915
|
-
|
|
6063
|
+
1. Visit [WeCom Admin Console](https://work.weixin.qq.com/wework_admin/frame#apps), go to Application Management → **Applications** page, and click **Create Application**.
|
|
5916
6064
|
|
|
5917
|
-
-
|
|
5918
|
-
- Click \`Start Processing\` to set alert status to \`In Progress\`
|
|
5919
|
-
- Click \`Close Directly\` to set alert status to \`Closed\`
|
|
5920
|
-
- Click \`Snooze 2h\` to snooze the alert for 2 hours, click \`...\` in top-right corner for more snooze options
|
|
6065
|
+
|
|
5921
6066
|
|
|
5922
|
-
|
|
6067
|
+
2. Configure **Application Logo**, **Application Name**, and **Application Visibility Range**.
|
|
5923
6068
|
|
|
5924
|
-
-
|
|
5925
|
-
- Flashduty requests card content updates when alert status changes
|
|
5926
|
-
- When alert status changes frequently, updates might fail due to update limit, use refresh button for one additional update opportunity
|
|
6069
|
+
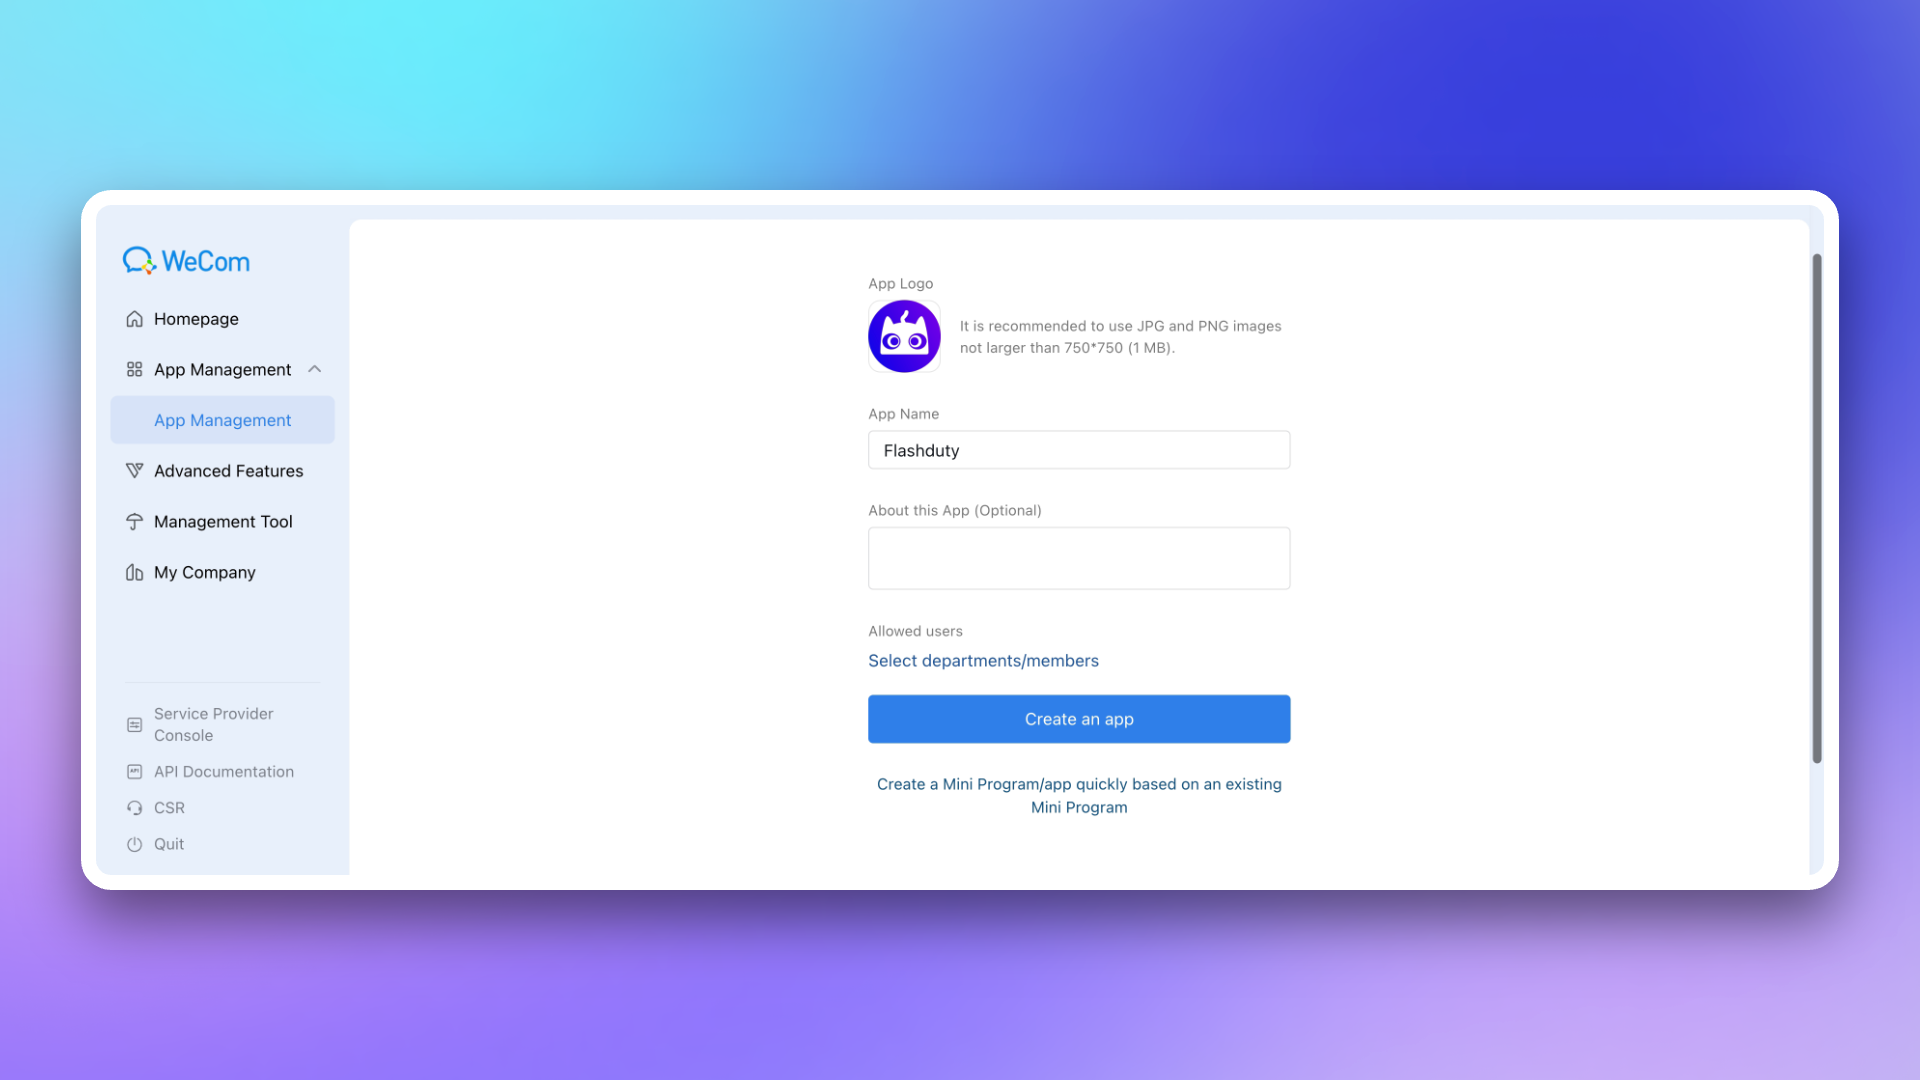
|
|
5927
6070
|
|
|
5928
|
-
|
|
6071
|
+
3. Return to the Flashduty integration configuration page and select whether WeCom is a \`non-private deployment version\` based on your actual situation.
|
|
5929
6072
|
|
|
5930
|
-
|
|
5931
|
-
- Try keyboard shortcut \`ctrl\` + \`command\` + \`shift\` + \`d\` to enable debug mode, then select \`Debug - Browser & WebView Related - Open in System Browser\` to change link opening behavior. Use the same shortcut to exit debug mode and retain settings
|
|
6073
|
+
If your WeCom is a private deployment version, you need to fill in the \`Endpoint\` in the configuration page. This address needs to be accessible by the Flashduty service. You may consider setting up **whitelist authorization** for it.
|
|
5932
6074
|
|
|
5933
|
-
|
|
6075
|
+
4. Visit [WeCom Admin Console](https://work.weixin.qq.com/wework_admin/frame#apps), go to **My Enterprise** page, obtain the \`Enterprise ID\`, and fill it in the Flashduty integration configuration page.
|
|
5934
6076
|
|
|
5935
|
-
|
|
5936
|
-
`,te=`---
|
|
5937
|
-
title: "Slack Integration"
|
|
5938
|
-
description: "Integrate with Slack to receive and respond to alerts within Slack"
|
|
5939
|
-
date: "2025-05-19T10:00:00+08:00"
|
|
5940
|
-
url: "https://docs.flashcat.cloud/en/flashduty/slack-integration-guide"
|
|
5941
|
-
---
|
|
6077
|
+
5. Return to [WeCom Admin Console](https://work.weixin.qq.com/wework_admin/frame#apps), go to **Application Management** page, click on the application you created to enter the details page. Obtain the \`AgentId\` from the page and fill it in the Flashduty integration configuration page.
|
|
5942
6078
|
|
|
5943
|
-
|
|
6079
|
+
6. On the application details page, obtain the \`Secret\` and fill it in the Flashduty integration configuration page.
|
|
5944
6080
|
|
|
5945
|
-
|
|
5946
|
-
---
|
|
6081
|
+
7. On the application details page, go to **Web Authorization and JS-SDK** page, click **Set Trusted Domain**, and configure **Callback domain for application OAuth 2.0 web authorization** as required.
|
|
5947
6082
|
|
|
5948
|
-
|
|
6083
|
+
> The trusted domain needs to point to Flashduty's backend address \`{api_host}\` (can be achieved through CNAME or proxy forwarding).
|
|
6084
|
+
>
|
|
6085
|
+
> For trusted domain requirements, see the official WeCom documentation [《Internal Development Domain Configuration Guide》](https://open.work.weixin.qq.com/wwopen/common/readDocument/40754).
|
|
5949
6086
|
|
|
5950
|
-
|
|
6087
|
+
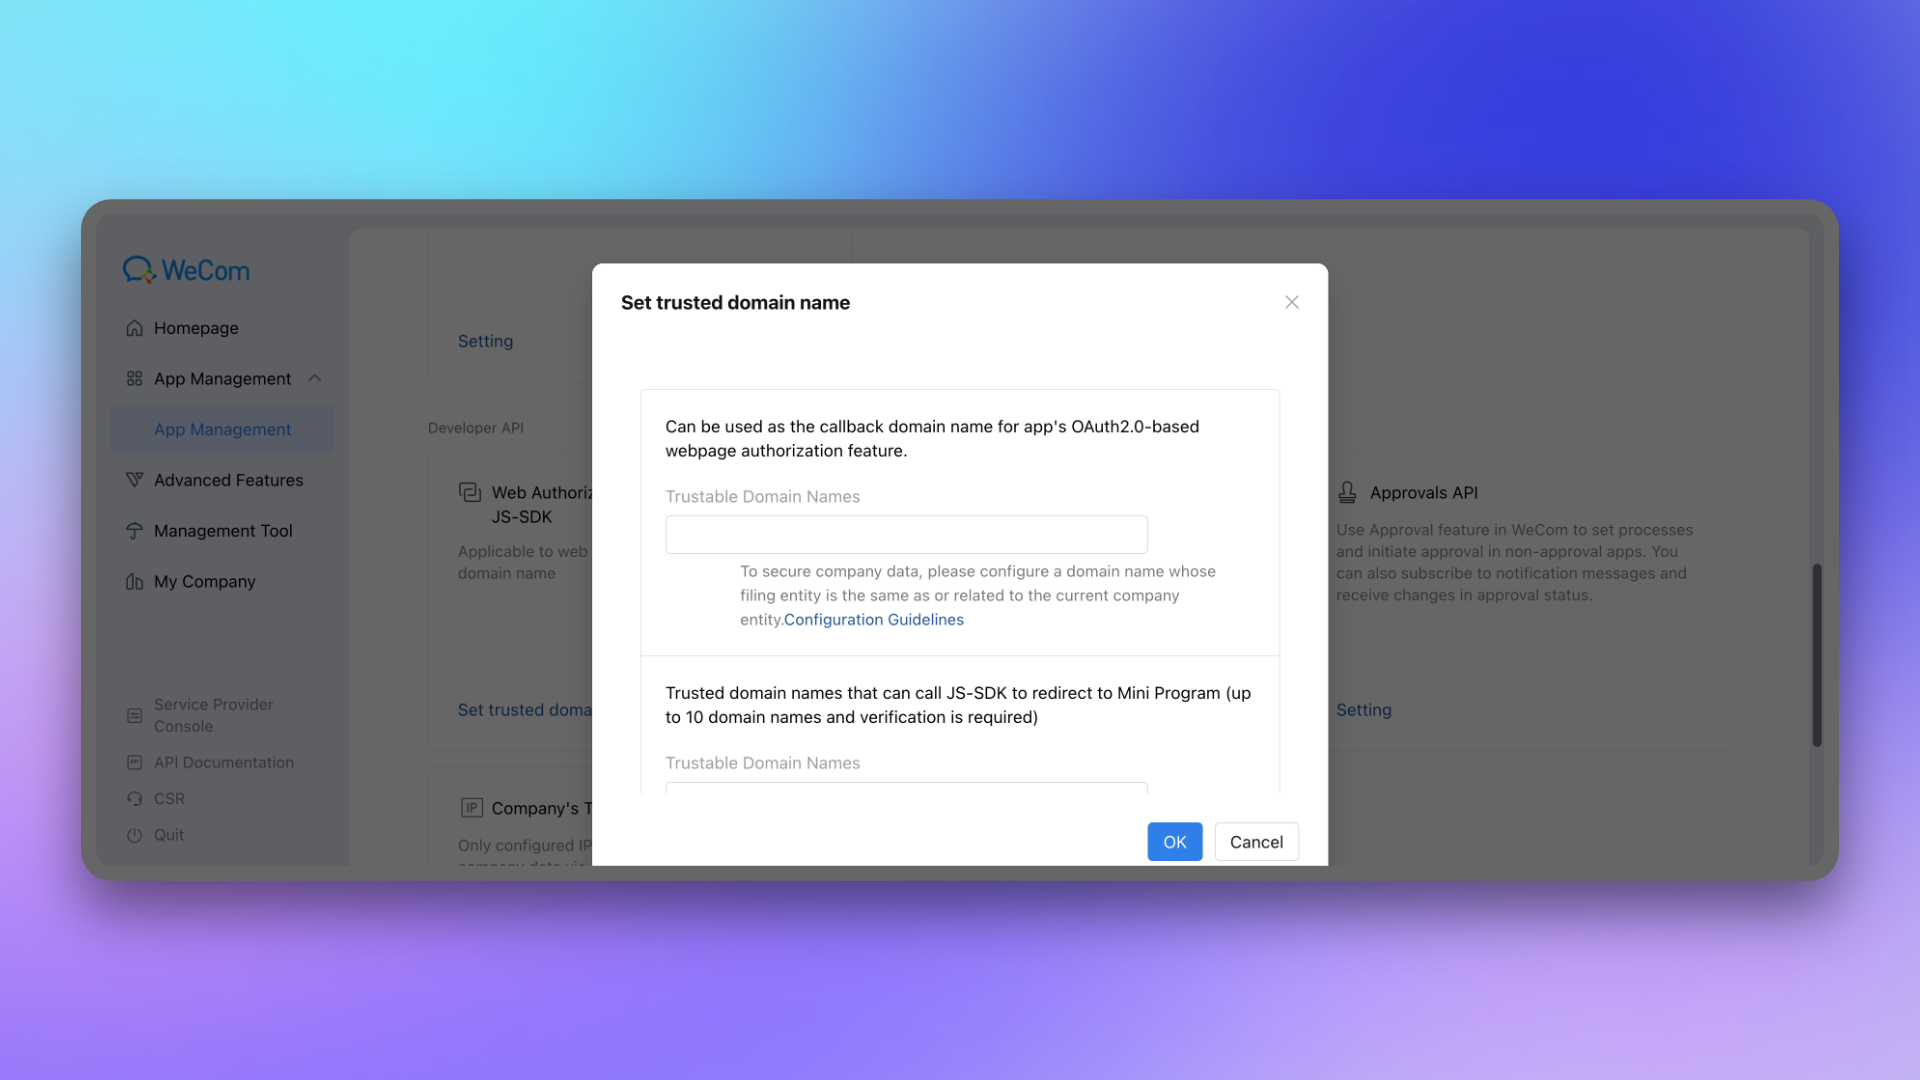
|
|
5951
6088
|
|
|
5952
|
-
|
|
6089
|
+
Return to the Flashduty integration configuration page, fill in this domain, and complete the verification.
|
|
5953
6090
|
|
|
5954
|
-
|
|
6091
|
+
8. On the application details page, go to **Receive Messages** page and **Set API Reception**. Click **Random Generation** for both \`Token\` and \`EncodingAESKey\`, then copy and save the generated values.
|
|
5955
6092
|
|
|
6093
|
+
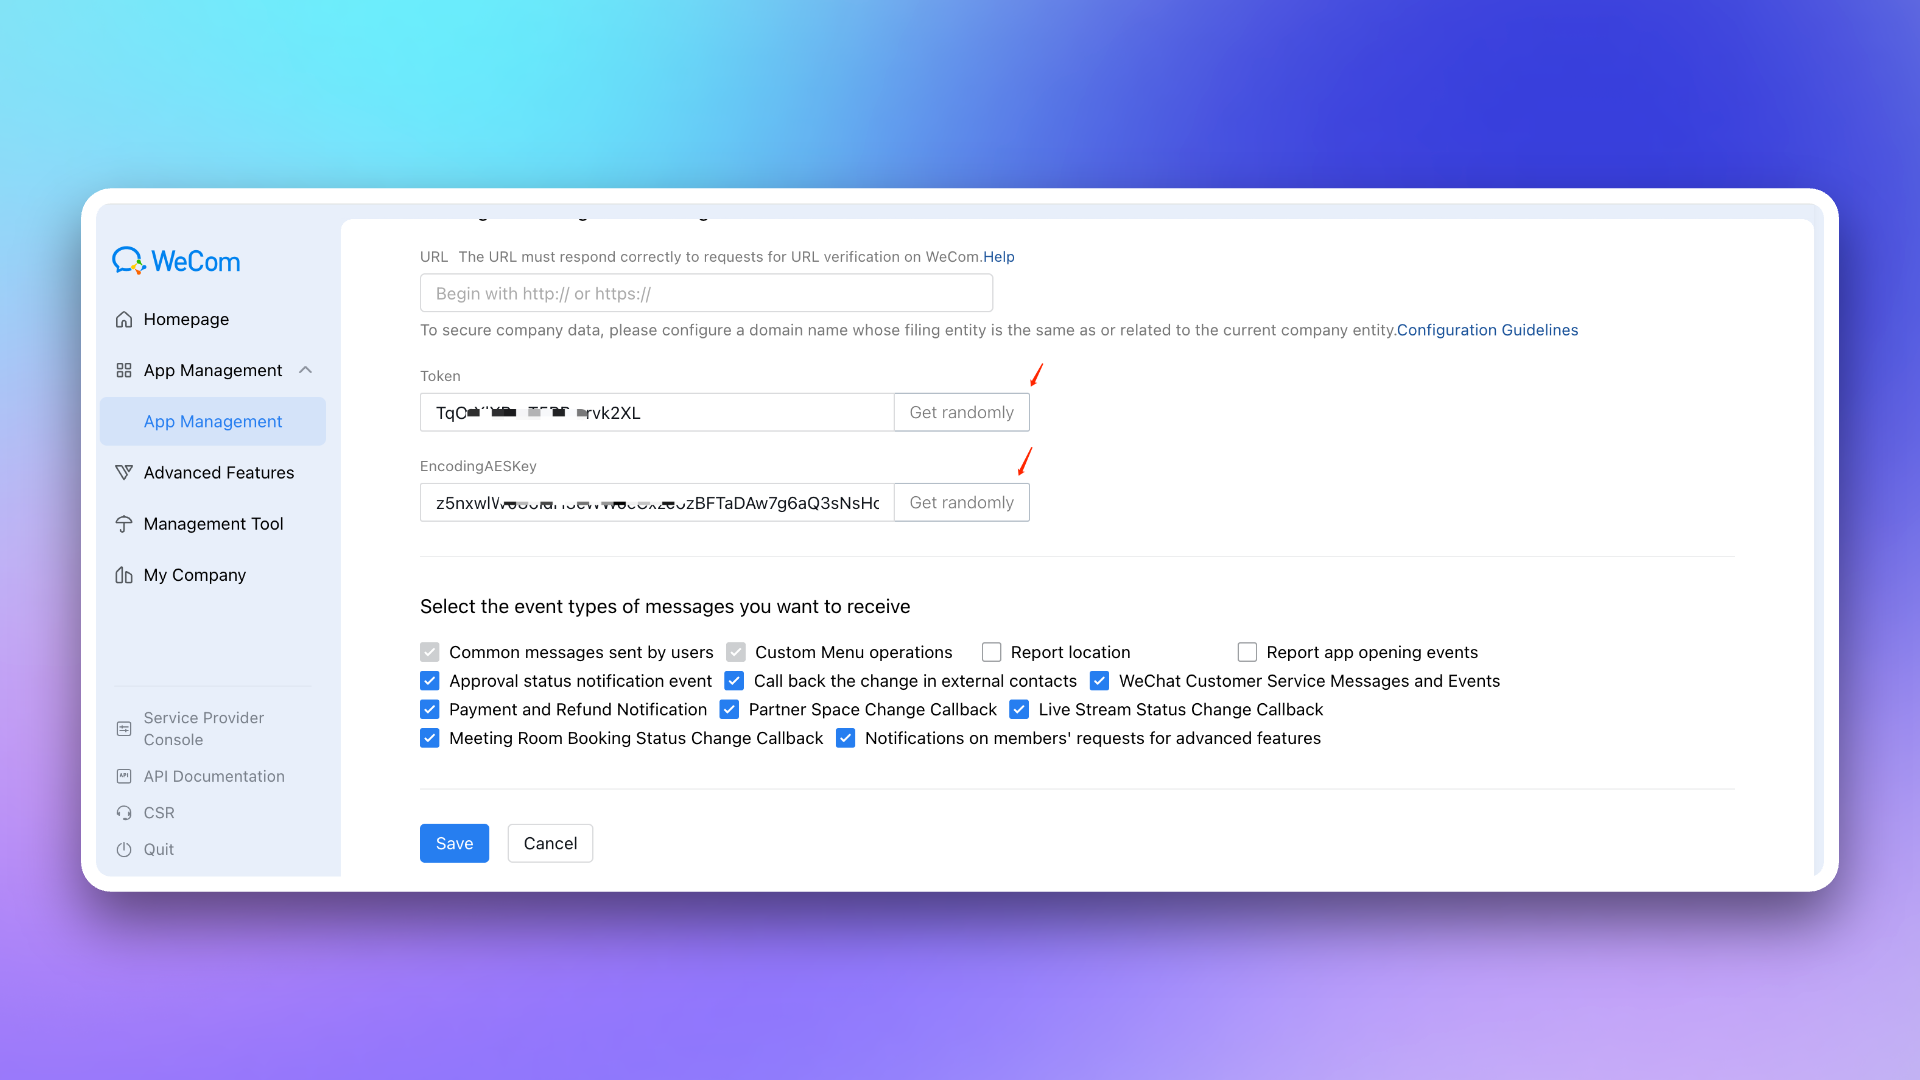
|
|
5956
6094
|
|
|
5957
|
-
|
|
5958
|
-
---
|
|
6095
|
+
Return to the Flashduty integration configuration page, fill in the saved \`Token\` and \`EncodingAESKey\`, and click **Save** to complete the integration.
|
|
5959
6096
|
|
|
5960
|
-
|
|
5961
|
-
- Adding the app to a channel requires Step 1 \`Install App\` to complete without errors
|
|
5962
|
-
- In the Slack channel, run \`/invite @FlashDuty\`. A message saying \`has joined\` or \`has been added by xx to xxx\` indicates successful addition
|
|
6097
|
+
9. Copy the \`Callback Address\` from the Flashduty integration details page, return to the **Receive Messages** page in WeCom. In the **API Reception** settings, fill in the \`Callback Address\` and the \`Token\` and \`EncodingAESKey\` saved in the previous step, then click **Save**.
|
|
5963
6098
|
|
|
5964
|
-
|
|
5965
|
-
- Add the app authorizer to the public channel
|
|
5966
|
-
- Or follow \`Common Issue 1\` to add the app to the channel
|
|
6099
|
+
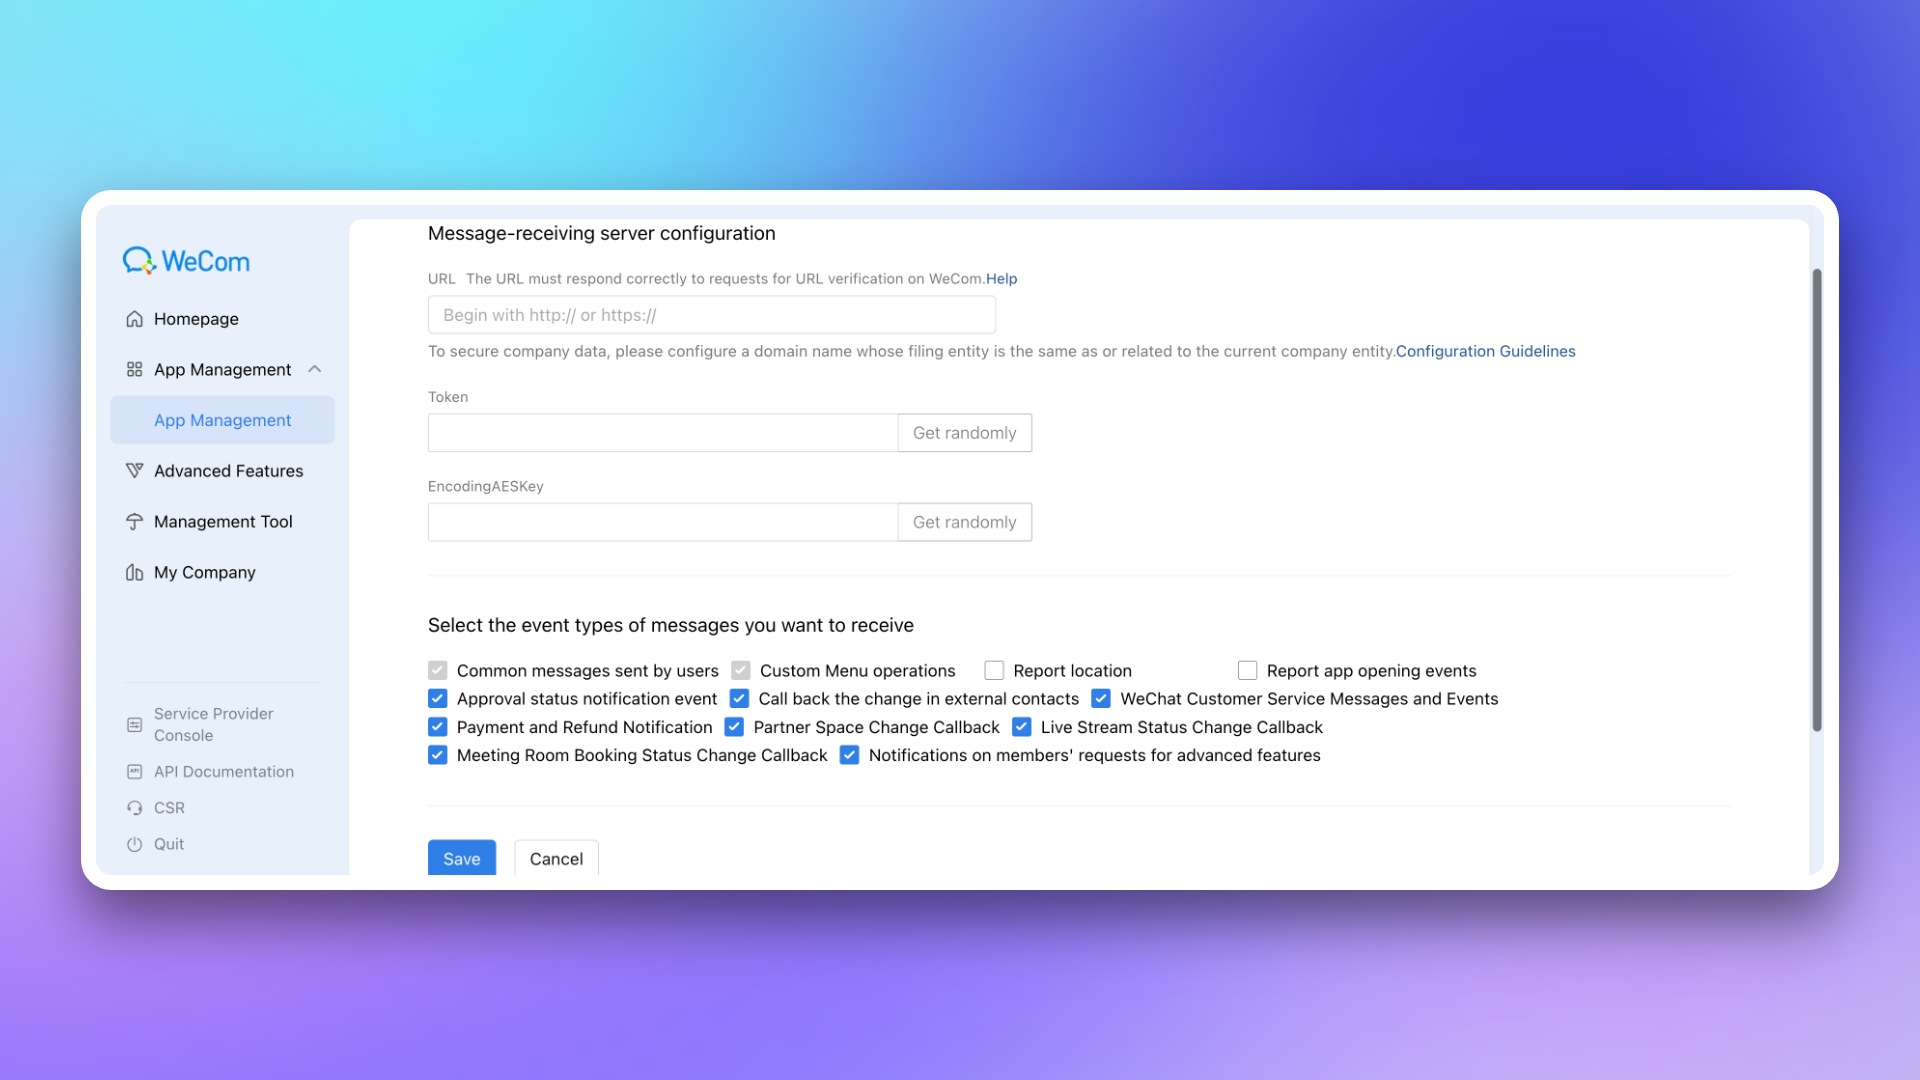
|
|
5967
6100
|
|
|
5968
|
-
|
|
5969
|
-
- Try again, as there might be communication issues between the server and Slack causing authorization problems. Return to the add integration page and retry
|
|
5970
|
-
- If the error persists, contact customer support
|
|
6101
|
+
10. Company's Trusted IP : 47.94.95.118; 123.56.8.183; 47.94.193.81; 1.13.19.96
|
|
5971
6102
|
|
|
5972
|
-
|
|
5973
|
-
- Try again, as there might be communication issues when FlashDuty attempts to obtain the permanent authorization code. Return to the add integration page and retry
|
|
5974
|
-
- If the error persists, contact customer support
|
|
6103
|
+
|
|
5975
6104
|
|
|
5976
|
-
|
|
5977
|
-
- Try again, as there might be issues with Slack service
|
|
5978
|
-
- If the error persists, contact customer support
|
|
6105
|
+
## 3. Configure war room
|
|
5979
6106
|
|
|
5980
|
-
|
|
5981
|
-
- Try again, as there might be communication timeout issues between the server and Slack
|
|
5982
|
-
- If the error persists, contact customer support
|
|
6107
|
+
---
|
|
5983
6108
|
|
|
5984
|
-
|
|
5985
|
-
- Try again, as there might be server errors, such as the integration being disabled
|
|
5986
|
-
- If the error persists, contact customer support
|
|
6109
|
+
> The war room feature is only supported when **custom enterprise application** mode is enabled.
|
|
5987
6110
|
|
|
5988
|
-
|
|
5989
|
-
|
|
5990
|
-
|
|
5991
|
-
|
|
5992
|
-
|
|
6111
|
+
After completing the previous steps, in the **Enhanced Features** module of the Flashduty integration configuration page, check **Enable War Room** to enable this feature without additional configuration.
|
|
6112
|
+
|
|
6113
|
+
## 4. FAQ
|
|
6114
|
+
|
|
6115
|
+
---
|
|
6116
|
+
|
|
6117
|
+
1. **After clicking the integration save button, the system reports \`authorize app first\`?**
|
|
6118
|
+
- Please check if you have completed the application installation steps. For example, can you see the Flashduty application in the WeCom workplace?
|
|
6119
|
+
- Please check if you have correctly configured the \`Corp ID\`.
|
|
6120
|
+
2. **How to complete account linking or message sending prompts \`app not linked\`?**
|
|
6121
|
+
- Log in to the WeCom client (both desktop and mobile are acceptable), go to **Workplace**, find and open the Flashduty application.
|
|
6122
|
+
- The first time you enter the application, you need to log in. Select your member account and log in successfully through password or single sign-on to complete the linking of your Flashduty account and WeCom account.
|
|
6123
|
+
- Subsequent entries to the application will automatically log in without a password.
|
|
6124
|
+
3. **How to send incident notifications?**
|
|
6125
|
+
- Before sending notifications, you must complete account linking as described in the previous question.
|
|
6126
|
+
- Enter the specified channel, navigate to \`Escalation Rules\` → **Personal Channels**, and select \`WeCom\` as the notification method.
|
|
6127
|
+
- Flashduty supports customizing WeCom notification content. You can go to the **Template Management** page to set custom templates. **The custom area can display up to 8 lines**, and excess content will be truncated by WeCom.
|
|
6128
|
+
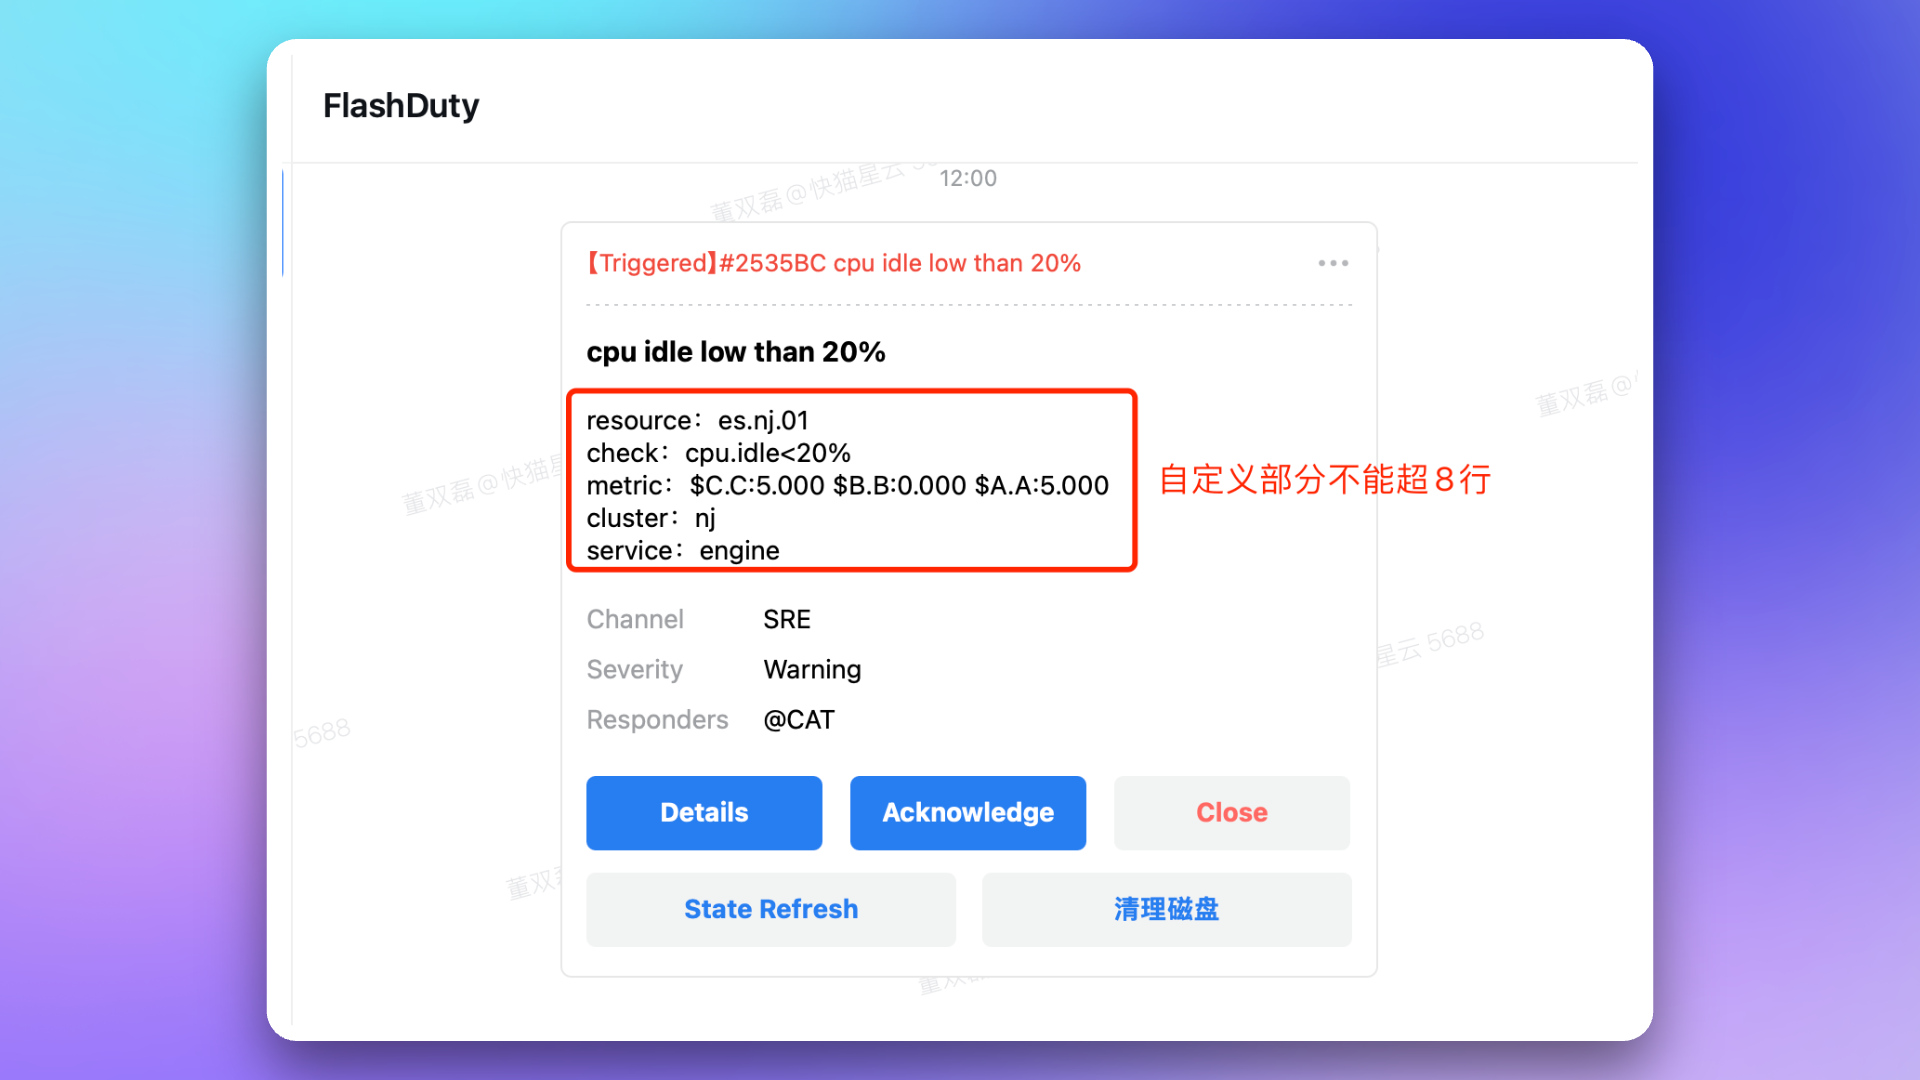
|
|
6129
|
+
4. **How to handle alerts within WeCom?**
|
|
6130
|
+
- Click on the card message to directly enter the alert details page.
|
|
6131
|
+
- Click **Start Processing** to directly set the alert to \`Processing\` status.
|
|
6132
|
+
- Click **Close Directly** to directly set the alert to \`Closed\` status.
|
|
6133
|
+
- Click **Snooze for 2 hours** to directly snooze the alert for 2 hours. If you want to snooze for longer, click the \`...\` in the upper right corner of the card to see more snooze options.
|
|
6134
|
+
5. **Why does the card message provide a \`Status Refresh\` button?**
|
|
6135
|
+
- According to WeCom's restrictions, after one card interaction, it can only be updated once within 72 hours. Each button operation is considered an interaction.
|
|
6136
|
+
- When the alert status changes, Flashduty will request to update the card content.
|
|
6137
|
+
- When the alert status changes frequently, the card may not be updated in real-time due to exceeding the update limit. At this time, you can click the **Refresh** button to manually get a chance to update the card status.
|
|
6138
|
+
6. **On Mac desktop, how to set clicking card messages to open with the \`system default browser\`?**
|
|
6139
|
+
- Mac desktop uses WeCom's built-in browser to open links by default.
|
|
6140
|
+
- You can try using the shortcut \`ctrl\` + \`command\` + \`shift\` + \`d\` to enable debug mode, then select **Debug** → **Browser, WebView Related** → **Open Web Page with System Browser** to change how links are opened. Use the same shortcut to close debug mode, and the settings will be retained.
|
|
6141
|
+
7. **Incident notification failed with prompt \`WeCom license not activated\`?**
|
|
6142
|
+
- Please contact Flashduty customer service or your dedicated technical support to purchase and activate the license for you.
|
|
6143
|
+
8. **Why is the war room feature not working as expected?**
|
|
6144
|
+
- Please refer to the **FAQ** section of the Flashduty [War Room Introduction](https://docs.flashcat.cloud/en/flashduty/war-room?nav=01JCQ7A4N4WRWNXW8EWEHXCMF5).`,ae=`---
|
|
6145
|
+
title: "Slack Integration"
|
|
6146
|
+
description: "By integrating the Slack third-party application, you can receive and respond to alerts within Slack."
|
|
5993
6147
|
date: "2025-05-19T10:00:00+08:00"
|
|
5994
|
-
url: "https://docs.flashcat.cloud/en/flashduty/
|
|
6148
|
+
url: "https://docs.flashcat.cloud/en/flashduty/slack-integration-guide?nav=01JCQ7A4N4WRWNXW8EWEHXCMF5"
|
|
5995
6149
|
---
|
|
5996
6150
|
|
|
5997
|
-
|
|
6151
|
+
By integrating the Slack third-party application, you can receive and respond to alerts within Slack.
|
|
5998
6152
|
|
|
5999
|
-
|
|
6000
|
-
---
|
|
6153
|
+
<span id="install-app"></span>
|
|
6001
6154
|
|
|
6002
|
-
|
|
6155
|
+
## 1. Install application
|
|
6003
6156
|
|
|
6004
|
-
|
|
6005
|
-
These steps must be completed by a Microsoft Teams administrator
|
|
6006
|
-
:::
|
|
6157
|
+
---
|
|
6007
6158
|
|
|
6008
|
-
|
|
6009
|
-
|
|
6159
|
+
1. Visit Flashduty Integration Center → IM → **Slack**, and click **Add**.
|
|
6160
|
+
2. On the redirected Slack page, select **Workspace** in the upper right corner, then click **Allow**.
|
|
6161
|
+
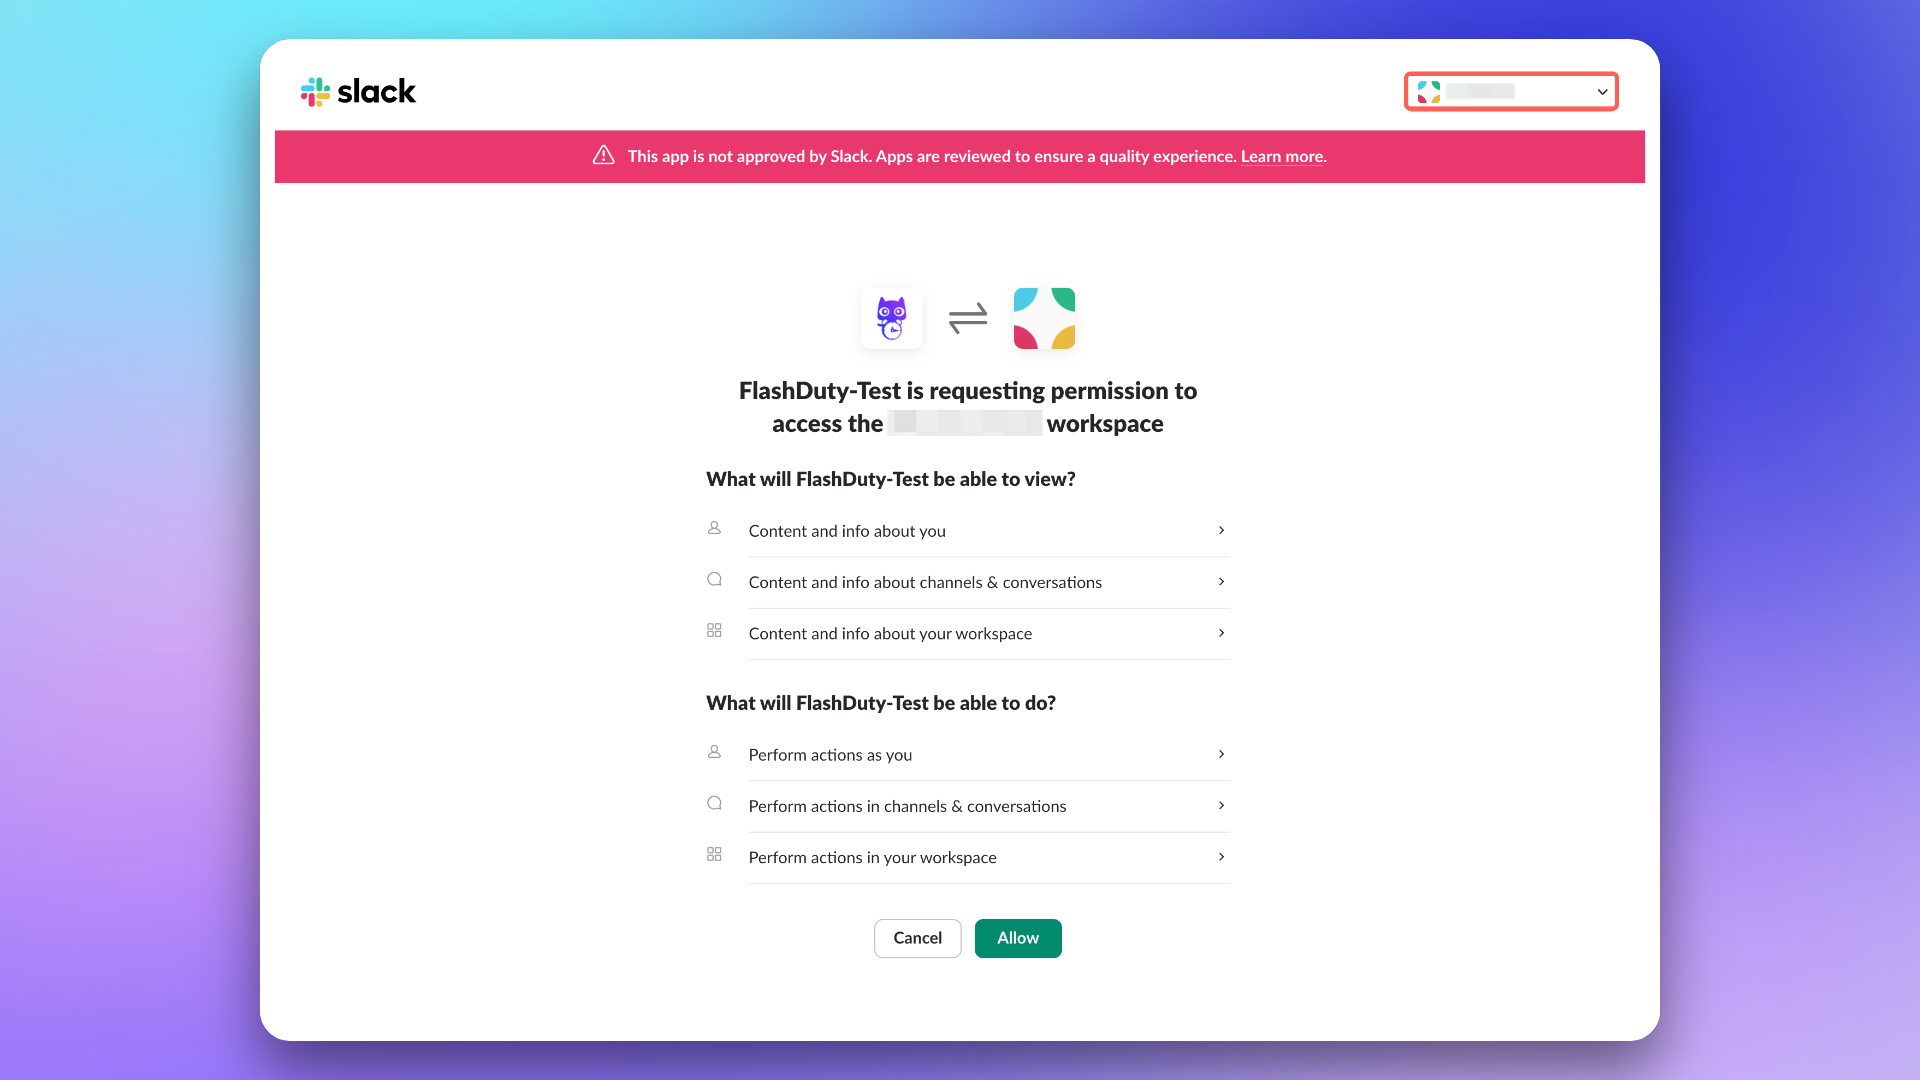
|
|
6162
|
+
3. Enter the data source name and click **Save**.
|
|
6010
6163
|
|
|
6011
|
-
|
|
6012
|
-
Go to **Microsoft Teams, navigate to [+Apps] - [Manage your apps] - [Upload an app] - [Upload an app to your org's app catalog]** and upload the FlashDutyBot.zip package
|
|
6164
|
+
## 2. Configure war room
|
|
6013
6165
|
|
|
6014
|
-
|
|
6166
|
+
After completing the previous steps, in the **Enhanced Features** module of the Flashduty integration configuration page, check **Enable War Room** to enable this feature without additional configuration.
|
|
6015
6167
|
|
|
6016
|
-
|
|
6017
|
-
Go to [Microsoft Teams Admin Center](https://admin.teams.microsoft.com/policies/manage-apps), find the FlashDuty application, and adjust the application visibility to everyone (or your custom scope)
|
|
6168
|
+
## 3. FAQ
|
|
6018
6169
|
|
|
6019
|
-
|
|
6020
|
-
If the application status shows [Blocked], please wait a moment and refresh the page or modify it manually
|
|
6021
|
-
:::
|
|
6022
|
-
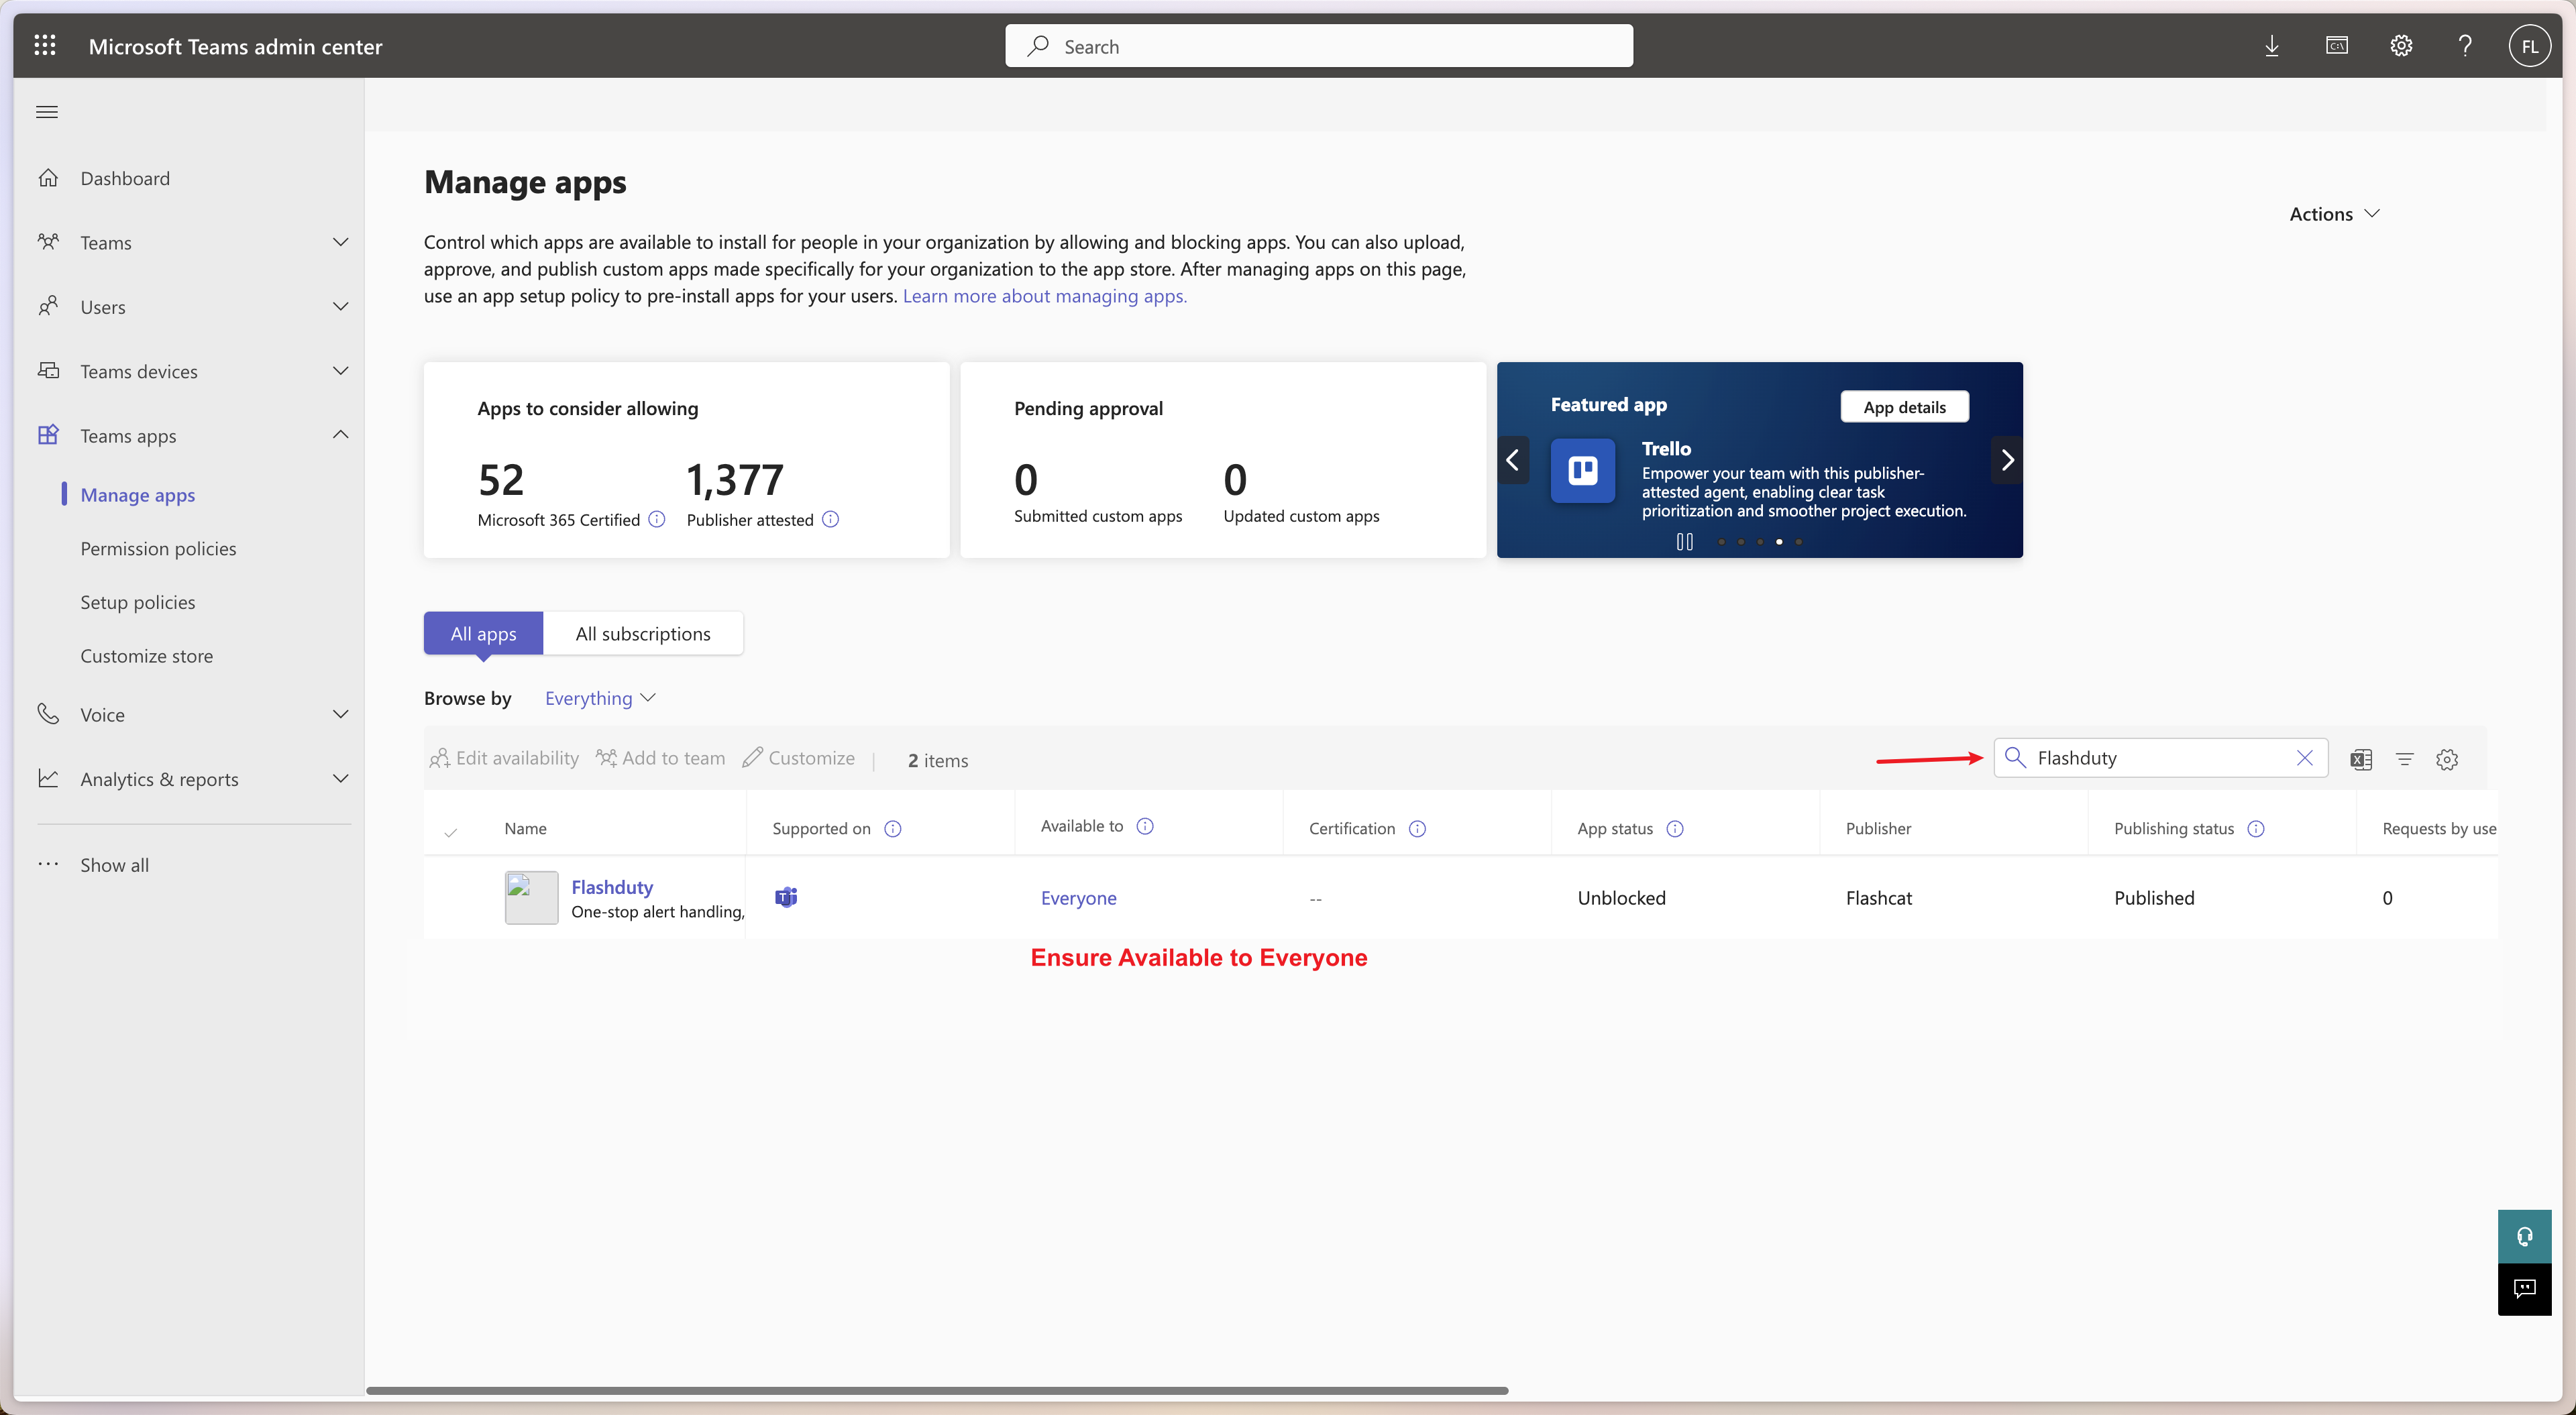
|
|
6170
|
+
---
|
|
6023
6171
|
|
|
6024
|
-
|
|
6025
|
-
|
|
6172
|
+
1. **The private channel I want is not in the group chat list of escalation rules?**
|
|
6173
|
+
- Ensure the [**Install Application**](#install-app) step has been completed successfully without errors.
|
|
6174
|
+
- Enter the relevant Slack channel and execute the \`/invite @Flashduty\` command. When you see the prompt \`has joined\` or \`has been added by xxx to xxx\`, it means the addition was successful.
|
|
6175
|
+
2. **The public channel I want is not in the group chat list of escalation rules?**
|
|
6176
|
+
- Add the application authorizer to the public channel.
|
|
6177
|
+
- Refer to the method in **Question 1** to add the application to the channel.
|
|
6178
|
+
3. **Error after clicking the \`Allow\` button in installation step 2?**
|
|
6179
|
+
- Please retry. This may be due to abnormal communication between the server and Slack causing authorization failure. Please return to the add data source page and try again.
|
|
6180
|
+
- If the error persists after retrying, please contact customer service.
|
|
6181
|
+
4. **Error after clicking the \`Save\` button in installation step 3?**
|
|
6182
|
+
- Please retry. This may be due to abnormal communication between the Flashduty server and Slack when obtaining the permanent authorization code. Please return to the add data source page and try again.
|
|
6183
|
+
- If the error persists after retrying, please contact customer service.
|
|
6184
|
+
5. **Slack App prompts \`not_authed\` error?**
|
|
6185
|
+
- Please retry, this may be a temporary issue with Slack service.
|
|
6186
|
+
- If the error persists after retrying, please contact customer service.
|
|
6187
|
+
6. **Slack App prompts \`Operation timed out\` error?**
|
|
6188
|
+
- Please retry. This may be due to communication timeout between the server and Slack.
|
|
6189
|
+
- If the error persists after retrying, please contact customer service.
|
|
6190
|
+
7. **Slack App prompts \`This app responded with Status Code 500\` error?**
|
|
6191
|
+
- Please retry. This may be an error on the Flashduty server side (for example, the data source is closed).
|
|
6192
|
+
- If the error persists after retrying, please contact customer service.
|
|
6193
|
+
8. **Slack App prompts other unknown errors?**
|
|
6194
|
+
- Please retry.
|
|
6195
|
+
- If the error persists after retrying, please contact customer service to record and resolve new issues.
|
|
6196
|
+
9. **Why is the war room feature not working as expected?**
|
|
6197
|
+
- For previously authorized Slack IM integrations, you need to manually reauthorize Slack in the Flashduty integration configuration page to grant the application the additional permissions required for the war room feature.
|
|
6198
|
+
- Please refer to the **FAQ** section of the Flashduty [War Room Introduction](https://docs.flashcat.cloud/en/flashduty/war-room?nav=01JCQ7A4N4WRWNXW8EWEHXCMF5).`,ie=`---
|
|
6199
|
+
title: "Microsoft Teams Integration"
|
|
6200
|
+
description: "By integrating the Microsoft Teams third-party application, you can receive and respond to alerts within Microsoft Teams."
|
|
6201
|
+
date: "2025-05-19T10:00:00+08:00"
|
|
6202
|
+
url: "https://docs.flashcat.cloud/en/flashduty/microsoft-teams-integration-guide?nav=01JCQ7A4N4WRWNXW8EWEHXCMF5"
|
|
6203
|
+
---
|
|
6204
|
+
By integrating the Microsoft Teams third-party application, you can receive and respond to alerts within Microsoft Teams.
|
|
6205
|
+
|
|
6206
|
+
## 1. Install and update application
|
|
6207
|
+
---
|
|
6026
6208
|
|
|
6027
|
-
|
|
6209
|
+
The Microsoft Teams integration is currently in Beta. You need to complete the following operations before linking.
|
|
6028
6210
|
|
|
6029
|
-
### 3. Update Application
|
|
6030
6211
|
::: caution
|
|
6031
|
-
|
|
6212
|
+
This step needs to be completed by a Microsoft Teams administrator.
|
|
6032
6213
|
:::
|
|
6033
6214
|
|
|
6034
|
-
|
|
6035
|
-
|
|
6036
|
-
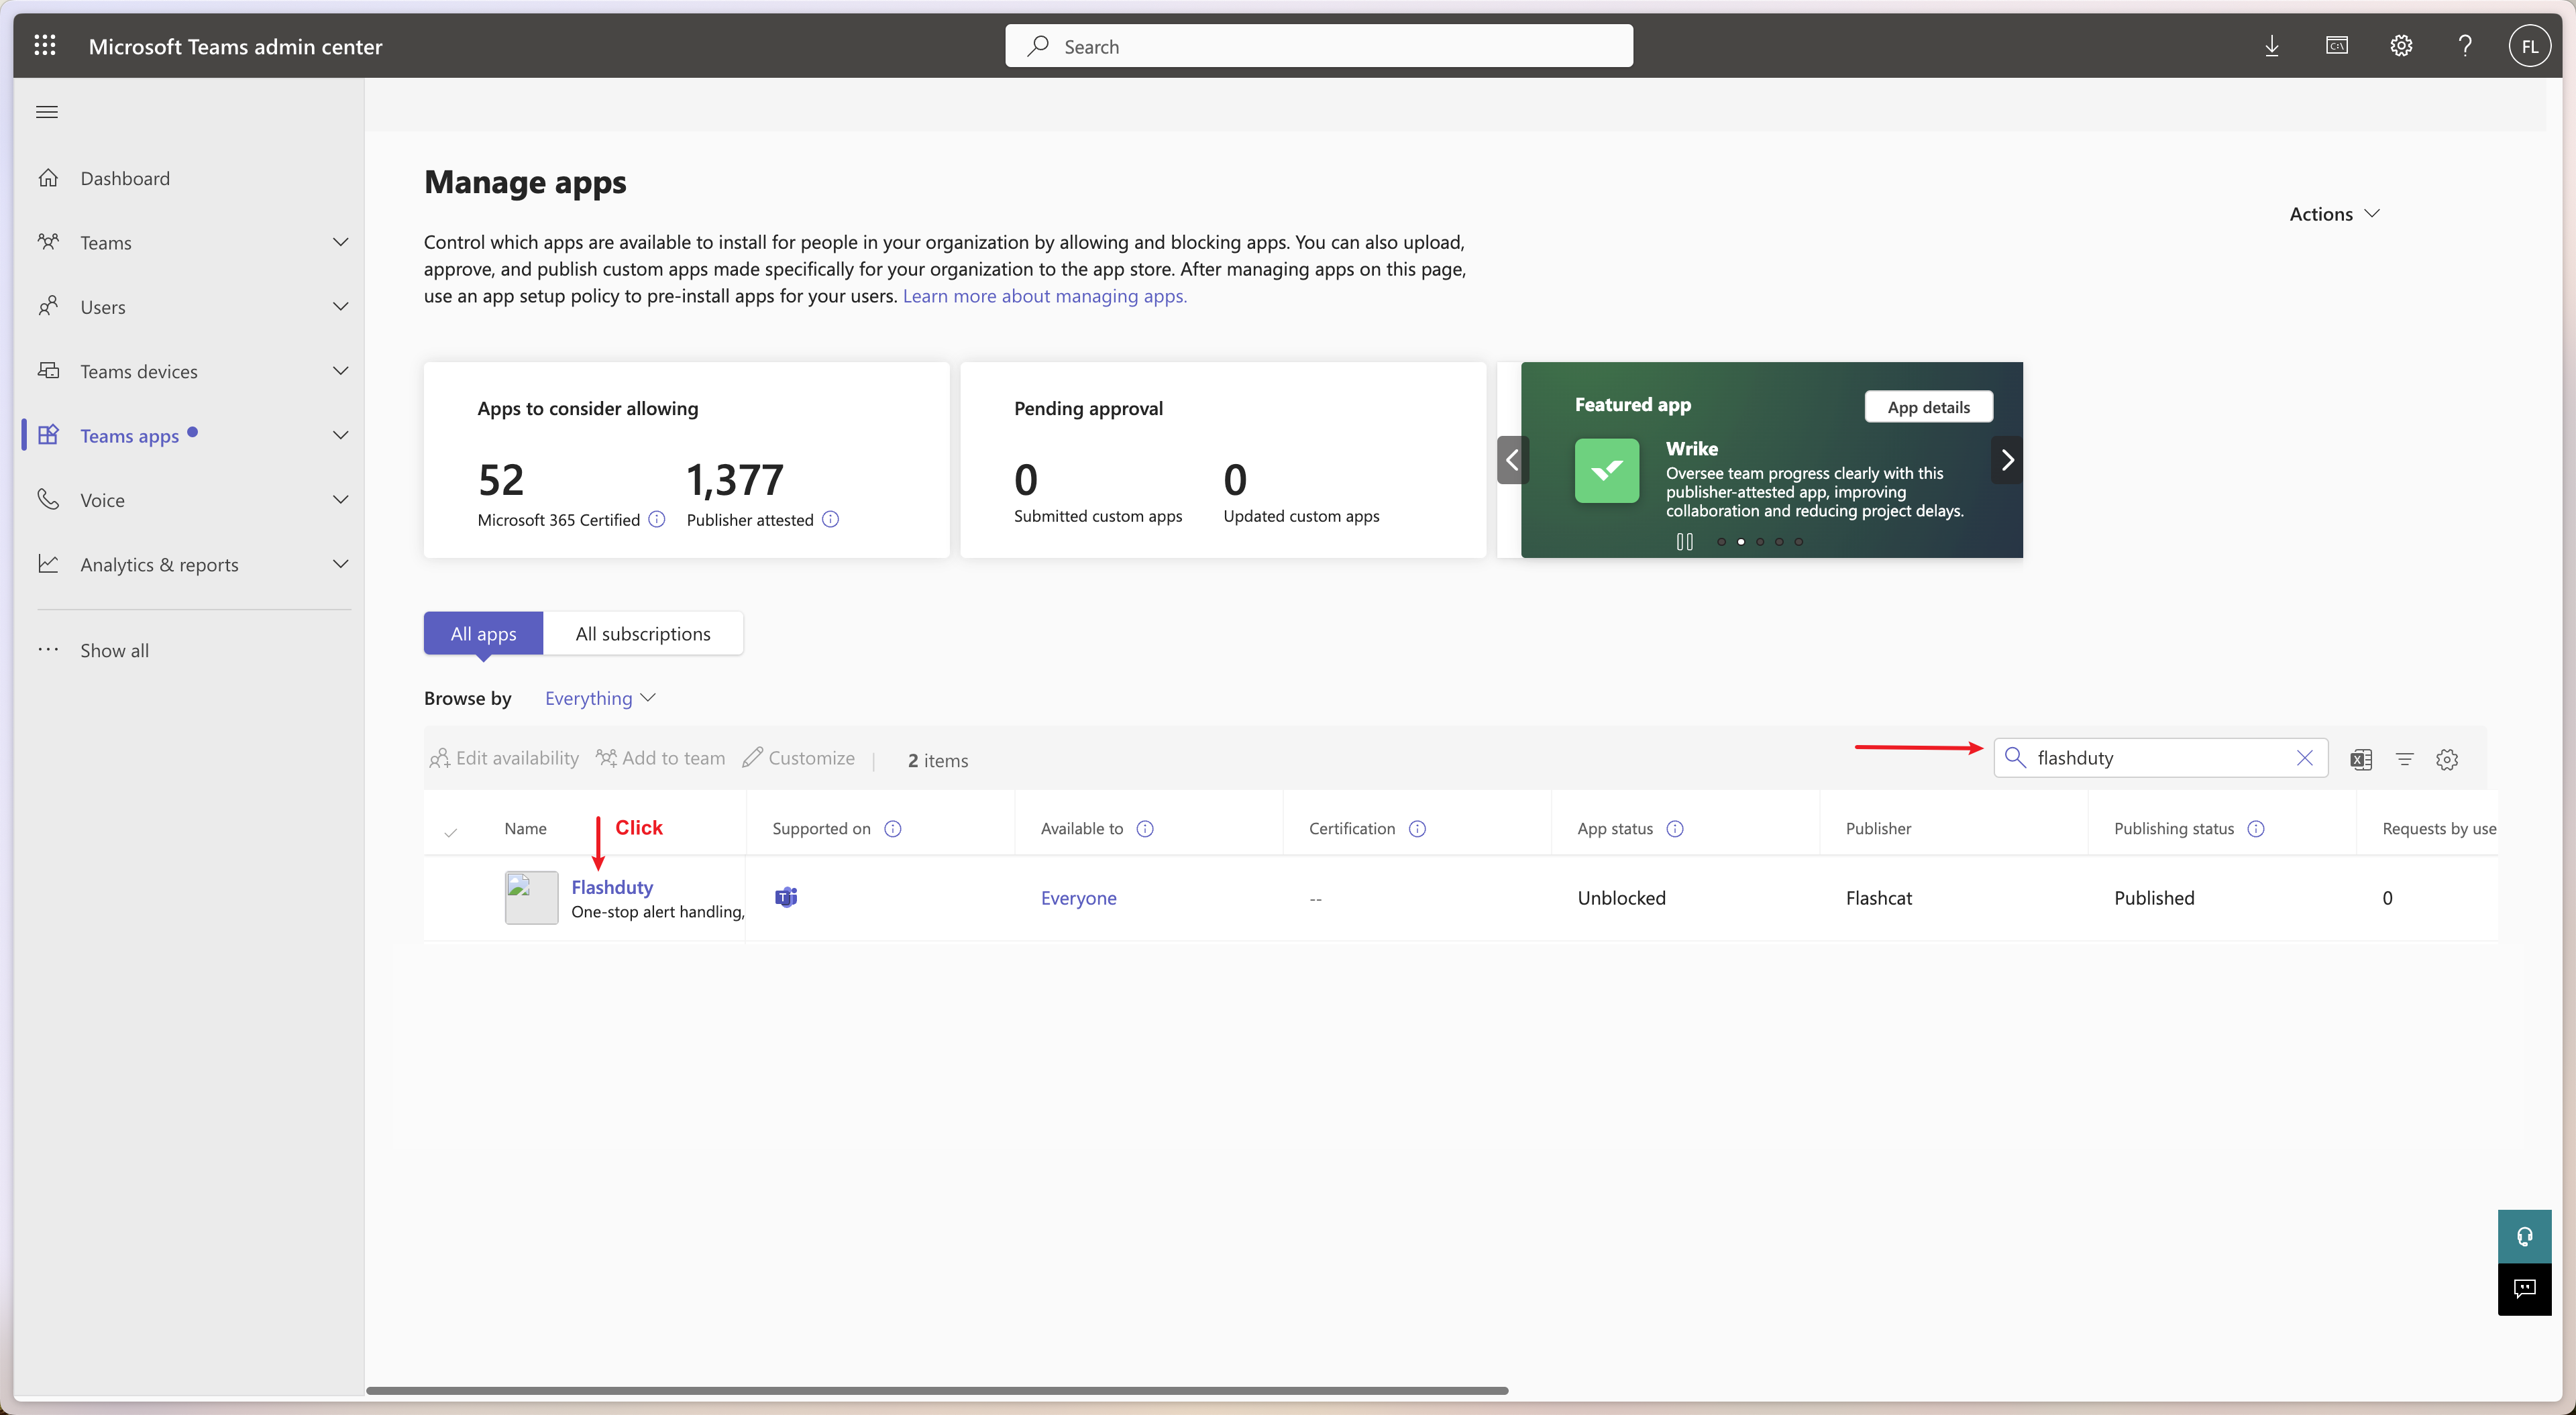
|
|
6215
|
+
### 1. Download application
|
|
6216
|
+
Download [FlashDutyBot-v1.0.3.zip](https://flashduty-docs.oss-cn-beijing.aliyuncs.com/docs/FlashdutyBot-v1.0.3.zip) to your local device.
|
|
6037
6217
|
|
|
6038
|
-
|
|
6218
|
+
### 2. Install application
|
|
6219
|
+
In Microsoft Teams, navigate to +Apps → Manage your apps → Upload an app → **Upload an app to your org's app catalog**, then upload the application package \`FlashDutyBot.zip\`.
|
|
6039
6220
|
|
|
6040
|
-
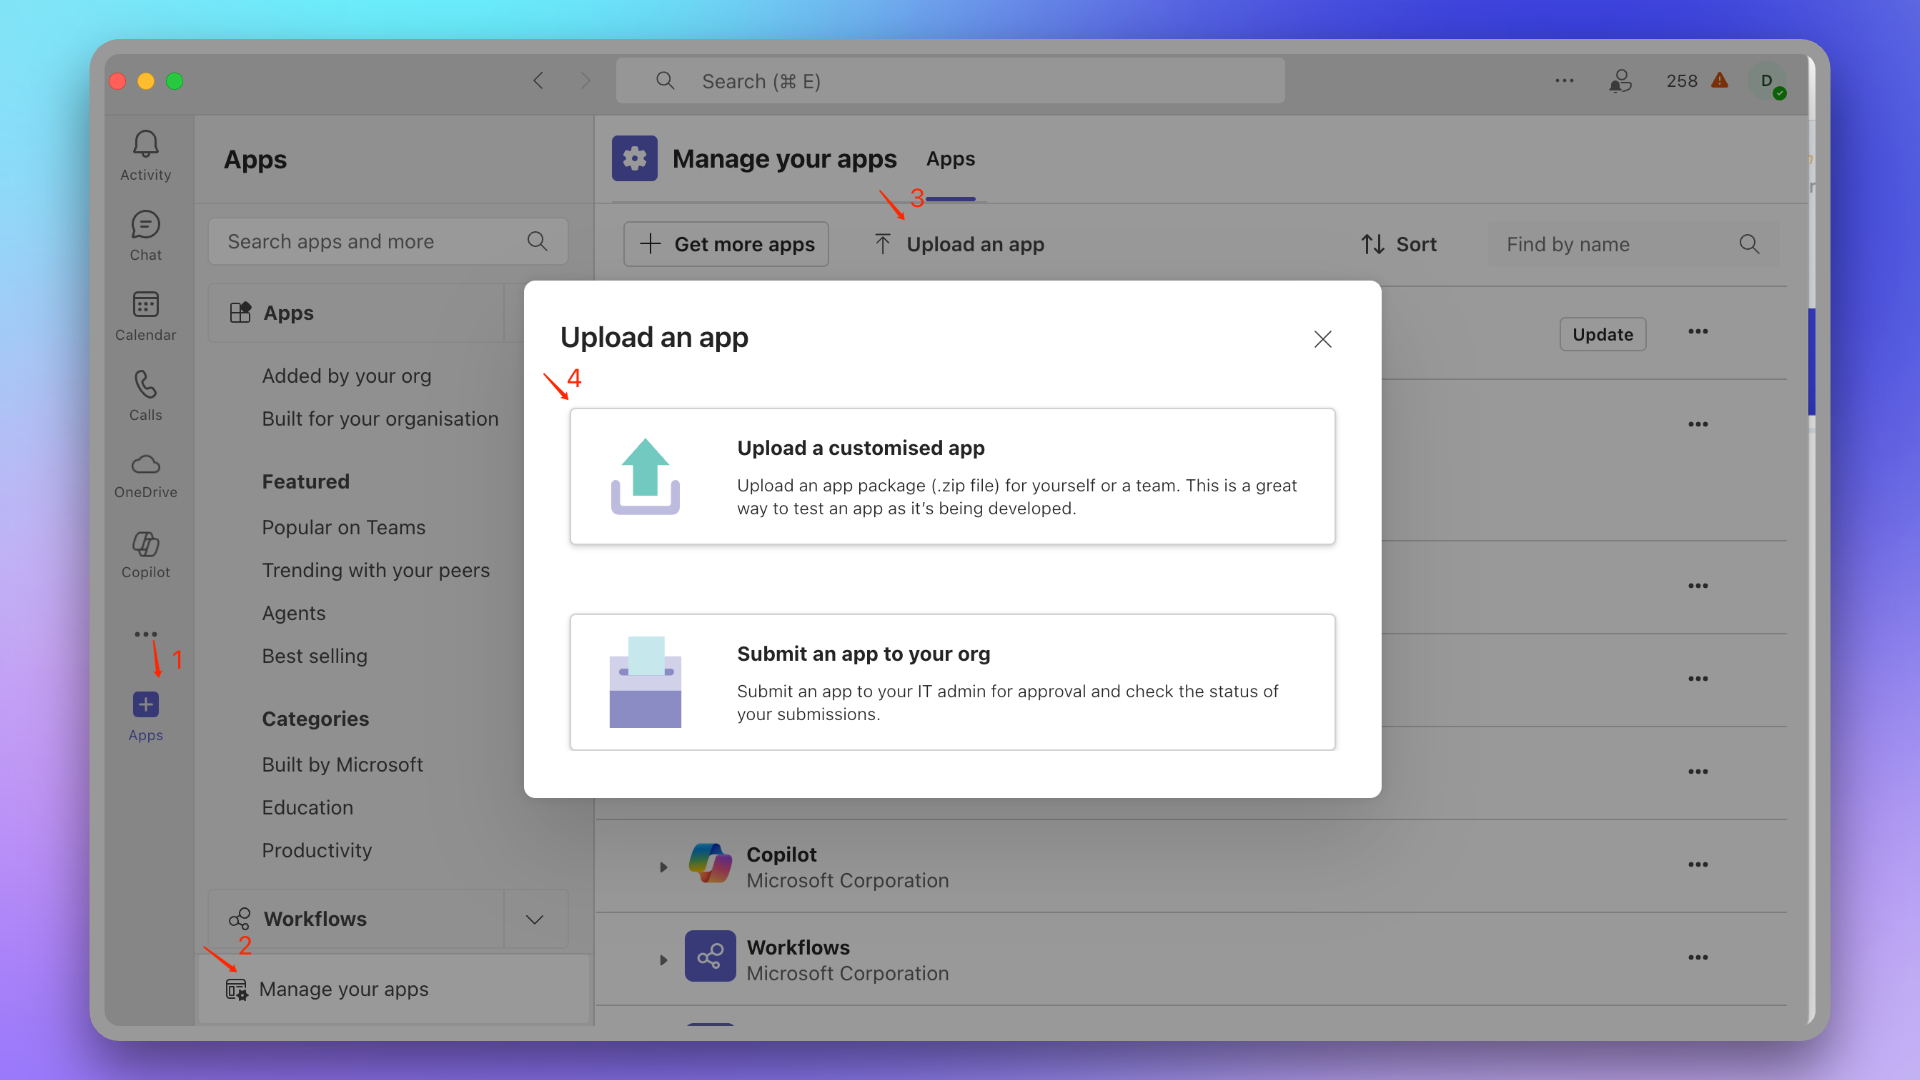
|
|
6041
6222
|
|
|
6042
|
-
|
|
6223
|
+
#### Configure application visibility
|
|
6224
|
+
Go to [Microsoft Teams Admin Center](https://admin.teams.microsoft.com/policies/manage-apps), find the Flashduty application, and adjust the application visibility to everyone or your specified scope.
|
|
6043
6225
|
|
|
6044
|
-
|
|
6045
|
-
|
|
6046
|
-
|
|
6226
|
+
::: tip
|
|
6227
|
+
If the application status is "Blocked", please wait a moment and refresh the page or manually modify it.
|
|
6228
|
+
:::
|
|
6229
|
+
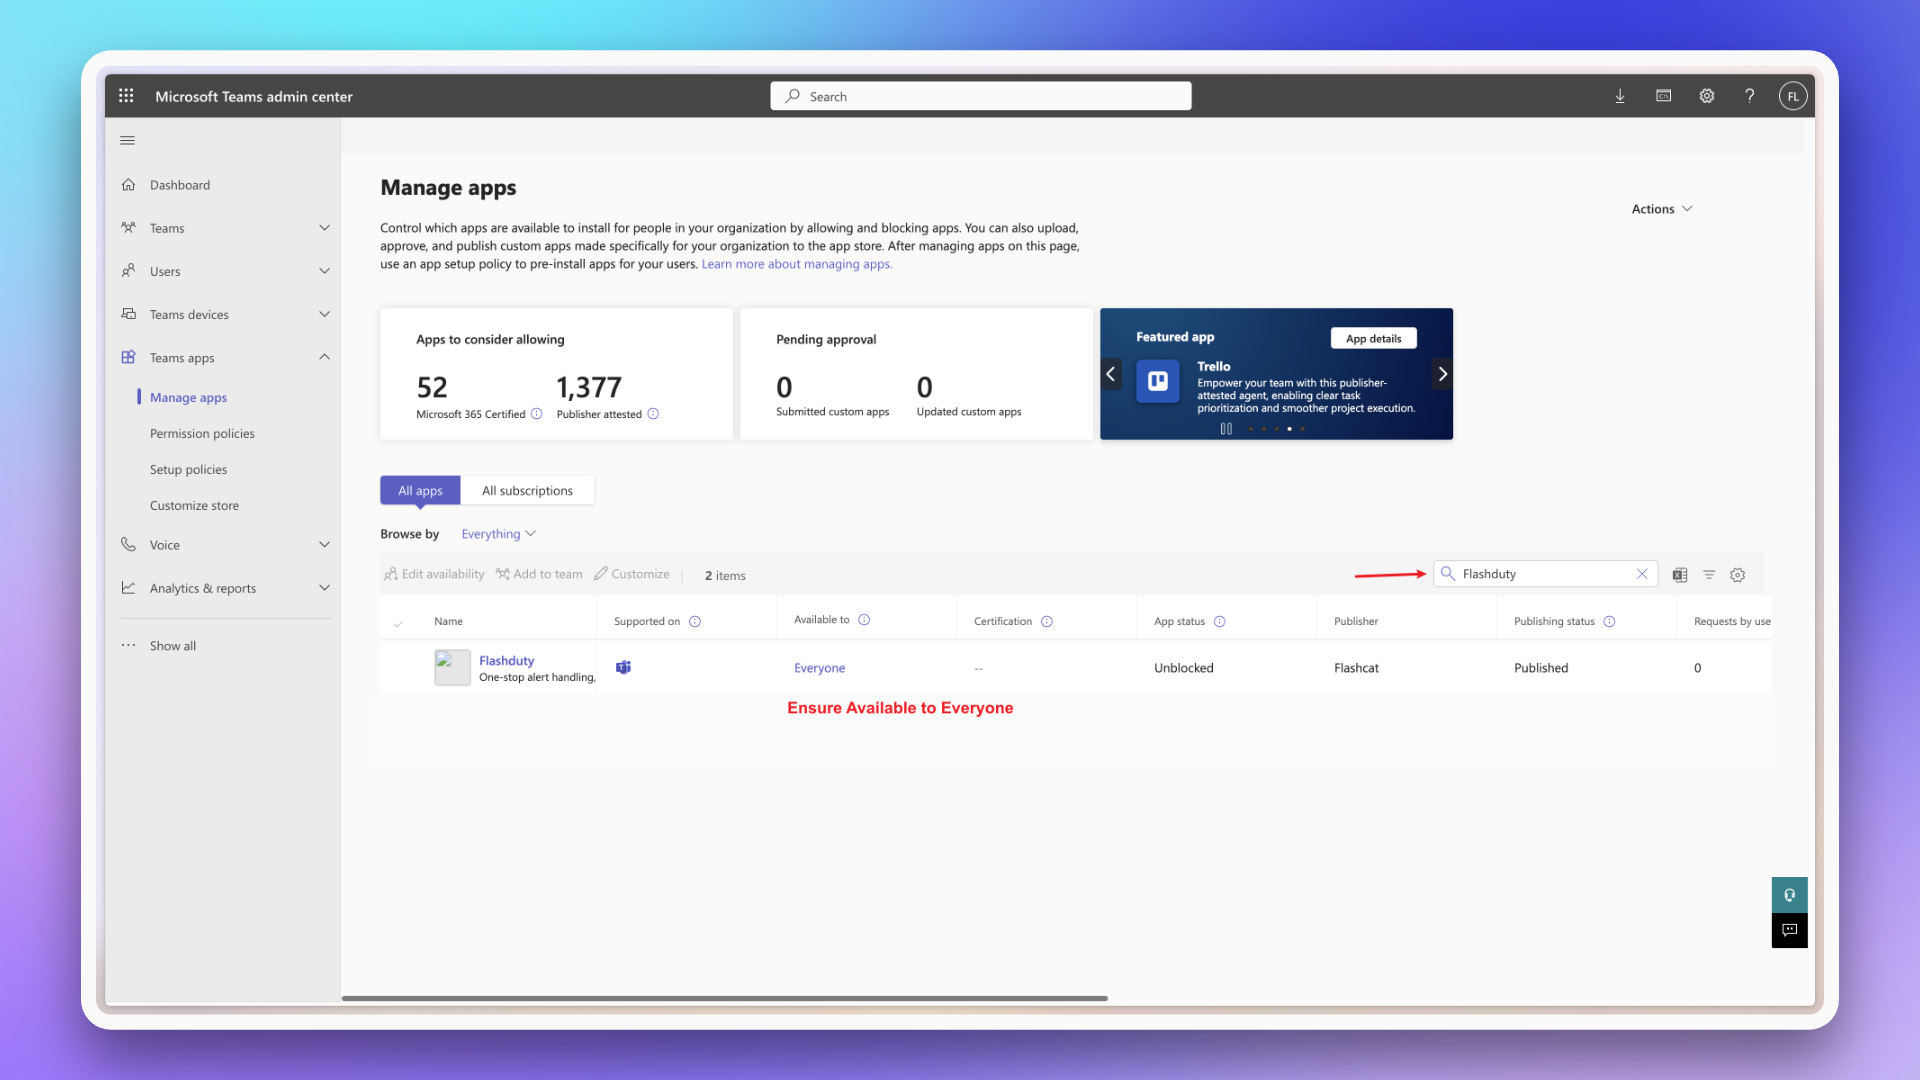
|
|
6047
6230
|
|
|
6048
|
-
### 1. Add FlashDuty Application to Target Team
|
|
6049
6231
|
|
|
6050
|
-
####
|
|
6051
|
-
|
|
6232
|
+
#### Check if successfully added
|
|
6233
|
+
After waiting a few minutes, organization members can find this application in +Apps → **Built for your org**.
|
|
6052
6234
|
|
|
6053
|
-
|
|
6054
6236
|
|
|
6055
|
-
|
|
6237
|
+
### 3. Update application
|
|
6056
6238
|
::: caution
|
|
6057
|
-
|
|
6239
|
+
If your installed application version is lower than 1.0.3, please follow this process to update.
|
|
6058
6240
|
:::
|
|
6059
6241
|
|
|
6060
|
-
|
|
6242
|
+
1. Go to [Microsoft Teams Admin Center](https://admin.teams.microsoft.com/policies/manage-apps), find and enter the Flashduty application details page.
|
|
6243
|
+
|
|
6244
|
+
|
|
6245
|
+
2. Upload the new version \`FlashdutyBot.zip\`.
|
|
6246
|
+
|
|
6061
6247
|
|
|
6062
|
-
|
|
6063
|
-
|
|
6248
|
+
3. Wait for the application version to update in the client (may take tens of minutes).
|
|
6249
|
+
|
|
6064
6250
|
|
|
6065
|
-
|
|
6251
|
+
## 2. Link Team
|
|
6252
|
+
---
|
|
6253
|
+
### 1. Add Flashduty application
|
|
6254
|
+
1. Find the Flashduty application in the app marketplace.
|
|
6255
|
+
> If there is no application, please contact your Microsoft Teams organization administrator.
|
|
6066
6256
|
|
|
6067
|
-
|
|
6257
|
+
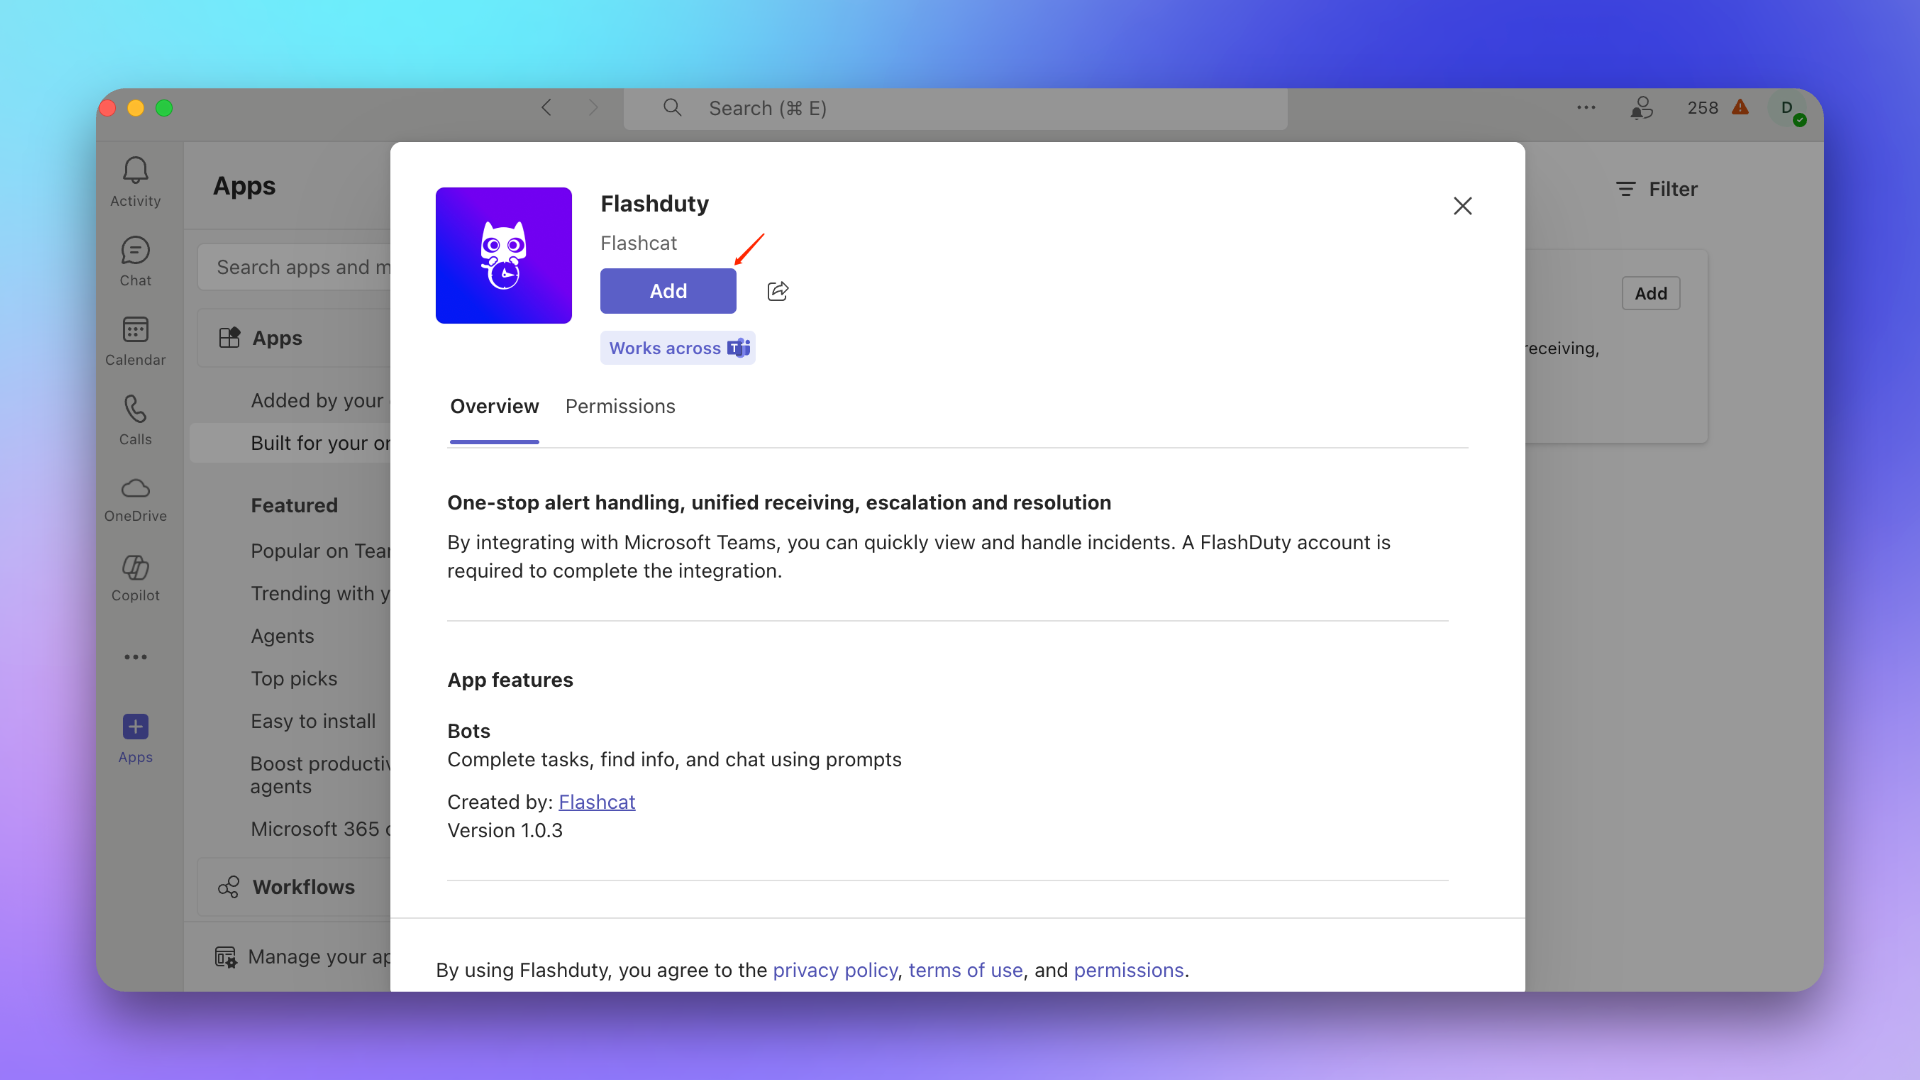
|
|
6068
6258
|
|
|
6069
|
-
|
|
6259
|
+
2. Add the application to the target Team.
|
|
6260
|
+
::: caution
|
|
6261
|
+
This step must select the General Channel of the target Team, otherwise incidents cannot be sent to the Team.
|
|
6262
|
+
:::
|
|
6070
6263
|
|
|
6071
|
-
|
|
6072
|
-
If there is no application, please contact your Microsoft Teams organization administrator
|
|
6264
|
+
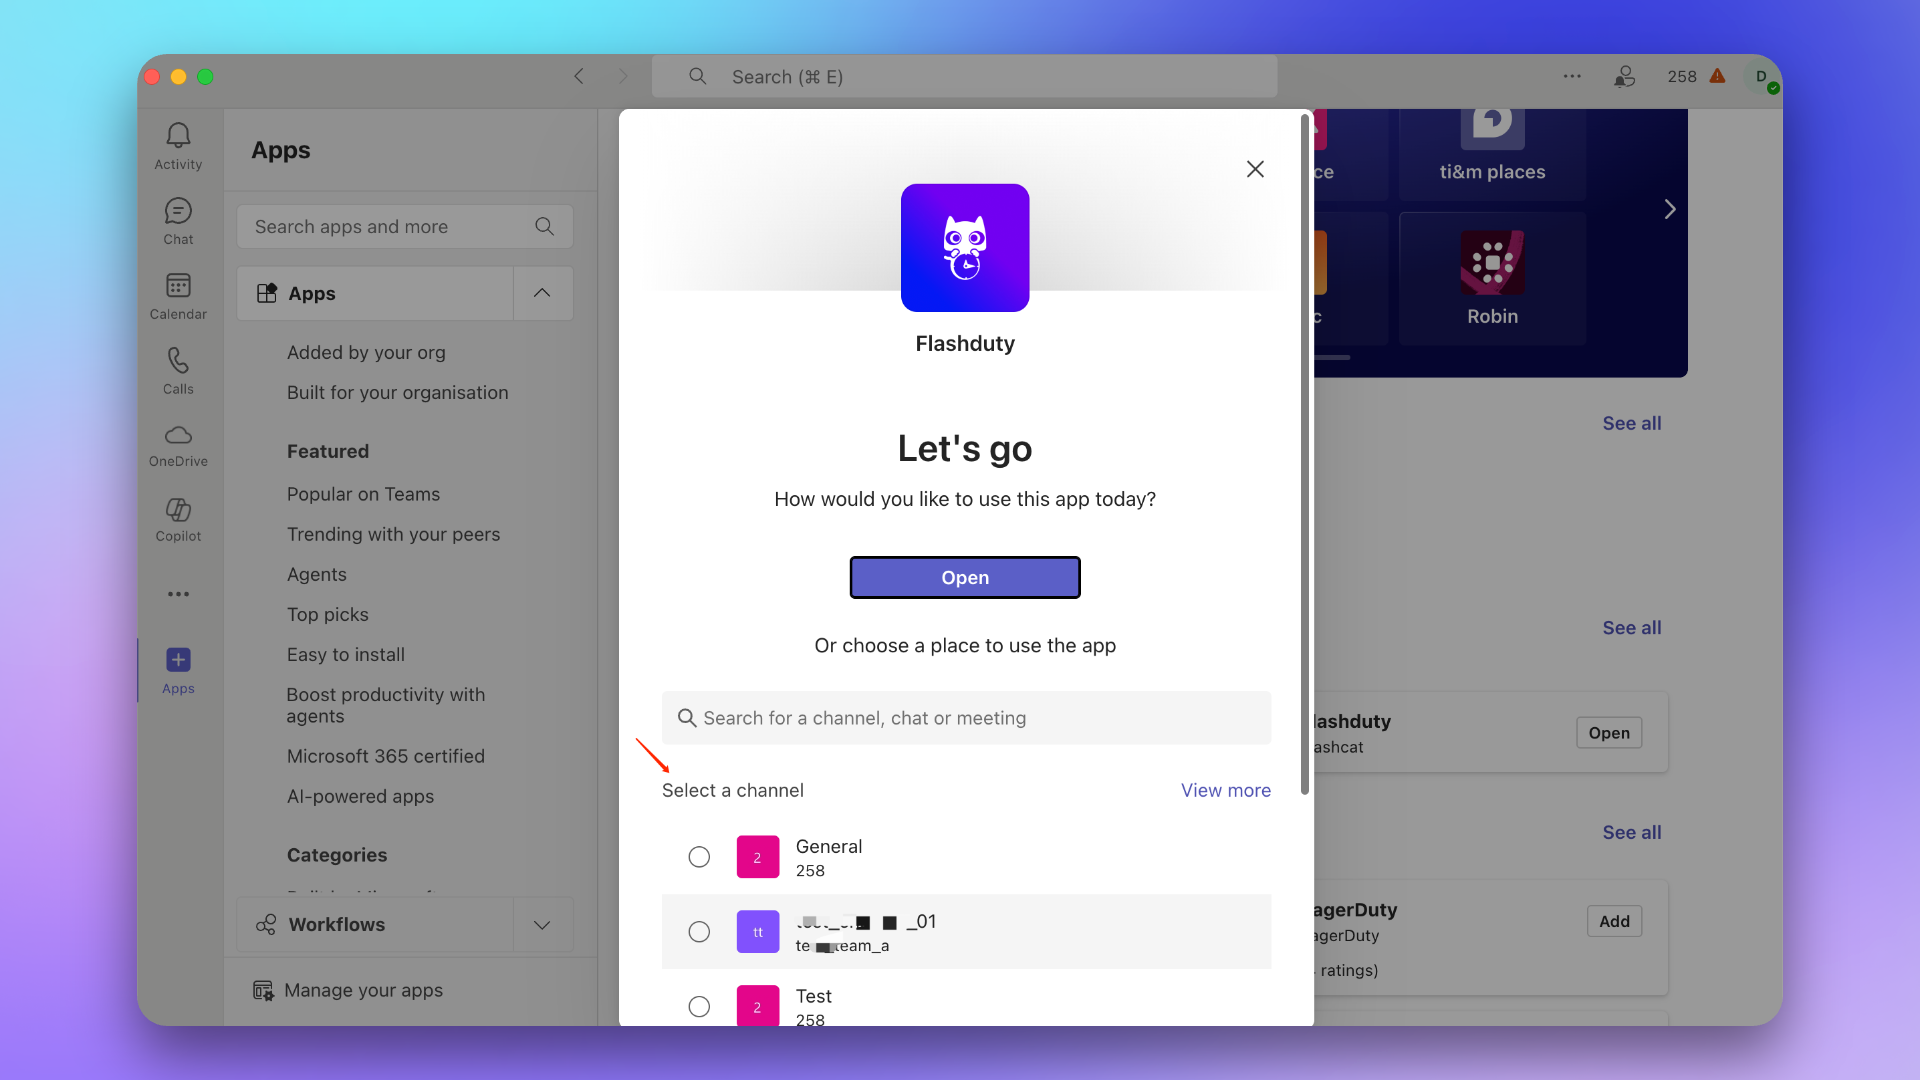
|
|
6073
6265
|
|
|
6074
|
-
|
|
6266
|
+
### 2. Send link command
|
|
6267
|
+
In the Team, @Flashduty and send the command \`linkTeam {ID}\`, then click **Link Now**.
|
|
6075
6268
|
|
|
6076
|
-
|
|
6269
|
+
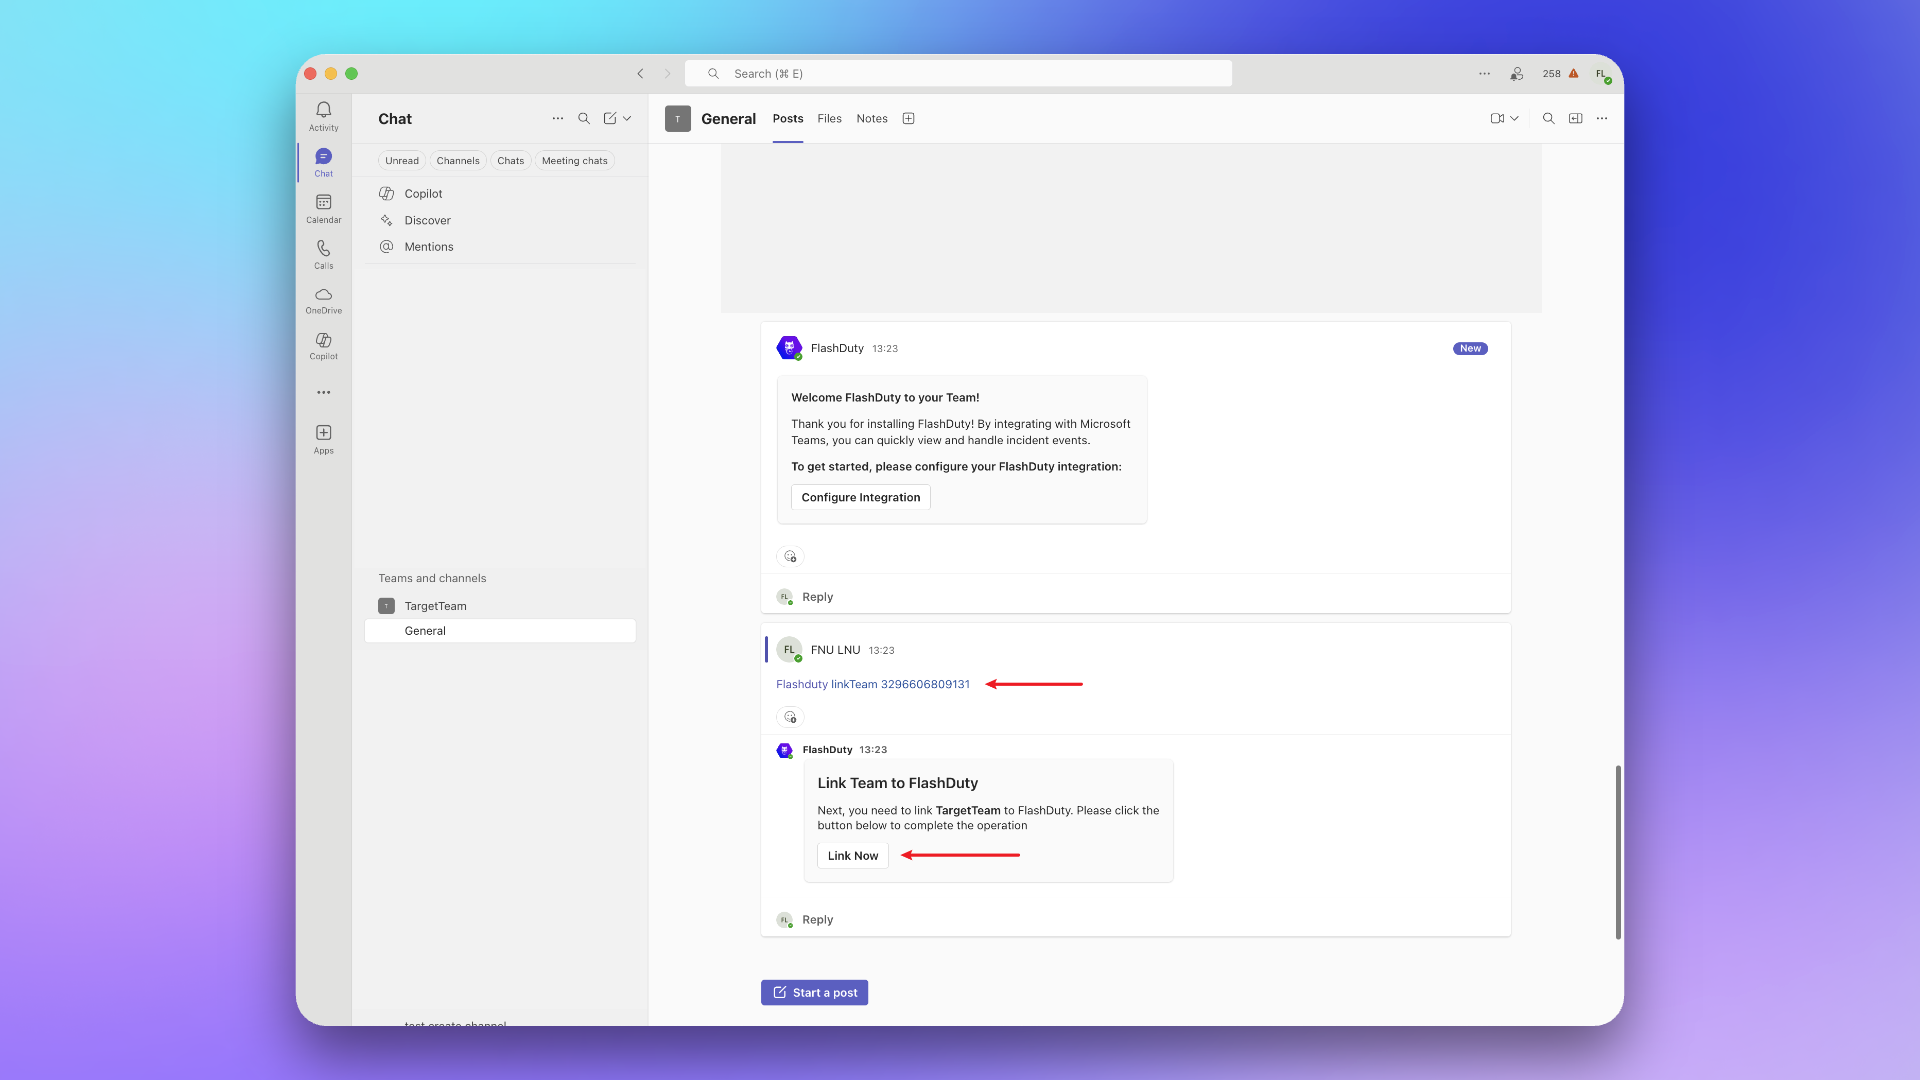
|
|
6077
6270
|
|
|
6078
|
-
|
|
6271
|
+
## 3. Link Chat
|
|
6272
|
+
---
|
|
6273
|
+
### 1. Add Flashduty application
|
|
6274
|
+
1. Find the Flashduty application in the app marketplace.
|
|
6275
|
+
> If there is no application, please contact your Microsoft Teams organization administrator.
|
|
6079
6276
|
|
|
6080
|
-
|
|
6081
|
-
@FlashDuty and send linkChat {ID} {ChatName} to the added Team, then click Associate Now
|
|
6277
|
+

|
|
6082
6278
|
|
|
6083
|
-
|
|
6279
|
+
2. Add the application to the target Chat.
|
|
6084
6280
|
|
|
6085
|
-
|
|
6281
|
+
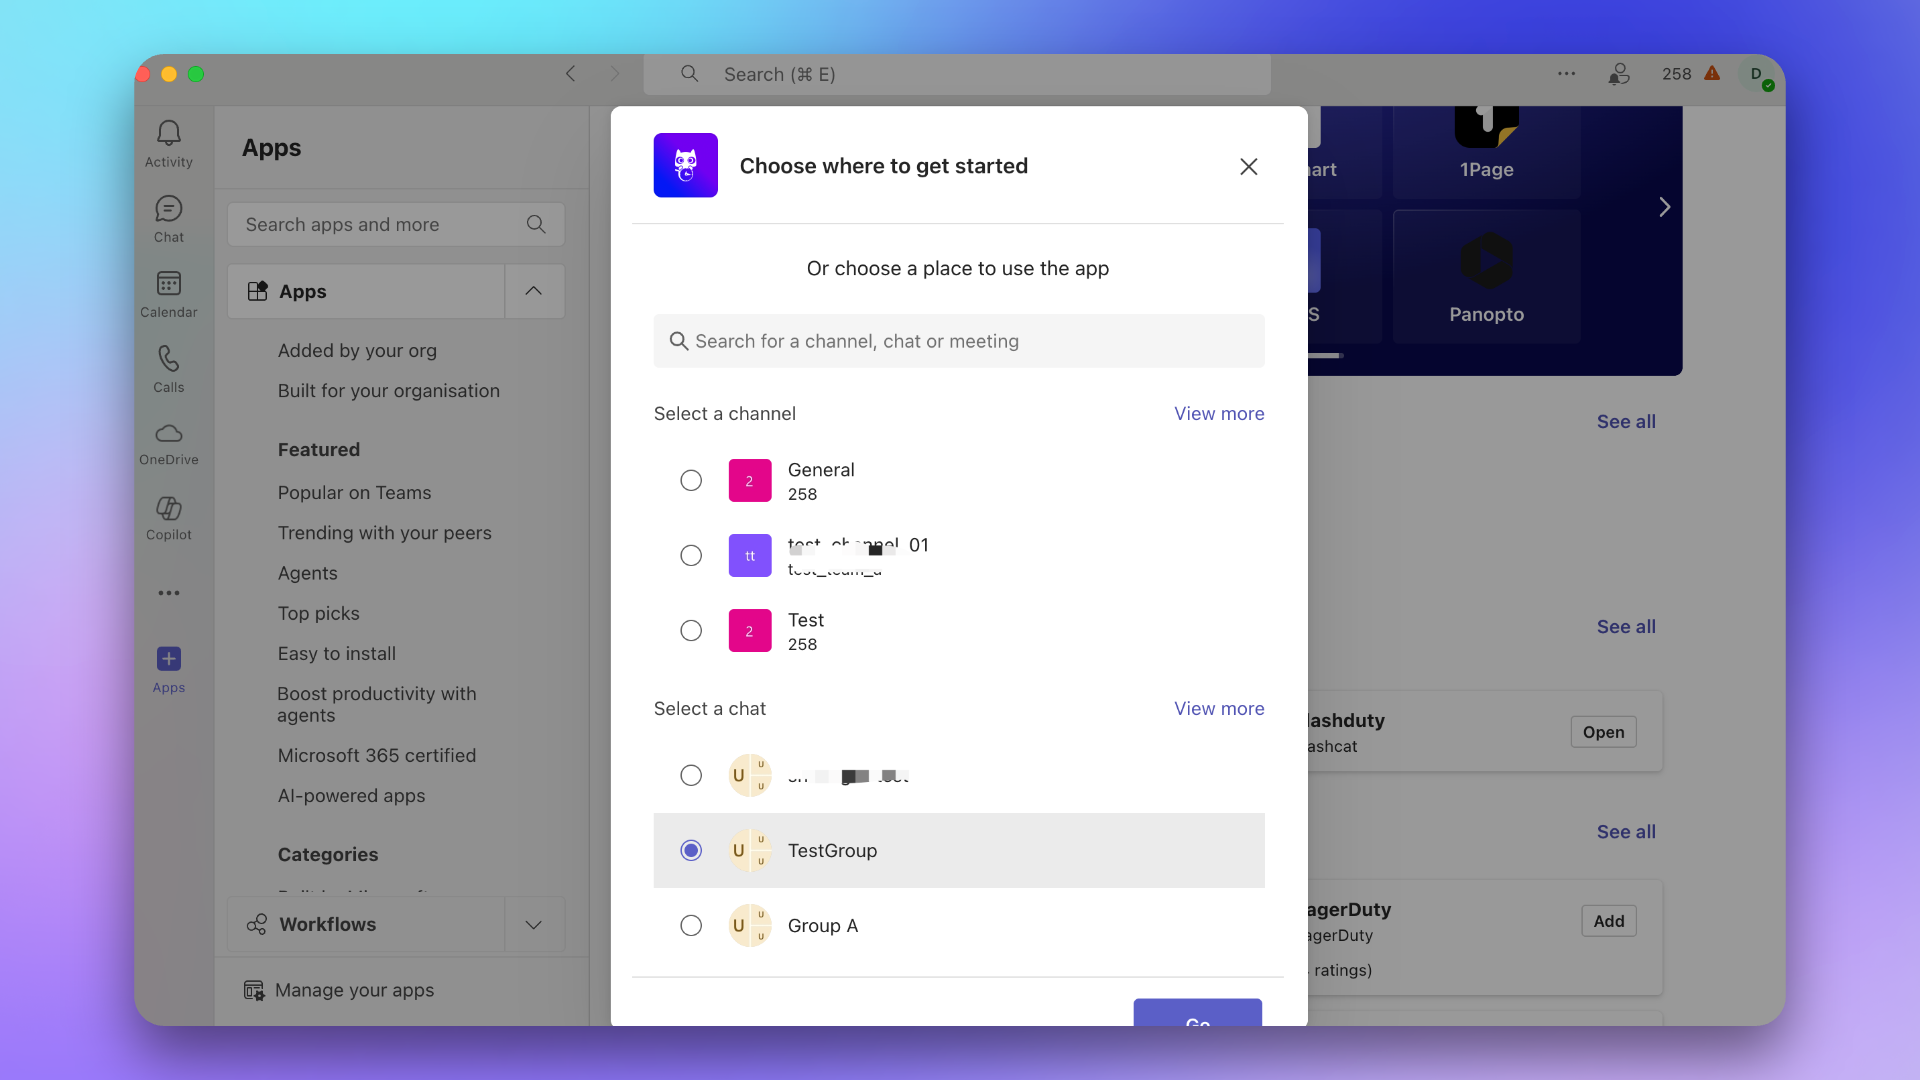
|
|
6086
6282
|
|
|
6087
|
-
###
|
|
6283
|
+
### 2. Send link command
|
|
6284
|
+
In the Chat, @Flashduty and send the command \`linkChat {ID} {ChatName}\`, then click **Link Now**.
|
|
6088
6285
|
|
|
6089
|
-
|
|
6090
|
-
If there is no application, please contact your Microsoft Teams organization administrator
|
|
6286
|
+
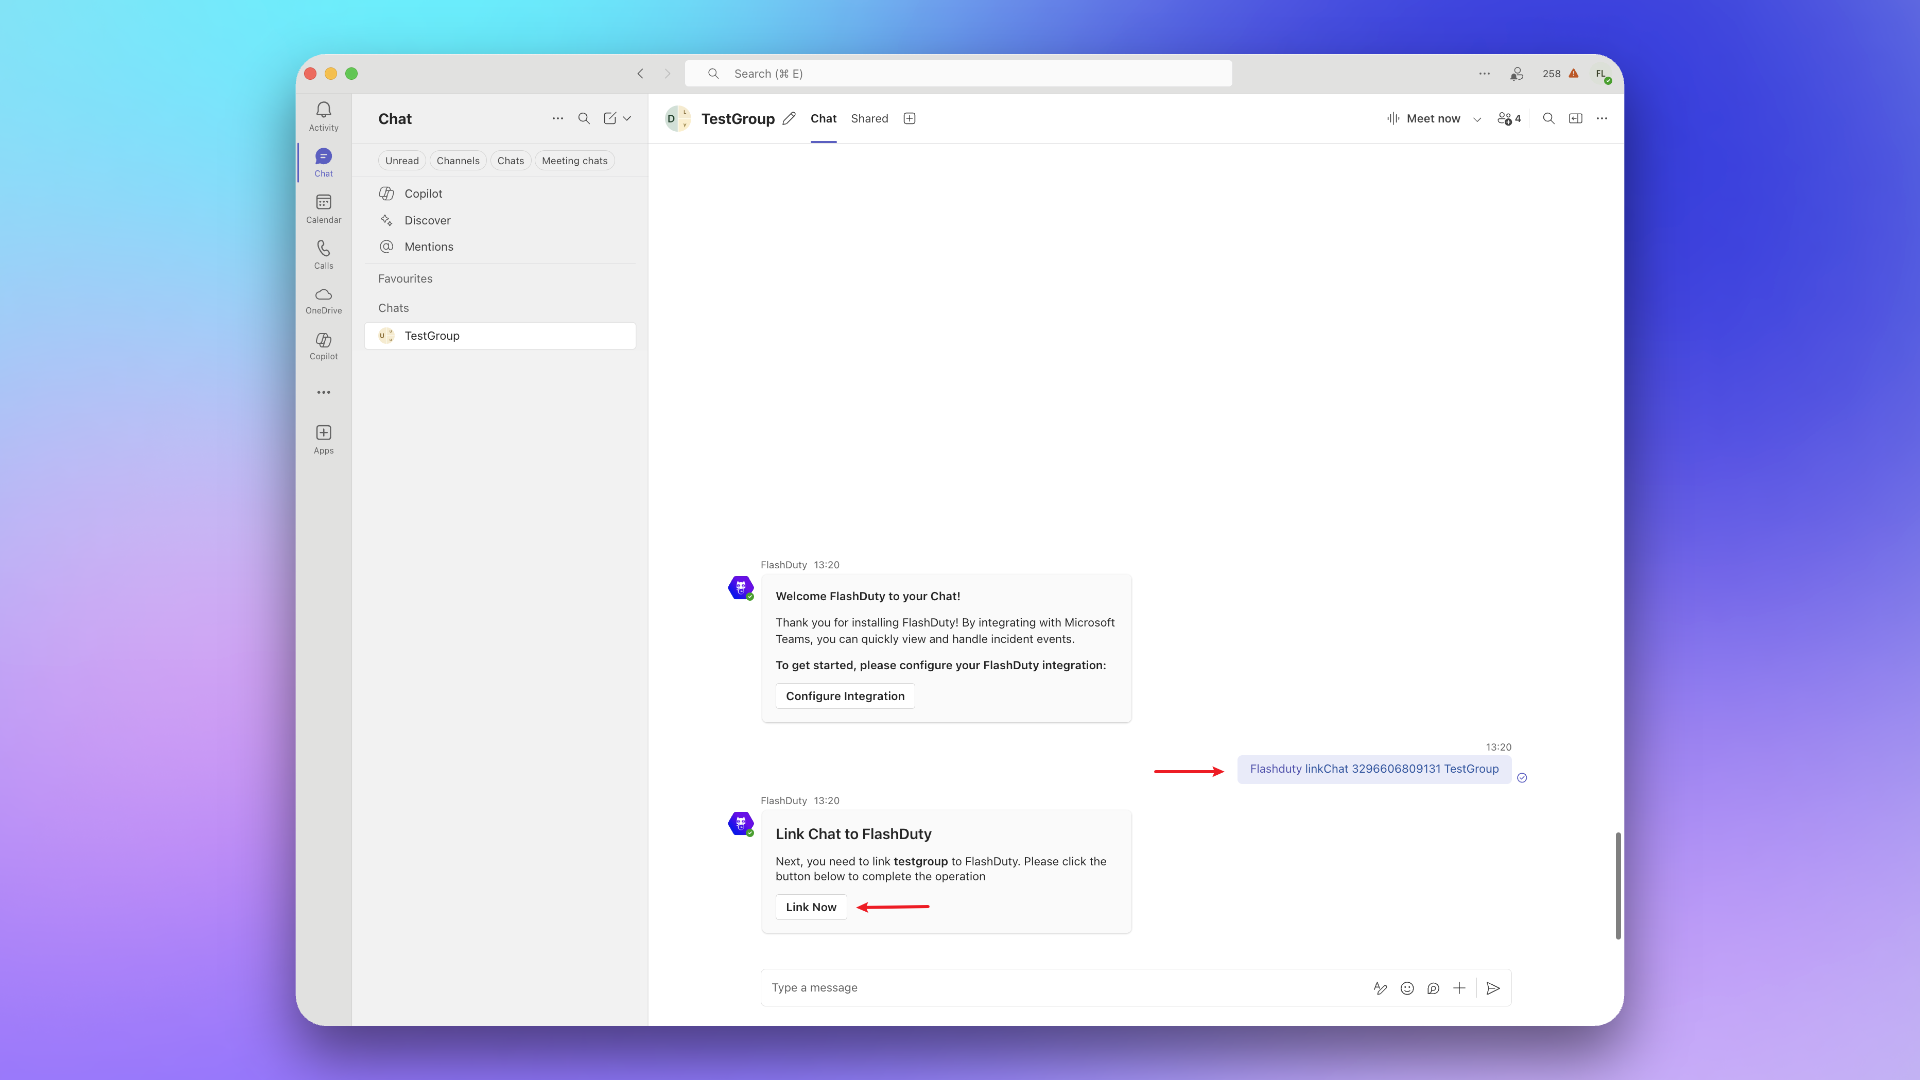
|
|
6091
6287
|
|
|
6092
|
-
|
|
6288
|
+
## 4. Link user
|
|
6289
|
+
---
|
|
6290
|
+
### 1. Add Flashduty application
|
|
6291
|
+
1. Find the Flashduty application in the app marketplace.
|
|
6292
|
+
> If there is no application, please contact your Microsoft Teams organization administrator.
|
|
6093
6293
|
|
|
6094
|
-
|
|
6095
|
-
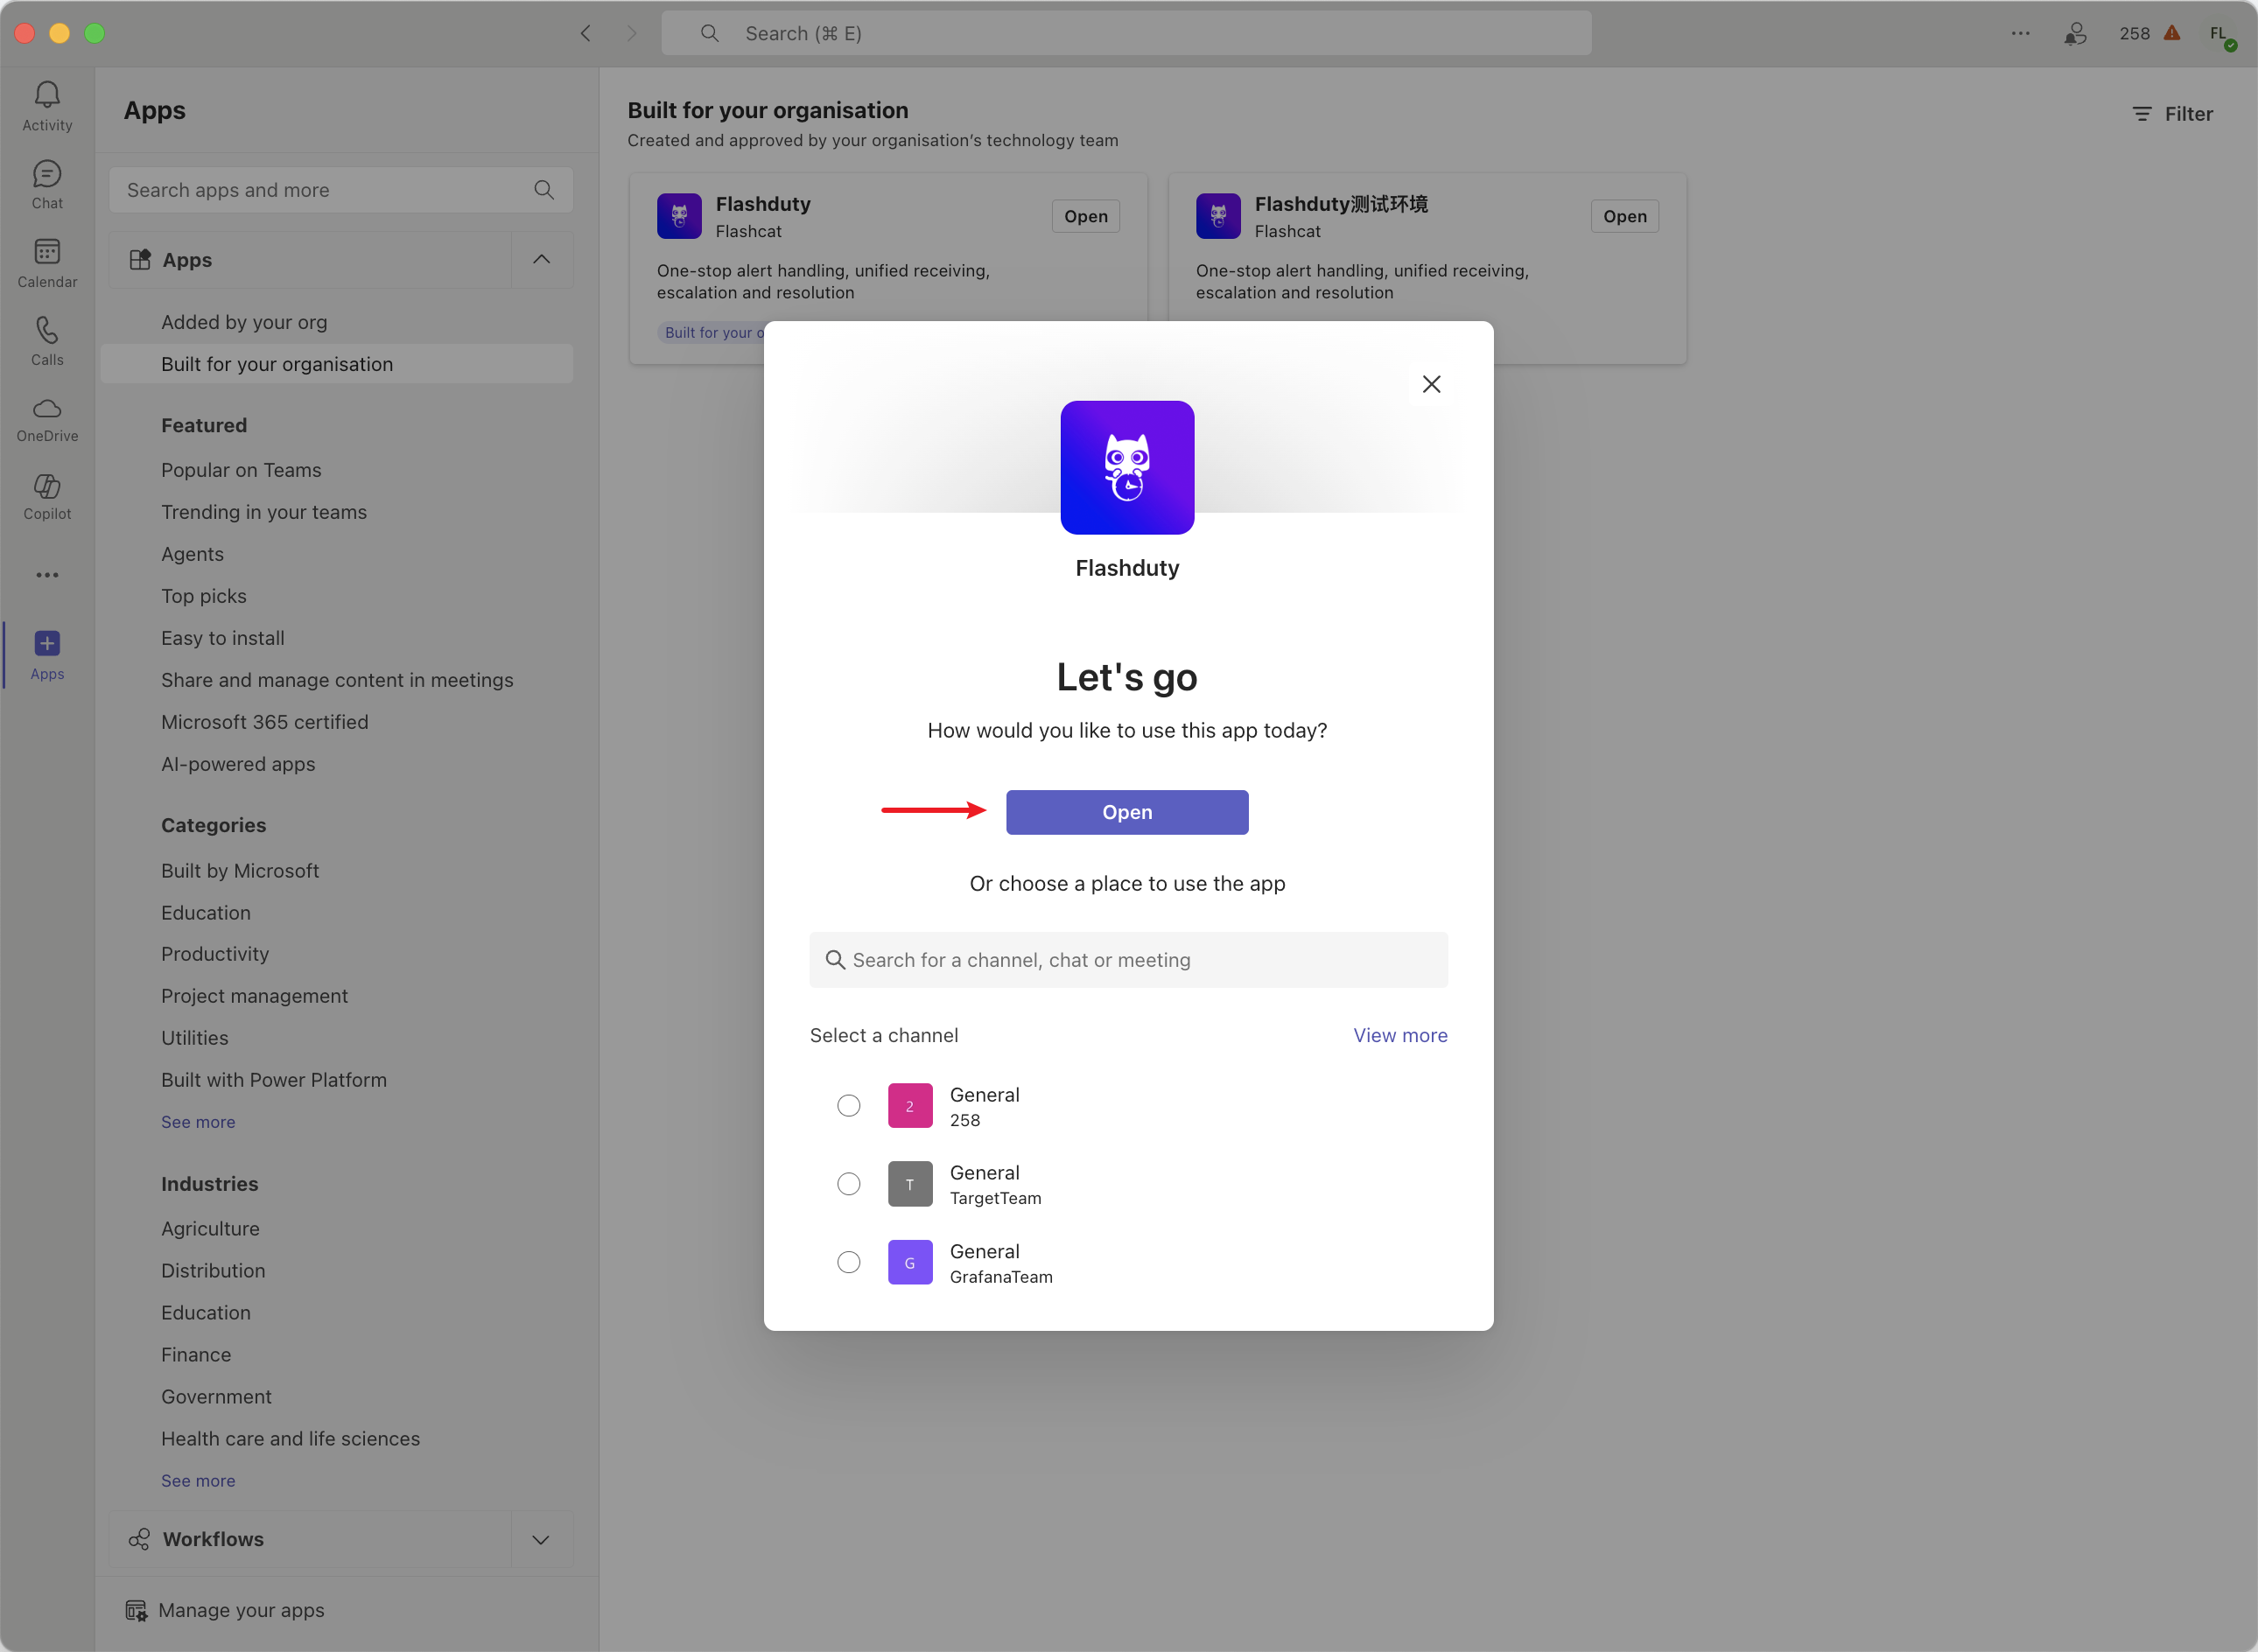
|
|
6294
|
+

|
|
6096
6295
|
|
|
6097
|
-
|
|
6098
|
-
Copy the command: linkUser {} and send it to the chat, then click Associate Now
|
|
6296
|
+
2. Click **Open Application**.
|
|
6099
6297
|
|
|
6100
|
-

|
|
6101
6299
|
|
|
6102
|
-
|
|
6103
|
-
|
|
6104
|
-
<summary>Team or individual not receiving messages</summary>
|
|
6105
|
-
Please check if the teams and users are successfully associated in Integration Center => Instant Messaging => Microsoft Teams
|
|
6106
|
-
</details>
|
|
6300
|
+
### 2. Send link command
|
|
6301
|
+
Copy and send the command \`linkUser {}\` to the chat, then click **Link Now**.
|
|
6107
6302
|
|
|
6108
|
-
|
|
6109
|
-
<summary>How to view associated teams and users</summary>
|
|
6110
|
-
Please check in Integration Center => Instant Messaging => Microsoft Teams under Associated Teams and Associated Users
|
|
6111
|
-
</details>
|
|
6303
|
+
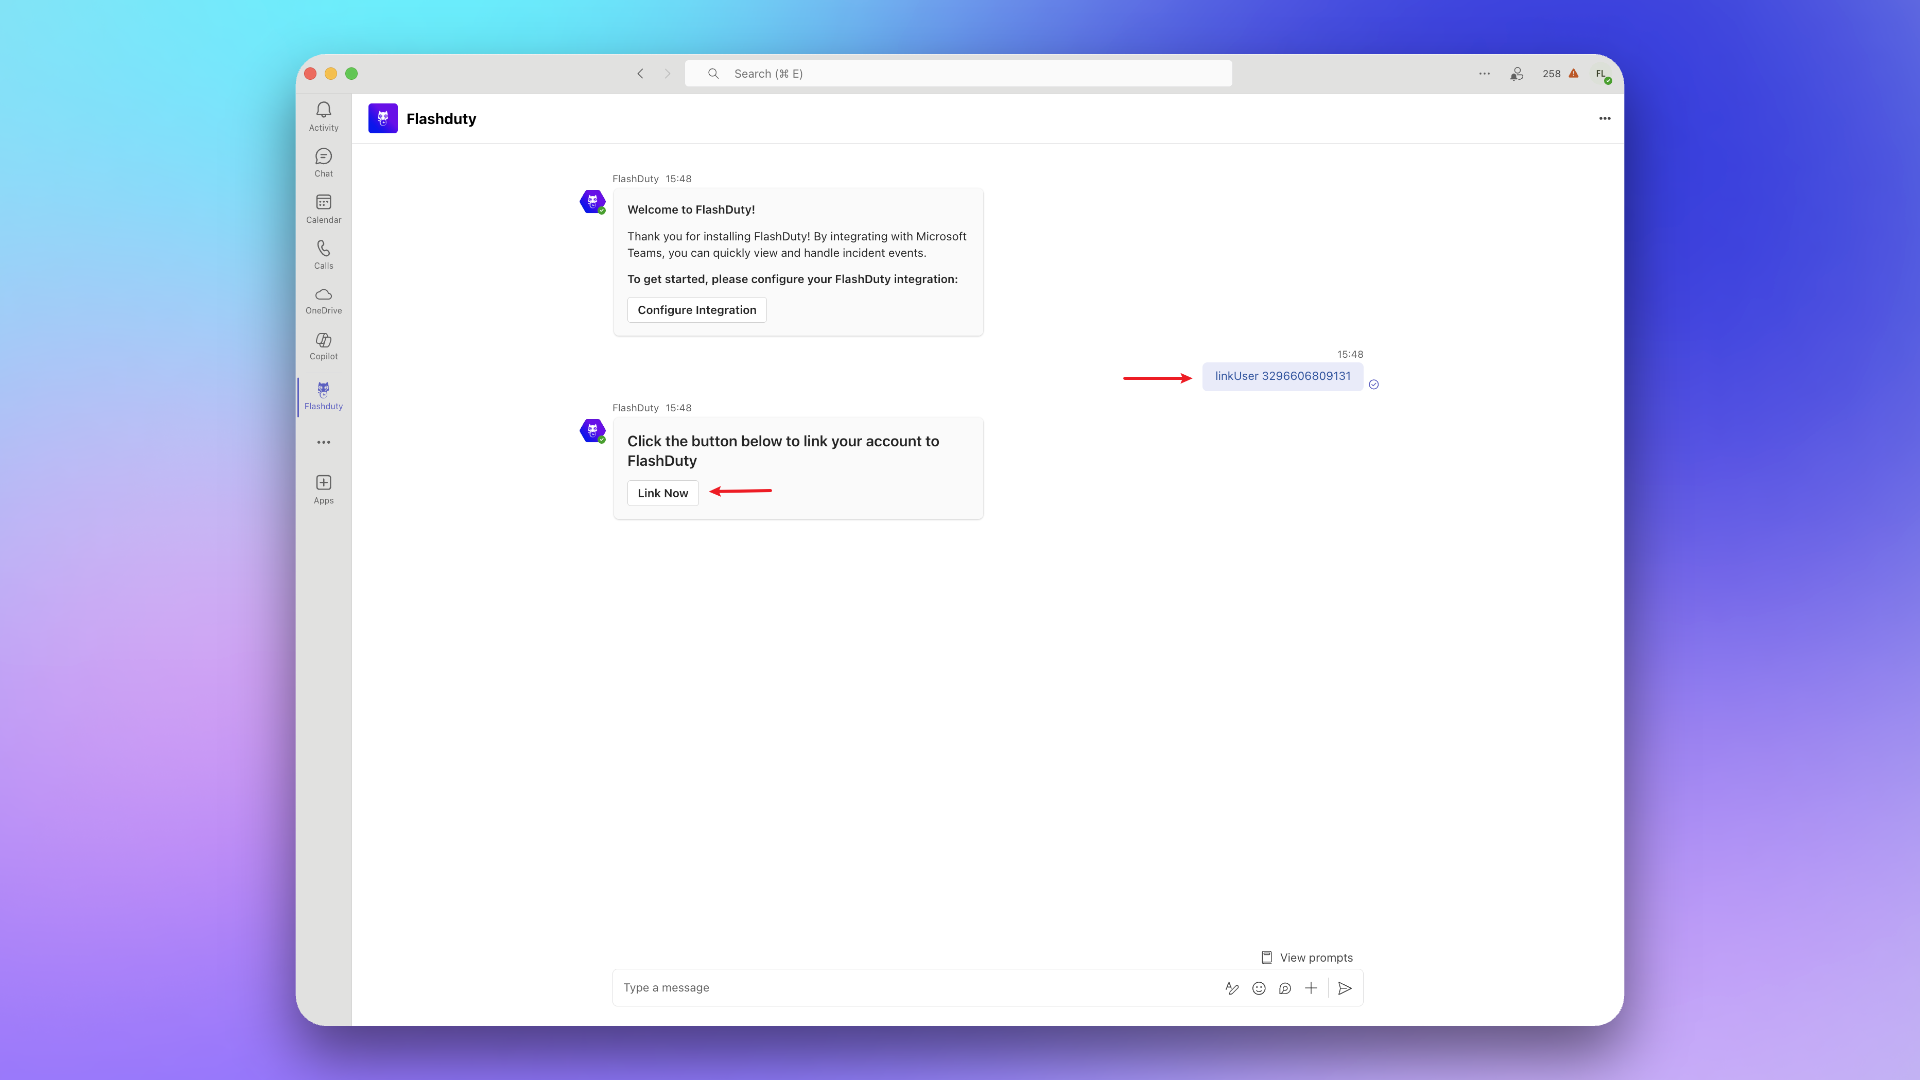
|
|
6112
6304
|
|
|
6113
|
-
|
|
6114
|
-
|
|
6115
|
-
Currently not supported
|
|
6116
|
-
</details>
|
|
6305
|
+
## 5. FAQ
|
|
6306
|
+
---
|
|
6117
6307
|
|
|
6118
|
-
|
|
6308
|
+
1. **Team or individual cannot receive messages?**
|
|
6309
|
+
- Please go to Integration Center → IM → **Microsoft Teams** to check if teams and users have been successfully linked.
|
|
6310
|
+
2. **How to view linked teams and users?**
|
|
6311
|
+
- Please go to Integration Center → IM → **Microsoft Teams** to view in **Linked Teams** and **Linked Users**.
|
|
6312
|
+
3. **How to cancel linked teams and users?**
|
|
6313
|
+
- This feature is not currently supported.`,oe=`Configure alert webhooks to receive HTTP callbacks at your specified URL when alerts have specific actions (such as triggering or closing). The callback content includes the latest key information about the alert, allowing integration with your custom tools.
|
|
6119
6314
|
|
|
6120
6315
|
<span id="EventTypes"></span>
|
|
6121
6316
|
|
|
@@ -6283,7 +6478,7 @@ curl -X POST 'https://example.com/alert/webhook?a=a' \\
|
|
|
6283
6478
|
4. **Trusted IP whitelist for push sources?**
|
|
6284
6479
|
- {ip_whitelist}
|
|
6285
6480
|
- May be updated in the future, please check periodically
|
|
6286
|
-
`,
|
|
6481
|
+
`,se=`Configure incident webhooks to receive HTTP callbacks at your specified URL when incidents have specific actions (such as triggering or closing). The callback content includes the latest key information about the incident, allowing integration with your custom tools.
|
|
6287
6482
|
|
|
6288
6483
|
<span id="EventTypes"></span>
|
|
6289
6484
|
|
|
@@ -6490,7 +6685,7 @@ curl -X POST 'https://example.com/incident/webhook?a=a' \\
|
|
|
6490
6685
|
|
|
6491
6686
|
4. **Trusted IP whitelist for push sources?**
|
|
6492
6687
|
- {ip_whitelist}
|
|
6493
|
-
- May be updated in the future, please check periodically`,
|
|
6688
|
+
- May be updated in the future, please check periodically`,re=`Custom incident actions allow you to quickly invoke external interfaces during incident troubleshooting for incident self-healing, information enrichment, and other custom operations.
|
|
6494
6689
|
|
|
6495
6690
|
## I. Creating Actions
|
|
6496
6691
|
|
|
@@ -6737,7 +6932,7 @@ When an incident occurs and is confirmed to be caused by a change, directly trig
|
|
|
6737
6932
|
|
|
6738
6933
|
### Update Status Page
|
|
6739
6934
|
|
|
6740
|
-
When an incident is confirmed to affect online services, trigger external status page updates to prompt`,
|
|
6935
|
+
When an incident is confirmed to affect online services, trigger external status page updates to prompt`,le=`---
|
|
6741
6936
|
title: "Jira Sync"
|
|
6742
6937
|
description: "Sync incidents with Jira issues through Jira Sync Webhook."
|
|
6743
6938
|
date: "2025-05-19T10:00:00+08:00"
|
|
@@ -6819,7 +7014,7 @@ In the Integration Center, select **Webhook**, choose **Jira Sync** integration,
|
|
|
6819
7014
|
|
|
6820
7015
|
- Flashduty syncs information according to default field mappings and your custom field configurations. If your Jira issue type has required fields without mapping relationships, Jira issue creation may fail.
|
|
6821
7016
|
- Jira issue details are accessed using project KEY + number format. If you modify the project KEY, saved issue URLs in Flashduty may become inaccessible, so please modify project KEYs with caution.
|
|
6822
|
-
`,
|
|
7017
|
+
`,de=`---
|
|
6823
7018
|
title: "ServiceNow Sync"
|
|
6824
7019
|
description: "Sync incidents with ServiceNow Incidents through ServiceNow sync webhook."
|
|
6825
7020
|
date: "2025-05-19T10:00:00+08:00"
|
|
@@ -6831,6 +7026,7 @@ Through ServiceNow sync webhook, Flashduty incidents are associated and synchron
|
|
|
6831
7026
|
## In ServiceNow
|
|
6832
7027
|
|
|
6833
7028
|
### Create User
|
|
7029
|
+
Create a user to connect to the ServiceNow instance for Incident sync and updates. Skip this step if you already have an available user.
|
|
6834
7030
|
|
|
6835
7031
|
1. Log in to the ServiceNow instance console, select \`ALL\`, enter \`USERS\` and select \`Organization\`-\`Users\`.
|
|
6836
7032
|
2. Click \`New\` to create a new user.
|
|
@@ -6842,14 +7038,20 @@ Through ServiceNow sync webhook, Flashduty incidents are associated and synchron
|
|
|
6842
7038
|
|
|
6843
7039
|
### Configure User
|
|
6844
7040
|
|
|
6845
|
-
|
|
7041
|
+
> **User Role Description**
|
|
7042
|
+
> **itil:** The main usage scope of this role in Flashduty is limited to field retrieval in ServiceNow Incident Table and does not involve any other operations.
|
|
7043
|
+
>
|
|
7044
|
+
> **personalize_dictionary:** This role in Flashduty is primarily used only for field retrieval from ServiceNow Incident Tables, and does not involve any other operations.
|
|
7045
|
+
>
|
|
7046
|
+
> For more information about the permission scope of these two roles, please refer to the ServiceNow [official documentation](https://www.servicenow.com/docs/bundle/washingtondc-platform-administration/page/administer/roles/reference/r_BaseSystemRoles.html#d130465e3182)
|
|
6846
7047
|
|
|
6847
7048
|
1. On the user list page, find the newly created \`flashduty\` user and go to the configuration page.
|
|
6848
7049
|
2. In the edit page, click \`Set Password\` to set a password.
|
|
6849
|
-
3. Click \`Roles\` to add **
|
|
7050
|
+
3. Click \`Roles\` to add **personalize_dictionary and itil** roles (If custom field mapping configuration is not required, the personalize_dictionary permission does not need to be retained).
|
|
6850
7051
|
4. Click \`Update\` to update the configuration.
|
|
6851
7052
|
|
|
6852
|
-
|
|
7053
|
+
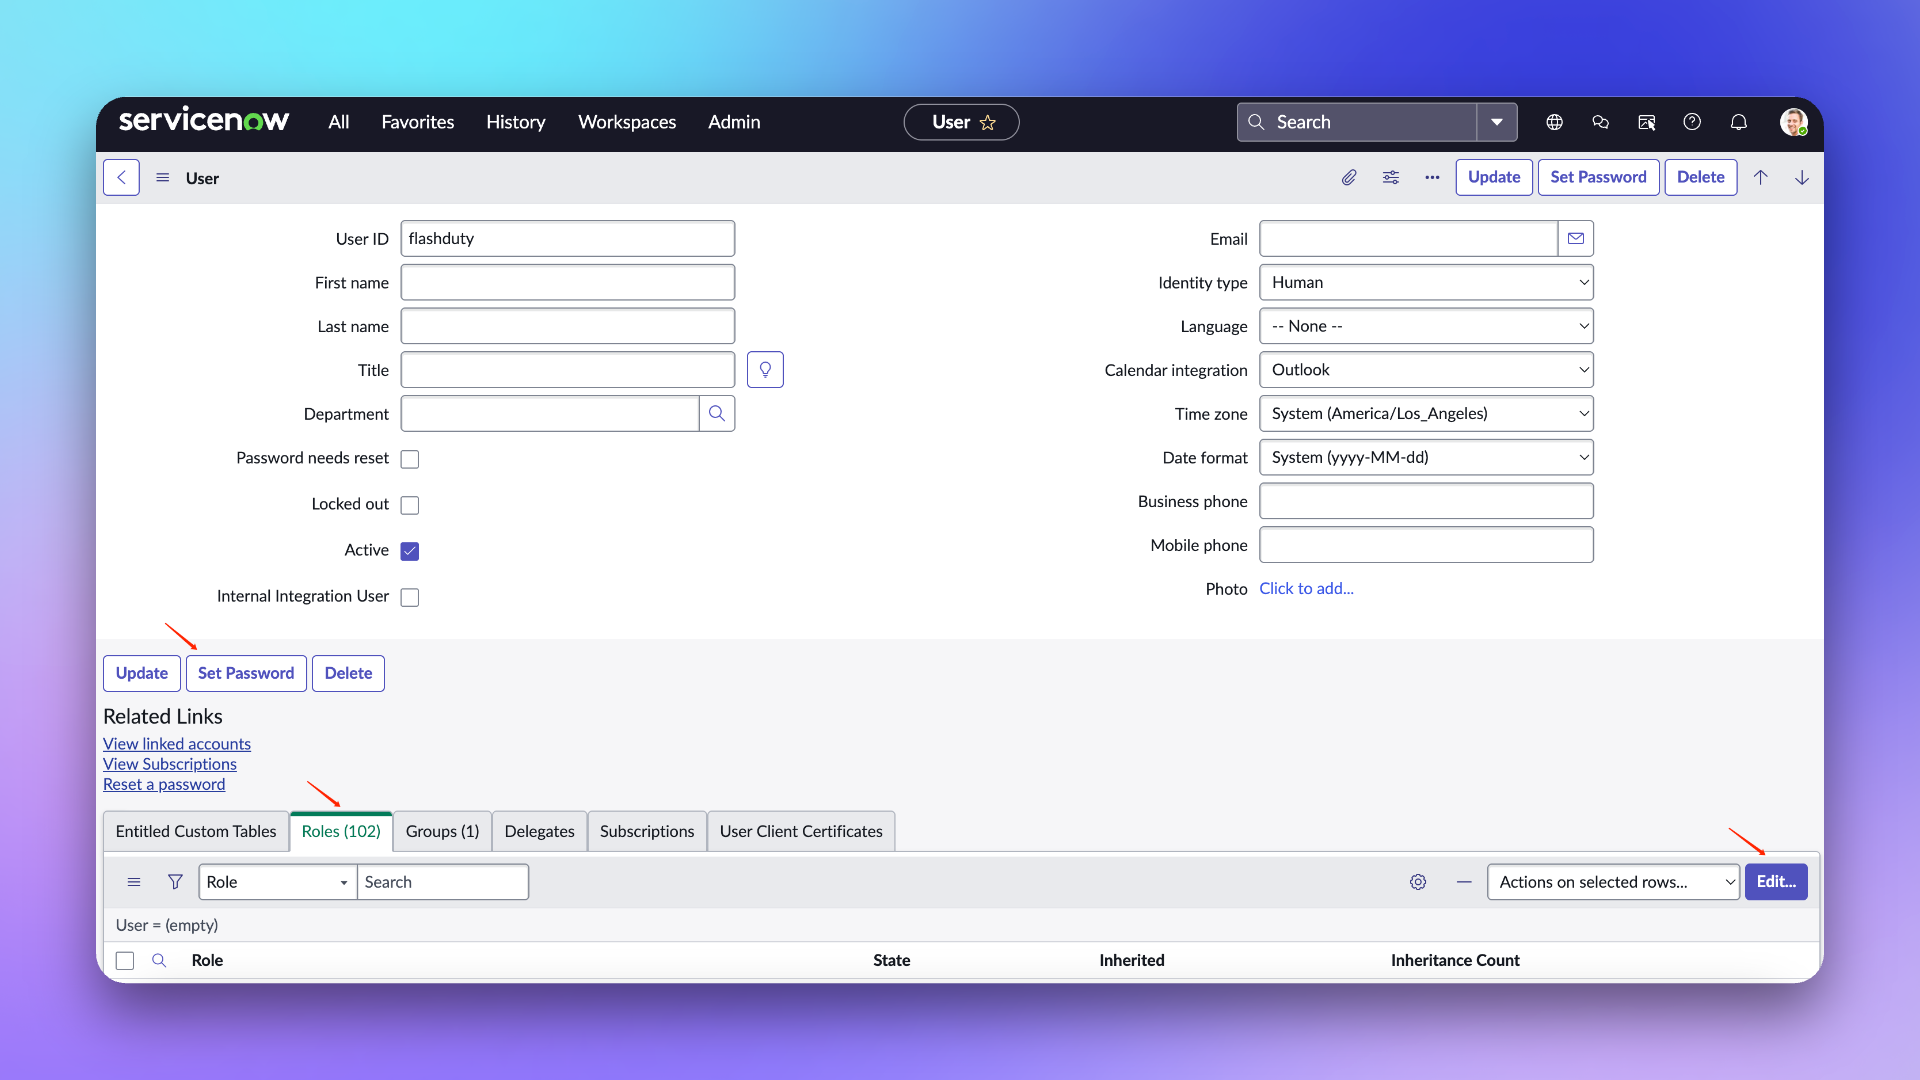
|
|
7054
|
+
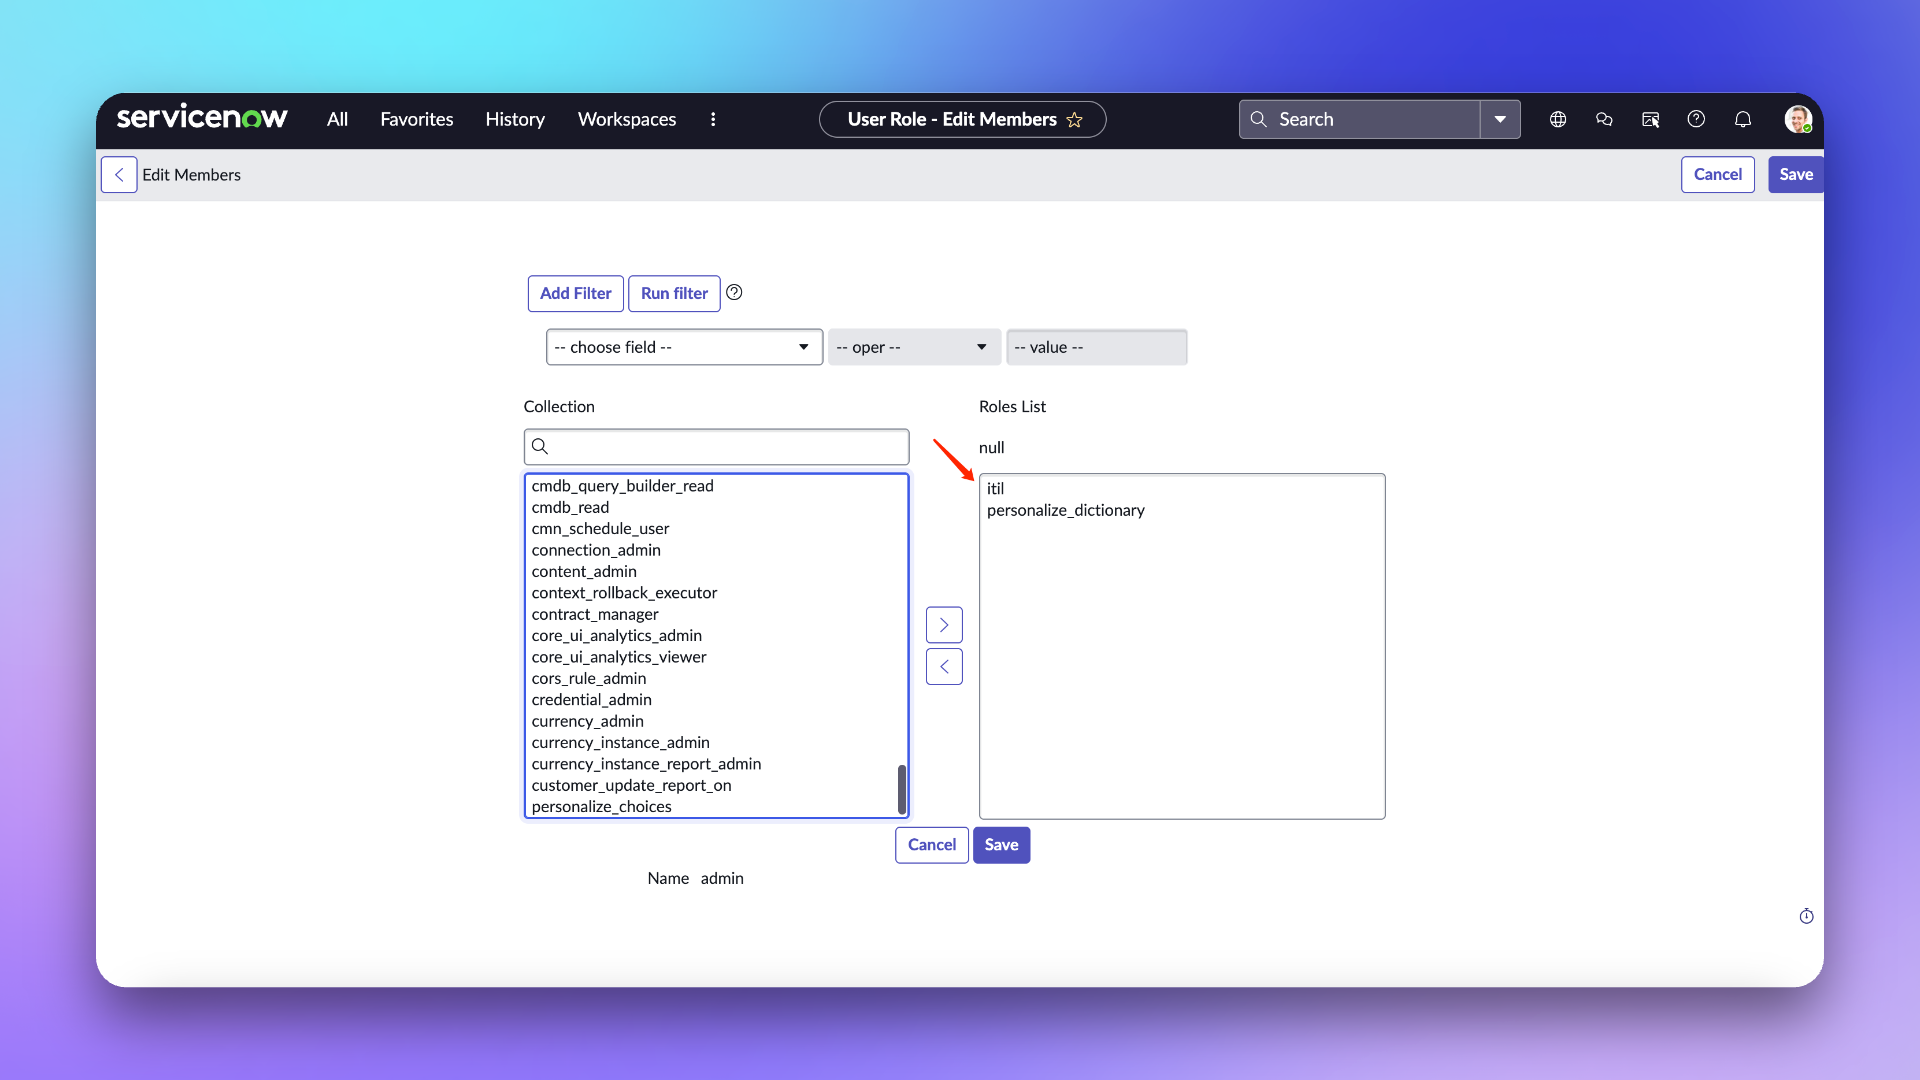
|
|
6853
7055
|
|
|
6854
7056
|
## In Flashduty
|
|
6855
7057
|
|
|
@@ -6861,14 +7063,27 @@ Enter the username/password and instance name configured above into the integrat
|
|
|
6861
7063
|
- **Management Team:** When a management team is selected, only team members and tenant administrators can edit this integration.
|
|
6862
7064
|
- **Channel:** Select the channel where this integration takes effect.
|
|
6863
7065
|
- **Sync Direction:**
|
|
7066
|
+
|
|
6864
7067
|
- To_ServiceNow: Sync Flashduty incidents to ServiceNow.
|
|
6865
7068
|
- From_ServiceNow: Sync ServiceNow Incidents to Flashduty.
|
|
6866
7069
|
- Two-way: Bidirectional sync between Flashduty and ServiceNow.
|
|
6867
|
-
|
|
7070
|
+
|
|
7071
|
+
- **Trigger Mode:**
|
|
7072
|
+
|
|
6868
7073
|
- Auto Trigger: Requires configuration of corresponding conditions, Flashduty will automatically sync incidents that meet the conditions to ServiceNow.
|
|
6869
7074
|
- Manual Trigger: Requires manual triggering of ServiceNow sync in the More Actions section of the incident details page (the integration configuration name is the trigger name).
|
|
6870
|
-
|
|
6871
|
-
- **
|
|
7075
|
+
|
|
7076
|
+
- **Severity Mapping:**
|
|
7077
|
+
- ServiceNow's Priority is determined by the combined values of Impact and Urgency, so you can refer to ServiceNow's \`Priority Lookup Rules\` for configuration.
|
|
7078
|
+
- Only when the Urgency of a ServiceNow Incident changes will it trigger an update to the Flashduty incident severity.
|
|
7079
|
+
- Since Flashduty cannot obtain ServiceNow's Impact and Urgency lists while following the principle of least privilege, only default values are provided. If you need to customize the mapping relationship, please contact technical support.
|
|
7080
|
+
|
|
7081
|
+
- **Custom Field Mapping:** You can map tags or custom fields from incidents to corresponding text fields in ServiceNow tickets, enabling automatic information filling. This feature supports synchronizing common contextual information (such as service name, instance address, metric name, etc.) to ServiceNow for easier subsequent troubleshooting and tracking.
|
|
7082
|
+
|
|
7083
|
+
- Only supports target fields of single-line text or multi-line text types.
|
|
7084
|
+
- Supports extracting values from incident tags (such as service, instance) or custom attributes.
|
|
7085
|
+
- If the source field is empty, the target field will also remain empty and will not overwrite existing content.
|
|
7086
|
+
- Mapping configurations are managed centrally in integration settings, eliminating the need for manual entry each time.
|
|
6872
7087
|
|
|
6873
7088
|
## In ServiceNow
|
|
6874
7089
|
|
|
@@ -7076,34 +7291,235 @@ Note: The body configures default receiving fields. If you have custom fields th
|
|
|
7076
7291
|
|
|
7077
7292
|
| ServiceNow | Flashduty | Notes |
|
|
7078
7293
|
| ------------------- | ------------- | ----- |
|
|
7079
|
-
| Short_description | Title |
|
|
7294
|
+
| Short_description | Title | Title |
|
|
7295
|
+
| Description | Description | Description |
|
|
7296
|
+
| Additional comments | Comments | Comments |
|
|
7297
|
+
| State | Progress | Progress |
|
|
7298
|
+
| Urgency | Severity | Severity |
|
|
7299
|
+
| Others | Custom Fields | Custom Fields |
|
|
7300
|
+
|
|
7301
|
+
### Status Mapping
|
|
7302
|
+
|
|
7303
|
+
| ServiceNow | Flashduty | Notes |
|
|
7304
|
+
| ----------- | ---------- | ---------------------- |
|
|
7305
|
+
| New | Trigger | Trigger |
|
|
7306
|
+
| In Progress | Processing | Processing |
|
|
7307
|
+
| On Hold | Snoozed | Default snooze 2 hours |
|
|
7308
|
+
| Resolved | CLosed | CLosed |
|
|
7309
|
+
| Closed | CLosed | CLosed |
|
|
7310
|
+
| Canceled | CLosed | CLosed |
|
|
7311
|
+
|
|
7312
|
+
### Priority Mapping
|
|
7313
|
+
|
|
7314
|
+
Only when ServiceNow's Urgency value changes will it affect Flashduty's Severity
|
|
7315
|
+
|
|
7316
|
+
| ServiceNow | Flashduty | Notes |
|
|
7317
|
+
| ---------- | --------- | ----- |
|
|
7318
|
+
| Low | Info | Info |
|
|
7319
|
+
| Medium | Warning | Warning |
|
|
7320
|
+
| High | Critical | Critical |
|
|
7321
|
+
|
|
7322
|
+
|
|
7323
|
+
## QA
|
|
7324
|
+
|
|
7325
|
+
<details>
|
|
7326
|
+
<summary>Can the UserID be customized when creating a new ServiceNow user?</summary>
|
|
7327
|
+
Yes, it can be customized. The documentation uses "flashduty" as the UserID to better identify that this user is used for Incident synchronization.
|
|
7328
|
+
</details>
|
|
7329
|
+
|
|
7330
|
+
<details>
|
|
7331
|
+
<summary>Getting 401 error when configuring integration</summary>
|
|
7332
|
+
A 401 error is generally caused by an incorrect password. Please check if the password is correct, or reset a new password (when setting the password, do not check the "Password needs reset" option).
|
|
7333
|
+
</details>`,ce=`---
|
|
7334
|
+
title: "ServiceDesk Plus Sync"
|
|
7335
|
+
description: "Sync incidents with ServiceDesk Plus requests through ServiceDesk Plus sync webhook."
|
|
7336
|
+
date: "2025-05-19T10:00:00+08:00"
|
|
7337
|
+
url: "https://docs.flashcat.cloud/en/flashduty/servicedesk-plus-sync"
|
|
7338
|
+
---
|
|
7339
|
+
|
|
7340
|
+
Through ServiceDesk Plus sync webhook, Flashduty incidents are associated and synchronized with ServiceDesk Plus requests to achieve integration between Flashduty and ServiceDesk Plus.
|
|
7341
|
+
|
|
7342
|
+
This integration is based on the official v3 API protocol provided by ServiceDesk Plus and is compatible with its interface specifications. If you are using an on-premises deployment version, please confirm whether its API supports the v3 version. Additionally, there are differences in authorization configuration between the cloud and on-premises of ServiceDesk Plus. Please refer to the relevant documentation for specific configurations.
|
|
7343
|
+
|
|
7344
|
+
- [Cloud](#cloud-version)
|
|
7345
|
+
- [On-premises](#on-premises)
|
|
7346
|
+
|
|
7347
|
+
When configuring this integration, if you choose the sync direction as From_ServiceDesk_Plus, you can skip the authorization-related configuration and directly refer to [Configure Sync](#configure-sync).
|
|
7348
|
+
|
|
7349
|
+
## Cloud <span id="cloud-version"></span>
|
|
7350
|
+
|
|
7351
|
+
### In ServiceDesk Plus
|
|
7352
|
+
#### Step 1 Create Authorization Application
|
|
7353
|
+
Please select the corresponding Developer Console address according to your ServiceDesk Plus service region: [Data Centres](https://www.manageengine.com/products/service-desk/sdpod-v3-api/getting-started/data-centers.html)
|
|
7354
|
+
|
|
7355
|
+
1. Log in to the Developer Console, select \`Self Client\` type Client and create it.
|
|
7356
|
+
2. Click \`Generate Code\`, fill in the \`Scope\`: **SDPOnDemand.requests.ALL,SDPOnDemand.setup.READ,SDPOnDemand.custommodule.READ**. Refer to [official documentation](https://www.manageengine.com/products/service-desk/sdpod-v3-api/getting-started/oauth-2.0.html#scopes) for permission scope.
|
|
7357
|
+
|
|
7358
|
+
3. Select the maximum **10 minutes** for \`Time Duration\`, fill in the \`Scope Description\` as customizable, for example: For Flashduty sync use, and create.
|
|
7359
|
+
4. Copy the generated **Code**, **Client ID** and **Client Secret** for backup.
|
|
7360
|
+
|
|
7361
|
+

|
|
7362
|
+

|
|
7363
|
+
|
|
7364
|
+
###### Note: The Code is only valid for 10 minutes and can only be used once, so after obtaining the Code, please complete the [Integration Authorization](#integration-authorization) as soon as possible within the validity period.
|
|
7365
|
+
|
|
7366
|
+
### In Flashduty
|
|
7367
|
+
#### Step 2 Integration Authorization <span id="integration-authorization"></span>
|
|
7368
|
+
Please select the corresponding API Endpoint and Accounts Server URL according to your ServiceDesk Plus service region: [Data Centres](https://www.manageengine.com/products/service-desk/sdpod-v3-api/getting-started/data-centers.html)
|
|
7369
|
+
|
|
7370
|
+
1. Select **Cloud** for \`Platform Type\`, fill in \`API Endpoint\` and \`Accounts Server URL\`.
|
|
7371
|
+
2. Fill in the \`Code\`, \`Client ID\` and \`Client Secret\` generated in the **Create Authorization Application** step into the corresponding edit boxes and click Next to complete [Integration Configuration](#integration-configuration) (if an error occurs, please re-obtain the Code or contact technical support to troubleshoot the problem).
|
|
7372
|
+
|
|
7373
|
+
## On-premises <span id="on-premises"></span>
|
|
7374
|
+
### In ServiceDesk Plus
|
|
7375
|
+
#### Step 1 Generate API Key
|
|
7376
|
+
1. Log in to the ServiceDesk Plus console, click \`Generate API Key\` in the personal center.
|
|
7377
|
+
2. Select **Never Expires** for \`Token Expiration Time\`, copy the generated **Token** for backup, and complete [Integration Authorization](#on-premises-integration-authorization).
|
|
7378
|
+
|
|
7379
|
+
###### Note: The user who generates the API key needs to have relevant permissions, such as create/update requests, obtain template/priority/custom field lists and other permissions. If the permissions are insufficient, it will cause the integration configuration to fail. It is recommended to use an administrator role to generate.
|
|
7380
|
+
|
|
7381
|
+
### In Flashduty
|
|
7382
|
+
#### Step 2 Integration Authorization <span id="on-premises-integration-authorization"></span>
|
|
7383
|
+
1. Select **On-premises** for \`Platform Type\`, fill in \`API Endpoint\`.
|
|
7384
|
+
2. Fill in the generated **Token** into the corresponding edit box and click Next to complete [Integration Configuration](#integration-configuration).
|
|
7385
|
+
|
|
7386
|
+
|
|
7387
|
+
## General Configuration
|
|
7388
|
+
|
|
7389
|
+
### In Flashduty
|
|
7390
|
+
#### Step 1 Integration Configuration <span id="integration-configuration"></span>
|
|
7391
|
+
|
|
7392
|
+
1. **Integration Name:** Define a name for the current integration.
|
|
7393
|
+
2. **Management Team:** When a management team is selected, only team members and tenant administrators can edit this integration.
|
|
7394
|
+
3. **Sync Direction:**
|
|
7395
|
+
|
|
7396
|
+
- To_ServiceDesk_Plus: Sync Flashduty incidents to ServiceDesk Plus.
|
|
7397
|
+
- From_ServiceDesk_Plus: Sync ServiceDesk Plus requests to Flashduty.
|
|
7398
|
+
- Two-way: Bidirectional sync between Flashduty and ServiceDesk Plus.
|
|
7399
|
+
|
|
7400
|
+
4. **Trigger Mode**:
|
|
7401
|
+
- Auto Trigger: Requires configuration of corresponding conditions, Flashduty will automatically sync incidents that meet the conditions to ServiceDesk Plus.
|
|
7402
|
+
- Manual Trigger: Requires manual triggering of ServiceDesk Plus sync in the More Actions section of the incident details page (the integration configuration name is the trigger name).
|
|
7403
|
+
|
|
7404
|
+
5. **Channel:** Select the channel where this integration takes effect.
|
|
7405
|
+
6. **Request Template:** Select the template to use when creating requests.
|
|
7406
|
+
7. **Severity Mapping:** The mapping relationship between Flashduty severity and ServiceDesk Plus priority. For default mapping relationship, please refer to [Priority Mapping](#priority-mapping).
|
|
7407
|
+
8. **Custom Field Mapping:** You can map labels or custom fields in incidents to corresponding text fields in ServiceDesk Plus tickets to achieve automatic information filling. This feature supports syncing common context information (such as service name, instance address, metric name, etc.) to ServiceDesk Plus for subsequent troubleshooting and tracking.
|
|
7408
|
+
- Only supports target fields of single-line text or multi-line text type.
|
|
7409
|
+
- Supports extracting values from incident labels (such as service, instance) or custom attributes.
|
|
7410
|
+
- If the source field is empty, the target field will also remain empty and will not overwrite existing content.
|
|
7411
|
+
- Mapping configuration is managed uniformly in integration settings without manual filling each time.
|
|
7412
|
+
|
|
7413
|
+
9. **Assignee Mapping:** When Flashduty incidents are synced to ServiceDesk Plus and need to be automatically assigned to Technician or Group, you can get the value of Flashduty incident labels as the assignee (if the corresponding assignee does not exist, it will cause sync failure, please choose carefully).
|
|
7414
|
+
|
|
7415
|
+
10. Click \`Save\` to complete the configuration.
|
|
7416
|
+
|
|
7417
|
+
### In ServiceDesk Plus
|
|
7418
|
+
#### Step 2 Create Requester
|
|
7419
|
+
When Flashduty incidents are synced to ServiceDesk Plus, the Requester automatically set by the system
|
|
7420
|
+
|
|
7421
|
+
1. Log in to the ServiceDesk Plus console and find the \`Setup\` configuration page.
|
|
7422
|
+
2. Select \`Users & Permissions\`, then enter the \`Users\` creation page and select \`New Requester\`.
|
|
7423
|
+
3. Fill in **flashduty** for \`Name (Display Name)\` and \`First Name\`, fill in **flashduty-sync@flashcat.cloud** for \`Email\`.
|
|
7424
|
+
4. Other settings can be configured as needed, click \`Save\` to save the configuration.
|
|
7425
|
+
|
|
7426
|
+
|
|
7427
|
+
|
|
7428
|
+
#### Step 3 Configure Sync <span id="configure-sync"></span>
|
|
7429
|
+
To achieve synchronization of ServiceDesk Plus requests to Flashduty, please refer to this configuration item. **Note:** Different versions may have slightly different paths, but the configuration method is the same.
|
|
7430
|
+
##### Create Webhook
|
|
7431
|
+
1. Log in to the ServiceDesk Plus console and find the \`Setup\` configuration page.
|
|
7432
|
+
2. Select \`Automation\`, then enter the \`Custom Actions\` page and select \`Webhooks\`.
|
|
7433
|
+
3. Click \`New Webhook\`, fill in **to_Flashduty** for \`Webhook Name\` in the edit page.
|
|
7434
|
+
4. Fill in the integration's <span class='integration_url'>push URL</span> for \`URL\`.
|
|
7435
|
+
5. Select **Requests** for \`Applies to\`, select **POST** for \`Method\`, fill in **Content-Type application/json** in \`Headers\`.
|
|
7436
|
+
6. Select **JSON** for \`Message Body\` Type and fill in the following content:
|
|
7437
|
+
|
|
7438
|
+
\`\`\`
|
|
7439
|
+
# Cloud
|
|
7440
|
+
{
|
|
7441
|
+
"subject":"\${subject}",
|
|
7442
|
+
"request_id":"\${id}",
|
|
7443
|
+
"description":"\${udf_fields.txt_destination}",
|
|
7444
|
+
"priority":"\${priority.name}",
|
|
7445
|
+
"status":"\${status.name}",
|
|
7446
|
+
"txt_test_field":"\${udf_fields.txt_test_field}"
|
|
7447
|
+
|
|
7448
|
+
}
|
|
7449
|
+
\`\`\`
|
|
7450
|
+
|
|
7451
|
+
\`\`\`
|
|
7452
|
+
# On-premises
|
|
7453
|
+
{
|
|
7454
|
+
"suject":"\${{request.subject}}",
|
|
7455
|
+
"request_id":"\${{request.id}}",
|
|
7456
|
+
"description":"\${{request.description}}",
|
|
7457
|
+
"status":"\${{request.status.name}}",
|
|
7458
|
+
"priority":"\${{request.priority.name}}",
|
|
7459
|
+
"udf_sline_301":"\${{request.udf_fields.udf_sline_301}}"
|
|
7460
|
+
}
|
|
7461
|
+
|
|
7462
|
+
\`\`\`
|
|
7463
|
+
7. Click \`Save\` to complete the configuration.
|
|
7464
|
+
|
|
7465
|
+
|
|
7466
|
+
|
|
7467
|
+
##### Create Trigger
|
|
7468
|
+
1. Log in to the ServiceDesk Plus console and find the \`Setup\` configuration page.
|
|
7469
|
+
2. Select \`Automation\`, then enter the \`Triggers\` page and select \`Request\`.
|
|
7470
|
+
3. Click \`New Trigger\`, fill in **to_Flashduty** for \`Name\` in the edit page.
|
|
7471
|
+
4. Select **Request** for \`Trigger applies to\`, check **Create and Edited** for \`Execute when a request is\`.
|
|
7472
|
+
5. Select **Any time** for \`Execute during\` and check **Enable Trigger**.
|
|
7473
|
+
6. Select \`Without condition\` for \`Conditions\` or configure according to actual needs.
|
|
7474
|
+
7. Select **Webhook** in \`Actions\` and check **to_Flashduty** channel.
|
|
7475
|
+
8. Click \`Save\` to complete the configuration.
|
|
7476
|
+
|
|
7477
|
+
|
|
7478
|
+
|
|
7479
|
+
|
|
7480
|
+
## Sync Information
|
|
7481
|
+
|
|
7482
|
+
### Form Fields
|
|
7483
|
+
|
|
7484
|
+
| ServiceDesk Plus | Flashduty | Notes |
|
|
7485
|
+
| ------------------- | ------------- | ----- |
|
|
7486
|
+
| Subject | Title | |
|
|
7080
7487
|
| Description | Description | |
|
|
7081
|
-
|
|
|
7082
|
-
|
|
|
7083
|
-
| Urgency | Severity | |
|
|
7488
|
+
| Status | Progress | |
|
|
7489
|
+
| Priority | Severity | |
|
|
7084
7490
|
| Others | Custom Fields | |
|
|
7085
7491
|
|
|
7086
7492
|
### Status Mapping
|
|
7087
7493
|
|
|
7088
|
-
|
|
|
7494
|
+
| ServiceDesk Plus | Flashduty | Notes |
|
|
7089
7495
|
| ----------- | ---------- | ---------------------- |
|
|
7090
|
-
|
|
|
7496
|
+
| Open | Trigger | |
|
|
7091
7497
|
| In Progress | Processing | |
|
|
7498
|
+
| Assigned | Processing | |
|
|
7499
|
+
| Pending Verification | Processing | |
|
|
7500
|
+
| Staging | Processing | |
|
|
7092
7501
|
| On Hold | Snoozed | Default snooze 2 hours |
|
|
7093
7502
|
| Resolved | CLosed | |
|
|
7094
7503
|
| Closed | CLosed | |
|
|
7095
7504
|
| Canceled | CLosed | |
|
|
7505
|
+
| Rejected | CLosed | |
|
|
7096
7506
|
|
|
7097
|
-
### Priority Mapping
|
|
7098
|
-
|
|
7099
|
-
Only when ServiceNow's Urgency value changes will it affect Flashduty's Severity
|
|
7507
|
+
### Priority Mapping <span id="priority-mapping"></span>
|
|
7100
7508
|
|
|
7101
|
-
|
|
|
7509
|
+
| ServiceDesk Plus | Flashduty | Notes |
|
|
7102
7510
|
| ---------- | --------- | ----- |
|
|
7103
7511
|
| Low | Info | |
|
|
7104
7512
|
| Medium | Warning | |
|
|
7105
7513
|
| High | Critical | |
|
|
7106
|
-
|
|
7514
|
+
|
|
7515
|
+
|
|
7516
|
+
## FAQ
|
|
7517
|
+
|
|
7518
|
+
<details>
|
|
7519
|
+
<summary> Can the Scope be changed</summary>
|
|
7520
|
+
No, the Scope currently used is already the smallest unit. Flashduty needs to perform get/create/update operations when syncing requests with ServiceDesk Plus, and needs to obtain priority/custom field lists when configuring integration, so corresponding permission support is required.
|
|
7521
|
+
</details>
|
|
7522
|
+
`,he=`---
|
|
7107
7523
|
title: "Configure Notification Templates"
|
|
7108
7524
|
description: "Customize notification content through template configuration"
|
|
7109
7525
|
date: "2024-05-10T10:00:00+08:00"
|
|
@@ -7352,7 +7768,36 @@ CloseTime | int64 | No | Close time, EndTime is alert recovery time, CloseTime i
|
|
|
7352
7768
|
{{jsonGet .Labels.rule_note "#(userId==7777)#.instanceId" }}
|
|
7353
7769
|
|
|
7354
7770
|
\`\`\`
|
|
7355
|
-
|
|
7771
|
+
|
|
7772
|
+
10. **How to Retrieve the Image URL via the Src Attribute of [Image](#Image)**
|
|
7773
|
+
- The imageSrcToURL function can be implemented, accepting parameters: $root and Src
|
|
7774
|
+
- If Src is an image_key from the Image Upload API, it should be converted into a short-term accessible URL
|
|
7775
|
+
- If Src is an accessible http/https address, the address should be returned directly
|
|
7776
|
+
- Dingtalk/Slack Apps employ this method to render images
|
|
7777
|
+
\`\`\`go
|
|
7778
|
+
{{ $root := . }}
|
|
7779
|
+
{{ range $i, $v := .Images }}
|
|
7780
|
+
{{ $imageURL := imageSrcToURL $root $v.Src }}
|
|
7781
|
+
{{ if $imageURL }}{{ end }}{{end}}
|
|
7782
|
+
\`\`\`
|
|
7783
|
+
|
|
7784
|
+
11. **How to Convert and Upload Images to a Third-Party Notification Platform**
|
|
7785
|
+
- The transferImage function can be implemented, accepting parameters: $root and Src
|
|
7786
|
+
- Src can be an image_key from the Image Upload API or an accessible http/https image URL
|
|
7787
|
+
- Image size must not exceed 10 MB
|
|
7788
|
+
- Supported image formats include JPG, JPEG, PNG, WEBP, GIF, BMP, ICO, TIFF, HEIC
|
|
7789
|
+
- Requires enabling the application permission to access and upload image or file resources
|
|
7790
|
+
- Lark/Feishu Apps employ this method to render images
|
|
7791
|
+
|
|
7792
|
+
\`\`\`go
|
|
7793
|
+
{{ $root := . }}
|
|
7794
|
+
{{ range $i, $v := .Images }}
|
|
7795
|
+
{{ $transferURL := transferImage $root $v.Src }}
|
|
7796
|
+
{{ if $transferURL }}{{ end }}
|
|
7797
|
+
{{ end }}
|
|
7798
|
+
\`\`\`
|
|
7799
|
+
|
|
7800
|
+
12. **How to use logical AND, OR, and other conditions for conditional rendering/content display judgment?**
|
|
7356
7801
|
|
|
7357
7802
|
\`\`\`
|
|
7358
7803
|
# Supported functions
|
|
@@ -7385,7 +7830,7 @@ CloseTime | int64 | No | Close time, EndTime is alert recovery time, CloseTime i
|
|
|
7385
7830
|
|
|
7386
7831
|
\`\`\`
|
|
7387
7832
|
|
|
7388
|
-
|
|
7833
|
+
13. **How do I find more functions and their usage examples?**
|
|
7389
7834
|
- Function list: https://github.com/flashcatcloud/sprig/blob/master/functions.go#L97
|
|
7390
7835
|
- Usage examples: Check corresponding _test.go files, e.g., date function test cases at https://github.com/flashcatcloud/sprig/blob/master/date_test.go
|
|
7391
7836
|
|
|
@@ -7398,10 +7843,15 @@ Below are specific instructions for each notification channel.
|
|
|
7398
7843
|
You need to configure \`Integration Center-Instant Message-Feishu\` integration first to send message cards. If custom content is not set, the system default template will be used, rendering all label information:
|
|
7399
7844
|
|
|
7400
7845
|
\`\`\`go
|
|
7401
|
-
{{if .
|
|
7402
|
-
{{if .Labels.resource}}**resource** : {{
|
|
7846
|
+
{{if .Labels.body_text}}{{.Labels.body_text}}{{else if .Description}}{{.Description}}{{end}}
|
|
7847
|
+
{{if .Labels.resource}}**resource** : {{(joinAlertLabels . "resource" ", ")}}{{end}}
|
|
7403
7848
|
{{range $k, $v := .Labels}}
|
|
7404
|
-
{{if not (in $k "resource" "body_text")}}**{{$k}}** : {{
|
|
7849
|
+
{{if not (in $k "resource" "body_text" "body_text_with_table")}}**{{$k}}** : {{$v}}{{end}}{{end}}
|
|
7850
|
+
{{ $root := . }}
|
|
7851
|
+
{{ range $i, $v := .Images }}
|
|
7852
|
+
{{ $transferURL := transferImage $root $v.Src }}
|
|
7853
|
+
{{ if $transferURL }}{{ end }}
|
|
7854
|
+
{{ end }}
|
|
7405
7855
|
\`\`\`
|
|
7406
7856
|
|
|
7407
7857
|
As shown below:
|
|
@@ -7448,6 +7898,10 @@ You need to configure \`Integration Center-Instant Message-Dingtalk\` integratio
|
|
|
7448
7898
|
{{if .Labels.resource}}**resource** : {{toHtml (joinAlertLabels . "resource" ", ")}}{{end}}
|
|
7449
7899
|
{{range $k, $v := .Labels}}
|
|
7450
7900
|
{{if not (in $k "resource" "body_text")}}**{{$k}}** : {{toHtml $v}}{{end}}{{end}}
|
|
7901
|
+
{{ $root := . }}
|
|
7902
|
+
{{ range $i, $v := .Images }}
|
|
7903
|
+
{{ $imageURL := imageSrcToURL $root $v.Src }}
|
|
7904
|
+
{{ if $imageURL }}{{ end }}{{ end }}
|
|
7451
7905
|
\`\`\`
|
|
7452
7906
|
|
|
7453
7907
|
As shown below:
|
|
@@ -7526,13 +7980,22 @@ As shown below:
|
|
|
7526
7980
|
|
|
7527
7981
|
## Slack App
|
|
7528
7982
|
---
|
|
7983
|
+
|
|
7529
7984
|
You need to configure \`Integration Center-Instant Message-Slack\` integration first to send message cards. If custom content is not set, the system default template will be used, rendering only common label information:
|
|
7530
7985
|
|
|
7531
7986
|
\`\`\`go
|
|
7532
|
-
{{if .
|
|
7533
|
-
{{if .Labels.resource}}*resource* : {{
|
|
7987
|
+
{{if .Labels.body_text}}{{.Labels.body_text}}{{else if .Description}}{{.Description}}{{end}}
|
|
7988
|
+
{{if .Labels.resource}}*resource* : {{(joinAlertLabels . "resource" ", ")}}{{end}}
|
|
7534
7989
|
{{range $k, $v := .Labels}}
|
|
7535
|
-
{{if not (in $k "resource" "body_text")}}*{{$k}}* : {{
|
|
7990
|
+
{{if not (in $k "resource" "body_text" "body_text_with_table")}}*{{$k}}* : {{$v}}{{end}}{{end}}
|
|
7991
|
+
{{ $root := . }}
|
|
7992
|
+
{{ range $i, $v := .Images }}
|
|
7993
|
+
{{ $imageURL := imageSrcToURL $root $v.Src }}
|
|
7994
|
+
{{ if $imageURL }}
|
|
7995
|
+
---
|
|
7996
|
+

|
|
7997
|
+
{{ end }}
|
|
7998
|
+
{{ end }}
|
|
7536
7999
|
\`\`\`
|
|
7537
8000
|
|
|
7538
8001
|
As shown below:
|
|
@@ -7544,6 +8007,7 @@ If you want to display only key label information, you can refer to the code seg
|
|
|
7544
8007
|
- We've listed some common labels, you can add or remove as needed
|
|
7545
8008
|
- Messages can be around 15000 characters long, content beyond this will be truncated
|
|
7546
8009
|
- In Slack app, the system will automatically remove empty rendered lines (due to non-existent labels), so you can configure freely
|
|
8010
|
+
- To display images, use three consecutive hyphens \`---\` to separate it from other content. The image syntax must begin with \`![\` format, as demonstrated in the FAQ section
|
|
7547
8011
|
|
|
7548
8012
|
\`\`\`go
|
|
7549
8013
|
{{if (index .Labels "resource")}}*resource*:{{toHtml (joinAlertLabels . "resource" ", ")}}{{end}}
|
|
@@ -8223,7 +8687,7 @@ As shown in the image below:
|
|
|
8223
8687
|
|
|
8224
8688
|
<img src="https://download.flashcat.cloud/flashduty/changelog/20230720/email_render.png" alt="drawing" style="display: block; margin: 0 auto;" width="500"/>
|
|
8225
8689
|
|
|
8226
|
-
</div>`,
|
|
8690
|
+
</div>`,ue=`---
|
|
8227
8691
|
title: "Link Integration"
|
|
8228
8692
|
description: "Through Link integration, you can quickly access external links by obtaining key parameters from incident attributes, labels, and other information"
|
|
8229
8693
|
date: "2025-05-19T10:00:00+08:00"
|
|
@@ -8280,4 +8744,4 @@ https://cmdb.com/vm?sn=VM123456
|
|
|
8280
8744
|
1. When referenced content does not exist, Link integration will still generate the corresponding link but will not be able to retrieve the value
|
|
8281
8745
|
2. Each channel can bind up to three Link integrations
|
|
8282
8746
|
3. Pay attention to reference syntax; improper variable reference formatting will result in failure to retrieve corresponding values
|
|
8283
|
-
`,
|
|
8747
|
+
`,ge={CustomAlert:n,Email:t,N9e:a,Prometheus:i,Grafana:o,Zabbix:s,UptimeKuma:r,AliyunARMS:l,AliyunCmEvent:d,AliyunCm:c,AliyunSLS:e,AWSCW:e,AzureMonitor:h,BaiDuBCM:u,HuaWeiCES:g,InfluxDB:p,OpenFalcon:m,PagerDuty:f,TencentBK:y,TencentCLS:v,TencentCm:b,TencentEb:w,OceanBase:C,Graylog:k,Skywalking:I,Sentry:S,Jiankongbao:A,AWSEventBridge:F,Dynatrace:x,HuaweiyunLTS:L,GoogleCM:_,Zilliz:G,Splunk:R,AppDynamics:T,SolarWinds:D,VolcEngineMetric:U,VolcEngineEvent:E,VolcEngineTLS:N,OpManager:P,Meraki:M,StateCloud:W,Guance:q,CustomChange:Q,Jira:X,Lark:ee,Dingtalk:ne,Wecom:te,Slack:ae,MicrosoftTeams:ie,AlertWebhook:oe,IncidentWebhook:se,CustomAction:re,Templates:he,HuaweiyunAPM:O,JiraSync:le,ZStack:$,Keep:j,ElastAlert2:H,DingtalkAlert:Y,FeishuAlert:z,VolcEngineDetect:B,Link:ue,ServiceNowSync:de,Monit:V,Rum:K,Cloudflare:J,WecomAlert:Z,ServiceDeskPlusSync:ce};module.exports=ge;
|