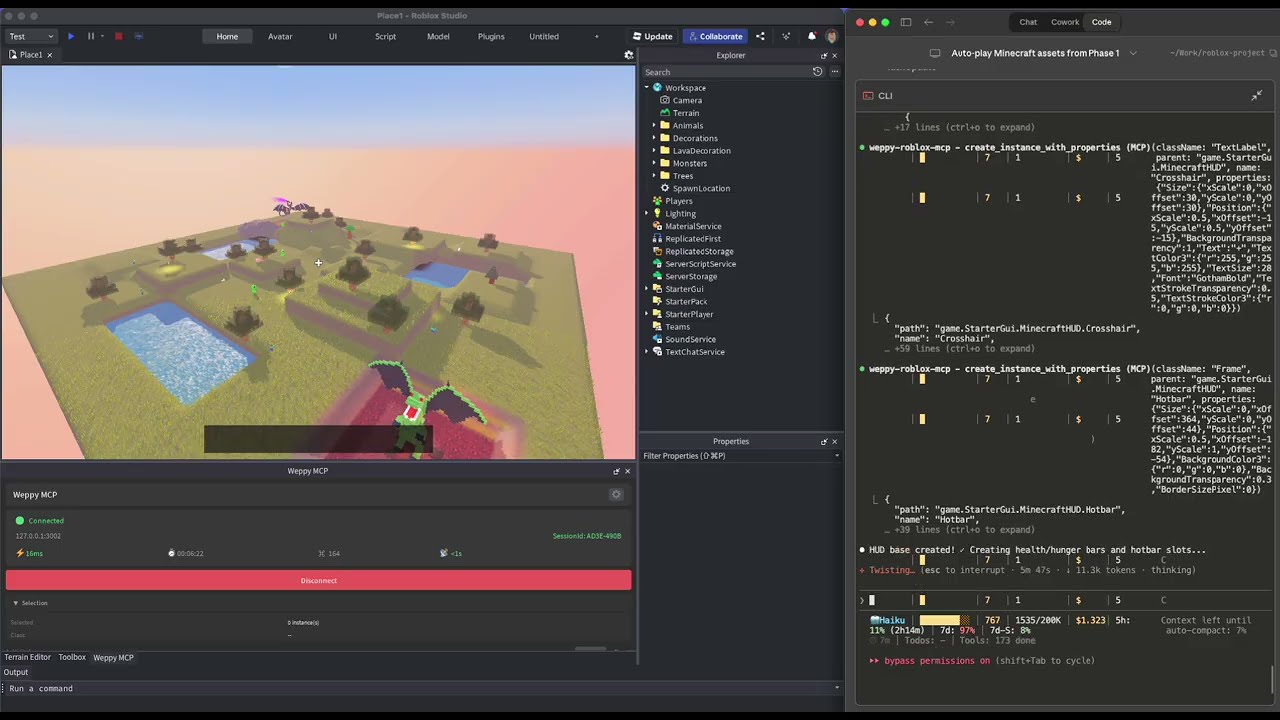
@weppy/roblox-mcp 2.0.1 → 2.0.3
This diff represents the content of publicly available package versions that have been released to one of the supported registries. The information contained in this diff is provided for informational purposes only and reflects changes between package versions as they appear in their respective public registries.
- package/.claude-plugin/marketplace.json +3 -3
- package/CHANGELOG.md +18 -0
- package/COMMERCIAL-LICENSE.md +13 -0
- package/Dockerfile +13 -0
- package/LICENSE +648 -40
- package/README.md +31 -2
- package/TRADEMARKS.md +18 -0
- package/docs/assets/screenshots/license/license-dashboard.png +3 -0
- package/docs/assets/screenshots/license/license-plugin.png +3 -0
- package/docs/compatibility.md +1 -1
- package/docs/en/installation/README.md +25 -2
- package/docs/en/installation/ai-apps/cursor.md +77 -0
- package/docs/en/installation/roblox-explorer.md +5 -5
- package/docs/en/installation/roblox-plugin.md +1 -0
- package/docs/en/pro-upgrade.md +36 -12
- package/docs/es/README.md +29 -10
- package/docs/es/installation/README.md +25 -2
- package/docs/es/installation/ai-apps/cursor.md +77 -0
- package/docs/es/installation/roblox-plugin.md +1 -0
- package/docs/es/pro-upgrade.md +37 -13
- package/docs/id/README.md +29 -10
- package/docs/id/installation/README.md +25 -2
- package/docs/id/installation/ai-apps/cursor.md +77 -0
- package/docs/id/installation/roblox-plugin.md +1 -0
- package/docs/id/pro-upgrade.md +36 -12
- package/docs/ja/README.md +29 -10
- package/docs/ja/installation/README.md +25 -2
- package/docs/ja/installation/ai-apps/cursor.md +77 -0
- package/docs/ja/installation/roblox-plugin.md +1 -0
- package/docs/ja/pro-upgrade.md +35 -11
- package/docs/ko/README.md +28 -9
- package/docs/ko/installation/README.md +25 -2
- package/docs/ko/installation/ai-apps/cursor.md +77 -0
- package/docs/ko/installation/roblox-explorer.md +5 -5
- package/docs/ko/installation/roblox-plugin.md +1 -0
- package/docs/ko/pro-upgrade.md +35 -11
- package/docs/pt-br/README.md +29 -10
- package/docs/pt-br/installation/README.md +25 -2
- package/docs/pt-br/installation/ai-apps/cursor.md +77 -0
- package/docs/pt-br/installation/roblox-plugin.md +1 -0
- package/docs/pt-br/pro-upgrade.md +37 -13
- package/glama.json +7 -0
- package/install.ps1 +277 -0
- package/install.sh +306 -0
- package/llms-full.txt +92 -7
- package/llms.txt +13 -1
- package/package.json +14 -3
- package/plugins/weppy-roblox-mcp/.claude-plugin/plugin.json +2 -2
- package/plugins/weppy-roblox-mcp/dashboard/dist/assets/{ChangelogDetailPage-Ss9rBuou.js → ChangelogDetailPage-IgHLnaEX.js} +1 -1
- package/plugins/weppy-roblox-mcp/dashboard/dist/assets/ChangelogPage-Br-A5H5t.css +1 -0
- package/plugins/weppy-roblox-mcp/dashboard/dist/assets/ChangelogPage-Dao4jPQA.js +1 -0
- package/plugins/weppy-roblox-mcp/dashboard/dist/assets/ConfirmModal-CvXLNYq0.js +1 -0
- package/plugins/weppy-roblox-mcp/dashboard/dist/assets/ConfirmModal-tvPLhSO9.css +1 -0
- package/plugins/weppy-roblox-mcp/dashboard/dist/assets/ConnectionPage-Bl7tLgL2.js +1 -0
- package/plugins/weppy-roblox-mcp/dashboard/dist/assets/ConnectionPage-CN3LYLAT.css +1 -0
- package/plugins/weppy-roblox-mcp/dashboard/dist/assets/InfoLabel-vz7vtbbV.js +1 -0
- package/plugins/weppy-roblox-mcp/dashboard/dist/assets/{OverviewPage-BcSHb-KS.js → OverviewPage-BDDctbAl.js} +1 -1
- package/plugins/weppy-roblox-mcp/dashboard/dist/assets/PlaytestPage-C0iCoAQp.js +1 -0
- package/plugins/weppy-roblox-mcp/dashboard/dist/assets/PlaytestPage-LnuHE5FL.css +1 -0
- package/plugins/weppy-roblox-mcp/dashboard/dist/assets/{PropertyDiff-BGBA0lal.js → PropertyDiff-CbDafceC.js} +1 -1
- package/plugins/weppy-roblox-mcp/dashboard/dist/assets/SettingsPage-CJs9ctOf.js +1 -0
- package/plugins/weppy-roblox-mcp/dashboard/dist/assets/SettingsPage-DP9OFhNb.css +1 -0
- package/plugins/weppy-roblox-mcp/dashboard/dist/assets/{StatusBadge-C_KxiYEt.js → StatusBadge-BMTgkxDJ.js} +1 -1
- package/plugins/weppy-roblox-mcp/dashboard/dist/assets/SyncPage-Bf1SdHGg.css +1 -0
- package/plugins/weppy-roblox-mcp/dashboard/dist/assets/SyncPage-BfXIBNVS.js +4 -0
- package/plugins/weppy-roblox-mcp/dashboard/dist/assets/{TierPromoPanel-B2hY_Iul.js → TierPromoPanel-CUrTMsXB.js} +1 -1
- package/plugins/weppy-roblox-mcp/dashboard/dist/assets/TierPromoProgress-DBA-FZGE.js +1 -0
- package/plugins/weppy-roblox-mcp/dashboard/dist/assets/ToolsPage-BZZZ3FXe.css +1 -0
- package/plugins/weppy-roblox-mcp/dashboard/dist/assets/ToolsPage-O4dXhEU-.js +1 -0
- package/plugins/weppy-roblox-mcp/dashboard/dist/assets/index-CkXvRg-O.js +69 -0
- package/plugins/weppy-roblox-mcp/dashboard/dist/assets/{tier-promo-config-BFJCz95t.js → tier-promo-config-B9lIKWCQ.js} +1 -1
- package/plugins/weppy-roblox-mcp/dashboard/dist/assets/{useLiveUptime-Gqoo4lJE.js → useLiveUptime-DXXyWm6j.js} +1 -1
- package/plugins/weppy-roblox-mcp/dashboard/dist/index.html +1 -1
- package/plugins/weppy-roblox-mcp/dist/index.js +58 -57
- package/plugins/weppy-roblox-mcp/roblox-plugin/WeppyRobloxMCP.rbxm +3 -0
- package/plugins/weppy-roblox-mcp/dashboard/dist/assets/ChangelogPage-ByQDwNhh.css +0 -1
- package/plugins/weppy-roblox-mcp/dashboard/dist/assets/ChangelogPage-D_OScUeF.js +0 -1
- package/plugins/weppy-roblox-mcp/dashboard/dist/assets/ConnectionPage-C3QU6eRJ.js +0 -1
- package/plugins/weppy-roblox-mcp/dashboard/dist/assets/ConnectionPage-CkQVyTc5.css +0 -1
- package/plugins/weppy-roblox-mcp/dashboard/dist/assets/InfoLabel-Cvotfyns.js +0 -1
- package/plugins/weppy-roblox-mcp/dashboard/dist/assets/PlaytestPage-CqIxk3qY.js +0 -1
- package/plugins/weppy-roblox-mcp/dashboard/dist/assets/PlaytestPage-emQ5xjZz.css +0 -1
- package/plugins/weppy-roblox-mcp/dashboard/dist/assets/SettingsPage-D-SyrBho.js +0 -1
- package/plugins/weppy-roblox-mcp/dashboard/dist/assets/SettingsPage-NF_CPSvZ.css +0 -1
- package/plugins/weppy-roblox-mcp/dashboard/dist/assets/SyncPage-BNHvpQxD.css +0 -1
- package/plugins/weppy-roblox-mcp/dashboard/dist/assets/SyncPage-DeQjKxmi.js +0 -4
- package/plugins/weppy-roblox-mcp/dashboard/dist/assets/TierPromoProgress-B9L7tJGd.js +0 -1
- package/plugins/weppy-roblox-mcp/dashboard/dist/assets/ToolsPage-CzFt06tW.js +0 -1
- package/plugins/weppy-roblox-mcp/dashboard/dist/assets/ToolsPage-cVoMPYAn.css +0 -1
- package/plugins/weppy-roblox-mcp/dashboard/dist/assets/index-mMUjBHCe.js +0 -69
package/README.md
CHANGED
|
@@ -16,7 +16,25 @@ AI coding agents like Claude, Codex, and Gemini are powerful — but they cannot
|
|
|
16
16
|
|
|
17
17
|
This is not just code generation. It is **executable, production-oriented actions** running directly in Studio.
|
|
18
18
|
|
|
19
|
-
## Quick Install
|
|
19
|
+
## Quick Install
|
|
20
|
+
|
|
21
|
+
**One-line install** — installs the MCP server, Roblox Studio plugin, and registers with your AI apps:
|
|
22
|
+
|
|
23
|
+
```bash
|
|
24
|
+
# macOS / Linux
|
|
25
|
+
curl -fsSL https://raw.githubusercontent.com/hope1026/weppy-roblox-mcp/main/install.sh | bash
|
|
26
|
+
|
|
27
|
+
# Windows (PowerShell)
|
|
28
|
+
irm https://raw.githubusercontent.com/hope1026/weppy-roblox-mcp/main/install.ps1 | iex
|
|
29
|
+
```
|
|
30
|
+
|
|
31
|
+
Then restart Roblox Studio — done!
|
|
32
|
+
|
|
33
|
+
If PowerShell execution is blocked on Windows, use the manual install path below. If you're using the ZIP package, you can also use `setup-plugin.bat` and `setup-mcp.bat`.
|
|
34
|
+
|
|
35
|
+
### Manual Install
|
|
36
|
+
|
|
37
|
+
If the one-line install does not work, or automatic installation is not available in your environment, use the manual install path below.
|
|
20
38
|
|
|
21
39
|
**Step 1** — Install the Roblox Studio plugin (bridge between Studio and AI):
|
|
22
40
|
[Plugin Installation Guide](docs/en/installation/roblox-plugin.md)
|
|
@@ -31,6 +49,7 @@ npx -y @weppy/roblox-mcp
|
|
|
31
49
|
|--------|-------|
|
|
32
50
|
| Claude Code | [Setup](docs/en/installation/ai-apps/claude-code.md) |
|
|
33
51
|
| Claude Desktop | [Setup](docs/en/installation/ai-apps/claude-app.md) |
|
|
52
|
+
| Cursor | [Setup](docs/en/installation/ai-apps/cursor.md) |
|
|
34
53
|
| Codex CLI | [Setup](docs/en/installation/ai-apps/codex-cli.md) |
|
|
35
54
|
| Codex Desktop | [Setup](docs/en/installation/ai-apps/codex-app.md) |
|
|
36
55
|
| Gemini CLI | [Setup](docs/en/installation/ai-apps/gemini-cli.md) |
|
|
@@ -138,7 +157,7 @@ Install the Roblox Studio plugin, then register the MCP server (`npx -y @weppy/r
|
|
|
138
157
|
Install the plugin, then add the MCP server config to Codex CLI. See [Codex CLI Setup](docs/en/installation/ai-apps/codex-cli.md).
|
|
139
158
|
|
|
140
159
|
### Does Roblox MCP work with Cursor?
|
|
141
|
-
Yes. Any MCP-compatible AI client works.
|
|
160
|
+
Yes. See [Cursor Setup](docs/en/installation/ai-apps/cursor.md). Any MCP-compatible AI client works.
|
|
142
161
|
|
|
143
162
|
### Can AI build Roblox games with this?
|
|
144
163
|
Yes. AI can create instances, write scripts, generate terrain, set up lighting, insert assets, configure physics, and more — all inside a live Roblox Studio session. It goes beyond code generation to executable actions.
|
|
@@ -158,8 +177,18 @@ Bidirectional Sync, advanced build capabilities, and AI token efficiency — all
|
|
|
158
177
|
|
|
159
178
|
[Pro Upgrade Guide](docs/en/pro-upgrade.md)
|
|
160
179
|
|
|
180
|
+
## License
|
|
181
|
+
|
|
182
|
+
This repository is licensed under `AGPL-3.0`.
|
|
183
|
+
|
|
184
|
+
Commercial licensing is available separately. See [COMMERCIAL-LICENSE.md](COMMERCIAL-LICENSE.md).
|
|
185
|
+
|
|
186
|
+
Use of the Weppy name and logos is governed by [TRADEMARKS.md](TRADEMARKS.md).
|
|
187
|
+
|
|
161
188
|
---
|
|
162
189
|
|
|
163
190
|
[](https://www.npmjs.com/package/@weppy/roblox-mcp) [](https://nodejs.org/) [](https://smithery.ai/server/@hope1026/weppy-roblox-mcp)
|
|
164
191
|
|
|
192
|
+
[](https://glama.ai/mcp/servers/hope1026/roblox-mcp)
|
|
193
|
+
|
|
165
194
|
[GitHub Issues](https://github.com/hope1026/weppy-roblox-mcp/issues) · [Discussions](https://github.com/hope1026/weppy-roblox-mcp/discussions) · [npm](https://www.npmjs.com/package/@weppy/roblox-mcp)
|
package/TRADEMARKS.md
ADDED
|
@@ -0,0 +1,18 @@
|
|
|
1
|
+
# Trademarks
|
|
2
|
+
|
|
3
|
+
`Weppy`, `Weppy Roblox MCP`, and related logos, product names, and branding are trademarks or brand identifiers of the maintainer.
|
|
4
|
+
|
|
5
|
+
The open-source software license for this repository does not grant trademark rights.
|
|
6
|
+
|
|
7
|
+
You may:
|
|
8
|
+
|
|
9
|
+
- Use the project name to make factual, nominative references to this project
|
|
10
|
+
- State that your software is compatible with or derived from this project
|
|
11
|
+
|
|
12
|
+
You may not:
|
|
13
|
+
|
|
14
|
+
- Use the Weppy name or branding in a way that suggests endorsement, affiliation, or official status
|
|
15
|
+
- Redistribute modified versions under the same branding in a way that could confuse users about origin
|
|
16
|
+
|
|
17
|
+
If you publish a fork or modified distribution, use distinct branding unless you have separate written permission.
|
|
18
|
+
|
package/docs/compatibility.md
CHANGED
|
@@ -6,7 +6,7 @@
|
|
|
6
6
|
|--------|:-----:|:---:|-------------|
|
|
7
7
|
| Claude Code | ✅ | ✅ | [Guide](en/installation/ai-apps/claude-code.md) |
|
|
8
8
|
| Claude Desktop | ✅ | ✅ | [Guide](en/installation/ai-apps/claude-app.md) |
|
|
9
|
-
| Cursor | ✅ | ✅ |
|
|
9
|
+
| Cursor | ✅ | ✅ | [Guide](en/installation/ai-apps/cursor.md) |
|
|
10
10
|
| Codex CLI | ✅ | ✅ | [Guide](en/installation/ai-apps/codex-cli.md) |
|
|
11
11
|
| Codex Desktop | ✅ | ✅ | [Guide](en/installation/ai-apps/codex-app.md) |
|
|
12
12
|
| Gemini CLI | ✅ | ✅ | [Guide](en/installation/ai-apps/gemini-cli.md) |
|
|
@@ -14,7 +14,29 @@ When an AI app says "Create a blue part", the MCP server converts this request,
|
|
|
14
14
|
|
|
15
15
|
---
|
|
16
16
|
|
|
17
|
-
##
|
|
17
|
+
## One-Line Install (Recommended)
|
|
18
|
+
|
|
19
|
+
Installs the MCP server, Roblox Studio plugin, and registers with your AI apps in one step:
|
|
20
|
+
|
|
21
|
+
```bash
|
|
22
|
+
# macOS / Linux
|
|
23
|
+
curl -fsSL https://raw.githubusercontent.com/hope1026/weppy-roblox-mcp/main/install.sh | bash
|
|
24
|
+
|
|
25
|
+
# Windows (PowerShell)
|
|
26
|
+
irm https://raw.githubusercontent.com/hope1026/weppy-roblox-mcp/main/install.ps1 | iex
|
|
27
|
+
```
|
|
28
|
+
|
|
29
|
+
Then restart Roblox Studio — done!
|
|
30
|
+
|
|
31
|
+
If PowerShell execution is blocked on Windows, use the manual install path below. If you're using the ZIP package, you can also run `setup-plugin.bat` and `setup-mcp.bat`.
|
|
32
|
+
|
|
33
|
+
---
|
|
34
|
+
|
|
35
|
+
## Manual Install
|
|
36
|
+
|
|
37
|
+
If the one-line install does not work, or automatic installation is not available in your environment, use the manual install path below as an alternative.
|
|
38
|
+
|
|
39
|
+
### Step 1: Install Roblox Studio Plugin
|
|
18
40
|
|
|
19
41
|
Download the plugin file from GitHub, then place it in Roblox Studio's Plugins folder.
|
|
20
42
|
|
|
@@ -22,7 +44,7 @@ Download the plugin file from GitHub, then place it in Roblox Studio's Plugins f
|
|
|
22
44
|
|
|
23
45
|
---
|
|
24
46
|
|
|
25
|
-
|
|
47
|
+
### Step 2: Register MCP Server with AI App
|
|
26
48
|
|
|
27
49
|
Register the MCP server with your AI app. You can use it with any AI app that supports MCP.
|
|
28
50
|
|
|
@@ -30,6 +52,7 @@ Register the MCP server with your AI app. You can use it with any AI app that su
|
|
|
30
52
|
|--------|-------------------|
|
|
31
53
|
| Claude Code | [Setup Instructions](ai-apps/claude-code.md) |
|
|
32
54
|
| Claude Desktop | [Setup Instructions](ai-apps/claude-app.md) |
|
|
55
|
+
| Cursor | [Setup Instructions](ai-apps/cursor.md) |
|
|
33
56
|
| Codex CLI | [Setup Instructions](ai-apps/codex-cli.md) |
|
|
34
57
|
| Codex Desktop | [Setup Instructions](ai-apps/codex-app.md) |
|
|
35
58
|
| Gemini CLI | [Setup Instructions](ai-apps/gemini-cli.md) |
|
|
@@ -0,0 +1,77 @@
|
|
|
1
|
+
# Cursor Setup
|
|
2
|
+
|
|
3
|
+
How to use Roblox MCP with [Cursor](https://cursor.com/).
|
|
4
|
+
|
|
5
|
+
## Prerequisites
|
|
6
|
+
|
|
7
|
+
- **Cursor** installed
|
|
8
|
+
- **Node.js** (v18.0.0 or higher)
|
|
9
|
+
- **Roblox Studio Plugin** installed
|
|
10
|
+
|
|
11
|
+
## Register MCP Server
|
|
12
|
+
|
|
13
|
+
### Method 1: Project Configuration
|
|
14
|
+
|
|
15
|
+
Add the following to `.cursor/mcp.json` in your project:
|
|
16
|
+
|
|
17
|
+
```json
|
|
18
|
+
{
|
|
19
|
+
"mcpServers": {
|
|
20
|
+
"weppy-roblox-mcp": {
|
|
21
|
+
"command": "npx",
|
|
22
|
+
"args": ["-y", "@weppy/roblox-mcp"]
|
|
23
|
+
}
|
|
24
|
+
}
|
|
25
|
+
}
|
|
26
|
+
```
|
|
27
|
+
|
|
28
|
+
### Method 2: Global Configuration
|
|
29
|
+
|
|
30
|
+
Add the same content to your global Cursor MCP config file.
|
|
31
|
+
|
|
32
|
+
**Configuration file locations:**
|
|
33
|
+
|
|
34
|
+
| Scope | Path |
|
|
35
|
+
|-------|------|
|
|
36
|
+
| Project | `<project>/.cursor/mcp.json` |
|
|
37
|
+
| Global (macOS/Linux) | `~/.cursor/mcp.json` |
|
|
38
|
+
| Global (Windows) | `%USERPROFILE%\\.cursor\\mcp.json` |
|
|
39
|
+
|
|
40
|
+
> If the file already exists, merge the `weppy-roblox-mcp` entry into the existing `mcpServers` object.
|
|
41
|
+
|
|
42
|
+
### Apply Changes
|
|
43
|
+
|
|
44
|
+
After editing the config, reload the Cursor window or restart the app.
|
|
45
|
+
|
|
46
|
+
## Connection Test
|
|
47
|
+
|
|
48
|
+
1. Open **Roblox Studio** → Plugins tab → **W-MCP** → **Connect**
|
|
49
|
+
2. In **Cursor**, enter:
|
|
50
|
+
```
|
|
51
|
+
Tell me what's currently selected in Roblox Studio
|
|
52
|
+
```
|
|
53
|
+
|
|
54
|
+
## Troubleshooting
|
|
55
|
+
|
|
56
|
+
### MCP server not showing up
|
|
57
|
+
|
|
58
|
+
- Check that the config file path is correct
|
|
59
|
+
- Verify the JSON syntax is valid
|
|
60
|
+
- Reload Cursor after editing the config
|
|
61
|
+
|
|
62
|
+
### Server won't start
|
|
63
|
+
|
|
64
|
+
Run the MCP server directly to check for errors:
|
|
65
|
+
|
|
66
|
+
```bash
|
|
67
|
+
npx -y @weppy/roblox-mcp
|
|
68
|
+
```
|
|
69
|
+
|
|
70
|
+
### Connection failed
|
|
71
|
+
|
|
72
|
+
- Verify the Roblox Studio plugin is in **Connected** state
|
|
73
|
+
- Check if port 3002 is blocked by a firewall
|
|
74
|
+
|
|
75
|
+
## Reference
|
|
76
|
+
|
|
77
|
+
- [Cursor MCP Documentation](https://docs.cursor.com/context/model-context-protocol)
|
|
@@ -11,11 +11,11 @@ Roblox Studio Explorer-like tree view for VSCode. Browse synced instance trees,
|
|
|
11
11
|
|
|
12
12
|
## Installation
|
|
13
13
|
|
|
14
|
-
### 1. Download
|
|
14
|
+
### 1. Download Release Package
|
|
15
15
|
|
|
16
|
-
Go to the [Releases](https://github.com/hope1026/weppy-roblox-mcp/releases) page and download the latest `weppy-roblox-explorer
|
|
16
|
+
Go to the [Releases](https://github.com/hope1026/weppy-roblox-mcp/releases) page and download the latest `weppy-roblox-explorer-v*.zip` file.
|
|
17
17
|
|
|
18
|
-
> The
|
|
18
|
+
> The ZIP package contains the `weppy-roblox-explorer-*.vsix` file you will install in VSCode.
|
|
19
19
|
|
|
20
20
|
### 2. Install in VSCode
|
|
21
21
|
|
|
@@ -25,7 +25,7 @@ Go to the [Releases](https://github.com/hope1026/weppy-roblox-mcp/releases) page
|
|
|
25
25
|
|
|
26
26
|

|
|
27
27
|
|
|
28
|
-
4.
|
|
28
|
+
4. Extract the ZIP package and select the included `.vsix` file
|
|
29
29
|
5. Reload VSCode when prompted
|
|
30
30
|
|
|
31
31
|
## Features
|
|
@@ -60,7 +60,7 @@ Go to the [Releases](https://github.com/hope1026/weppy-roblox-mcp/releases) page
|
|
|
60
60
|
|
|
61
61
|
## Updating
|
|
62
62
|
|
|
63
|
-
Download the latest
|
|
63
|
+
Download the latest `weppy-roblox-explorer-v*.zip` from [Releases](https://github.com/hope1026/weppy-roblox-mcp/releases), extract the `.vsix`, and repeat the installation steps. VSCode will replace the existing version.
|
|
64
64
|
|
|
65
65
|
## Related
|
|
66
66
|
|
|
@@ -39,6 +39,7 @@ The MCP server must be installed. Complete the guide for your AI app first:
|
|
|
39
39
|
|--------|-------------------|
|
|
40
40
|
| Claude Code | [Setup Guide](ai-apps/claude-code.md) |
|
|
41
41
|
| Claude Desktop | [Setup Guide](ai-apps/claude-app.md) |
|
|
42
|
+
| Cursor | [Setup Guide](ai-apps/cursor.md) |
|
|
42
43
|
| Codex CLI | [Setup Guide](ai-apps/codex-cli.md) |
|
|
43
44
|
| Codex Desktop | [Setup Guide](ai-apps/codex-app.md) |
|
|
44
45
|
| Gemini CLI | [Setup Guide](ai-apps/gemini-cli.md) |
|
package/docs/en/pro-upgrade.md
CHANGED
|
@@ -17,28 +17,54 @@ Pro Sync goes beyond one-way export. Edit scripts locally and push them to Studi
|
|
|
17
17
|
|
|
18
18
|
Bulk and advanced actions reduce repetitive round trips — do more per prompt.
|
|
19
19
|
|
|
20
|
+
### Let AI run and verify playtests directly
|
|
21
|
+
|
|
22
|
+
AI can control Roblox Studio playtests directly. It can start and stop Play (F5) or Run (F8), inject test scripts, collect logs, and generate local reports automatically.
|
|
23
|
+
|
|
24
|
+
- "Start a Run-mode playtest and check whether the NPC reaches the target."
|
|
25
|
+
- "Write a test that verifies the SpawnLocation is above the ground and run it."
|
|
26
|
+
- "Validate that the script I just changed runs without errors in playtest."
|
|
27
|
+
|
|
20
28
|
### Broader advanced capabilities
|
|
21
29
|
|
|
22
30
|
Terrain generation, asset search, spatial analysis, animation, audio, and production-scale automation.
|
|
23
31
|
|
|
24
|
-
##
|
|
32
|
+
## Buy and Activate
|
|
25
33
|
|
|
26
|
-
### Step 1:
|
|
34
|
+
### Step 1: Buy a Pro subscription license on Gumroad
|
|
27
35
|
|
|
28
36
|
1. Go to [Gumroad - Weppy Roblox Plugin](https://gumroad.com/l/faccjs?utm_source=github&utm_medium=repo&utm_campaign=pro_upgrade_md)
|
|
29
37
|
2. Complete your Pro subscription license purchase
|
|
38
|
+
3. Copy the license key you receive after purchase
|
|
39
|
+
|
|
40
|
+
You only need to activate the license once, either in the plugin or in the dashboard. Both surfaces share the same MCP local license state, so once you activate in one place, the same status appears in the other.
|
|
41
|
+
|
|
42
|
+
### Activate in the plugin
|
|
43
|
+
|
|
44
|
+
1. Open **W-MCP** in Roblox Studio and connect to the MCP server.
|
|
45
|
+
2. Open **Settings > License** in the plugin.
|
|
46
|
+
3. Paste your purchased key into the `License key` field.
|
|
47
|
+
4. Click **Activate** to activate the license.
|
|
48
|
+
5. If the status does not update immediately, click **Refresh**.
|
|
49
|
+
6. When activation succeeds, the status changes from Basic to Pro and Pro features become available.
|
|
50
|
+
|
|
51
|
+

|
|
52
|
+
|
|
53
|
+
### Activate in the dashboard
|
|
30
54
|
|
|
31
|
-
|
|
55
|
+
1. Start the MCP server, then open **Settings > License** in the dashboard.
|
|
56
|
+
2. Confirm that the provider is set to `gumroad`.
|
|
57
|
+
3. Paste your purchased key into the `License Key` field.
|
|
58
|
+
4. Click **Activate License** to activate the license.
|
|
59
|
+
5. If needed, use **Refresh License** to fetch the latest status.
|
|
32
60
|
|
|
33
|
-
|
|
34
|
-
2. Download `weppy-roblox-mcp-v{version}.zip`
|
|
35
|
-
3. Extract and copy `roblox-plugin/WeppyRobloxMCP.rbxm` to your Roblox Plugins folder
|
|
61
|
+

|
|
36
62
|
|
|
37
|
-
###
|
|
63
|
+
### After activation
|
|
38
64
|
|
|
39
|
-
|
|
40
|
-
|
|
41
|
-
|
|
65
|
+
- If the license status is shown as `active` or `grace`, Pro features are available.
|
|
66
|
+
- The plugin and dashboard share the same license state, so activating in one place is reflected in the other.
|
|
67
|
+
- Use **Refresh** or **Refresh License** whenever you want to check the latest status again.
|
|
42
68
|
|
|
43
69
|
## Feature Comparison
|
|
44
70
|
|
|
@@ -49,8 +75,6 @@ Terrain generation, asset search, spatial analysis, animation, audio, and produc
|
|
|
49
75
|
| Sync Direction | Studio → Local (one-way) | Bidirectional |
|
|
50
76
|
| Per-type Sync Direction | ❌ | ✅ Scripts / Values / Containers / Data / Services |
|
|
51
77
|
| Per-type Apply Mode | ❌ | ✅ Auto / Manual |
|
|
52
|
-
| Full Sync | ❌ | ✅ |
|
|
53
|
-
| Resync / Rebuild state | ❌ | ✅ |
|
|
54
78
|
| Change History | ❌ | ✅ |
|
|
55
79
|
| Multi-place Sync | ❌ | ✅ Up to 3 places, each with isolated storage |
|
|
56
80
|
| Playtest Control (Play/Stop/Pause/Resume) | ❌ | ✅ |
|
package/docs/es/README.md
CHANGED
|
@@ -8,10 +8,28 @@
|
|
|
8
8
|
|
|
9
9
|
[](https://youtu.be/3jrUpBbZPaw)
|
|
10
10
|
|
|
11
|
-
## Instalacion rapida
|
|
11
|
+
## Instalacion rapida
|
|
12
|
+
|
|
13
|
+
**Instalacion en un solo comando** — Instala el servidor MCP, el plugin de Roblox Studio y registra tus apps de IA en un solo paso:
|
|
14
|
+
|
|
15
|
+
```bash
|
|
16
|
+
# macOS / Linux
|
|
17
|
+
curl -fsSL https://raw.githubusercontent.com/hope1026/weppy-roblox-mcp/main/install.sh | bash
|
|
18
|
+
|
|
19
|
+
# Windows (PowerShell)
|
|
20
|
+
irm https://raw.githubusercontent.com/hope1026/weppy-roblox-mcp/main/install.ps1 | iex
|
|
21
|
+
```
|
|
22
|
+
|
|
23
|
+
¡Reinicia Roblox Studio y listo!
|
|
24
|
+
|
|
25
|
+
Si la ejecución de PowerShell está bloqueada en Windows, continúa con la instalación manual de abajo. Si usas el paquete ZIP, también puedes usar `setup-plugin.bat` y `setup-mcp.bat`.
|
|
26
|
+
|
|
27
|
+
### Instalacion manual
|
|
28
|
+
|
|
29
|
+
Si la instalación en un solo comando no funciona, o si no puedes usar la instalación automática en tu entorno, usa la instalación manual de abajo como alternativa.
|
|
12
30
|
|
|
13
31
|
**Paso 1** — Instala el plugin de Roblox Studio (puente entre Studio e IA):
|
|
14
|
-
[Guia de instalacion del plugin](
|
|
32
|
+
[Guia de instalacion del plugin](installation/roblox-plugin.md)
|
|
15
33
|
|
|
16
34
|
**Paso 2** — Registra el servidor MCP en tu app de IA:
|
|
17
35
|
|
|
@@ -21,11 +39,12 @@ npx -y @weppy/roblox-mcp
|
|
|
21
39
|
|
|
22
40
|
| App de IA | Guia |
|
|
23
41
|
|-----------|------|
|
|
24
|
-
| Claude Code | [Configuracion](
|
|
25
|
-
| Claude Desktop | [Configuracion](
|
|
26
|
-
|
|
|
27
|
-
| Codex
|
|
28
|
-
|
|
|
42
|
+
| Claude Code | [Configuracion](installation/ai-apps/claude-code.md) |
|
|
43
|
+
| Claude Desktop | [Configuracion](installation/ai-apps/claude-app.md) |
|
|
44
|
+
| Cursor | [Configuracion](installation/ai-apps/cursor.md) |
|
|
45
|
+
| Codex CLI | [Configuracion](installation/ai-apps/codex-cli.md) |
|
|
46
|
+
| Codex Desktop | [Configuracion](installation/ai-apps/codex-app.md) |
|
|
47
|
+
| Gemini CLI | [Configuracion](installation/ai-apps/gemini-cli.md) |
|
|
29
48
|
|
|
30
49
|
> Funciona con cualquier cliente MCP compatible. El comando del servidor es `npx -y @weppy/roblox-mcp`.
|
|
31
50
|
|
|
@@ -95,11 +114,11 @@ Visualiza el arbol completo de instancias de tu lugar en Roblox Studio directame
|
|
|
95
114
|
|
|
96
115
|
## Documentacion detallada
|
|
97
116
|
|
|
98
|
-
- [Guia de instalacion](
|
|
117
|
+
- [Guia de instalacion](installation/README.md)
|
|
99
118
|
- [Lista completa de tools](tools/overview.md)
|
|
100
119
|
- [Guia detallada de Sync](sync/overview.md)
|
|
101
120
|
- [Guia del Dashboard](dashboard/overview.md)
|
|
102
|
-
- [Roblox Explorer (Extension VSCode)](
|
|
121
|
+
- [Roblox Explorer (Extension VSCode)](installation/roblox-explorer.md)
|
|
103
122
|
- [Compatibilidad](../compatibility.md)
|
|
104
123
|
- [Solucion de problemas](../troubleshooting.md)
|
|
105
124
|
|
|
@@ -116,7 +135,7 @@ Visualiza el arbol completo de instancias de tu lugar en Roblox Studio directame
|
|
|
116
135
|
|
|
117
136
|
Sync bidireccional, capacidades de creacion avanzadas y eficiencia de tokens de IA — todo en una sola actualizacion.
|
|
118
137
|
|
|
119
|
-
[Guia de actualizacion Pro](
|
|
138
|
+
[Guia de actualizacion Pro](pro-upgrade.md)
|
|
120
139
|
|
|
121
140
|
---
|
|
122
141
|
|
|
@@ -10,13 +10,35 @@ App de IA (Claude, etc.)
|
|
|
10
10
|
Plugin de Roblox Studio
|
|
11
11
|
```
|
|
12
12
|
|
|
13
|
-
##
|
|
13
|
+
## Instalación en un solo comando (Recomendado)
|
|
14
|
+
|
|
15
|
+
Instala el servidor MCP, el plugin de Roblox Studio y registra tus apps de IA en un solo paso:
|
|
16
|
+
|
|
17
|
+
```bash
|
|
18
|
+
# macOS / Linux
|
|
19
|
+
curl -fsSL https://raw.githubusercontent.com/hope1026/weppy-roblox-mcp/main/install.sh | bash
|
|
20
|
+
|
|
21
|
+
# Windows (PowerShell)
|
|
22
|
+
irm https://raw.githubusercontent.com/hope1026/weppy-roblox-mcp/main/install.ps1 | iex
|
|
23
|
+
```
|
|
24
|
+
|
|
25
|
+
¡Reinicia Roblox Studio y listo!
|
|
26
|
+
|
|
27
|
+
Si la ejecución de PowerShell está bloqueada en Windows, continúa con la instalación manual de abajo. Si usas el paquete ZIP, también puedes ejecutar `setup-plugin.bat` y `setup-mcp.bat`.
|
|
28
|
+
|
|
29
|
+
---
|
|
30
|
+
|
|
31
|
+
## Instalación manual
|
|
32
|
+
|
|
33
|
+
Este es el método alternativo cuando la instalación en un solo comando no funciona, o cuando no puedes usar la instalación automática en tu entorno.
|
|
34
|
+
|
|
35
|
+
### Paso 1: Instalar el Plugin de Roblox Studio
|
|
14
36
|
|
|
15
37
|
El plugin conecta Roblox Studio con la IA.
|
|
16
38
|
|
|
17
39
|
👉 [Guía de instalación del plugin](roblox-plugin.md)
|
|
18
40
|
|
|
19
|
-
|
|
41
|
+
### Paso 2: Registrar el Servidor MCP en tu App de IA
|
|
20
42
|
|
|
21
43
|
Configura el servidor MCP en tu app de IA para que pueda comunicarse con Roblox Studio.
|
|
22
44
|
|
|
@@ -24,6 +46,7 @@ Configura el servidor MCP en tu app de IA para que pueda comunicarse con Roblox
|
|
|
24
46
|
|-----------|----------------|
|
|
25
47
|
| **Claude Code** | [Instrucciones](ai-apps/claude-code.md) |
|
|
26
48
|
| **Claude Desktop** | [Instrucciones](ai-apps/claude-app.md) |
|
|
49
|
+
| **Cursor** | [Instrucciones](ai-apps/cursor.md) |
|
|
27
50
|
| **Codex CLI** | [Instrucciones](ai-apps/codex-cli.md) |
|
|
28
51
|
| **Codex Desktop** | [Instrucciones](ai-apps/codex-app.md) |
|
|
29
52
|
| **Gemini CLI** | [Instrucciones](ai-apps/gemini-cli.md) |
|
|
@@ -0,0 +1,77 @@
|
|
|
1
|
+
# Configuración de Cursor
|
|
2
|
+
|
|
3
|
+
Cómo usar Roblox MCP con [Cursor](https://cursor.com/).
|
|
4
|
+
|
|
5
|
+
## Requisitos previos
|
|
6
|
+
|
|
7
|
+
- **Cursor** instalado
|
|
8
|
+
- **Node.js** (v18.0.0 o superior)
|
|
9
|
+
- **Plugin de Roblox Studio** instalado
|
|
10
|
+
|
|
11
|
+
## Registrar el servidor MCP
|
|
12
|
+
|
|
13
|
+
### Método 1: Configuración del proyecto
|
|
14
|
+
|
|
15
|
+
Agrega lo siguiente a `.cursor/mcp.json` dentro de tu proyecto:
|
|
16
|
+
|
|
17
|
+
```json
|
|
18
|
+
{
|
|
19
|
+
"mcpServers": {
|
|
20
|
+
"weppy-roblox-mcp": {
|
|
21
|
+
"command": "npx",
|
|
22
|
+
"args": ["-y", "@weppy/roblox-mcp"]
|
|
23
|
+
}
|
|
24
|
+
}
|
|
25
|
+
}
|
|
26
|
+
```
|
|
27
|
+
|
|
28
|
+
### Método 2: Configuración global
|
|
29
|
+
|
|
30
|
+
Agrega el mismo contenido al archivo de configuración global de Cursor.
|
|
31
|
+
|
|
32
|
+
**Ubicaciones del archivo de configuración:**
|
|
33
|
+
|
|
34
|
+
| Alcance | Ruta |
|
|
35
|
+
|---------|------|
|
|
36
|
+
| Proyecto | `<proyecto>/.cursor/mcp.json` |
|
|
37
|
+
| Global (macOS/Linux) | `~/.cursor/mcp.json` |
|
|
38
|
+
| Global (Windows) | `%USERPROFILE%\\.cursor\\mcp.json` |
|
|
39
|
+
|
|
40
|
+
> Si el archivo ya existe, fusiona la entrada `weppy-roblox-mcp` dentro del objeto `mcpServers`.
|
|
41
|
+
|
|
42
|
+
### Aplicar cambios
|
|
43
|
+
|
|
44
|
+
Después de editar la configuración, recarga la ventana de Cursor o reinicia la aplicación.
|
|
45
|
+
|
|
46
|
+
## Prueba de conexión
|
|
47
|
+
|
|
48
|
+
1. Abre **Roblox Studio** → pestaña Plugins → **W-MCP** → **Connect**
|
|
49
|
+
2. En **Cursor**, escribe:
|
|
50
|
+
```
|
|
51
|
+
Tell me what's currently selected in Roblox Studio
|
|
52
|
+
```
|
|
53
|
+
|
|
54
|
+
## Solución de problemas
|
|
55
|
+
|
|
56
|
+
### El servidor MCP no aparece
|
|
57
|
+
|
|
58
|
+
- Verifica que la ruta del archivo de configuración sea correcta
|
|
59
|
+
- Comprueba que la sintaxis JSON sea válida
|
|
60
|
+
- Recarga Cursor después de editar la configuración
|
|
61
|
+
|
|
62
|
+
### El servidor no inicia
|
|
63
|
+
|
|
64
|
+
Ejecuta el servidor MCP directamente para revisar errores:
|
|
65
|
+
|
|
66
|
+
```bash
|
|
67
|
+
npx -y @weppy/roblox-mcp
|
|
68
|
+
```
|
|
69
|
+
|
|
70
|
+
### La conexión falla
|
|
71
|
+
|
|
72
|
+
- Verifica que el plugin de Roblox Studio esté en estado **Connected**
|
|
73
|
+
- Revisa si el puerto 3002 está bloqueado por el firewall
|
|
74
|
+
|
|
75
|
+
## Referencia
|
|
76
|
+
|
|
77
|
+
- [Documentación de Cursor MCP](https://docs.cursor.com/context/model-context-protocol)
|
|
@@ -39,6 +39,7 @@ El servidor MCP debe estar instalado. Completa primero la guia de tu app de IA:
|
|
|
39
39
|
|---------------|---------------------|
|
|
40
40
|
| Claude Code | [Como configurar](ai-apps/claude-code.md) |
|
|
41
41
|
| Claude Desktop | [Como configurar](ai-apps/claude-app.md) |
|
|
42
|
+
| Cursor | [Como configurar](ai-apps/cursor.md) |
|
|
42
43
|
| Codex CLI | [Como configurar](ai-apps/codex-cli.md) |
|
|
43
44
|
| Codex Desktop | [Como configurar](ai-apps/codex-app.md) |
|
|
44
45
|
| Gemini CLI | [Como configurar](ai-apps/gemini-cli.md) |
|
package/docs/es/pro-upgrade.md
CHANGED
|
@@ -17,28 +17,54 @@ Pro Sync va más allá del simple export. Edita scripts localmente y súbelos a
|
|
|
17
17
|
|
|
18
18
|
Las acciones masivas y avanzadas reducen las llamadas repetitivas — haz más por cada prompt.
|
|
19
19
|
|
|
20
|
+
### IA que controla los playtests directamente
|
|
21
|
+
|
|
22
|
+
La IA puede controlar los playtests de Roblox Studio de forma directa. Puede iniciar y detener Play (F5) o Run (F8), inyectar scripts de prueba, recopilar logs y generar reportes automáticamente.
|
|
23
|
+
|
|
24
|
+
- "Inicia un playtest en modo Run y verifica si el NPC llega al objetivo."
|
|
25
|
+
- "Escribe un test que compruebe si el SpawnLocation está sobre el suelo y ejecútalo."
|
|
26
|
+
- "Valida que el script que acabo de cambiar funciona sin errores en el playtest."
|
|
27
|
+
|
|
20
28
|
### Capacidades avanzadas más amplias
|
|
21
29
|
|
|
22
30
|
Generación de terreno, búsqueda de assets, análisis espacial, animación, audio y automatización a escala de producción.
|
|
23
31
|
|
|
24
|
-
##
|
|
32
|
+
## Compra y activación
|
|
25
33
|
|
|
26
|
-
### Paso 1:
|
|
34
|
+
### Paso 1: Compra una licencia de suscripción Pro en Gumroad
|
|
27
35
|
|
|
28
36
|
1. Ve a [Gumroad - Weppy Roblox Plugin](https://gumroad.com/l/faccjs?utm_source=github&utm_medium=repo&utm_campaign=pro_upgrade_md)
|
|
29
|
-
2. Completa la compra de licencia
|
|
37
|
+
2. Completa la compra de la licencia de suscripción Pro
|
|
38
|
+
3. Copia la clave de licencia que recibes después de la compra
|
|
39
|
+
|
|
40
|
+
Solo necesitas activar la licencia una vez, ya sea en el plugin o en el dashboard. Ambas superficies comparten el mismo estado local de licencia del MCP, así que al activarla en un lugar, el mismo estado aparecerá en el otro.
|
|
41
|
+
|
|
42
|
+
### Activar en el plugin
|
|
43
|
+
|
|
44
|
+
1. Abre **W-MCP** en Roblox Studio y conéctalo al servidor MCP.
|
|
45
|
+
2. Abre la sección **Settings > License** del plugin.
|
|
46
|
+
3. Pega la clave comprada en el campo `License key`.
|
|
47
|
+
4. Haz clic en **Activate** para activar la licencia.
|
|
48
|
+
5. Si el estado no se actualiza de inmediato, haz clic en **Refresh**.
|
|
49
|
+
6. Cuando la activación se complete, el estado cambiará de Basic a Pro y las funciones Pro quedarán disponibles.
|
|
50
|
+
|
|
51
|
+

|
|
52
|
+
|
|
53
|
+
### Activar en el dashboard
|
|
30
54
|
|
|
31
|
-
|
|
55
|
+
1. Inicia el servidor MCP y abre **Settings > License** en el dashboard.
|
|
56
|
+
2. Confirma que el proveedor esté configurado como `gumroad`.
|
|
57
|
+
3. Pega la clave comprada en el campo `License Key`.
|
|
58
|
+
4. Haz clic en **Activate License** para activar la licencia.
|
|
59
|
+
5. Si hace falta, usa **Refresh License** para obtener el estado más reciente.
|
|
32
60
|
|
|
33
|
-
|
|
34
|
-
2. Descarga `weppy-roblox-mcp-v{version}.zip`
|
|
35
|
-
3. Extrae y copia `roblox-plugin/WeppyRobloxMCP.rbxm` a tu carpeta de Plugins de Roblox
|
|
61
|
+

|
|
36
62
|
|
|
37
|
-
###
|
|
63
|
+
### Después de activar
|
|
38
64
|
|
|
39
|
-
|
|
40
|
-
|
|
41
|
-
|
|
65
|
+
- Si el estado de la licencia aparece como `active` o `grace`, las funciones Pro ya están disponibles.
|
|
66
|
+
- El plugin y el dashboard comparten el mismo estado de licencia, así que la activación hecha en uno se refleja en el otro.
|
|
67
|
+
- Usa **Refresh** o **Refresh License** cuando quieras volver a comprobar el estado más reciente.
|
|
42
68
|
|
|
43
69
|
## Comparación de Funciones
|
|
44
70
|
|
|
@@ -49,8 +75,6 @@ Generación de terreno, búsqueda de assets, análisis espacial, animación, aud
|
|
|
49
75
|
| Dirección de Sync | Studio → Local (una vía) | Bidireccional |
|
|
50
76
|
| Sync Direction por tipo | ❌ | ✅ Scripts / Values / Containers / Data / Services |
|
|
51
77
|
| Apply Mode por tipo | ❌ | ✅ Auto / Manual |
|
|
52
|
-
| Full Sync | ❌ | ✅ |
|
|
53
|
-
| Resync / Reconstruir estado | ❌ | ✅ |
|
|
54
78
|
| Historial de cambios | ❌ | ✅ |
|
|
55
79
|
| Sync multi-place | ❌ | ✅ Hasta 3 places con almacenamiento aislado |
|
|
56
80
|
| Control de Playtest (Reproducir/Detener/Pausar/Reanudar) | ❌ | ✅ |
|