@ray-js/t-agent 0.0.5-beta-1
This diff represents the content of publicly available package versions that have been released to one of the supported registries. The information contained in this diff is provided for informational purposes only and reflects changes between package versions as they appear in their respective public registries.
- package/LICENSE.md +21 -0
- package/README-zh_CN.md +1350 -0
- package/README.md +1345 -0
- package/dist/chat/ChatAgent.d.ts +157 -0
- package/dist/chat/ChatAgent.js +276 -0
- package/dist/chat/ChatBubbleTile.d.ts +32 -0
- package/dist/chat/ChatBubbleTile.js +104 -0
- package/dist/chat/ChatMessage.d.ts +32 -0
- package/dist/chat/ChatMessage.js +173 -0
- package/dist/chat/ChatSession.d.ts +27 -0
- package/dist/chat/ChatSession.js +89 -0
- package/dist/chat/ChatTile.d.ts +26 -0
- package/dist/chat/ChatTile.js +75 -0
- package/dist/chat/Emitter.d.ts +28 -0
- package/dist/chat/Emitter.js +61 -0
- package/dist/chat/Logger.d.ts +16 -0
- package/dist/chat/Logger.js +90 -0
- package/dist/chat/StreamResponse.d.ts +22 -0
- package/dist/chat/StreamResponse.js +47 -0
- package/dist/chat/createChatAgent.d.ts +6 -0
- package/dist/chat/createChatAgent.js +21 -0
- package/dist/chat/index.d.ts +12 -0
- package/dist/chat/index.js +12 -0
- package/dist/chat/types.d.ts +177 -0
- package/dist/chat/types.js +29 -0
- package/dist/chat/utils.d.ts +32 -0
- package/dist/chat/utils.js +207 -0
- package/dist/index.d.ts +3 -0
- package/dist/index.js +3 -0
- package/dist/plugins/debug.d.ts +10 -0
- package/dist/plugins/debug.js +33 -0
- package/dist/plugins/ui.d.ts +28 -0
- package/dist/plugins/ui.js +44 -0
- package/package.json +30 -0
package/README-zh_CN.md
ADDED
|
@@ -0,0 +1,1350 @@
|
|
|
1
|
+
[English](./README.md) | 简体中文
|
|
2
|
+
|
|
3
|
+
# AI 智能体 SDK
|
|
4
|
+
|
|
5
|
+
## 安装(ray 小程序)
|
|
6
|
+
|
|
7
|
+
```shell
|
|
8
|
+
yarn add @ray-js/t-agent @ray-js/t-agent-plugin-assistant @ray-js/t-agent-ui-ray
|
|
9
|
+
```
|
|
10
|
+
|
|
11
|
+
> 确保 `@ray-js/t-agent` `@ray-js/t-agent-plugin-assistant` `@ray-js/t-agent-ui-ray` 版本一致
|
|
12
|
+
|
|
13
|
+
## 小程序 kit 要求
|
|
14
|
+
|
|
15
|
+
```json
|
|
16
|
+
{
|
|
17
|
+
"dependencies": {
|
|
18
|
+
"BaseKit": "3.12.0",
|
|
19
|
+
"BizKit": "4.10.0",
|
|
20
|
+
"DeviceKit": "4.6.1",
|
|
21
|
+
"HomeKit": "3.4.0",
|
|
22
|
+
"MiniKit": "3.12.1"
|
|
23
|
+
},
|
|
24
|
+
"baseversion": "2.21.10"
|
|
25
|
+
}
|
|
26
|
+
```
|
|
27
|
+
|
|
28
|
+
## package.json 依赖要求
|
|
29
|
+
|
|
30
|
+
```json
|
|
31
|
+
{
|
|
32
|
+
"dependencies": {
|
|
33
|
+
"@ray-js/ray": ">=1.6.8"
|
|
34
|
+
}
|
|
35
|
+
}
|
|
36
|
+
```
|
|
37
|
+
|
|
38
|
+
## 开发
|
|
39
|
+
|
|
40
|
+
```shell
|
|
41
|
+
# 开发 sdk
|
|
42
|
+
yarn run dev
|
|
43
|
+
|
|
44
|
+
# 开发模板小程序
|
|
45
|
+
yarn run miniapp
|
|
46
|
+
```
|
|
47
|
+
|
|
48
|
+
## 使用示例
|
|
49
|
+
|
|
50
|
+
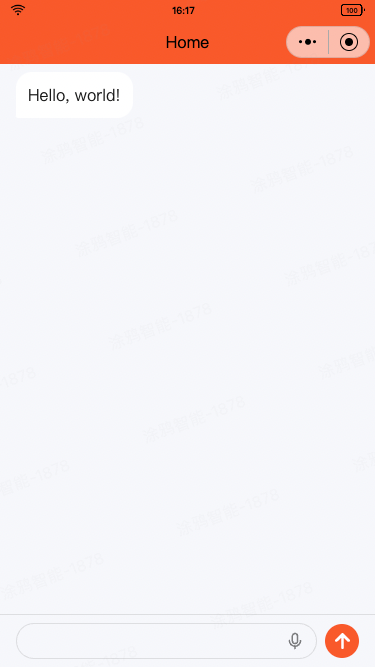
使用 ray ui 实现一个对话页面
|
|
51
|
+
|
|
52
|
+
|
|
53
|
+
|
|
54
|
+
```tsx
|
|
55
|
+
// ChatPage.tsx
|
|
56
|
+
import React from 'react';
|
|
57
|
+
import { View } from '@ray-js/components';
|
|
58
|
+
import { createChatAgent, withDebug, withUI } from '@ray-js/t-agent';
|
|
59
|
+
import { ChatContainer, MessageInput, MessageList } from '@ray-js/t-agent-ui-ray';
|
|
60
|
+
import { withAssistant, withBuildIn } from '@ray-js/t-agent-plugin-assistant';
|
|
61
|
+
|
|
62
|
+
const createAgent = () => {
|
|
63
|
+
// 应用插件是有顺序的
|
|
64
|
+
const agent = createChatAgent(
|
|
65
|
+
withUI(), // 第一个插件 withUI 插件提供了一些默认的 UI 行为,必选
|
|
66
|
+
withAssistant({
|
|
67
|
+
// withAssistant 插件对接小程序 AI 智能体平台,在小程序中必选
|
|
68
|
+
channel: '', // 输入你的智能体ID
|
|
69
|
+
multiModal: false, // 是否开启多模态
|
|
70
|
+
}),
|
|
71
|
+
withDebug(), // withDebug 会在 console 里打印日志
|
|
72
|
+
withBuildIn() // withBuildIn 插件提供了一些内置的功能
|
|
73
|
+
);
|
|
74
|
+
|
|
75
|
+
// 将生命周期钩子拿出来,方便注册自定义行为
|
|
76
|
+
const { onChatStart, createMessage, onChatResume, onError, onInputBlocksPush, session } = agent;
|
|
77
|
+
|
|
78
|
+
// 初始化聊天时,发送一条消息
|
|
79
|
+
onChatStart(async result => {
|
|
80
|
+
const hello = createMessage({
|
|
81
|
+
role: 'assistant',
|
|
82
|
+
});
|
|
83
|
+
|
|
84
|
+
hello.bubble.setText('Hello, world!');
|
|
85
|
+
result.messages.push(hello);
|
|
86
|
+
// 持久化消息,下次进入时会展示
|
|
87
|
+
await hello.persist('createText');
|
|
88
|
+
});
|
|
89
|
+
|
|
90
|
+
// 恢复聊天时,发送一条消息
|
|
91
|
+
onChatResume(async result => {
|
|
92
|
+
const welcomeBack = createMessage({
|
|
93
|
+
role: 'assistant',
|
|
94
|
+
});
|
|
95
|
+
|
|
96
|
+
welcomeBack.bubble.setText('Welcome back');
|
|
97
|
+
result.messages.push(welcomeBack);
|
|
98
|
+
await welcomeBack.persist('createText');
|
|
99
|
+
});
|
|
100
|
+
return agent;
|
|
101
|
+
};
|
|
102
|
+
|
|
103
|
+
export default function ChatPage() {
|
|
104
|
+
return (
|
|
105
|
+
<View style={{ height: '100vh' }}>
|
|
106
|
+
<ChatContainer createAgent={createAgent}>
|
|
107
|
+
<MessageList />
|
|
108
|
+
<MessageInput />
|
|
109
|
+
</ChatContainer>
|
|
110
|
+
</View>
|
|
111
|
+
);
|
|
112
|
+
}
|
|
113
|
+
```
|
|
114
|
+
|
|
115
|
+
# t-agent
|
|
116
|
+
|
|
117
|
+
t-agent 包是使用 TypeScript 编写的对话智能体 SDK,用于构建对话智能体,支持插件机制,可以扩展对话智能体的功能。
|
|
118
|
+
该包是纯 SDK 包,不包含任何 UI 组件,可以和任何 UI 框架搭配使用。
|
|
119
|
+
|
|
120
|
+
## 基本概念
|
|
121
|
+
|
|
122
|
+
|
|
123
|
+
|
|
124
|
+
### ChatAgent 对话智能体 Agent
|
|
125
|
+
|
|
126
|
+
对话智能体的核心类,负责管理对话的生命周期,消息的创建,消息的持久化等,支持插件和 hook 机制,可以扩展对话智能体的功能。
|
|
127
|
+
|
|
128
|
+
使用 `createChatAgent` 创建一个 ChatAgent 实例,如下:
|
|
129
|
+
|
|
130
|
+
```tsx
|
|
131
|
+
import { createChatAgent } from '@ray-js/t-agent';
|
|
132
|
+
const createAgent = () => {
|
|
133
|
+
/* 在 createChatAgent 参数里应用插件,注意插件是有顺序的 */
|
|
134
|
+
const agent = createChatAgent();
|
|
135
|
+
|
|
136
|
+
return agent;
|
|
137
|
+
};
|
|
138
|
+
```
|
|
139
|
+
|
|
140
|
+
主要属性:
|
|
141
|
+
|
|
142
|
+
- `agent.session` ChatSession 会话容器,用于存储会话相关的数据
|
|
143
|
+
- `agent.plugins` 应用插件后,会在这里存储插件的相关方法和 Hooks
|
|
144
|
+
|
|
145
|
+
主要方法:
|
|
146
|
+
|
|
147
|
+
- `agent.start()` 启动
|
|
148
|
+
- `agent.dispose()` 释放
|
|
149
|
+
- `agent.pushInputBlocks(blocks, signal)` 从外部将消息 block 推到 ChatAgent 里,用于用户向 AI 发送消息
|
|
150
|
+
- `agent.createMessage(data)` 创建一个与当前 Agent 绑定的消息
|
|
151
|
+
- `agent.emitTileEvent(tileId: string, payload: any)` tile 发送事件
|
|
152
|
+
- `agent.removeMessage(messageId: string)` 删除消息
|
|
153
|
+
- `agent.flushStreamToShow(message: ChatMessage, response: StreamResponse, composer: ComposeHandler)` 流式更新消息
|
|
154
|
+
|
|
155
|
+
### Hooks 机制
|
|
156
|
+
|
|
157
|
+
ChatAgent 仅定义了一个运行框架和数据结构,具体行为是由 Hook 机制实现的,Hook 机制是一种事件驱动的编程模型,通过注册回调函数来实现对话智能体的行为。
|
|
158
|
+
|
|
159
|
+
```tsx
|
|
160
|
+
import { createChatAgent } from '@ray-js/t-agent';
|
|
161
|
+
const createAgent = () => {
|
|
162
|
+
const agent = createChatAgent();
|
|
163
|
+
|
|
164
|
+
const { onChatStart } = agent;
|
|
165
|
+
|
|
166
|
+
// 在对话开始时触发 onChatStart Hook
|
|
167
|
+
onChatStart(result => {
|
|
168
|
+
console.log('Chat start', result);
|
|
169
|
+
});
|
|
170
|
+
return agent;
|
|
171
|
+
};
|
|
172
|
+
```
|
|
173
|
+
|
|
174
|
+
ChatAgent 主要 Hook 和参数:
|
|
175
|
+
|
|
176
|
+
- `agent.onAgentStart` 初始化 Agent
|
|
177
|
+
- `agent.onChatStart` 对话开始时触发
|
|
178
|
+
- `result.messages` 用于初始化消息列表
|
|
179
|
+
- `agent.onChatResume` 对话恢复时触发
|
|
180
|
+
- `result.messages` 已经恢复好了的消息列表
|
|
181
|
+
- `agent.onMessageListInit` 对话开始、对话恢复后,消息列表初始化时触发
|
|
182
|
+
- `result.messages` 用于渲染的消息列表,和前面两个 hooks 的 message 是同一个列表
|
|
183
|
+
- `agent.onInputBlocksPush` 推送消息 block 时触发
|
|
184
|
+
- `blocks` 输入的消息块 blocks
|
|
185
|
+
- `signal` 中断信号
|
|
186
|
+
- `agent.onMessageChange` 消息变化时触发
|
|
187
|
+
- `type` 变化的类型,`show`、`update`、`remove`
|
|
188
|
+
- `message` 变化的消息
|
|
189
|
+
- `agent.onMessagePersist` 消息持久化时触发
|
|
190
|
+
- `payload` 持久化相关参数
|
|
191
|
+
- `message` 持久化的目标消息
|
|
192
|
+
- `agent.onTileEvent` 消息持久化完成时触发
|
|
193
|
+
- `tile` 触发事件的 tile
|
|
194
|
+
- `payload` 事件的 payload
|
|
195
|
+
- `agent.onAgentDispose` 释放 Agent 时触发
|
|
196
|
+
- `agent.onUserAbort` 用户中断时触发
|
|
197
|
+
- `reason` 中断原因
|
|
198
|
+
- `agent.onError` 出错时触发
|
|
199
|
+
- `error` 错误对象
|
|
200
|
+
|
|
201
|
+
这些 hooks 都接收一个回调函数作为参数,当触发时会调用这个回调函数,回调函数可以是同步也可以是异步,回调函数的返回不影响结果,
|
|
202
|
+
如果需要改变结果,可以通过修改回调函数的 result 参数或修改 tile、message 对象来修改。
|
|
203
|
+
|
|
204
|
+
### ChatSession 会话容器
|
|
205
|
+
|
|
206
|
+
ChatSession 存储和智能体聊天的消息列表,上下文数据等内容,在 ChatAgent 创建时一同创建
|
|
207
|
+
|
|
208
|
+
主要属性:
|
|
209
|
+
|
|
210
|
+
- `session.messages` 消息列表
|
|
211
|
+
- `session.sessionId` 会话 id
|
|
212
|
+
- `session.isNewChat` 是否是新会话,用于区分新会话 `onChatStart` 和恢复会话 `onChatResume`
|
|
213
|
+
|
|
214
|
+
主要方法:
|
|
215
|
+
|
|
216
|
+
- `session.set` 设置会话数据,可以是任意类型
|
|
217
|
+
- `session.get` 获取会话数据
|
|
218
|
+
- `session.getData` 用对象的方式获取会话数据
|
|
219
|
+
- `session.getLatestMessage` 获取最后一条消息
|
|
220
|
+
|
|
221
|
+
Hooks:
|
|
222
|
+
|
|
223
|
+
- `session.onChange` 注册会话数据变化的回调
|
|
224
|
+
|
|
225
|
+
### ChatMessage 对话消息
|
|
226
|
+
|
|
227
|
+
ChatMessage 是对话消息的抽象,用于存储消息的内容,状态等信息,也提供了一系列方便的方法用于操作消息。
|
|
228
|
+
一条消息 ChatMessage 下,会有多个 ChatTile,用于展示不同的内容。
|
|
229
|
+
|
|
230
|
+
创建一条消息使用 `createMessage` 方法,如下:
|
|
231
|
+
|
|
232
|
+
```tsx
|
|
233
|
+
const createAgent = () => {
|
|
234
|
+
const agent = createChatAgent();
|
|
235
|
+
|
|
236
|
+
const { createMessage, onChatStart } = agent;
|
|
237
|
+
|
|
238
|
+
// 初始化聊天时,发送一条消息
|
|
239
|
+
onChatStart(async result => {
|
|
240
|
+
// 创建一条由智能体助手发送的消息
|
|
241
|
+
const message = createMessage({
|
|
242
|
+
role: 'assistant',
|
|
243
|
+
});
|
|
244
|
+
|
|
245
|
+
// 访问 message.bubble 可以快速创建一个文本气泡
|
|
246
|
+
message.bubble.setText('Hello!');
|
|
247
|
+
result.messages.push(message);
|
|
248
|
+
});
|
|
249
|
+
|
|
250
|
+
return agent;
|
|
251
|
+
};
|
|
252
|
+
```
|
|
253
|
+
|
|
254
|
+
主要属性:
|
|
255
|
+
|
|
256
|
+
- `message.id` 消息 id
|
|
257
|
+
- `message.role` 消息角色,可以是 assistant 或者 user
|
|
258
|
+
- `message.tiles` 消息的 tile 列表
|
|
259
|
+
- `message.status` 消息状态,`ChatMessageStatus` 枚举,可以是 `START`、`UPDATING`、`FINISH` 等
|
|
260
|
+
- `message.meta` 消息附带的额外数据
|
|
261
|
+
- `message.isShow` 是否已经展示到界面上
|
|
262
|
+
- `message.bubble` 消息中,气泡 tile 的快捷方式
|
|
263
|
+
|
|
264
|
+
主要方法
|
|
265
|
+
|
|
266
|
+
- `message.show` 消息展示到界面上
|
|
267
|
+
- `message.update` 将当前消息状态更新到界面上
|
|
268
|
+
- `message.remove` 将当前消息从界面上移除
|
|
269
|
+
- `message.persist` 持久化消息
|
|
270
|
+
- `message.addTile` 添加一个 tile
|
|
271
|
+
- `message.removeTile` 移除一个 tile
|
|
272
|
+
- `message.setTilesLocked` 设置所有的 tile 的锁定状态
|
|
273
|
+
- `message.set` 设置消息的属性
|
|
274
|
+
- `message.setMetaValue` 按 key-value 设置 meta 的属性
|
|
275
|
+
- `message.deleteMetaValue` 删除 meta 的属性
|
|
276
|
+
- `message.setMeta` 直接设置 meta 对象
|
|
277
|
+
- `message.findTileByType` 通过 tile 类型查找 tile
|
|
278
|
+
|
|
279
|
+
#### ChatTile 对话消息块
|
|
280
|
+
|
|
281
|
+
ChatTile 是对话消息的块,用于展示消息内的不同内容,例如文本、图片、卡片等。
|
|
282
|
+
|
|
283
|
+
为消息添加一个 tile 使用 `addTile` 方法,如下:
|
|
284
|
+
|
|
285
|
+
```tsx
|
|
286
|
+
const message = createMessage({
|
|
287
|
+
role: 'assistant',
|
|
288
|
+
});
|
|
289
|
+
|
|
290
|
+
// 添加一个图片 tile
|
|
291
|
+
message.addTile('image', {
|
|
292
|
+
src: '/image.jpg',
|
|
293
|
+
});
|
|
294
|
+
|
|
295
|
+
await message.show();
|
|
296
|
+
```
|
|
297
|
+
|
|
298
|
+
ChatTile 的主要属性:
|
|
299
|
+
|
|
300
|
+
- `tile.id` tile 的 id
|
|
301
|
+
- `tile.type` tile 类型
|
|
302
|
+
- `tile.data` tile 数据
|
|
303
|
+
- `tile.children` tile 的子 tile
|
|
304
|
+
- `tile.locked` tile 是否被锁定
|
|
305
|
+
- `tile.fallback` 当 tile 无法展示时的回退内容
|
|
306
|
+
- `tile.message` tile 所属的消息
|
|
307
|
+
|
|
308
|
+
ChatTile 的主要方法:
|
|
309
|
+
|
|
310
|
+
- `tile.update` 是 `tile.message.update` 的快捷方式
|
|
311
|
+
- `tile.show` 是 `tile.message.show` 的快捷方式
|
|
312
|
+
- `tile.setLocked` 设置 tile 的锁定状态
|
|
313
|
+
- `tile.addTile` 添加一个子 tile
|
|
314
|
+
- `tile.setData` 设置 tile 的数据
|
|
315
|
+
- `tile.setFallback` 设置 tile 的回退内容
|
|
316
|
+
- `tile.findByType` 通过 tile 类型查找子 tile
|
|
317
|
+
|
|
318
|
+
`message.bubble` 是一个快捷方式,只要访问它,就会在当前的消息中快速添加一个气泡 tile,如下:
|
|
319
|
+
|
|
320
|
+
```tsx
|
|
321
|
+
const message = createMessage({
|
|
322
|
+
role: 'assistant',
|
|
323
|
+
});
|
|
324
|
+
|
|
325
|
+
message.bubble.setText('Hello, world!');
|
|
326
|
+
// 等价于
|
|
327
|
+
message.addTile('bubble', {}).addTile('text', { text: 'Hello, world!' });
|
|
328
|
+
|
|
329
|
+
await message.show();
|
|
330
|
+
```
|
|
331
|
+
|
|
332
|
+
针对气泡消息,除了支持 tile 基本方法外,还额外提供了一些属性和方法:
|
|
333
|
+
|
|
334
|
+
- `message.bubble.text` 属性,读取气泡文本
|
|
335
|
+
- `message.bubble.setText` 方法,设置气泡文本
|
|
336
|
+
- `message.bubble.isMarkdown` 属性,是否是 markdown 格式
|
|
337
|
+
- `message.bubble.setIsMarkdown` 方法,设置是否是 markdown 格式
|
|
338
|
+
- `message.bubble.status` 属性,气泡状态 BubbleTileStatus
|
|
339
|
+
- `message.bubble.setStatus` 方法,设置气泡状态
|
|
340
|
+
- `message.bubble.info` 属性,气泡信息
|
|
341
|
+
- `message.bubble.setInfo` 方法,设置气泡信息
|
|
342
|
+
- `message.bubble.initWithInputBlocks` 方法,用输入块初始化气泡
|
|
343
|
+
|
|
344
|
+
### 生命周期
|
|
345
|
+
|
|
346
|
+
ChatAgent 在不同的阶段会触发不同的 Hook,开发者可以通过注册 Hook 来实现自定义行为,下面的时序图展示了 ChatAgent 的生命周期。
|
|
347
|
+
|
|
348
|
+
```mermaid
|
|
349
|
+
sequenceDiagram
|
|
350
|
+
participant AI as Backend(AI)
|
|
351
|
+
participant A as ChatAgent
|
|
352
|
+
participant UI as UI界面
|
|
353
|
+
actor User as 用户
|
|
354
|
+
|
|
355
|
+
User ->> UI: 打开聊天界面
|
|
356
|
+
UI ->> UI: 创建 Agent 对象 agent
|
|
357
|
+
UI ->> A: agent.start() 启动 Agent
|
|
358
|
+
rect rgba(255,255,0,0.1)
|
|
359
|
+
note over A: Hook: onAgentStart
|
|
360
|
+
A ->> AI: 获取是否新会话
|
|
361
|
+
AI ->> A: 返回
|
|
362
|
+
end
|
|
363
|
+
alt 是新会话
|
|
364
|
+
A ->> AI: 开始新会话
|
|
365
|
+
note over A: Hook: onChatStart
|
|
366
|
+
else 是恢复会话
|
|
367
|
+
A ->> AI: 读取会话历史
|
|
368
|
+
AI ->> A: 返回历史消息
|
|
369
|
+
note over A: Hook: onChatResume
|
|
370
|
+
end
|
|
371
|
+
rect rgba(255,255,0,0.1)
|
|
372
|
+
note over A: Hook: onMessageListInit
|
|
373
|
+
A ->> UI: 组装要展示的消息
|
|
374
|
+
UI ->> User: 展示消息
|
|
375
|
+
end
|
|
376
|
+
opt 对话
|
|
377
|
+
User ->> UI: 输入并发送消息
|
|
378
|
+
UI ->> A: agent.pushInputBlocks()
|
|
379
|
+
rect rgba(255,255,0,0.1)
|
|
380
|
+
note over A: Hook: onInputBlocksPush
|
|
381
|
+
A ->> A: 创建 Message 对象 msg<br/>msg 设置为用户输入的文本<br/>msg.show()
|
|
382
|
+
note over A: Hook: onMessageChange show
|
|
383
|
+
A -->> UI: 更新界面
|
|
384
|
+
UI -->> User: 展示新消息
|
|
385
|
+
A ->> A: 创建 Message 对象 respMsg<br/>respMsg 设置为 loading<br/>respMsg.show()
|
|
386
|
+
note over A: Hook: onMessageChange show
|
|
387
|
+
A -->> UI: 更新界面
|
|
388
|
+
UI -->> User: 展示响应消息loading
|
|
389
|
+
A ->> AI: 调用 AI
|
|
390
|
+
AI ->> A: 返回消息流
|
|
391
|
+
loop 流式消息
|
|
392
|
+
AI ->> A: 消息包
|
|
393
|
+
A ->> A: 更新respMsg数据<br/>respMsg.update()
|
|
394
|
+
note over A: Hook: onMessageChange update
|
|
395
|
+
A -->> UI: 更新界面
|
|
396
|
+
UI -->> User: 蹦字/展示卡片
|
|
397
|
+
end
|
|
398
|
+
end
|
|
399
|
+
end
|
|
400
|
+
|
|
401
|
+
opt 操作消息行动点(以单选为例)
|
|
402
|
+
User ->> UI: 选中选项
|
|
403
|
+
UI ->> A: agent.emitTileEvent()
|
|
404
|
+
rect rgba(255,255,0,0.1)
|
|
405
|
+
note over A: Hook: onTileEvent
|
|
406
|
+
A ->> A: 设置 msg 状态<br/>msg.persist()
|
|
407
|
+
note over A: Hook: onMessagePersist
|
|
408
|
+
A ->> AI: 持久化消息
|
|
409
|
+
AI ->> A: 返回结果
|
|
410
|
+
A ->> A: msg.update()
|
|
411
|
+
note over A: Hook: onMessageChange update
|
|
412
|
+
A ->> UI: 更新界面
|
|
413
|
+
UI ->> User: 消息置灰,高亮选中
|
|
414
|
+
end
|
|
415
|
+
end
|
|
416
|
+
opt 删除消息
|
|
417
|
+
User ->> UI: 删除消息
|
|
418
|
+
UI ->> A: agent.removeMessage()
|
|
419
|
+
rect rgba(255,255,0,0.1)
|
|
420
|
+
A ->> A: msg.remove()
|
|
421
|
+
A ->> AI: 标记消息删除
|
|
422
|
+
note over A: Hook: onMessageChange remove
|
|
423
|
+
A ->> UI: 更新界面
|
|
424
|
+
UI ->> User: 消息消失
|
|
425
|
+
end
|
|
426
|
+
end
|
|
427
|
+
```
|
|
428
|
+
|
|
429
|
+
### Plugin 插件机制
|
|
430
|
+
|
|
431
|
+
插件是基于以上的 Hook 机制实现的,插件可以实现对话智能体的功能,例如对接 AI 平台,提供 UI 界面等。
|
|
432
|
+
插件也可以暴露一些方法和属性,供开发者使用。
|
|
433
|
+
|
|
434
|
+
```tsx
|
|
435
|
+
import { createChatAgent, withUI } from '@ray-js/t-agent';
|
|
436
|
+
const createAgent = () => {
|
|
437
|
+
const agent = createChatAgent(
|
|
438
|
+
withUI() // withUI 插件提供了一些渲染 UI 的方法
|
|
439
|
+
);
|
|
440
|
+
|
|
441
|
+
return agent;
|
|
442
|
+
};
|
|
443
|
+
|
|
444
|
+
// ScrollToBottom.tsx
|
|
445
|
+
import React from 'react';
|
|
446
|
+
import { Button } from '@ray-js/components';
|
|
447
|
+
import { useChatAgent } from '@ray-js/t-agent-ui-ray';
|
|
448
|
+
const ScrollToBottom = () => {
|
|
449
|
+
const agent = useChatAgent();
|
|
450
|
+
|
|
451
|
+
const scroll = () => {
|
|
452
|
+
// 使用插件暴露的方法
|
|
453
|
+
agent.plugins.ui.emitEvent('scrollToBottom', { animation: false });
|
|
454
|
+
};
|
|
455
|
+
|
|
456
|
+
return <Button onClick={scroll}>Scroll to bottom</Button>;
|
|
457
|
+
};
|
|
458
|
+
```
|
|
459
|
+
|
|
460
|
+
#### 编写一个插件
|
|
461
|
+
|
|
462
|
+
插件是一个高阶函数,接收一个选项,返回一个函数,这个函数接收一个 ChatAgent 对象,可以在这个函数中注册 Hook。
|
|
463
|
+
|
|
464
|
+
```tsx
|
|
465
|
+
import { ChatAgent, createHooks, Hookable } from '@ray-js/t-agent';
|
|
466
|
+
|
|
467
|
+
// 试下一个 MyPlugin 插件
|
|
468
|
+
export type MyPlugin = GetChatPluginHandler<typeof withMyPlugin>;
|
|
469
|
+
|
|
470
|
+
export const withMyPlugin = (options: any) => {
|
|
471
|
+
// 创建一个 Hookable 对象
|
|
472
|
+
const hooks = createHooks();
|
|
473
|
+
|
|
474
|
+
return (agent: ChatAgent) => {
|
|
475
|
+
const { onChatStart } = agent;
|
|
476
|
+
|
|
477
|
+
onChatStart(async () => {
|
|
478
|
+
console.log('Chat start');
|
|
479
|
+
// 触发插件的 Hook
|
|
480
|
+
await hooks.callHook('onMyHook', 'Hello, world!');
|
|
481
|
+
});
|
|
482
|
+
|
|
483
|
+
// 暴露插件的方法和 Hook
|
|
484
|
+
return {
|
|
485
|
+
hooks,
|
|
486
|
+
myPlugin: {
|
|
487
|
+
// 暴露一个方法
|
|
488
|
+
myMethod() {
|
|
489
|
+
console.log('My method');
|
|
490
|
+
},
|
|
491
|
+
// 暴露一个 Hook
|
|
492
|
+
onMyHook: fn => {
|
|
493
|
+
return hooks.hook('onMyHook', fn);
|
|
494
|
+
},
|
|
495
|
+
},
|
|
496
|
+
};
|
|
497
|
+
};
|
|
498
|
+
};
|
|
499
|
+
```
|
|
500
|
+
|
|
501
|
+
```tsx
|
|
502
|
+
// 使用插件
|
|
503
|
+
import { createChatAgent } from '@ray-js/t-agent';
|
|
504
|
+
|
|
505
|
+
const createAgent = () => {
|
|
506
|
+
const agent = createChatAgent(
|
|
507
|
+
// 使用插件
|
|
508
|
+
withMyPlugin({})
|
|
509
|
+
);
|
|
510
|
+
|
|
511
|
+
// 调用插件暴露的方法
|
|
512
|
+
agent.plugins.myPlugin.myMethod();
|
|
513
|
+
|
|
514
|
+
// 注册插件的 Hook
|
|
515
|
+
agent.plugins.myPlugin.onMyHook(msg => {
|
|
516
|
+
console.log(msg);
|
|
517
|
+
});
|
|
518
|
+
|
|
519
|
+
return agent;
|
|
520
|
+
};
|
|
521
|
+
```
|
|
522
|
+
|
|
523
|
+
## 内置插件
|
|
524
|
+
|
|
525
|
+
### withDebug
|
|
526
|
+
|
|
527
|
+
withDebug 插件会在 console 里打印日志,方便调试
|
|
528
|
+
|
|
529
|
+
```tsx
|
|
530
|
+
const agent = createChatAgent(
|
|
531
|
+
withDebug({
|
|
532
|
+
autoStart: true, // 是否自动启动,默认为 true
|
|
533
|
+
})
|
|
534
|
+
);
|
|
535
|
+
|
|
536
|
+
// 启动
|
|
537
|
+
agent.plugins.debug.start();
|
|
538
|
+
|
|
539
|
+
// 停止
|
|
540
|
+
agent.plugins.debug.stop();
|
|
541
|
+
```
|
|
542
|
+
|
|
543
|
+
### withUI
|
|
544
|
+
|
|
545
|
+
withUI 插件提供了一些默认的 UI 行为,例如消息的展示,消息的删除等,消息总线
|
|
546
|
+
|
|
547
|
+
```tsx
|
|
548
|
+
const agent = createChatAgent(withUI());
|
|
549
|
+
|
|
550
|
+
agent.plugins.ui.emitter; // 消息总线
|
|
551
|
+
|
|
552
|
+
// 滚动到底部
|
|
553
|
+
agent.plugins.ui.emitEvent('scrollToBottom', { animation: false });
|
|
554
|
+
|
|
555
|
+
// 监听事件
|
|
556
|
+
const off = agent.plugins.ui.onEvent('scrollToBottom', payload => {
|
|
557
|
+
console.log('scroll to bottom', payload.animation);
|
|
558
|
+
});
|
|
559
|
+
|
|
560
|
+
// 取消监听
|
|
561
|
+
off();
|
|
562
|
+
```
|
|
563
|
+
|
|
564
|
+
ui 插件的主要事件如下,你还可以自由地注册需要的事件:
|
|
565
|
+
|
|
566
|
+
- `messageListInit` 初始化消息列表
|
|
567
|
+
- `payload.messages: ChatMessageObject[]` 消息列表
|
|
568
|
+
- `messageChange` 消息变化
|
|
569
|
+
- `payload.type: 'show' | 'update' | 'remove'` 变化类型
|
|
570
|
+
- `payload.message: ChatMessageObject` 消息
|
|
571
|
+
- `scrollToBottom` 滚动到底部
|
|
572
|
+
- `payload.animation: boolean` 是否使用动画
|
|
573
|
+
- `sendMessage` 发送消息,触发 UI 界面更新
|
|
574
|
+
- `payload.blocks: InputBlock[]` 输入块
|
|
575
|
+
- `setInputBlocks` 设置输入块到 MessageInput 输入框
|
|
576
|
+
- `payload.blocks: InputBlock[]` 输入块
|
|
577
|
+
|
|
578
|
+
> 注意,这里的 ChatMessageObject 是一个消息对象,不是 ChatMessage 类型,
|
|
579
|
+
> 它包含了消息的一些属性和方法,这是为了避免在 UI 层修改消息对象,导致 ChatAgent 中的消息对象不一致。
|
|
580
|
+
> 对消息对象的修改应该始终在 ChatAgent 中进行。
|
|
581
|
+
|
|
582
|
+
## 附带 utils 工具
|
|
583
|
+
|
|
584
|
+
### getLogger(prefix: string): Logger
|
|
585
|
+
|
|
586
|
+
创建一个 logger,用于打印日志
|
|
587
|
+
|
|
588
|
+
```tsx
|
|
589
|
+
import { getLogger } from '@ray-js/t-agent';
|
|
590
|
+
const logger = getLogger('MyPlugin');
|
|
591
|
+
logger.debug('Hello, world!');
|
|
592
|
+
```
|
|
593
|
+
|
|
594
|
+
### Emitter 事件总线
|
|
595
|
+
|
|
596
|
+
Emitter 是一个事件总线,用于注册和触发事件
|
|
597
|
+
|
|
598
|
+
```tsx
|
|
599
|
+
import { Emitter, EmitterEvent } from '@ray-js/t-agent';
|
|
600
|
+
const emitter = new Emitter();
|
|
601
|
+
|
|
602
|
+
// 注册事件
|
|
603
|
+
const cb = event => console.log('detail', event.detail);
|
|
604
|
+
emitter.addEventListener('event', cb);
|
|
605
|
+
|
|
606
|
+
// 触发事件
|
|
607
|
+
emitter.dispatchEvent(new EmitterEvent('event', { detail: 'Hello, world!' }));
|
|
608
|
+
|
|
609
|
+
// 移除事件
|
|
610
|
+
emitter.removeEventListener('event', cb);
|
|
611
|
+
```
|
|
612
|
+
|
|
613
|
+
### StreamResponse
|
|
614
|
+
|
|
615
|
+
StreamResponse 是一个流式响应对象,用于处理流式消息
|
|
616
|
+
|
|
617
|
+
```tsx
|
|
618
|
+
import { StreamResponse } from '@ray-js/t-agent';
|
|
619
|
+
|
|
620
|
+
const partStream = await getPartStream(); // 获取流数据
|
|
621
|
+
const response = new StreamResponse(partStream);
|
|
622
|
+
|
|
623
|
+
const parts = response.parts();
|
|
624
|
+
for await (const part of parts) {
|
|
625
|
+
console.log('part', part);
|
|
626
|
+
}
|
|
627
|
+
```
|
|
628
|
+
|
|
629
|
+
### createHooks、Hookable
|
|
630
|
+
|
|
631
|
+
参见 `hookable` npm 包
|
|
632
|
+
|
|
633
|
+
### isAbortError
|
|
634
|
+
|
|
635
|
+
判断是否是中断错误
|
|
636
|
+
|
|
637
|
+
### safeParseJSON
|
|
638
|
+
|
|
639
|
+
安全地解析 JSON 字符串,解析失败返回 `undefined`
|
|
640
|
+
|
|
641
|
+
```tsx
|
|
642
|
+
import { safeParseJSON } from '@ray-js/t-agent';
|
|
643
|
+
|
|
644
|
+
const obj = safeParseJSON<{ a: number }>('{"a": 1}');
|
|
645
|
+
|
|
646
|
+
console.log(obj.a); // 1
|
|
647
|
+
```
|
|
648
|
+
|
|
649
|
+
# t-agent-plugin-assistant
|
|
650
|
+
|
|
651
|
+
t-agent-plugin-assistant 是一个对接小程序 AI 智能体平台的插件,提供了对接小程序 AI 智能体平台的能力。
|
|
652
|
+
|
|
653
|
+
## 安装
|
|
654
|
+
|
|
655
|
+
```shell
|
|
656
|
+
yarn add @ray-js/t-agent-plugin-assistant
|
|
657
|
+
```
|
|
658
|
+
|
|
659
|
+
## 使用
|
|
660
|
+
|
|
661
|
+
```tsx
|
|
662
|
+
import { createChatAgent, withUI } from '@ray-js/t-agent';
|
|
663
|
+
import { withAssistant, withBuildIn } from '@ray-js/t-agent-plugin-assistant';
|
|
664
|
+
|
|
665
|
+
const createAgent = () => {
|
|
666
|
+
const agent = createChatAgent(
|
|
667
|
+
withUI(), // 一般都需要应用 withUI 插件
|
|
668
|
+
withAssistant({
|
|
669
|
+
channel: 'your-channel-id', // 输入你的智能体ID
|
|
670
|
+
multiModal: false, // 是否开启多模态,默认为 true
|
|
671
|
+
}),
|
|
672
|
+
withBuildIn()
|
|
673
|
+
);
|
|
674
|
+
|
|
675
|
+
return agent;
|
|
676
|
+
};
|
|
677
|
+
```
|
|
678
|
+
|
|
679
|
+
## 包含的插件
|
|
680
|
+
|
|
681
|
+
### withAssistant 插件
|
|
682
|
+
|
|
683
|
+
提供了对接小程序 AI 智能体平台的能力
|
|
684
|
+
|
|
685
|
+
参数:
|
|
686
|
+
|
|
687
|
+
- `channel` 智能体 ID
|
|
688
|
+
- `multiModal` 是否开启多模态,默认为 true
|
|
689
|
+
- `wireInputToAssistant` 是否将输入块传递给智能体,默认为 true,设置为 false 时,需要你自己编写 onInputBlocksPush Hook 来处理输入块
|
|
690
|
+
- `historySize` 历史消息大小,默认为 100
|
|
691
|
+
|
|
692
|
+
方法:
|
|
693
|
+
|
|
694
|
+
- `agent.plugins.assistant.send` 向智能体发送一条消息
|
|
695
|
+
- `agent.plugins.assistant.chat` 向智能体发送一条消息,并生成提问 ChatMessage 对象和 AI 回答 ChatMessage 对象,流式更新,可以将其用在 onInputBlocksPush 里。
|
|
696
|
+
|
|
697
|
+
Hooks:
|
|
698
|
+
|
|
699
|
+
- `onSocketStatusChange` 当网络状态发生变化时触发
|
|
700
|
+
- `onRawMessageParse` 当读取历史消息,解析消息时触发,可以在这个 Hook 里修改消息
|
|
701
|
+
- `rawItems` 原始消息数据
|
|
702
|
+
- `result.messages` 消息列表,对一条历史记录一般会解析出两条,一问 `messages[0]` 一答 `messages[1]`,你可以修改这个列表追加或减少消息
|
|
703
|
+
- `onExtensionCompose` 当解析到消息扩展数据时触发
|
|
704
|
+
- `extension` 扩展数据
|
|
705
|
+
- `responseMessage` 响应消息
|
|
706
|
+
- `result.messages` 消息列表
|
|
707
|
+
|
|
708
|
+
### withBuildIn 插件
|
|
709
|
+
|
|
710
|
+
提供了一些内置的功能,比如工作流,按钮,推荐行动等,还在实现中
|
|
711
|
+
|
|
712
|
+
### withAssistantCopyHistory 插件
|
|
713
|
+
|
|
714
|
+
使用这个插件,在真机预览中,会自动将历史记录复制到剪贴板,方便调试
|
|
715
|
+
|
|
716
|
+
## mock 机制
|
|
717
|
+
|
|
718
|
+
为了方便开发,我们提供了一个 mock 机制,可以在开发时不用连接小程序 AI 智能体平台,直接使用 mock 数据进行开发。
|
|
719
|
+
|
|
720
|
+
### mock 一个 ttt 接口
|
|
721
|
+
|
|
722
|
+
```tsx
|
|
723
|
+
import { mock } from '@ray-js/t-agent-plugin-assistant';
|
|
724
|
+
|
|
725
|
+
// mock 获取历史数据接口
|
|
726
|
+
mock.hooks.hook('getAIAssistantGroupHistory', context => {
|
|
727
|
+
context.result = yourMockData;
|
|
728
|
+
});
|
|
729
|
+
```
|
|
730
|
+
|
|
731
|
+
### mock AI 助手响应
|
|
732
|
+
|
|
733
|
+
```tsx
|
|
734
|
+
import { mock } from '@ray-js/t-agent-plugin-assistant';
|
|
735
|
+
|
|
736
|
+
mock.hooks.hook('sendToAssistant', context => {
|
|
737
|
+
if (context.options.block?.includes('hello')) {
|
|
738
|
+
context.responseText = 'hello, who are you?';
|
|
739
|
+
}
|
|
740
|
+
|
|
741
|
+
if (context.options.block?.includes('卡片')) {
|
|
742
|
+
context.responseText = '这是卡片示例';
|
|
743
|
+
context.responseExtensions = {
|
|
744
|
+
aiCards: [
|
|
745
|
+
{
|
|
746
|
+
cardCode: 'myCard',
|
|
747
|
+
cardType: ChatCardType.CUSTOM,
|
|
748
|
+
cardData: { title: '卡片 1' },
|
|
749
|
+
},
|
|
750
|
+
{
|
|
751
|
+
cardCode: 'myCard',
|
|
752
|
+
cardType: ChatCardType.CUSTOM,
|
|
753
|
+
cardData: { title: '卡片 2' },
|
|
754
|
+
},
|
|
755
|
+
],
|
|
756
|
+
};
|
|
757
|
+
}
|
|
758
|
+
|
|
759
|
+
if (context.options.block?.includes('工作流')) {
|
|
760
|
+
context.responseText = '这是工作流';
|
|
761
|
+
context.responseExtensions = {
|
|
762
|
+
workflowAskOptions: {
|
|
763
|
+
options: [
|
|
764
|
+
{
|
|
765
|
+
name: '选项 1',
|
|
766
|
+
value: '选项 1',
|
|
767
|
+
},
|
|
768
|
+
{
|
|
769
|
+
name: '选项 2',
|
|
770
|
+
value: '选项 2',
|
|
771
|
+
},
|
|
772
|
+
{
|
|
773
|
+
name: '选项 3',
|
|
774
|
+
value: '选项 3',
|
|
775
|
+
},
|
|
776
|
+
],
|
|
777
|
+
},
|
|
778
|
+
};
|
|
779
|
+
}
|
|
780
|
+
});
|
|
781
|
+
```
|
|
782
|
+
|
|
783
|
+
### mock ASR 语音识别
|
|
784
|
+
|
|
785
|
+
```tsx
|
|
786
|
+
import { mock } from '@ray-js/t-agent-plugin-assistant';
|
|
787
|
+
|
|
788
|
+
mock.hooks.hook('asrDetection', context => {
|
|
789
|
+
context.responseText = 'Hello world!, I am a virtual assistant.';
|
|
790
|
+
});
|
|
791
|
+
```
|
|
792
|
+
|
|
793
|
+
## 附带的 utils 工具(现在不稳定,还在开发中)
|
|
794
|
+
|
|
795
|
+
### AbortController
|
|
796
|
+
|
|
797
|
+
这个是小程序里的 AbortController ponyfill,参见 mdn
|
|
798
|
+
|
|
799
|
+
### runTTTAction
|
|
800
|
+
|
|
801
|
+
运行一个 TTTAction,用于处理用户的操作行为,目前支持以下动作
|
|
802
|
+
|
|
803
|
+
- `openRoute` 打开一个路由
|
|
804
|
+
- `openMiniApp` 打开一个小程序
|
|
805
|
+
- `openH5` 打开一个 H5 页面
|
|
806
|
+
- `sendMessage` 发送一条消息
|
|
807
|
+
- `buildIn` 内置行动
|
|
808
|
+
|
|
809
|
+
### Asr
|
|
810
|
+
|
|
811
|
+
ASR 语音识别封装,用于识别用户的语音输入
|
|
812
|
+
|
|
813
|
+
使用方法:
|
|
814
|
+
|
|
815
|
+
```tsx
|
|
816
|
+
import { Asr, AsrDetectResultState, AsrError } from '@ray-js/t-agent-plugin-assistant';
|
|
817
|
+
|
|
818
|
+
async function startAsr() {
|
|
819
|
+
// 先向用户申请权限
|
|
820
|
+
await Asr.authorize();
|
|
821
|
+
|
|
822
|
+
// 初始文本
|
|
823
|
+
let initial = '';
|
|
824
|
+
|
|
825
|
+
// 之前识别的文本
|
|
826
|
+
let last = initial;
|
|
827
|
+
|
|
828
|
+
// 生成一个识别器
|
|
829
|
+
const asr = Asr.detect(async res => {
|
|
830
|
+
if (res.state === AsrDetectResultState.STARTING || res.state === AsrDetectResultState.END) {
|
|
831
|
+
// 全文
|
|
832
|
+
const full = initial + res.text;
|
|
833
|
+
|
|
834
|
+
// 最近一次识别的文本
|
|
835
|
+
const incoming = full.slice(last.length);
|
|
836
|
+
|
|
837
|
+
// 之前识别的文本
|
|
838
|
+
last = full;
|
|
839
|
+
}
|
|
840
|
+
|
|
841
|
+
if (res.state === AsrDetectResultState.ERROR) {
|
|
842
|
+
onError(new AsrError(res.errorCode));
|
|
843
|
+
}
|
|
844
|
+
});
|
|
845
|
+
|
|
846
|
+
// 开始识别
|
|
847
|
+
await asr.start();
|
|
848
|
+
}
|
|
849
|
+
```
|
|
850
|
+
|
|
851
|
+
### promisify TTT
|
|
852
|
+
|
|
853
|
+
内置大量 TTT API 的 promisify 方法,用于将 TTT API 转换为 Promise,同时支持 mock
|
|
854
|
+
|
|
855
|
+
使用方法:
|
|
856
|
+
|
|
857
|
+
```tsx
|
|
858
|
+
import { promisify } from '@ray-js/t-agent-plugin-assistant';
|
|
859
|
+
|
|
860
|
+
interface RouterParams {
|
|
861
|
+
/** 路由链接 */
|
|
862
|
+
url: string;
|
|
863
|
+
complete?: () => void;
|
|
864
|
+
success?: (params: null) => void;
|
|
865
|
+
fail?: (params: {
|
|
866
|
+
errorMsg: string;
|
|
867
|
+
errorCode: string | number;
|
|
868
|
+
innerError: {
|
|
869
|
+
errorCode: string | number;
|
|
870
|
+
errorMsg: string;
|
|
871
|
+
};
|
|
872
|
+
}) => void;
|
|
873
|
+
}
|
|
874
|
+
const router = promisify<RouterParams>(ty.router);
|
|
875
|
+
|
|
876
|
+
// mock,只在 IDE 下生效
|
|
877
|
+
mock.hooks.hook('router', context => {
|
|
878
|
+
console.log('call router', context.options);
|
|
879
|
+
});
|
|
880
|
+
|
|
881
|
+
// 调用
|
|
882
|
+
await router({ url: '/pages/index/index' });
|
|
883
|
+
```
|
|
884
|
+
|
|
885
|
+
### sendBlockToAssistant
|
|
886
|
+
|
|
887
|
+
给 Assistant 发送消息
|
|
888
|
+
|
|
889
|
+
```tsx
|
|
890
|
+
import { sendBlockToAssistant, getAIAssistantRequestId } from '@ray-js/t-agent-ui-ray';
|
|
891
|
+
|
|
892
|
+
const send = async () => {
|
|
893
|
+
const requestId = await getAIAssistantRequestId();
|
|
894
|
+
const result = sendBlockToAssistant({
|
|
895
|
+
channel: 'your-channel-id',
|
|
896
|
+
sessionId: 'your-session-id',
|
|
897
|
+
requestId,
|
|
898
|
+
blocks: [{ type: 'text', text: 'hello' }],
|
|
899
|
+
});
|
|
900
|
+
|
|
901
|
+
// 获取发送后的元数据
|
|
902
|
+
const meta = await result.metaPromise;
|
|
903
|
+
|
|
904
|
+
// 获取流式消息
|
|
905
|
+
const parts = result.parts();
|
|
906
|
+
|
|
907
|
+
for await (const part of parts) {
|
|
908
|
+
console.log('part', part);
|
|
909
|
+
}
|
|
910
|
+
};
|
|
911
|
+
```
|
|
912
|
+
|
|
913
|
+
### sendSkillToAssistant
|
|
914
|
+
|
|
915
|
+
给 Assistant 发送技能
|
|
916
|
+
|
|
917
|
+
```tsx
|
|
918
|
+
import { sendSkillToAssistant } from '@ray-js/t-agent-ui-ray';
|
|
919
|
+
|
|
920
|
+
const send = async () => {
|
|
921
|
+
const result = sendSkillToAssistant({
|
|
922
|
+
channel: 'your-channel-id',
|
|
923
|
+
sessionId: 'your-session-id',
|
|
924
|
+
options: {
|
|
925
|
+
domain: 'string',
|
|
926
|
+
intent: 'string',
|
|
927
|
+
},
|
|
928
|
+
});
|
|
929
|
+
|
|
930
|
+
// 获取发送后的元数据
|
|
931
|
+
const meta = await result.metaPromise;
|
|
932
|
+
|
|
933
|
+
// 获取流式消息
|
|
934
|
+
const parts = result.parts();
|
|
935
|
+
|
|
936
|
+
for await (const part of parts) {
|
|
937
|
+
console.log('part', part);
|
|
938
|
+
}
|
|
939
|
+
};
|
|
940
|
+
```
|
|
941
|
+
|
|
942
|
+
### authorizeAssistantPolicy
|
|
943
|
+
|
|
944
|
+
弹窗提醒用户接受 AI 隐私协议,安全要求,在 App 里需要用户同意协议后才能使用 AI 功能
|
|
945
|
+
|
|
946
|
+
```tsx
|
|
947
|
+
import { authorizeAssistantPolicy } from '@ray-js/t-agent-plugin-assistant';
|
|
948
|
+
|
|
949
|
+
// 在页面加载完成后调用该函数,弹出协议弹窗
|
|
950
|
+
const authorize = async () => {
|
|
951
|
+
try {
|
|
952
|
+
const result = await authorizeAssistantPolicy();
|
|
953
|
+
|
|
954
|
+
if (result) {
|
|
955
|
+
// 已经同意过,或者点了同意按钮
|
|
956
|
+
console.log('用户同意了 AI 隐私协议');
|
|
957
|
+
} else {
|
|
958
|
+
ty.exitMiniProgram({});
|
|
959
|
+
console.log('用户拒绝了 AI 隐私协议');
|
|
960
|
+
}
|
|
961
|
+
} catch (e) {
|
|
962
|
+
// 弹出错误消息
|
|
963
|
+
ty.showToast({
|
|
964
|
+
title: I18n.t('get_sign_error'),
|
|
965
|
+
icon: 'error',
|
|
966
|
+
});
|
|
967
|
+
// 延迟触发,等待用户看清
|
|
968
|
+
setTimeout(() => {
|
|
969
|
+
ty.exitMiniProgram({});
|
|
970
|
+
}, 1000);
|
|
971
|
+
}
|
|
972
|
+
};
|
|
973
|
+
```
|
|
974
|
+
|
|
975
|
+
### 媒体文件相关函数
|
|
976
|
+
|
|
977
|
+
`uploadMedia`、`uploadVideo`、`uploadImage` 用于上传媒体文件,带缓存
|
|
978
|
+
|
|
979
|
+
`isFullLink` 用于判断是否是 http(s) 协议开头的链接
|
|
980
|
+
|
|
981
|
+
`parseCloudKey` 用于解析 URL 中云存储的 key
|
|
982
|
+
|
|
983
|
+
`isLinkExpired` 用于判断链接是否过期
|
|
984
|
+
|
|
985
|
+
`getUrlByCloudKey` 从缓存中获取云存储的下载签名 URL,如果没有则返回 `undefined`
|
|
986
|
+
|
|
987
|
+
`setUrlByCloudKey` 设置云存储的下载签名 URL 到缓存中
|
|
988
|
+
|
|
989
|
+
`resetUrlByCloudKey` 重置云存储的下载签名 URL 缓存
|
|
990
|
+
|
|
991
|
+
`chooseImage`、`chooseVideo` 选择媒体文件
|
|
992
|
+
|
|
993
|
+
```tsx
|
|
994
|
+
import { useEffect } from 'react';
|
|
995
|
+
|
|
996
|
+
async function getPictureList() {
|
|
997
|
+
// 从云端拉取用户私有的图片列表
|
|
998
|
+
const list = await pictureListRequest();
|
|
999
|
+
// 这样设置到缓存里,下次就不用再请求了
|
|
1000
|
+
for (const item of list) {
|
|
1001
|
+
setUrlByCloudKey(item.path, item.displayUrl);
|
|
1002
|
+
}
|
|
1003
|
+
}
|
|
1004
|
+
```
|
|
1005
|
+
|
|
1006
|
+
# t-agent-ui-ray
|
|
1007
|
+
|
|
1008
|
+
t-agent-ui-ray 是一个基于 ray 的 UI 组件库,包含了一些常用的对话界面组件,例如消息列表、消息输入框等。
|
|
1009
|
+
|
|
1010
|
+
## 安装
|
|
1011
|
+
|
|
1012
|
+
```shell
|
|
1013
|
+
yarn add @ray-js/t-agent-ui-ray
|
|
1014
|
+
```
|
|
1015
|
+
|
|
1016
|
+
## 使用
|
|
1017
|
+
|
|
1018
|
+
```tsx
|
|
1019
|
+
import { ChatContainer, MessageList, MessageInput } from '@ray-js/t-agent-ui-ray';
|
|
1020
|
+
// createAgent 实现参见 t-agent 的使用示例
|
|
1021
|
+
import { createAgent } from './createAgent';
|
|
1022
|
+
|
|
1023
|
+
export default function ChatPage() {
|
|
1024
|
+
// createAgent 必须返回一个 ChatAgent 应用过 withUI、withAssistant 插件的实例
|
|
1025
|
+
return (
|
|
1026
|
+
<View style={{ height: '100vh' }}>
|
|
1027
|
+
<ChatContainer createAgent={createAgent}>
|
|
1028
|
+
<MessageList />
|
|
1029
|
+
<MessageInput />
|
|
1030
|
+
</ChatContainer>
|
|
1031
|
+
</View>
|
|
1032
|
+
);
|
|
1033
|
+
}
|
|
1034
|
+
```
|
|
1035
|
+
|
|
1036
|
+
## 组件
|
|
1037
|
+
|
|
1038
|
+
### ChatContainer
|
|
1039
|
+
|
|
1040
|
+
对话容器,用于包裹消息列表和消息输入框,提供了 `ChatAgent` 的上下文
|
|
1041
|
+
|
|
1042
|
+
props:
|
|
1043
|
+
|
|
1044
|
+
- `className` 容器的类名
|
|
1045
|
+
- `createAgent` 创建 `ChatAgent` 的函数,在 `ChatContainer` 挂载后会调用这个函数创建 `ChatAgent` 实例
|
|
1046
|
+
- `renderOptions` 渲染选项,用于决定 `MessageList` 中各个元素的渲染方式,具体参照下面的 renderOptions 自定义渲染 部分
|
|
1047
|
+
- `renderTileAs` 该函数决定如何在消息中渲染 tile
|
|
1048
|
+
- `customBlockTypes` 自定义 block 类型,只有在这里注册的 block 类型才会被 `renderCustomBlockAs` 渲染
|
|
1049
|
+
- `renderCustomBlockAs` 该函数决定如何在 markdown 气泡消息中渲染自定义 block,默认支持 `echarts`
|
|
1050
|
+
- `renderCardAs` 该函数决定如何在消息中渲染卡片,一般不需要自定义此项
|
|
1051
|
+
- `customCardMap` 自定义卡片映射,无需修改 `renderCardAs` 函数,只需要在这里注册卡片类型和对应的组件
|
|
1052
|
+
- `getStaticResourceBizType` 获取静态资源 `bizType`,用于获取静态资源
|
|
1053
|
+
|
|
1054
|
+
### MessageList
|
|
1055
|
+
|
|
1056
|
+
消息列表,用于展示消息
|
|
1057
|
+
|
|
1058
|
+
props:
|
|
1059
|
+
|
|
1060
|
+
- `className` 列表的类名
|
|
1061
|
+
- `roleSide` 消息角色的对齐方式,默认 `{ user: 'end', assistant: 'start' }`
|
|
1062
|
+
|
|
1063
|
+
### MessageInput
|
|
1064
|
+
|
|
1065
|
+
消息输入框,用于输入消息、上传附件、ASR 语音识别
|
|
1066
|
+
|
|
1067
|
+
props:
|
|
1068
|
+
|
|
1069
|
+
- `className` 输入框的类名
|
|
1070
|
+
- `placeholder` 输入框的占位符
|
|
1071
|
+
- `renderTop` 用于渲染输入框上方的内容
|
|
1072
|
+
|
|
1073
|
+
### PrivateImage
|
|
1074
|
+
|
|
1075
|
+
私有图片组件,用于展示私有图片,props 同 Image,增加 bizType 参数
|
|
1076
|
+
|
|
1077
|
+
### 内置 tile 组件
|
|
1078
|
+
|
|
1079
|
+
- bubble 气泡
|
|
1080
|
+
- buttons 按钮组
|
|
1081
|
+
- card 卡片
|
|
1082
|
+
- image 图片
|
|
1083
|
+
- recommendations 推荐行动
|
|
1084
|
+
- text 文本,包含 markdown 支持
|
|
1085
|
+
- time 时间标识
|
|
1086
|
+
- tip 提示
|
|
1087
|
+
- video 视频
|
|
1088
|
+
- workflow 工作选项
|
|
1089
|
+
|
|
1090
|
+
### 内置 card
|
|
1091
|
+
|
|
1092
|
+
- WorkflowReplyCard 工作流回复卡片
|
|
1093
|
+
|
|
1094
|
+
## React Hooks
|
|
1095
|
+
|
|
1096
|
+
### useChatAgent
|
|
1097
|
+
|
|
1098
|
+
在 `ChatContainer` 上下文里取得 `ChatAgent` 实例
|
|
1099
|
+
|
|
1100
|
+
### useAgentMessage
|
|
1101
|
+
|
|
1102
|
+
在 `ChatContainer` 上下文里取得 `messages: ChatMessageObject[]` 列表
|
|
1103
|
+
|
|
1104
|
+
### useRenderOptions
|
|
1105
|
+
|
|
1106
|
+
在 `ChatContainer` 上下文里取得 `renderOptions` 对象
|
|
1107
|
+
|
|
1108
|
+
### useOnEvent
|
|
1109
|
+
|
|
1110
|
+
在 `ChatContainer` 上下文里注册 ui 事件,在组件卸载时自动取消注册
|
|
1111
|
+
|
|
1112
|
+
```tsx
|
|
1113
|
+
import { useOnEvent } from '@ray-js/t-agent-ui-ray';
|
|
1114
|
+
|
|
1115
|
+
const MyComponent = () => {
|
|
1116
|
+
useOnEvent('scrollToBottom', payload => {
|
|
1117
|
+
console.log('scroll to bottom', payload.animation);
|
|
1118
|
+
});
|
|
1119
|
+
|
|
1120
|
+
return <div>My Component</div>;
|
|
1121
|
+
};
|
|
1122
|
+
```
|
|
1123
|
+
|
|
1124
|
+
### useEmitEvent
|
|
1125
|
+
|
|
1126
|
+
在 `ChatContainer` 上下文里触发 ui 事件
|
|
1127
|
+
|
|
1128
|
+
```tsx
|
|
1129
|
+
import { useEmitEvent } from '@ray-js/t-agent-ui-ray';
|
|
1130
|
+
|
|
1131
|
+
const MyComponent = () => {
|
|
1132
|
+
const emitEvent = useEmitEvent();
|
|
1133
|
+
|
|
1134
|
+
const scroll = () => {
|
|
1135
|
+
emitEvent('scrollToBottom', { animation: false });
|
|
1136
|
+
};
|
|
1137
|
+
|
|
1138
|
+
return <button onClick={scroll}>Scroll to bottom</button>;
|
|
1139
|
+
};
|
|
1140
|
+
```
|
|
1141
|
+
|
|
1142
|
+
### useTileProps
|
|
1143
|
+
|
|
1144
|
+
在 tile 组件里取得 `TileProps` 对象,如果是 tile,可以直接从 props 中获取
|
|
1145
|
+
|
|
1146
|
+
```tsx
|
|
1147
|
+
import { useTileProps } from '@ray-js/t-agent-ui-ray';
|
|
1148
|
+
|
|
1149
|
+
const MyTilePart = () => {
|
|
1150
|
+
const { message, agent, tile, emitEvent } = useTileProps();
|
|
1151
|
+
|
|
1152
|
+
return <div>My Tile</div>;
|
|
1153
|
+
};
|
|
1154
|
+
```
|
|
1155
|
+
|
|
1156
|
+
### useSendAction
|
|
1157
|
+
|
|
1158
|
+
发送一个 TTTAction,注意只能在 tile 组件(或 card)里使用
|
|
1159
|
+
|
|
1160
|
+
```tsx
|
|
1161
|
+
import { useSendAction } from '@ray-js/t-agent-ui-ray';
|
|
1162
|
+
|
|
1163
|
+
const MyTilePart = () => {
|
|
1164
|
+
const sendAction = useSendAction();
|
|
1165
|
+
|
|
1166
|
+
const handleClick = () => {
|
|
1167
|
+
sendAction({ type: 'sendMessage', blocks: [{ type: 'text', text: 'hello' }] });
|
|
1168
|
+
};
|
|
1169
|
+
|
|
1170
|
+
return <button onClick={handleClick}>Send Message</button>;
|
|
1171
|
+
};
|
|
1172
|
+
```
|
|
1173
|
+
|
|
1174
|
+
## renderOptions 自定义渲染
|
|
1175
|
+
|
|
1176
|
+
### 替换或新增 tile
|
|
1177
|
+
|
|
1178
|
+
如果你需要将某个 tile 替换成自己的实现,或者新增一个 tile,可以复写 `renderTileAs`,例如:
|
|
1179
|
+
|
|
1180
|
+
```tsx
|
|
1181
|
+
import { ImageTileData } from '@ray-js/t-agent';
|
|
1182
|
+
import { Image } from '@ray-js/ray';
|
|
1183
|
+
import { defaultRenderOptions, TileProps } from '@ray-js/t-agent-ui-ray';
|
|
1184
|
+
|
|
1185
|
+
function MyImageTile(props: TileProps<ImageTileData>) {
|
|
1186
|
+
// 实现自己的 ImageTile
|
|
1187
|
+
return <Image src={props.tile.data.src}></Image>;
|
|
1188
|
+
}
|
|
1189
|
+
|
|
1190
|
+
const renderOptions = {
|
|
1191
|
+
...defaultRenderOptions,
|
|
1192
|
+
renderTileAs: (props: TileProps) => {
|
|
1193
|
+
if (props.tile.type === 'image') {
|
|
1194
|
+
return <MyImageTile {...props} />;
|
|
1195
|
+
}
|
|
1196
|
+
// 保持默认行为
|
|
1197
|
+
return defaultRenderOptions.renderTileAs(props);
|
|
1198
|
+
},
|
|
1199
|
+
};
|
|
1200
|
+
```
|
|
1201
|
+
|
|
1202
|
+
### 自定义卡片
|
|
1203
|
+
|
|
1204
|
+
卡片分为三类:内置卡片(buildIn)、自定义卡片(custom)、低代码卡片(lowCode),目前低代码卡片还在开发中,自定义卡片可以通过 `customCardMap` 注册自己的卡片组件。
|
|
1205
|
+
|
|
1206
|
+
卡片的数据结构如下:
|
|
1207
|
+
|
|
1208
|
+
```tsx
|
|
1209
|
+
enum ChatCardType {
|
|
1210
|
+
CUSTOM = 'custom', // 可供业务方使用的自定义卡片
|
|
1211
|
+
BUILD_IN = 'buildIn', // 平台内置的卡片
|
|
1212
|
+
LOW_CODE = 'lowCode', // 低代码卡片
|
|
1213
|
+
}
|
|
1214
|
+
|
|
1215
|
+
interface ChatCardObject<T = any> {
|
|
1216
|
+
cardCode: string; // 唯一标识卡片的 code
|
|
1217
|
+
cardType: ChatCardType; // 卡片类型
|
|
1218
|
+
cardData: T; // 卡片携带的数据
|
|
1219
|
+
}
|
|
1220
|
+
```
|
|
1221
|
+
|
|
1222
|
+
注册一个自定义卡片:
|
|
1223
|
+
|
|
1224
|
+
```tsx
|
|
1225
|
+
import {
|
|
1226
|
+
ChatCardObject,
|
|
1227
|
+
ChatCardType,
|
|
1228
|
+
defaultRenderOptions,
|
|
1229
|
+
useTileProps,
|
|
1230
|
+
useSendAction,
|
|
1231
|
+
} from '@ray-js/t-agent-ui-ray';
|
|
1232
|
+
import { View, Text, Button } from '@ray-js/ray';
|
|
1233
|
+
|
|
1234
|
+
function MyCard(props: { card: ChatCardObject }) {
|
|
1235
|
+
// 如果你需要拿到 agent、message、tile、emitEvent 等属性,可以使用 useTileProps
|
|
1236
|
+
const { message, agent, tile, emitEvent } = useTileProps();
|
|
1237
|
+
|
|
1238
|
+
// 如果你需要发送一个 TTTAction,可以使用 useSendAction
|
|
1239
|
+
const sendAction = useSendAction();
|
|
1240
|
+
|
|
1241
|
+
return (
|
|
1242
|
+
<View>
|
|
1243
|
+
<Text>My Card</Text>
|
|
1244
|
+
<Button
|
|
1245
|
+
onClick={() =>
|
|
1246
|
+
sendAction({ type: 'sendMessage', blocks: [{ type: 'text', text: 'hello' }] })
|
|
1247
|
+
}
|
|
1248
|
+
>
|
|
1249
|
+
填充文本到输入框
|
|
1250
|
+
</Button>
|
|
1251
|
+
</View>
|
|
1252
|
+
);
|
|
1253
|
+
}
|
|
1254
|
+
|
|
1255
|
+
const renderOptions = {
|
|
1256
|
+
...defaultRenderOptions,
|
|
1257
|
+
customCardMap: {
|
|
1258
|
+
myCard: MyCard,
|
|
1259
|
+
},
|
|
1260
|
+
};
|
|
1261
|
+
```
|
|
1262
|
+
|
|
1263
|
+
### 自定义 block
|
|
1264
|
+
|
|
1265
|
+
在 `TextTile` 里的 markdown 渲染器是支持自定义 block 的,你可以通过 `customBlockTypes` 和 `renderCustomBlockAs` 来注册和渲染自定义 block。
|
|
1266
|
+
|
|
1267
|
+
block 的数据结构如下:
|
|
1268
|
+
|
|
1269
|
+
```tsx
|
|
1270
|
+
export interface MarkdownBlock {
|
|
1271
|
+
id: string;
|
|
1272
|
+
type: string;
|
|
1273
|
+
children: string; // block 里的内容
|
|
1274
|
+
}
|
|
1275
|
+
```
|
|
1276
|
+
|
|
1277
|
+
注册一个自定义 block:
|
|
1278
|
+
|
|
1279
|
+
```tsx
|
|
1280
|
+
import { defaultRenderOptions, MarkdownBlock } from '@ray-js/t-agent-ui-ray';
|
|
1281
|
+
import { View, Text } from '@ray-js/ray';
|
|
1282
|
+
|
|
1283
|
+
const renderOptions = {
|
|
1284
|
+
...defaultRenderOptions,
|
|
1285
|
+
customBlockTypes: ['my-block'],
|
|
1286
|
+
renderCustomBlockAs: (block: MarkdownBlock) => {
|
|
1287
|
+
if (block.type === 'my-block') {
|
|
1288
|
+
return (
|
|
1289
|
+
<View>
|
|
1290
|
+
<View>This is My Block</View>
|
|
1291
|
+
<View>{block.children}</View>
|
|
1292
|
+
</View>
|
|
1293
|
+
);
|
|
1294
|
+
}
|
|
1295
|
+
return defaultRenderOptions.renderCustomBlockAs(props);
|
|
1296
|
+
},
|
|
1297
|
+
};
|
|
1298
|
+
```
|
|
1299
|
+
|
|
1300
|
+
假设 AI 给你发了 markdown 文本,里面有一个类型是 `my-block` 的 `fence`,在上面我们注册了 `my-block`,那这个 `fence` 可以当做自定义 block。
|
|
1301
|
+
|
|
1302
|
+
````markdown
|
|
1303
|
+
这是我的自定义 block!
|
|
1304
|
+
|
|
1305
|
+
```my-block
|
|
1306
|
+
Hello, world!
|
|
1307
|
+
```
|
|
1308
|
+
|
|
1309
|
+
以下 fence 没有注册过,不会被渲染成自定义 block,仅当做普通的代码块渲染。
|
|
1310
|
+
|
|
1311
|
+
```javascript
|
|
1312
|
+
console.log('Hello, world!');
|
|
1313
|
+
```
|
|
1314
|
+
````
|
|
1315
|
+
|
|
1316
|
+
渲染结果如下:
|
|
1317
|
+
|
|
1318
|
+
```
|
|
1319
|
+
这是我的自定义 block!
|
|
1320
|
+
This is My Block
|
|
1321
|
+
Hello, world!
|
|
1322
|
+
以下 fence 没有注册过,不会被渲染成自定义 block,仅当做普通的代码块渲染。
|
|
1323
|
+
----------------------------------
|
|
1324
|
+
| console.log('Hello, world!'); |
|
|
1325
|
+
----------------------------------
|
|
1326
|
+
```
|
|
1327
|
+
|
|
1328
|
+
### getStaticResourceBizType
|
|
1329
|
+
|
|
1330
|
+
如果你的静态资源需要带上 `bizType`,可以通过 `getStaticResourceBizType` 来获取 `bizType`。
|
|
1331
|
+
|
|
1332
|
+
```tsx
|
|
1333
|
+
import { defaultRenderOptions } from '@ray-js/t-agent-ui-ray';
|
|
1334
|
+
|
|
1335
|
+
const renderOptions = {
|
|
1336
|
+
...defaultRenderOptions,
|
|
1337
|
+
getStaticResourceBizType: (src: string, scene: string) => 'bizType',
|
|
1338
|
+
};
|
|
1339
|
+
```
|
|
1340
|
+
|
|
1341
|
+
针对不同的场景,你可以需要不同的 `bizType`,你可以根据 `src` 和 `scene` 来返回不同的 `bizType`。
|
|
1342
|
+
|
|
1343
|
+
内置的 `scene` 有以下几种:
|
|
1344
|
+
|
|
1345
|
+
- `image:view` 图片查看
|
|
1346
|
+
- `image:upload` 图片上传
|
|
1347
|
+
- `video:view` 视频查看
|
|
1348
|
+
- `video:upload` 视频上传
|
|
1349
|
+
- `videoThumb:view` 视频缩略图查看
|
|
1350
|
+
- `videoThumb:upload` 视频缩略图上传
|