@powerhousedao/academy 5.1.0-dev.14 → 5.1.0-dev.17
This diff represents the content of publicly available package versions that have been released to one of the supported registries. The information contained in this diff is provided for informational purposes only and reflects changes between package versions as they appear in their respective public registries.
- package/CHANGELOG.md +29 -0
- package/docs/academy/01-GetStarted/00-ExploreDemoPackage.mdx +11 -11
- package/docs/academy/01-GetStarted/01-CreateNewPowerhouseProject.md +22 -5
- package/docs/academy/01-GetStarted/02-DefineToDoListDocumentModel.md +2 -20
- package/docs/academy/01-GetStarted/03-ImplementOperationReducers.md +2 -3
- package/docs/academy/01-GetStarted/05-BuildToDoListEditor.md +4 -4
- package/docs/academy/01-GetStarted/home.mdx +43 -104
- package/docs/academy/01-GetStarted/images/DocumentModelOperations.png +0 -0
- package/docs/academy/01-GetStarted/styles.module.css +30 -6
- package/docs/academy/02-MasteryTrack/01-BuilderEnvironment/02-VetraStudio.md +95 -0
- package/docs/academy/02-MasteryTrack/01-BuilderEnvironment/{02-StandardDocumentModelWorkflow.md → 03-CreateAPackageWithVetra.md} +202 -33
- package/docs/academy/02-MasteryTrack/01-BuilderEnvironment/{03-BuilderTools.md → BuilderTools} +1 -1
- package/docs/academy/02-MasteryTrack/03-BuildingUserExperiences/02-ConfiguringDrives.md +4 -4
- package/docs/academy/02-MasteryTrack/03-BuildingUserExperiences/03-BuildingADriveExplorer.md +34 -34
- package/docs/academy/02-MasteryTrack/03-BuildingUserExperiences/07-Authorization/03-DocumentPermissions.md +387 -0
- package/docs/academy/02-MasteryTrack/05-Launch/02-PublishYourProject.md +118 -184
- package/docs/academy/02-MasteryTrack/05-Launch/03-SetupEnvironment.md +1 -1
- package/docs/academy/02-MasteryTrack/05-Launch/05-DockerDeployment.md +1 -1
- package/docs/academy/02-MasteryTrack/_category_.json +1 -1
- package/docs/academy/03-ExampleUsecases/00-Overview.mdx +60 -0
- package/docs/academy/03-ExampleUsecases/Chatroom/02-CreateNewPowerhouseProject.md +38 -16
- package/docs/academy/03-ExampleUsecases/Chatroom/03-DefineChatroomDocumentModel.md +11 -14
- package/docs/academy/03-ExampleUsecases/Chatroom/04-ImplementOperationReducers.md +12 -95
- package/docs/academy/03-ExampleUsecases/Chatroom/05-ImplementChatroomEditor.md +30 -20
- package/docs/academy/03-ExampleUsecases/Chatroom/{06-LaunchALocalReactor.md → 06-LaunchALocalReactor} +13 -8
- package/docs/academy/03-ExampleUsecases/VetraPackageLibrary/VetraPackageLibrary.md +13 -0
- package/docs/academy/03-ExampleUsecases/_category_.json +9 -0
- package/docs/academy/04-APIReferences/00-PowerhouseCLI.md +168 -15
- package/docs/academy/04-APIReferences/01-ReactHooks.md +7 -0
- package/docs/academy/04-APIReferences/04-RelationalDatabase.md +6 -0
- package/docs/academy/04-APIReferences/renown-sdk/03-CLIIdentity.md +321 -0
- package/docs/academy/05-Architecture/00-PowerhouseArchitecture.md +46 -11
- package/docs/academy/07-Cookbook.md +598 -145
- package/docs/academy/08-Glossary.md +1 -1
- package/docusaurus.config.ts +13 -35
- package/package.json +1 -1
- package/sidebars.ts +11 -11
- package/src/css/custom.css +28 -30
- package/src/theme/DocSidebarItem/Category/index.tsx +47 -0
- package/tsconfig.tsbuildinfo +1 -1
- package/docs/academy/02-MasteryTrack/01-BuilderEnvironment/05-VetraStudio.md +0 -253
- package/docs/academy/02-MasteryTrack/05-Launch/01-IntroductionToPackages.md +0 -78
|
@@ -1,4 +1,4 @@
|
|
|
1
|
-
# Create
|
|
1
|
+
# Create a package with Vetra
|
|
2
2
|
|
|
3
3
|
:::warning
|
|
4
4
|
**This tutorial is a summary for builders that are already familiar with building document models**.
|
|
@@ -12,9 +12,8 @@ Please start with the '**Get Started**' Chapter or '**Document Model Creation**'
|
|
|
12
12
|
|
|
13
13
|
- `pnpm install -g ph-cmd` or `npm install -g ph-cmd`: Installs the Powerhouse CLI globally.
|
|
14
14
|
- `ph init`: Initializes a new Powerhouse project or sets up the local environment.
|
|
15
|
-
- `ph
|
|
16
|
-
- `ph
|
|
17
|
-
- `ph generate --editor YourModelName --document-types powerhouse/YourModelName`: Generates an editor template for a document model.
|
|
15
|
+
- `ph vetra --interactive`: Launches Vetra Studio in interactive mode for package development.
|
|
16
|
+
- `ph vetra --interactive --watch`: Launches Vetra Studio with dynamic reloading for document-models and editors.
|
|
18
17
|
- `pnpm build` or `npm run build`: Builds the project for production.
|
|
19
18
|
- `pnpm run test` or `npm test`: Runs unit tests.
|
|
20
19
|
- `npm login`: Logs into your NPM account.
|
|
@@ -45,7 +44,7 @@ See the [Prerequisites](/academy/MasteryTrack/BuilderEnvironment/Prerequisites)
|
|
|
45
44
|
|
|
46
45
|
### 1.2. Initialize your project environment
|
|
47
46
|
|
|
48
|
-
Before creating a specific project, or if you're setting up your environment for the first time
|
|
47
|
+
Before creating a specific project, or if you're setting up your environment for the first time, initialize the Powerhouse environment. This command prepares your local setup, including a local Reactor configuration.
|
|
49
48
|
|
|
50
49
|
```bash
|
|
51
50
|
ph init
|
|
@@ -74,7 +73,45 @@ Please be aware that these versions can contain bugs and experimental features t
|
|
|
74
73
|
|
|
75
74
|
</details>
|
|
76
75
|
|
|
77
|
-
### 1.3. Launch
|
|
76
|
+
### 1.3. Launch Vetra Studio
|
|
77
|
+
|
|
78
|
+
You can launch Vetra Studio in two modes:
|
|
79
|
+
|
|
80
|
+
#### Interactive Mode (Recommended for Development)
|
|
81
|
+
```bash
|
|
82
|
+
ph vetra --interactive
|
|
83
|
+
```
|
|
84
|
+
In interactive mode:
|
|
85
|
+
- You'll receive confirmation prompts before any code generation
|
|
86
|
+
- Changes require explicit confirmation before being processed
|
|
87
|
+
- Provides better control and visibility over document changes
|
|
88
|
+
|
|
89
|
+
#### Watch Mode
|
|
90
|
+
|
|
91
|
+
```bash
|
|
92
|
+
ph vetra --interactive --watch
|
|
93
|
+
```
|
|
94
|
+
In watch mode:
|
|
95
|
+
|
|
96
|
+
- Adding `--watch` to your command enables dynamic loading for document-models and editors in Vetra studio and switchboard.
|
|
97
|
+
- When enabled, the system will watch for changes in these directories and reload them dynamically.
|
|
98
|
+
|
|
99
|
+
:::warning Be Aware
|
|
100
|
+
When you are building your document model the code can break the Vetra Studio environment.
|
|
101
|
+
A full overview of the Vetra Studio commands can be found in the [Powerhouse CLI](/academy/APIReferences/PowerhouseCLI#vetra)
|
|
102
|
+
:::
|
|
103
|
+
|
|
104
|
+
#### Standard Mode
|
|
105
|
+
```bash
|
|
106
|
+
ph vetra
|
|
107
|
+
```
|
|
108
|
+
In standard mode:
|
|
109
|
+
- Changes are processed automatically with 1-second debounce
|
|
110
|
+
- Multiple changes are batched and processed together
|
|
111
|
+
- Uses the latest document state for processing
|
|
112
|
+
|
|
113
|
+
<details>
|
|
114
|
+
<summary>Alternatively: Use Connect</summary>
|
|
78
115
|
|
|
79
116
|
Connect is your local development hub. Running it in Studio Mode spins up a local instance with a local Reactor, allowing you to define, build, and test document models.
|
|
80
117
|
|
|
@@ -88,17 +125,113 @@ This command typically opens Connect in your browser at `http://localhost:3000/`
|
|
|
88
125
|
**Powerhouse Reactors** are essential nodes in the Powerhouse network. They store documents, manage versions, resolve conflicts, and verify document operation histories by rerunning them. Reactors can be configured for local storage (as in Studio Mode), centralized cloud storage, or decentralized storage networks.
|
|
89
126
|
:::
|
|
90
127
|
|
|
91
|
-
|
|
128
|
+
</details>
|
|
129
|
+
|
|
130
|
+
### 1.4. Launch Claude with Reactor-MCP
|
|
131
|
+
|
|
132
|
+
Vetra Studio integrates deeply with Claude through MCP (Model Control Protocol). This is where AI comes into the mix and you get the chance to have greater control and direction over what your llm is coding for you.
|
|
133
|
+
|
|
134
|
+
<details>
|
|
135
|
+
<summary>Explainer: Specification Driven AI</summary>
|
|
136
|
+
|
|
137
|
+
In the **'Get Started'** chapter we've been making use of strict schema definition principles to communicate the intended use case of our reactive documents.
|
|
138
|
+
The **schema definition language**, is a not only a shared language that bridges the gap between developer, designer and analyst but also the gap between builder and AI-agent through **specification driven AI control**.
|
|
139
|
+
|
|
140
|
+
- Communicate your solution and intent through a structured specification framework designed for AI collaboration.
|
|
141
|
+
- Specifications enable precise, iterative edits, since all our specification documents are machine-readable and executable.
|
|
142
|
+
|
|
143
|
+
</details>
|
|
144
|
+
|
|
145
|
+
<details>
|
|
146
|
+
<summary> Reactor MCP Overview</summary>
|
|
147
|
+
|
|
148
|
+
#### Key Reactor MCP Features
|
|
149
|
+
|
|
150
|
+
**Reactor-mcp** is a Model Context Protocol (MCP) server that bridges AI agents with Powerhouse document operations.
|
|
151
|
+
|
|
152
|
+
- It supports automatic document model creation from natural language descriptions
|
|
153
|
+
- It implements a smart editor based on the underlying document models
|
|
154
|
+
- It automatically triggers code generation when documents reach valid state
|
|
155
|
+
- The MCP server enables the agent to work with both existing and newly created document models
|
|
156
|
+
- Vetra supports integration with custom remote drives, allowing users to create, share and manage documents within these drives
|
|
157
|
+
|
|
158
|
+
**Document Operations:**
|
|
159
|
+
- `createDocument` / `getDocument` / `deleteDocument` - Manage documents
|
|
160
|
+
- `addActions` - Modify document state through operations
|
|
161
|
+
|
|
162
|
+
**Drive Operations:**
|
|
163
|
+
- `getDrives` / `addDrive` / `getDrive` - Manage document drives
|
|
164
|
+
- `addRemoteDrive` - Connect to remote drives
|
|
165
|
+
|
|
166
|
+
**Document Model Operations:**
|
|
167
|
+
- `getDocumentModels` - List available document model types
|
|
168
|
+
- `getDocumentModelSchema` - Get schema for specific models
|
|
169
|
+
|
|
170
|
+
**Document Model Agent:**
|
|
171
|
+
A specialized AI agent that guides users through document model creation with requirements gathering, design confirmation, and implementation including state schema definition, operation creation, and code generation.
|
|
172
|
+
|
|
173
|
+
</details>
|
|
174
|
+
|
|
175
|
+
#### 1. Start the Reactor MCP:
|
|
176
|
+
|
|
177
|
+
Make sure you are in the same directory as your project.
|
|
178
|
+
Claude will automatically recognize the necessary files and MCP tools.
|
|
179
|
+
|
|
180
|
+
```bash
|
|
181
|
+
claude
|
|
182
|
+
```
|
|
183
|
+
|
|
184
|
+
Since you're interacting with a llm it has a high capacit for interpretating your intentions.
|
|
185
|
+
Any commands in the same trend will do the job.
|
|
186
|
+
|
|
187
|
+
```bash
|
|
188
|
+
connect to the reactor mcp
|
|
189
|
+
```
|
|
190
|
+
|
|
191
|
+
#### 2. Verify MCP connection:
|
|
192
|
+
- Check that the Reactor MCP is available.
|
|
193
|
+
- Confirm Vetra Studio shows "Connected to Reactor MCP"
|
|
194
|
+
|
|
195
|
+
```bash
|
|
196
|
+
Connected to MCP successfully! I can see there's a
|
|
197
|
+
"vetra-4de7fa45" drive available. The reactor-mcp server is
|
|
198
|
+
running and ready for document model operations.
|
|
199
|
+
```
|
|
200
|
+
|
|
201
|
+
## Phase 2: Package Creation
|
|
202
|
+
|
|
203
|
+
### 2.1. Set Package Description (Required)
|
|
204
|
+
1. Provide a name for your package
|
|
205
|
+
2. Add a meaningful description
|
|
206
|
+
3. Add keywords to add search terms to your package
|
|
207
|
+
4. Confirm changes when prompted in interactive mode
|
|
92
208
|
|
|
93
|
-
### 2.
|
|
209
|
+
### 2.2. Define Document Model (Required)
|
|
210
|
+
|
|
211
|
+
You can create document models in two ways:
|
|
212
|
+
|
|
213
|
+
#### Manual Creation
|
|
214
|
+
- Define document schema with fields and types as in the **'Get Started'**
|
|
215
|
+
- Create the necessary operations
|
|
216
|
+
- Add the required modules to your package
|
|
217
|
+
- The document model creation chapter in the Mastery track provides in depth support [here](/academy/MasteryTrack/DocumentModelCreation/SpecifyTheStateSchema)
|
|
218
|
+
|
|
219
|
+
#### Using MCP (AI-Assisted)
|
|
220
|
+
- Describe your document needs in natural language in great detail.
|
|
221
|
+
- Claude will:
|
|
222
|
+
- Generate an appropriate schema
|
|
223
|
+
- Create the necessary operations
|
|
224
|
+
- Implement the required reducers
|
|
225
|
+
- Place the document in the Vetra drive
|
|
226
|
+
|
|
227
|
+
<details>
|
|
228
|
+
<summary>Alternatively: Use Connect</summary>
|
|
94
229
|
|
|
95
230
|
Within Connect Studio Mode, navigate to the Document Model Editor. Here, you'll specify the structure of your document model using GraphQL Schema Definition Language (SDL).
|
|
96
231
|
|
|
97
232
|
- **State Schema:** Describes the data fields and types within your document (e.g., `ToDoItem` with `id`, `text`, `checked` fields).
|
|
98
233
|
- This schema is the blueprint for your document model's data.
|
|
99
234
|
|
|
100
|
-
### 2.2. Define document model operations
|
|
101
|
-
|
|
102
235
|
In the same editor, specify the operations (state transitions) for your document model. These are also defined using GraphQL, specifically input types.
|
|
103
236
|
|
|
104
237
|
- **Operations Schema:** Specifies the actions that can be performed on the document (e.g., `AddTodoItemInput`, `UpdateTodoItemInput`, `DeleteTodoItemInput`).
|
|
@@ -108,15 +241,14 @@ In the same editor, specify the operations (state transitions) for your document
|
|
|
108
241
|
- Use GraphQL input types for operation parameters.
|
|
109
242
|
- Ensure operations reflect user intent for a clean API.
|
|
110
243
|
|
|
111
|
-
### 2.3. Export document model specification
|
|
112
|
-
|
|
113
244
|
Once your schema and operations are defined in Connect, export the specification. This will download a `.phdm.zip` file (e.g., `YourModelName.phdm.zip`). Save this file in the root of your Powerhouse project directory.
|
|
114
245
|
|
|
115
|
-
|
|
246
|
+
</details>
|
|
116
247
|
|
|
117
|
-
|
|
248
|
+
<details>
|
|
249
|
+
<summary>Alternatively: Generate command</summary>
|
|
118
250
|
|
|
119
|
-
Use the Powerhouse CLI to process
|
|
251
|
+
Use the Powerhouse CLI to process an exported `.phdm.zip` file and generate the necessary boilerplate code for your document model.
|
|
120
252
|
|
|
121
253
|
```bash
|
|
122
254
|
ph generate YourModelName.phdm.zip
|
|
@@ -129,7 +261,46 @@ This command creates a new directory under `document-models/YourModelName/` cont
|
|
|
129
261
|
- A `gen/` folder with autogenerated TypeScript types, action creators, and utility functions based on your schema.
|
|
130
262
|
- A `src/` folder where you'll implement your custom logic (reducers, utils).
|
|
131
263
|
|
|
132
|
-
|
|
264
|
+
</details>
|
|
265
|
+
|
|
266
|
+
### 2.3. Add Document Editor (Required)
|
|
267
|
+
|
|
268
|
+
#### Manual Creation
|
|
269
|
+
- Select your target document model
|
|
270
|
+
- Configure the currently limited editor properties
|
|
271
|
+
- Add the editor specification to Vetra Studio drive
|
|
272
|
+
- The system will generate scaffolding code
|
|
273
|
+
|
|
274
|
+
#### Using MCP (AI-Assisted)
|
|
275
|
+
- Request Claude to create an editor for your document. Do this with the help of a detailed description of the user interface, user experience and logic that you wish to generate. Make sure to reference operations from the document model to get the best results
|
|
276
|
+
- Claude will:
|
|
277
|
+
- Generate editor components
|
|
278
|
+
- Implement necessary hooks
|
|
279
|
+
- Create required UI elements
|
|
280
|
+
|
|
281
|
+
<details>
|
|
282
|
+
<summary>Alternatively: Generate command</summary>
|
|
283
|
+
|
|
284
|
+
A document editor provides the user interface for interacting with your document model. Generate an editor template:
|
|
285
|
+
|
|
286
|
+
```bash
|
|
287
|
+
ph generate --editor YourModelName --document-types powerhouse/YourModelName
|
|
288
|
+
```
|
|
289
|
+
|
|
290
|
+
- The `--editor YourModelName` flag specifies the document model this editor is for.
|
|
291
|
+
- The `--document-types powerhouse/YourModelName` flag links the editor to the specific document type defined in your model specification.
|
|
292
|
+
|
|
293
|
+
This creates a template file, typically at `editors/your-model-name/editor.tsx`.
|
|
294
|
+
|
|
295
|
+
- Customize this React component to build your UI.
|
|
296
|
+
- You can use standard HTML, Tailwind CSS (available in Connect), or import custom CSS.
|
|
297
|
+
- Utilize components from `@powerhousedao/document-engineering` for consistency and rapid development. Learn more at [Document-Engineering](/academy/ComponentLibrary/DocumentEngineering)
|
|
298
|
+
|
|
299
|
+
</details>
|
|
300
|
+
|
|
301
|
+
## Phase 3: Implementation and testing
|
|
302
|
+
|
|
303
|
+
### 3.1. Implement reducer logic
|
|
133
304
|
|
|
134
305
|
Reducers are pure functions that implement the state transition logic for each operation defined in your schema. Navigate to `document-models/YourModelName/src/reducers/to-do-list.ts` (or similar, based on your model name).
|
|
135
306
|
|
|
@@ -137,7 +308,7 @@ Reducers are pure functions that implement the state transition logic for each o
|
|
|
137
308
|
- These functions take the current state and an action (containing input data) and return the new state.
|
|
138
309
|
- Powerhouse handles immutability behind the scenes.
|
|
139
310
|
|
|
140
|
-
### 3.
|
|
311
|
+
### 3.2. Write unit tests for reducers
|
|
141
312
|
|
|
142
313
|
It's crucial to test your reducer logic. Write unit tests in the `document-models/YourModelName/src/reducers/tests/` directory.
|
|
143
314
|
|
|
@@ -155,24 +326,12 @@ Or with npm:
|
|
|
155
326
|
npm test
|
|
156
327
|
```
|
|
157
328
|
|
|
158
|
-
### 3.
|
|
159
|
-
|
|
160
|
-
A document editor provides the user interface for interacting with your document model in Connect. Generate an editor template:
|
|
329
|
+
### 3.3. Test the editor
|
|
161
330
|
|
|
162
|
-
|
|
163
|
-
ph generate --editor YourModelName --document-types powerhouse/YourModelName
|
|
164
|
-
```
|
|
331
|
+
Test your editor in Vetra Studio by creating a new document of your defined type. Interact with your editor, test all functionalities, and ensure it correctly dispatches actions to the reducers and reflects state changes.
|
|
165
332
|
|
|
166
|
-
|
|
167
|
-
|
|
168
|
-
|
|
169
|
-
This creates a template file, typically at `editors/your-model-name/editor.tsx`.
|
|
170
|
-
|
|
171
|
-
- Customize this React component to build your UI.
|
|
172
|
-
- You can use standard HTML, Tailwind CSS (available in Connect), or import custom CSS.
|
|
173
|
-
- Utilize components from `@powerhousedao/document-engineering` for consistency and rapid development. Learn more at [Document-Engineering](/academy/ComponentLibrary/DocumentEngineering)
|
|
174
|
-
|
|
175
|
-
### 3.5. Test the editor
|
|
333
|
+
<details>
|
|
334
|
+
<summary>Alternatively: Use Connect</summary>
|
|
176
335
|
|
|
177
336
|
Run Connect locally to see your editor in action:
|
|
178
337
|
|
|
@@ -182,6 +341,16 @@ ph connect
|
|
|
182
341
|
|
|
183
342
|
Create a new document of your defined type. Interact with your editor, test all functionalities, and ensure it correctly dispatches actions to the reducers and reflects state changes.
|
|
184
343
|
|
|
344
|
+
</details>
|
|
345
|
+
|
|
346
|
+
### Best Practices
|
|
347
|
+
|
|
348
|
+
**Working with MCP and claude**
|
|
349
|
+
- Provide clear, specific instructions and ask for clarifying questions to be answered before code generation.
|
|
350
|
+
- Review generated schemas before confirmation and work in layers instead of 'one-shotting' your code.
|
|
351
|
+
- Verify implementation details in generated code before continuing.
|
|
352
|
+
- Always double-check proposed next actions
|
|
353
|
+
|
|
185
354
|
## Phase 4: Packaging and publishing
|
|
186
355
|
|
|
187
356
|
Once your document model and editor are implemented and tested, you can package them for distribution. A Powerhouse Package is a modular unit that can group document models, editors, scripts, and processors.
|
package/docs/academy/02-MasteryTrack/01-BuilderEnvironment/{03-BuilderTools.md → BuilderTools}
RENAMED
|
@@ -245,7 +245,7 @@ Handles client-side interactions
|
|
|
245
245
|
|
|
246
246
|
Manages local storage and offline functionality
|
|
247
247
|
|
|
248
|
-
###
|
|
248
|
+
### drive-app
|
|
249
249
|
|
|
250
250
|
Handles document organization and storage management, but can also be customized to offer specific functionality, categorization, or tailored interfaces for your documents.
|
|
251
251
|
|
|
@@ -34,11 +34,11 @@ A reactor allows you to store multiple documents and host **drives** and Drive E
|
|
|
34
34
|
|
|
35
35
|
A drive uses a reactor and its underlying storage layer. A reactor is the low-level component that enables the synchronization of documents and drives.
|
|
36
36
|
|
|
37
|
-
###
|
|
37
|
+
### drive-apps
|
|
38
38
|
|
|
39
|
-
**Drive Explorers** (also known as
|
|
39
|
+
**Drive Explorers** (also known as drive-apps) are specialized interfaces that enhance how users interact with documents within a drive. As mentioned, a drive is technically just another document containing a list of other documents. This means you can create a custom editor for your drive document.
|
|
40
40
|
|
|
41
|
-
These customized editors are called Drive Explorers or
|
|
41
|
+
These customized editors are called Drive Explorers or drive-apps. They provide custom views, organization tools, and interactive features tailored to specific use cases. For example, a Drive Explorer might present data as a Kanban board, provide aggregated insights, or offer specialized widgets for data processing.
|
|
42
42
|
|
|
43
43
|
To learn more about building and customizing Drive Explorers, check out our [Building a Drive Explorer](/academy/MasteryTrack/BuildingUserExperiences/BuildingADriveExplorer) guide.
|
|
44
44
|
|
|
@@ -53,7 +53,7 @@ To create a new drive in Powerhouse, follow these steps:
|
|
|
53
53
|
|
|
54
54
|
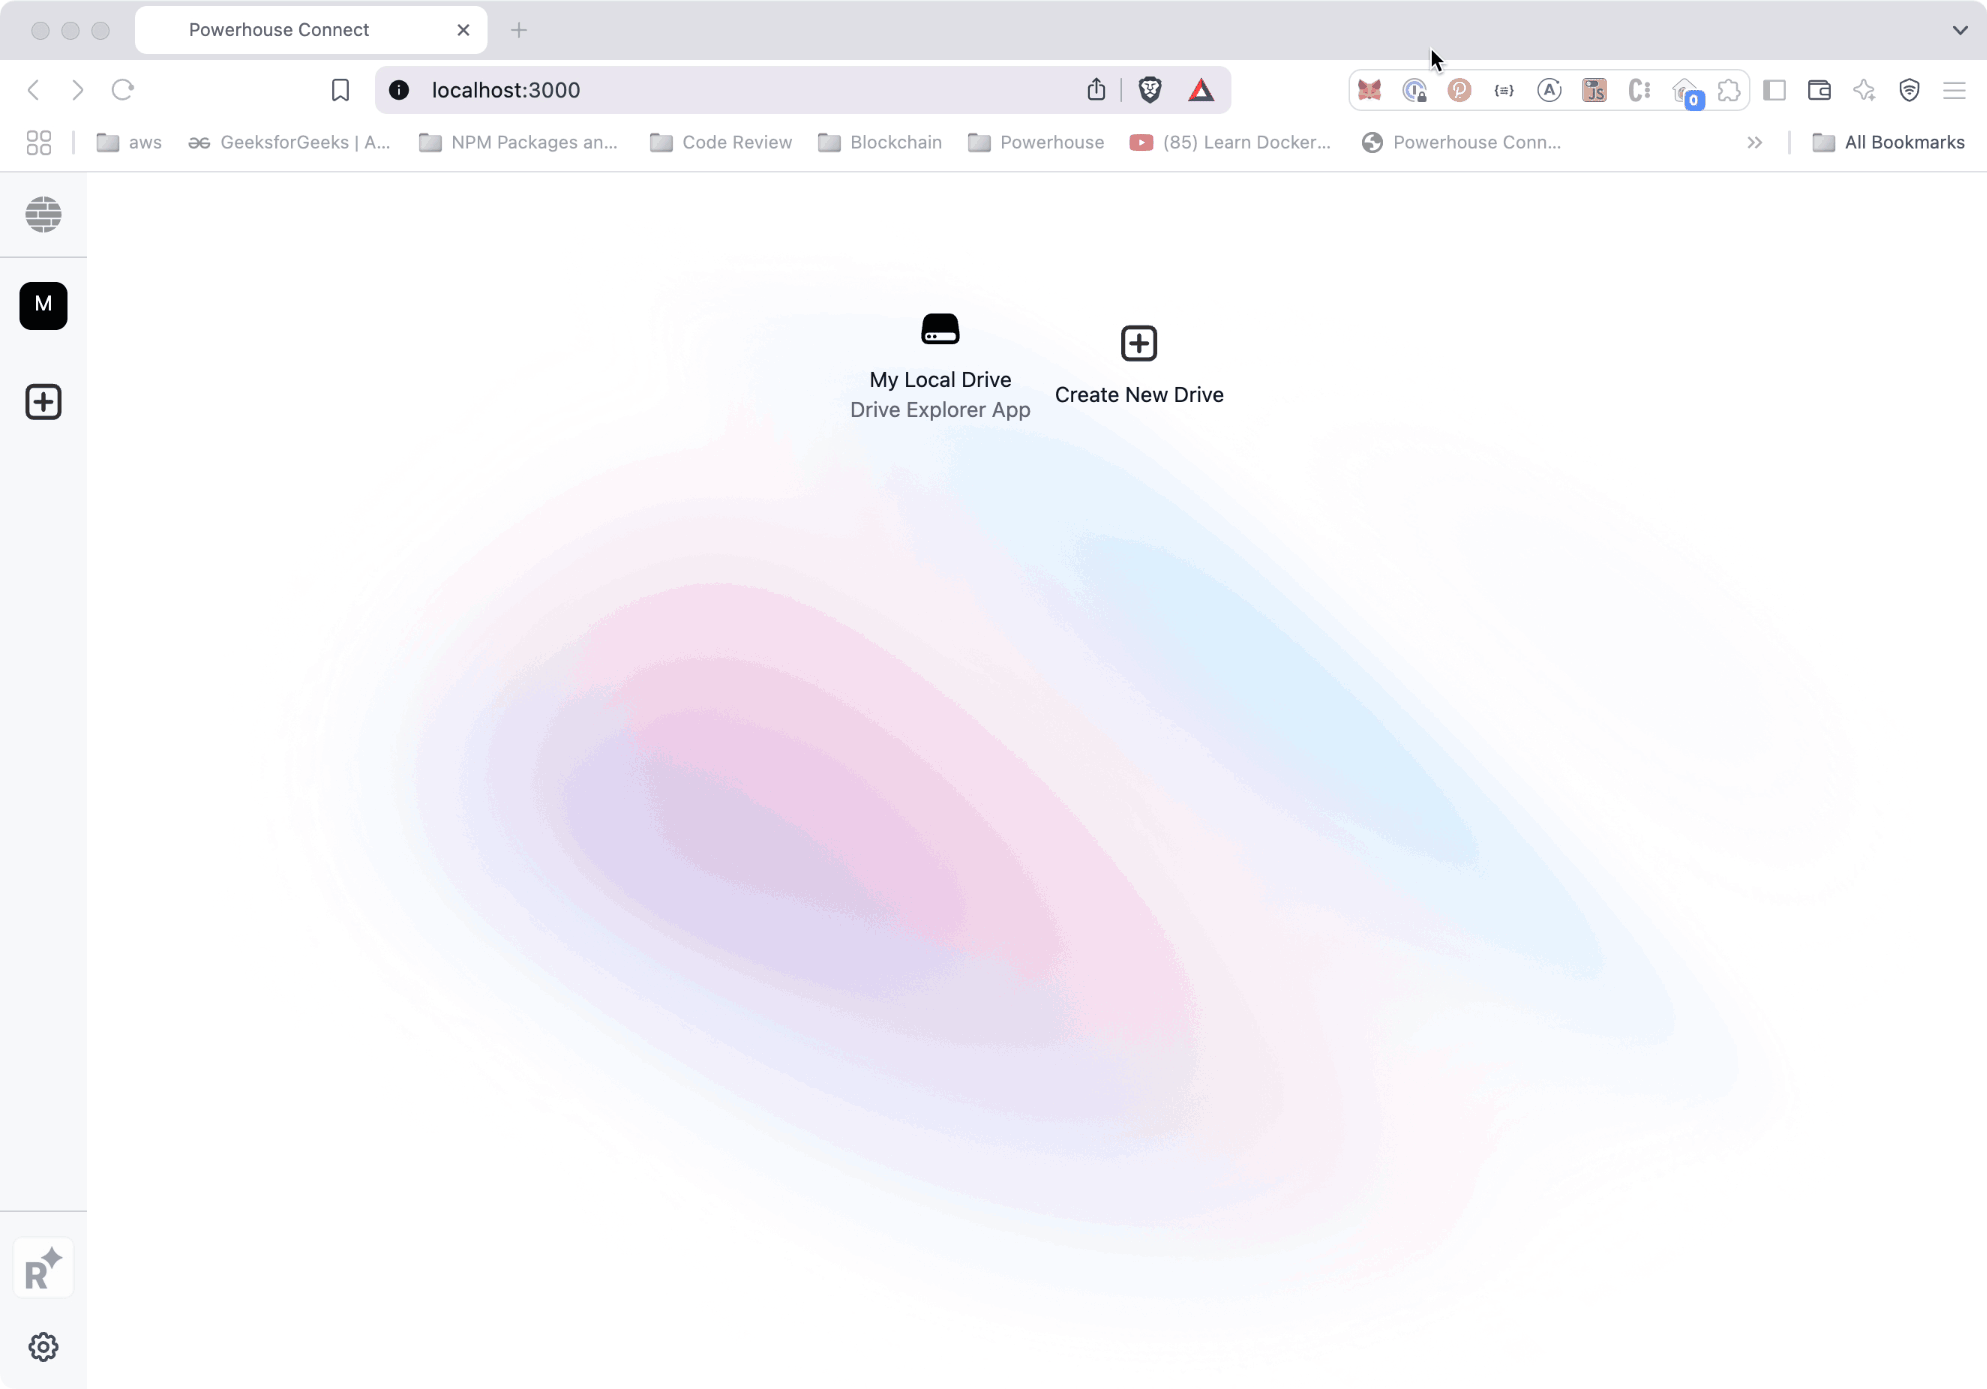
1. Click the "**Create New Drive**" button in the Connect interface or the **+** icon in the Connect sidebar.
|
|
55
55
|
2. In the modal that appears, enter a name for your drive in the "**Drive Name**" field.
|
|
56
|
-
3. Select the desired
|
|
56
|
+
3. Select the desired drive-app (such as the Generic Drive Explorer, or any other drive-app you've installed).
|
|
57
57
|
4. Choose the location for your drive: **Local** (only available to you), **Cloud** (available to people in this drive), or **Public** (available to everyone).
|
|
58
58
|
5. (Optional) Enable the "Make available offline" toggle if you want to keep a local backup of your drive.
|
|
59
59
|
6. Once all options are set, click the "Create new drive" button to finalize and create your drive.
|
package/docs/academy/02-MasteryTrack/03-BuildingUserExperiences/03-BuildingADriveExplorer.md
CHANGED
|
@@ -1,43 +1,43 @@
|
|
|
1
|
-
# Build a drive
|
|
1
|
+
# Build a drive-app
|
|
2
2
|
|
|
3
|
-
**Drive
|
|
3
|
+
**Drive explorers or drive-apps** enhance how contributors and organizations interact with document models.
|
|
4
4
|
They create an 'app-like' experience by providing a **custom interface** for exploring and interacting with the contents of a drive.
|
|
5
|
-
:::tip What is a
|
|
6
|
-
A
|
|
7
|
-
Think of a
|
|
5
|
+
:::tip What is a drive explorer or drive-app?
|
|
6
|
+
A drive explorer or drive-app offers a tailored application designed around its document models.
|
|
7
|
+
Think of a drive explorer as a specialized lens—it offers **different ways to visualize, organize, and interact with** the data stored within a drive, making it more intuitive and efficient for specific use cases.
|
|
8
8
|
:::
|
|
9
9
|
|
|
10
|
-
### Drive
|
|
10
|
+
### Drive-apps are purpose-built
|
|
11
11
|
|
|
12
|
-
Organizations typically build
|
|
12
|
+
Organizations typically build drive explorers for specific use cases, often packaging them with a corresponding document model. This allows for customized user experiences, streamlined workflows, and maximized efficiency for contributors.
|
|
13
13
|
|
|
14
|
-
|
|
14
|
+
drive explorers or drive-apps **bridge the gap between raw data and usability**, unlocking the full potential of document models within the Powerhouse framework.
|
|
15
15
|
|
|
16
|
-
### Key features of drive
|
|
16
|
+
### Key features of drive-apps
|
|
17
17
|
|
|
18
|
-
- **Custom Views & Organization** –
|
|
18
|
+
- **Custom Views & Organization** – drive-apps can present data in formats like Kanban boards, list views, or other structured layouts to suit different workflows.
|
|
19
19
|
- **Aggregated Insights** – They can provide high-level summaries of important details across document models, enabling quick decision-making.
|
|
20
|
-
- **Enhanced Interactivity** –
|
|
20
|
+
- **Enhanced Interactivity** – drive-apps can include widgets, data processors, or read models to process and display document data dynamically.
|
|
21
21
|
|
|
22
|
-
## Build a drive
|
|
22
|
+
## Build a drive-app
|
|
23
23
|
|
|
24
|
-
|
|
25
|
-
Let's start with a **quick overview** of the three steps for building a
|
|
24
|
+
drive-apps provide custom interfaces for interacting with the contents of a drive.
|
|
25
|
+
Let's start with a **quick overview** of the three steps for building a drive-app. We will then apply these steps to create our **To-do List drive-app**.
|
|
26
26
|
|
|
27
27
|
### Step 1. Generate the scaffolding code
|
|
28
28
|
|
|
29
|
-
Use the `generate drive editor` command to create the basic template structure for your
|
|
29
|
+
Use the `generate drive editor` command to create the basic template structure for your drive-app:
|
|
30
30
|
|
|
31
31
|
```bash
|
|
32
|
-
ph generate --drive-editor <
|
|
32
|
+
ph generate --drive-editor <drive-app>
|
|
33
33
|
```
|
|
34
34
|
|
|
35
35
|
### Step 2. Update the manifest file
|
|
36
36
|
|
|
37
|
-
After creating your
|
|
37
|
+
After creating your drive-app, you need to update its `manifest.json` file.
|
|
38
38
|
This file identifies your project and its components within the Powerhouse ecosystem.
|
|
39
39
|
|
|
40
|
-
### Step 3. Customize the drive
|
|
40
|
+
### Step 3. Customize the drive-app
|
|
41
41
|
|
|
42
42
|
Review the generated template and modify it to better suit your document model:
|
|
43
43
|
|
|
@@ -45,7 +45,7 @@ Review the generated template and modify it to better suit your document model:
|
|
|
45
45
|
2. Add custom views specific to your data model
|
|
46
46
|
3. Implement specialized interactions for your use case
|
|
47
47
|
|
|
48
|
-
### About the drive
|
|
48
|
+
### About the drive-app template
|
|
49
49
|
|
|
50
50
|
The default template provides a solid foundation. It contains:
|
|
51
51
|
|
|
@@ -56,9 +56,9 @@ The default template provides a solid foundation. It contains:
|
|
|
56
56
|
But the real power comes from tailoring the interface to your specific document models.
|
|
57
57
|
Now, let's implement a specific example for the to-do list we've been working on throughout this guide.
|
|
58
58
|
|
|
59
|
-
## Implementation example: To-do drive
|
|
59
|
+
## Implementation example: To-do drive-app
|
|
60
60
|
|
|
61
|
-
This example demonstrates how to create a To-do
|
|
61
|
+
This example demonstrates how to create a To-do drive-app application using the Powerhouse platform.
|
|
62
62
|
The application allows users to create and manage to-do lists with a visual progress indicator.
|
|
63
63
|
|
|
64
64
|
:::warning Heads-up!
|
|
@@ -101,9 +101,9 @@ ph generate --editor ToDoList --document-types powerhouse/todolist
|
|
|
101
101
|
</details>
|
|
102
102
|
:::
|
|
103
103
|
|
|
104
|
-
## Generate the drive
|
|
104
|
+
## Generate the drive-app
|
|
105
105
|
|
|
106
|
-
### 1. Generate a drive
|
|
106
|
+
### 1. Generate a drive-app:
|
|
107
107
|
|
|
108
108
|
```bash
|
|
109
109
|
ph generate --drive-editor todo-drive-explorer
|
|
@@ -111,12 +111,12 @@ ph generate --drive-editor todo-drive-explorer
|
|
|
111
111
|
|
|
112
112
|
### 2. Update the `powerhouse.manifest.json` file:
|
|
113
113
|
|
|
114
|
-
- The manifest file contains metadata for your package that is displayed when other users install it. Update the manifest to register your new
|
|
114
|
+
- The manifest file contains metadata for your package that is displayed when other users install it. Update the manifest to register your new drive-app:
|
|
115
115
|
|
|
116
116
|
```json
|
|
117
117
|
{
|
|
118
118
|
"name": "To-do List Package",
|
|
119
|
-
"description": "A simple todo list with a dedicated
|
|
119
|
+
"description": "A simple todo list with a dedicated drive-app",
|
|
120
120
|
"category": "Productivity",
|
|
121
121
|
"publisher": {
|
|
122
122
|
"name": "Powerhouse",
|
|
@@ -138,7 +138,7 @@ ph generate --drive-editor todo-drive-explorer
|
|
|
138
138
|
"apps": [
|
|
139
139
|
{
|
|
140
140
|
"id": "todo-drive-explorer",
|
|
141
|
-
"name": "To-do
|
|
141
|
+
"name": "To-do drive-app",
|
|
142
142
|
"driveEditor": "todo-drive-explorer"
|
|
143
143
|
}
|
|
144
144
|
],
|
|
@@ -158,14 +158,14 @@ rm -rf editors/todo-drive-explorer/components/FolderItemsGrid.tsx
|
|
|
158
158
|
rm -rf editors/todo-drive-explorer/components/FolderTree.tsx
|
|
159
159
|
```
|
|
160
160
|
|
|
161
|
-
### 4. Create custom components for your drive
|
|
161
|
+
### 4. Create custom components for your drive-app:
|
|
162
162
|
|
|
163
|
-
- Next, create the following files. These will define the data types for our to-do items and provide the custom React components for our
|
|
163
|
+
- Next, create the following files. These will define the data types for our to-do items and provide the custom React components for our drive-app.
|
|
164
164
|
|
|
165
165
|
<details>
|
|
166
166
|
<summary>Create `editors/todo-drive-explorer/types/todo.ts`</summary>
|
|
167
167
|
|
|
168
|
-
This file defines the TypeScript type `ToDoState`. It specifies the shape of to-do document data within the
|
|
168
|
+
This file defines the TypeScript type `ToDoState`. It specifies the shape of to-do document data within the drive-app, combining the document's revision information with its global state. This ensures that our components work with a predictable and strongly-typed data structure.
|
|
169
169
|
|
|
170
170
|
```typescript
|
|
171
171
|
import { type ToDoListDocument} from "../../../document-models/to-do-list/index.js"
|
|
@@ -226,7 +226,7 @@ rm -rf editors/todo-drive-explorer/components/FolderTree.tsx
|
|
|
226
226
|
<details>
|
|
227
227
|
<summary>Update `editors/todo-drive-explorer/components/DriveExplorer.tsx`</summary>
|
|
228
228
|
|
|
229
|
-
This is the main component of our
|
|
229
|
+
This is the main component of our drive-app. It fetches all `powerhouse/todo` documents from the drive, displays them in a table with their progress, and allows a user to click on a document to open it in the `EditorContainer`. It also includes a button to create new documents.
|
|
230
230
|
|
|
231
231
|
```typescript
|
|
232
232
|
import { useCallback, useState, useRef, useEffect, useMemo } from "react";
|
|
@@ -556,19 +556,19 @@ return showRevisionHistory ? (
|
|
|
556
556
|
|
|
557
557
|
### 3. Run the application:
|
|
558
558
|
|
|
559
|
-
- With the code for our
|
|
559
|
+
- With the code for our drive-app in place, it's time to see it in action. Run Connect in Studio mode:
|
|
560
560
|
|
|
561
561
|
```bash
|
|
562
562
|
ph connect
|
|
563
563
|
```
|
|
564
564
|
|
|
565
|
-
|
|
566
566
|
|
|
567
567
|
### Now it's your turn!
|
|
568
568
|
|
|
569
|
-
Start building your own drive
|
|
569
|
+
Start building your own drive-apps, explorers or experiences.
|
|
570
570
|
Congratulations on completing this tutorial!
|
|
571
|
-
You've successfully built a custom
|
|
571
|
+
You've successfully built a custom drive explorer, enhancing the way users interact with document models.
|
|
572
572
|
|
|
573
573
|
Now, take a moment to think about the possibilities!
|
|
574
574
|
|