@powerhousedao/academy 0.1.0-dev.0
This diff represents the content of publicly available package versions that have been released to one of the supported registries. The information contained in this diff is provided for informational purposes only and reflects changes between package versions as they appear in their respective public registries.
- package/.vscode/settings.json +3 -0
- package/CHANGELOG.md +9 -0
- package/Dockerfile +31 -0
- package/ProcFile +1 -0
- package/README.md +43 -0
- package/babel.config.js +3 -0
- package/blog/BeyondCommunication-ABlueprintForDevelopment.md +88 -0
- package/blog/TheChallengeOfChange.md +86 -0
- package/blog/images/Iteration.png +0 -0
- package/blog/images/RAD.png +0 -0
- package/docs/academy/01-GetStarted/00-GetStarted.mdx +181 -0
- package/docs/academy/01-GetStarted/01_InstallDemoPackage.md +38 -0
- package/docs/academy/01-GetStarted/02-ToDoList/01-CreateNewPowerhouseProject.md +97 -0
- package/docs/academy/01-GetStarted/02-ToDoList/02-DefineToDoListDocumentModel.md +86 -0
- package/docs/academy/01-GetStarted/02-ToDoList/03-ImplementOperationReducers.md +201 -0
- package/docs/academy/01-GetStarted/02-ToDoList/04-BuildToDoListEditor.md +494 -0
- package/docs/academy/01-GetStarted/02-ToDoList/_category_.json +8 -0
- package/docs/academy/01-GetStarted/02-ToDoList/images/DocumentModelHeader.png +0 -0
- package/docs/academy/01-GetStarted/02-ToDoList/images/DocumentModelOperations.png +0 -0
- package/docs/academy/01-GetStarted/02-ToDoList/images/OpenDocumentModelEditor.gif +0 -0
- package/docs/academy/01-GetStarted/02-ToDoList/images/completeEditor.png +0 -0
- package/docs/academy/01-GetStarted/02-ToDoList/images/connectApp.gif +0 -0
- package/docs/academy/01-GetStarted/02-ToDoList/images/form.png +0 -0
- package/docs/academy/01-GetStarted/02-ToDoList/images/mytodolist.gif +0 -0
- package/docs/academy/01-GetStarted/02-ToDoList/images/reducers.png +0 -0
- package/docs/academy/01-GetStarted/02-ToDoList/images/vscode.png +0 -0
- package/docs/academy/01-GetStarted/styles.module.css +99 -0
- package/docs/academy/02-AdvancedTutorial/01-Create/00-BuilderTools.md +234 -0
- package/docs/academy/02-AdvancedTutorial/01-Create/01-SetupBuilderEnvironment.md +247 -0
- package/docs/academy/02-AdvancedTutorial/01-Create/02-MoreTutorials/04-UtilitiesAndTips.md +79 -0
- package/docs/academy/02-AdvancedTutorial/01-Create/02-MoreTutorials/Chatroom/01-SetupBuilderEnvironment.md +216 -0
- package/docs/academy/02-AdvancedTutorial/01-Create/02-MoreTutorials/Chatroom/02-CreateNewPowerhouseProject.md +78 -0
- package/docs/academy/02-AdvancedTutorial/01-Create/02-MoreTutorials/Chatroom/03-DefineChatroomDocumentModel.md +139 -0
- package/docs/academy/02-AdvancedTutorial/01-Create/02-MoreTutorials/Chatroom/04-ImplementOperationReducers.md +364 -0
- package/docs/academy/02-AdvancedTutorial/01-Create/02-MoreTutorials/Chatroom/05-ImplementChatroomEditor.md +194 -0
- package/docs/academy/02-AdvancedTutorial/01-Create/02-MoreTutorials/Chatroom/06-LaunchALocalReactor.md +15 -0
- package/docs/academy/02-AdvancedTutorial/01-Create/02-MoreTutorials/Chatroom/_category_.json +8 -0
- package/docs/academy/02-AdvancedTutorial/01-Create/02-MoreTutorials/Chatroom/image-1.png +0 -0
- package/docs/academy/02-AdvancedTutorial/01-Create/02-MoreTutorials/Chatroom/image-2.png +0 -0
- package/docs/academy/02-AdvancedTutorial/01-Create/02-MoreTutorials/Chatroom/image-3.png +0 -0
- package/docs/academy/02-AdvancedTutorial/01-Create/02-MoreTutorials/Chatroom/image-4.png +0 -0
- package/docs/academy/02-AdvancedTutorial/01-Create/02-MoreTutorials/Chatroom/image-5.png +0 -0
- package/docs/academy/02-AdvancedTutorial/01-Create/02-MoreTutorials/Chatroom/image.png +0 -0
- package/docs/academy/02-AdvancedTutorial/01-Create/02-MoreTutorials/Chatroom/images/ChatRoomConnectApp.gif +0 -0
- package/docs/academy/02-AdvancedTutorial/01-Create/02-MoreTutorials/Chatroom/images/ChatRoomTest.gif +0 -0
- package/docs/academy/02-AdvancedTutorial/01-Create/02-MoreTutorials/Chatroom/images/completeEditor.png +0 -0
- package/docs/academy/02-AdvancedTutorial/01-Create/02-MoreTutorials/Chatroom/images/form.png +0 -0
- package/docs/academy/02-AdvancedTutorial/01-Create/02-MoreTutorials/Chatroom/images/reducers.png +0 -0
- package/docs/academy/02-AdvancedTutorial/01-Create/02-MoreTutorials/Chatroom/images/vscode.png +0 -0
- package/docs/academy/02-AdvancedTutorial/01-Create/02-MoreTutorials/_category_.json +8 -0
- package/docs/academy/02-AdvancedTutorial/01-Create/02-StandardDocumentModelWorkflow.md +229 -0
- package/docs/academy/02-AdvancedTutorial/03-BuildingUserExperiences/01-BuildingBeautifulDocumentEditors.md +109 -0
- package/docs/academy/02-AdvancedTutorial/03-BuildingUserExperiences/02-ConfiguringDrives.md +51 -0
- package/docs/academy/02-AdvancedTutorial/03-BuildingUserExperiences/03-BuildingADriveExplorer.md +174 -0
- package/docs/academy/02-AdvancedTutorial/03-BuildingUserExperiences/07-DocumentTools/01-OperationHistory.md +67 -0
- package/docs/academy/02-AdvancedTutorial/03-BuildingUserExperiences/07-DocumentTools/02-RevisionHistoryTimeline.md +132 -0
- package/docs/academy/02-AdvancedTutorial/03-BuildingUserExperiences/07-DocumentTools/_category_.json +7 -0
- package/docs/academy/02-AdvancedTutorial/03-BuildingUserExperiences/07-DocumentTools/images/committer-address-popup.png +0 -0
- package/docs/academy/02-AdvancedTutorial/03-BuildingUserExperiences/07-DocumentTools/images/revision-hash-popup.png +0 -0
- package/docs/academy/02-AdvancedTutorial/03-BuildingUserExperiences/07-DocumentTools/images/revision-history-list.png +0 -0
- package/docs/academy/02-AdvancedTutorial/03-BuildingUserExperiences/07-DocumentTools/images/signature-details-popup.png +0 -0
- package/docs/academy/02-AdvancedTutorial/03-BuildingUserExperiences/_category_.json +8 -0
- package/docs/academy/02-AdvancedTutorial/03-BuildingUserExperiences/images/CreateDrive.png +0 -0
- package/docs/academy/02-AdvancedTutorial/03-BuildingUserExperiences/images/mytodolist.gif +0 -0
- package/docs/academy/02-AdvancedTutorial/04-WorkWithData/01-ReadingAndWritingThroughTheAPI.mdx +121 -0
- package/docs/academy/02-AdvancedTutorial/04-WorkWithData/02-GraphQLAtPowerhouse.md +156 -0
- package/docs/academy/02-AdvancedTutorial/04-WorkWithData/03-WorkingWithSubgraphs/02-GraphQLAndSubgraphs.mdx +119 -0
- package/docs/academy/02-AdvancedTutorial/04-WorkWithData/03-WorkingWithSubgraphs/03-WorkingWithSubgraphs.md +312 -0
- package/docs/academy/02-AdvancedTutorial/04-WorkWithData/03-WorkingWithSubgraphs/_category_.json +8 -0
- package/docs/academy/02-AdvancedTutorial/04-WorkWithData/04-analytics-processor.md +342 -0
- package/docs/academy/02-AdvancedTutorial/04-WorkWithData/05-AnalyticsProcessorTutorial/01-SetupBuilderEnvironment.md +215 -0
- package/docs/academy/02-AdvancedTutorial/04-WorkWithData/05-AnalyticsProcessorTutorial/02-CreateNewPowerhouseProject.md +55 -0
- package/docs/academy/02-AdvancedTutorial/04-WorkWithData/05-AnalyticsProcessorTutorial/03-GenerateAnAnalyticsProcessor.md +173 -0
- package/docs/academy/02-AdvancedTutorial/04-WorkWithData/05-AnalyticsProcessorTutorial/04-UpdateAnalyticsProcessor.md +223 -0
- package/docs/academy/02-AdvancedTutorial/04-WorkWithData/05-AnalyticsProcessorTutorial/_category_.json +8 -0
- package/docs/academy/02-AdvancedTutorial/04-WorkWithData/05-AnalyticsProcessorTutorial/images/Create-SPV.gif +0 -0
- package/docs/academy/02-AdvancedTutorial/04-WorkWithData/05-AnalyticsProcessorTutorial/images/Create-a-new-asset.png +0 -0
- package/docs/academy/02-AdvancedTutorial/04-WorkWithData/05-AnalyticsProcessorTutorial/images/Create-a-transaction.gif +0 -0
- package/docs/academy/02-AdvancedTutorial/04-WorkWithData/05-AnalyticsProcessorTutorial/images/Transaction-table.png +0 -0
- package/docs/academy/02-AdvancedTutorial/04-WorkWithData/05-AnalyticsProcessorTutorial/images/create-a-new-RWA-document.gif +0 -0
- package/docs/academy/02-AdvancedTutorial/04-WorkWithData/05-AnalyticsProcessorTutorial/images/granularity.png +0 -0
- package/docs/academy/02-AdvancedTutorial/04-WorkWithData/06-Analytics Engine/GraphQL References/QueryingADocumentWithGraphQL.md +244 -0
- package/docs/academy/02-AdvancedTutorial/04-WorkWithData/06-Analytics Engine/GraphQL References/rwa-reports/listener-raw.png +0 -0
- package/docs/academy/02-AdvancedTutorial/04-WorkWithData/06-Analytics Engine/GraphQL References/rwa-reports/raw-reports1.png +0 -0
- package/docs/academy/02-AdvancedTutorial/04-WorkWithData/06-Analytics Engine/GraphQL References/rwa-reports/raw-reports2.png +0 -0
- package/docs/academy/02-AdvancedTutorial/04-WorkWithData/06-Analytics Engine/GraphQL References/rwa-reports/rwaRegister.png +0 -0
- package/docs/academy/02-AdvancedTutorial/04-WorkWithData/06-Analytics Engine/apse.png +0 -0
- package/docs/academy/02-AdvancedTutorial/04-WorkWithData/06-Analytics Engine/best-practices.md +60 -0
- package/docs/academy/02-AdvancedTutorial/04-WorkWithData/06-Analytics Engine/filter.png +0 -0
- package/docs/academy/02-AdvancedTutorial/04-WorkWithData/06-Analytics Engine/filteroptions.png +0 -0
- package/docs/academy/02-AdvancedTutorial/04-WorkWithData/06-Analytics Engine/graphql/index.md +166 -0
- package/docs/academy/02-AdvancedTutorial/04-WorkWithData/06-Analytics Engine/graphql/integration.md +75 -0
- package/docs/academy/02-AdvancedTutorial/04-WorkWithData/06-Analytics Engine/images/dbs.png +0 -0
- package/docs/academy/02-AdvancedTutorial/04-WorkWithData/06-Analytics Engine/images/high-level.jpg +0 -0
- package/docs/academy/02-AdvancedTutorial/04-WorkWithData/06-Analytics Engine/images/indexeddb.png +0 -0
- package/docs/academy/02-AdvancedTutorial/04-WorkWithData/06-Analytics Engine/images/libs-core.jpg +0 -0
- package/docs/academy/02-AdvancedTutorial/04-WorkWithData/06-Analytics Engine/images/libs.jpg +0 -0
- package/docs/academy/02-AdvancedTutorial/04-WorkWithData/06-Analytics Engine/images/lod.jpg +0 -0
- package/docs/academy/02-AdvancedTutorial/04-WorkWithData/06-Analytics Engine/images/logo.png +0 -0
- package/docs/academy/02-AdvancedTutorial/04-WorkWithData/06-Analytics Engine/images/navbar.png +0 -0
- package/docs/academy/02-AdvancedTutorial/04-WorkWithData/06-Analytics Engine/images/overview-1.jpg +0 -0
- package/docs/academy/02-AdvancedTutorial/04-WorkWithData/06-Analytics Engine/images/overview-2.jpg +0 -0
- package/docs/academy/02-AdvancedTutorial/04-WorkWithData/06-Analytics Engine/images/overview-3.jpg +0 -0
- package/docs/academy/02-AdvancedTutorial/04-WorkWithData/06-Analytics Engine/images/overview-4.jpg +0 -0
- package/docs/academy/02-AdvancedTutorial/04-WorkWithData/06-Analytics Engine/images/overview-5.jpg +0 -0
- package/docs/academy/02-AdvancedTutorial/04-WorkWithData/06-Analytics Engine/images/overview-6.jpg +0 -0
- package/docs/academy/02-AdvancedTutorial/04-WorkWithData/06-Analytics Engine/images/paths-1.jpg +0 -0
- package/docs/academy/02-AdvancedTutorial/04-WorkWithData/06-Analytics Engine/images/paths-2.jpg +0 -0
- package/docs/academy/02-AdvancedTutorial/04-WorkWithData/06-Analytics Engine/intro.md +149 -0
- package/docs/academy/02-AdvancedTutorial/04-WorkWithData/06-Analytics Engine/typescript/benchmarks.md +27 -0
- package/docs/academy/02-AdvancedTutorial/04-WorkWithData/06-Analytics Engine/typescript/browser.md +77 -0
- package/docs/academy/02-AdvancedTutorial/04-WorkWithData/06-Analytics Engine/typescript/compatibility.md +14 -0
- package/docs/academy/02-AdvancedTutorial/04-WorkWithData/06-Analytics Engine/typescript/index.md +230 -0
- package/docs/academy/02-AdvancedTutorial/04-WorkWithData/06-Analytics Engine/typescript/memory.md +72 -0
- package/docs/academy/02-AdvancedTutorial/04-WorkWithData/06-Analytics Engine/typescript/pg.md +63 -0
- package/docs/academy/02-AdvancedTutorial/04-WorkWithData/06-Analytics Engine/typescript/schema.md +14 -0
- package/docs/academy/02-AdvancedTutorial/04-WorkWithData/06-Analytics Engine/typescript/utilities.md +102 -0
- package/docs/academy/02-AdvancedTutorial/04-WorkWithData/06-Analytics Engine/use-cases/index.md +7 -0
- package/docs/academy/02-AdvancedTutorial/04-WorkWithData/06-Analytics Engine/use-cases/maker.md +652 -0
- package/docs/academy/02-AdvancedTutorial/04-WorkWithData/06-Analytics Engine/use-cases/processors.md +3 -0
- package/docs/academy/02-AdvancedTutorial/04-WorkWithData/_category_.json +8 -0
- package/docs/academy/02-AdvancedTutorial/04-WorkWithData/images/OperationHistory.png +0 -0
- package/docs/academy/02-AdvancedTutorial/04-WorkWithData/images/OperationsQuery.png +0 -0
- package/docs/academy/02-AdvancedTutorial/04-WorkWithData/images/QueryDocumentID.png +0 -0
- package/docs/academy/02-AdvancedTutorial/04-WorkWithData/images/SwitchboardButton.png +0 -0
- package/docs/academy/02-AdvancedTutorial/05-Launch/00-IntegrateInAFront-End +3 -0
- package/docs/academy/02-AdvancedTutorial/05-Launch/01-IntroducingFusion +18 -0
- package/docs/academy/02-AdvancedTutorial/05-Launch/02-IntroductionToPackages.md +79 -0
- package/docs/academy/02-AdvancedTutorial/05-Launch/02-PublishYourProject.md +230 -0
- package/docs/academy/02-AdvancedTutorial/05-Launch/03-RunOnACloudServer.md +279 -0
- package/docs/academy/02-AdvancedTutorial/05-Launch/03-SetupEnvironment.md +436 -0
- package/docs/academy/02-AdvancedTutorial/05-Launch/04-GraphQLNamespacing +44 -0
- package/docs/academy/02-AdvancedTutorial/05-Launch/05-LaunchYourBackend.md +3 -0
- package/docs/academy/02-AdvancedTutorial/05-Launch/06-LaunchYourFrontend.md +3 -0
- package/docs/academy/02-AdvancedTutorial/05-Launch/_category_.json +8 -0
- package/docs/academy/02-AdvancedTutorial/05-Launch/images/SSHConnection.png +0 -0
- package/docs/academy/02-AdvancedTutorial/05-Launch/images/homedesign.png +0 -0
- package/docs/academy/02-AdvancedTutorial/05-Launch/images/keyconcepts.png +0 -0
- package/docs/academy/02-AdvancedTutorial/05-Launch/images/tutorialschema.png +0 -0
- package/docs/academy/02-AdvancedTutorial/06-Authorization/Authorization.md +100 -0
- package/docs/academy/02-AdvancedTutorial/_category_.json +7 -0
- package/docs/academy/03-APIReferences/00-PowerhouseCLI.md +1 -0
- package/docs/academy/03-APIReferences/_category_.json +7 -0
- package/docs/academy/04-ComponentLibrary/01-PowerhouseDesignSystem.md +94 -0
- package/docs/academy/04-ComponentLibrary/02-BuildingWithScalars.md +54 -0
- package/docs/academy/04-ComponentLibrary/03-Scalar-Components/01-phid-field.mdx +72 -0
- package/docs/academy/04-ComponentLibrary/03-Scalar-Components/02-input-field.mdx +0 -0
- package/docs/academy/04-ComponentLibrary/04-Complex-Components/01-sidebar.mdx +36 -0
- package/docs/academy/04-ComponentLibrary/05-Layout-Components/01-test-toupdate.mdx +61 -0
- package/docs/academy/04-ComponentLibrary/06-Fragments/01-test-toupdate.mdx +61 -0
- package/docs/academy/04-ComponentLibrary/_category_.json +8 -0
- package/docs/academy/05-Architecture/00-PowerhouseArchitecture.md +50 -0
- package/docs/academy/05-Architecture/01-WorkingWithTheReactor.md +48 -0
- package/docs/academy/05-Architecture/02-ReferencingMonorepoPackages +65 -0
- package/docs/academy/05-Architecture/04-MovingBeyondCRUD +61 -0
- package/docs/academy/05-Architecture/05-DocumentModelTheory/01-WhatIsADocumentModel.md +188 -0
- package/docs/academy/05-Architecture/05-DocumentModelTheory/02-DAOandDocumentsModelsQ+A.md +177 -0
- package/docs/academy/05-Architecture/05-DocumentModelTheory/02-domain-modeling.md +103 -0
- package/docs/academy/05-Architecture/05-DocumentModelTheory/03-BenefitsOfDocumentModels.md +95 -0
- package/docs/academy/05-Architecture/05-DocumentModelTheory/05-best-practices.md +257 -0
- package/docs/academy/05-Architecture/05-DocumentModelTheory/_category_.json +8 -0
- package/docs/academy/05-Architecture/05-DocumentModelTheory/three-data-layers.png +0 -0
- package/docs/academy/05-Architecture/_category_.json +7 -0
- package/docs/academy/05-Architecture/images/image.png +0 -0
- package/docs/academy/06-Cookbook.md +905 -0
- package/docs/academy/07-Glossary.md +50 -0
- package/docs/bookofpowerhouse/01-Overview.md +29 -0
- package/docs/bookofpowerhouse/02-GeneralFrameworkAndPhilosophy.md +15 -0
- package/docs/bookofpowerhouse/03-PowerhouseSoftwareArchitecture.md +33 -0
- package/docs/bookofpowerhouse/04-DevelopmentApproaches.md +36 -0
- package/docs/bookofpowerhouse/05-SNOsandANewModelForOSSandPublicGoods.md +73 -0
- package/docs/bookofpowerhouse/06-SNOsInActionAndPlatformEconomies.md +17 -0
- package/docs/renown/01-intro.md +18 -0
- package/docs/renown/02-renown-login-flow.md +60 -0
- package/docusaurus +0 -0
- package/docusaurus.config.ts +170 -0
- package/package.json +50 -0
- package/powerhouse-docs@0.0.0 +0 -0
- package/sidebars.ts +33 -0
- package/src/components/HomepageFeatures/index.tsx +250 -0
- package/src/components/HomepageFeatures/styles.module.css +267 -0
- package/src/css/custom.css +450 -0
- package/src/pages/index.module.css +37 -0
- package/src/pages/index.tsx +42 -0
- package/src/pages/markdown-page.md +7 -0
- package/static/.nojekyll +0 -0
- package/static/fonts/FranieBold.otf +0 -0
- package/static/fonts/FranieRegular.otf +0 -0
- package/static/img/Powerhouse Website Drive.png +0 -0
- package/static/img/Powerhouse Website Storage Layer (1).png +0 -0
- package/static/img/Powerhouse Website Storage Layer.png +0 -0
- package/static/img/Powerhouse-main-light.svg +13 -0
- package/static/img/Powerhouse-main.svg +13 -0
- package/static/img/Renown Intro Diagram.png +0 -0
- package/static/img/Union.svg +3 -0
- package/static/img/academy/icons/Advanced.svg +4 -0
- package/static/img/academy/icons/Book.svg +5 -0
- package/static/img/academy/icons/Cookbook.svg +3 -0
- package/static/img/academy/icons/Create.svg +3 -0
- package/static/img/academy/icons/Data.svg +3 -0
- package/static/img/academy/icons/Editor.svg +3 -0
- package/static/img/academy/icons/Flash.svg +3 -0
- package/static/img/academy/icons/Launch.svg +3 -0
- package/static/img/academy-icon.png +0 -0
- package/static/img/connect-icon.png +0 -0
- package/static/img/connect.png +0 -0
- package/static/img/docusaurus-social-card.jpg +0 -0
- package/static/img/docusaurus.png +0 -0
- package/static/img/empty-background.png +0 -0
- package/static/img/favicon.ico +0 -0
- package/static/img/fusion-icon.png +0 -0
- package/static/img/fusion.png +0 -0
- package/static/img/ph-icon-light.svg +3 -0
- package/static/img/powerhouse-layer.png +0 -0
- package/static/img/powerhouse-storage-layer.png +0 -0
- package/static/img/reactor.png +0 -0
- package/static/img/renown-icon.png +0 -0
- package/static/img/renown.png +0 -0
- package/static/img/switchboard-icon.png +0 -0
- package/static/img/switchboard.png +0 -0
- package/static/img/undraw_docusaurus_mountain.svg +171 -0
- package/static/img/undraw_docusaurus_react.svg +170 -0
- package/static/img/undraw_docusaurus_tree.svg +40 -0
- package/static/img/video-placeholder.svg +16 -0
- package/static.json +7 -0
- package/tsconfig.json +7 -0
|
@@ -0,0 +1,229 @@
|
|
|
1
|
+
# Standard Document Model Workflow
|
|
2
|
+
This tutorial will guide you through the process of creating a new document model using the Document Model Editor in the Connect app.
|
|
3
|
+
We'll use the Document Model Boilerplate, which provides code generation for scaffolding editors and models.
|
|
4
|
+
This boilerplate ensures compatibility with host applications like Connect and the Reactors for seamless document model and editor integration.
|
|
5
|
+
|
|
6
|
+
<details>
|
|
7
|
+
<summary>Available NPM commands</summary>
|
|
8
|
+
|
|
9
|
+
- `generate`: Updates the generated code according to the JSON spec and GraphQL schema.
|
|
10
|
+
- `lint`: Checks for errors with ESLint and TypeScript checking.
|
|
11
|
+
- `format`: Formats the code using Prettier.
|
|
12
|
+
- `build`: Builds the library project using Vite.
|
|
13
|
+
- `storybook`: Starts Storybook in development mode.
|
|
14
|
+
- `build-storybook`: Builds Storybook.
|
|
15
|
+
- `test`: Runs Jest for testing.
|
|
16
|
+
|
|
17
|
+
</details>
|
|
18
|
+
|
|
19
|
+
# Run Connect Locally
|
|
20
|
+
|
|
21
|
+
Running Connect locally allows builders and developers to create, test, and deploy document models.
|
|
22
|
+
Connect can be locally launched through a simple CLI command using the provided npm package.
|
|
23
|
+
Once launched, the studio allows any developer or document model builder to run a local instance of the Connect hub on their machine and begin working immediately.
|
|
24
|
+
|
|
25
|
+
## Setup of the local reactor
|
|
26
|
+
|
|
27
|
+
:::info
|
|
28
|
+
**Powerhouse Reactors** are the nodes in the network that store documents, resolve conflicts and rerun operations to verify document event histories.
|
|
29
|
+
Reactors can be configured for local storage, centralized cloud storage or on a decentralized storage network.
|
|
30
|
+
:::
|
|
31
|
+
|
|
32
|
+
When using Connect in Studio mode a local reactor will be spun up which will function as the back-end to your local Connect frond-end service. This local reactor will make use of your local document storage and will eventually be able to sync with other reactors on the network, or the 'Powergrid', you will set up.
|
|
33
|
+
|
|
34
|
+
## Let's get started
|
|
35
|
+
|
|
36
|
+
Connect can be spun up through CLI commands in your favorite IDE.
|
|
37
|
+
Connect offers an interface to add your graphql schema and configure the settings of your document model.
|
|
38
|
+
Start with the following command to get started with the Powerhouse CLI
|
|
39
|
+
|
|
40
|
+
```
|
|
41
|
+
$ pnpm install -g ph-cmd
|
|
42
|
+
```
|
|
43
|
+
|
|
44
|
+
Your next step is to initialize the CLI with the following command. This will prompt the creation of a local configuratior file and accompagning reactor set up in .ph/documents.
|
|
45
|
+
|
|
46
|
+
```
|
|
47
|
+
ph init
|
|
48
|
+
```
|
|
49
|
+
<details>
|
|
50
|
+
<summary> How to make use of different branches? </summary>
|
|
51
|
+
|
|
52
|
+
When installing or using the Powerhouse CLI commands you are able to make use of the dev & staging branches. These branches contain more experimental features then the latest stable release the PH CLI uses by default. They can be used to get access to a bugfix or features under development.
|
|
53
|
+
|
|
54
|
+
| Command | Description |
|
|
55
|
+
|---------|-------------|
|
|
56
|
+
| **pnpm install -g ph-cmd** | Install latest stable version |
|
|
57
|
+
| **pnpm install -g ph-cmd@dev** | Install development version |
|
|
58
|
+
| **pnpm install -g ph-cmd@staging** | Install staging version |
|
|
59
|
+
| **ph init** | Use latest stable version of the boilerplate |
|
|
60
|
+
| **ph init --dev** | Use development version of the boilerplate |
|
|
61
|
+
| **ph init --staging** | Use staging version of the boilerplate |
|
|
62
|
+
| **ph use** | Switch all dependencies to latest production versions |
|
|
63
|
+
| **ph use dev** | Switch all dependencies to development versions |
|
|
64
|
+
| **ph use prod** | Switch all dependencies to production versions |
|
|
65
|
+
|
|
66
|
+
Please be aware that these versions can contain bugs and experimental features that aren't fully tested.
|
|
67
|
+
</details>
|
|
68
|
+
|
|
69
|
+
To run a local version of the Connect in Studio Mode use the following command
|
|
70
|
+
|
|
71
|
+
```
|
|
72
|
+
ph connect
|
|
73
|
+
```
|
|
74
|
+
|
|
75
|
+
### 1. Defining Your Document Model GraphQL Schema
|
|
76
|
+
Start by creating your own document model library.
|
|
77
|
+
|
|
78
|
+
Step 1: Run the following command to set up your document model library:
|
|
79
|
+
|
|
80
|
+
```bash
|
|
81
|
+
ph init
|
|
82
|
+
```
|
|
83
|
+
|
|
84
|
+
Step 2: Use the Document Model Editor in the Connect app:
|
|
85
|
+
|
|
86
|
+
Launch Connect Studio Mode:
|
|
87
|
+
|
|
88
|
+
```bash
|
|
89
|
+
ph connect
|
|
90
|
+
```
|
|
91
|
+
## Document Model Creation
|
|
92
|
+
|
|
93
|
+
At the core of Connect is the Document Model Editor. This powerful editor enables business analysts, user researchers, or aspiring document model builders to craft a GraphQL Schema Definition that reflects the business domain the document model will operate in. The schema serves as the foundation of the document model, defining its structure and how it interacts with the broader business processes. To learn more about domain modeling, please visit our section on Document Model dee
|
|
94
|
+
|
|
95
|
+
Open the Document Model Editor to define your document schema.
|
|
96
|
+
This schema will define the structure and fields for your document model using GraphQL.
|
|
97
|
+
|
|
98
|
+
|
|
99
|
+
### 2. Defining Document Model Operations
|
|
100
|
+
Using the Document Model Operations Editor, define the operations for your document model and their GraphQL counterparts. These operations will handle state changes within your document model.
|
|
101
|
+
|
|
102
|
+
**Best Practices:**
|
|
103
|
+
|
|
104
|
+
- Clearly define CRUD operations (Create, Read, Update, Delete).
|
|
105
|
+
- Use GraphQL input types to specify the parameters for each operation.
|
|
106
|
+
- Ensure that operations align with user intent to maintain a clean and understandable API.
|
|
107
|
+
|
|
108
|
+
### 3. Generating Scaffolding Code
|
|
109
|
+
Export your document model as a .zip file from Connect.
|
|
110
|
+
Import the .zip file into your project directory created in Step 1.
|
|
111
|
+
Run the following command to generate the scaffolding code:
|
|
112
|
+
|
|
113
|
+
```bash
|
|
114
|
+
ph generate YourModelName.phdm.zip
|
|
115
|
+
```
|
|
116
|
+
|
|
117
|
+
This will create a new directory under /document-models containing:
|
|
118
|
+
|
|
119
|
+
JSON file with the document model specification.
|
|
120
|
+
GraphQL file with state and operation schemas.
|
|
121
|
+
A gen/ folder with autogenerated code.
|
|
122
|
+
A src/ folder for your custom code implementation.
|
|
123
|
+
|
|
124
|
+
### 4. Implementing Reducer Code and Unit Tests
|
|
125
|
+
Navigate to the reducer directory:
|
|
126
|
+
|
|
127
|
+
```bash
|
|
128
|
+
cd document-models/"YourModelName"/src/reducers
|
|
129
|
+
```
|
|
130
|
+
|
|
131
|
+
Implement the reducer functions for each document model operation. These functions will handle state transitions.
|
|
132
|
+
|
|
133
|
+
Add utility functions in:
|
|
134
|
+
|
|
135
|
+
```bash
|
|
136
|
+
document-models/"YourModelName"/src/utils.ts
|
|
137
|
+
```
|
|
138
|
+
|
|
139
|
+
Write unit tests to ensure the correctness of your reducers:
|
|
140
|
+
|
|
141
|
+
Test files should be located in:
|
|
142
|
+
|
|
143
|
+
```bash
|
|
144
|
+
document-models/"YourModelName"/src/reducers/tests
|
|
145
|
+
```
|
|
146
|
+
|
|
147
|
+
Run the tests:
|
|
148
|
+
|
|
149
|
+
```bash
|
|
150
|
+
pnpm run test
|
|
151
|
+
```
|
|
152
|
+
|
|
153
|
+
Test the editor functionality:
|
|
154
|
+
|
|
155
|
+
```bash
|
|
156
|
+
ph connect
|
|
157
|
+
```
|
|
158
|
+
|
|
159
|
+
### 5. Implementing Document Editors
|
|
160
|
+
Generate the editor template for your document model:
|
|
161
|
+
|
|
162
|
+
```bash
|
|
163
|
+
ph generate -- --editor YourModelName --document-types powerhouse/YourModelName
|
|
164
|
+
```
|
|
165
|
+
|
|
166
|
+
The --editor flag specifies the name of your document model.
|
|
167
|
+
The --document-types flag links the editor to your document model type.
|
|
168
|
+
After generation:
|
|
169
|
+
|
|
170
|
+
Open the editor template:
|
|
171
|
+
|
|
172
|
+
```bash
|
|
173
|
+
editors/YourModelName/editor.tsx
|
|
174
|
+
```
|
|
175
|
+
|
|
176
|
+
Customize the editor interface to suit your document model.
|
|
177
|
+
|
|
178
|
+
### 6. Testing the Document Editor
|
|
179
|
+
Run the Connect app to test your document editor:
|
|
180
|
+
|
|
181
|
+
```bash
|
|
182
|
+
ph connect
|
|
183
|
+
```
|
|
184
|
+
|
|
185
|
+
Verify that the editor functions as expected.
|
|
186
|
+
Perform end-to-end testing to ensure smooth integration between the document model and its editor.
|
|
187
|
+
|
|
188
|
+
### 7. Adding a Manifest File
|
|
189
|
+
Create a manifest file to describe your document model and editor. This enables proper integration with the host application.
|
|
190
|
+
|
|
191
|
+
**Example manifest.json:**
|
|
192
|
+
|
|
193
|
+
```json
|
|
194
|
+
{
|
|
195
|
+
"name": "your-model-name",
|
|
196
|
+
"description": "A brief description of your document model.",
|
|
197
|
+
"category": "your-category", // e.g., "Finance", "People Ops", "Legal"
|
|
198
|
+
"publisher": {
|
|
199
|
+
"name": "your-publisher-name",
|
|
200
|
+
"url": "your-publisher-url"
|
|
201
|
+
},
|
|
202
|
+
"documentModels": [
|
|
203
|
+
{
|
|
204
|
+
"id": "your-model-id",
|
|
205
|
+
"name": "your-model-name"
|
|
206
|
+
}
|
|
207
|
+
],
|
|
208
|
+
"editors": [
|
|
209
|
+
{
|
|
210
|
+
"id": "your-editor-id",
|
|
211
|
+
"name": "your-editor-name",
|
|
212
|
+
"documentTypes": ["your-model-id"]
|
|
213
|
+
}
|
|
214
|
+
]
|
|
215
|
+
}
|
|
216
|
+
```
|
|
217
|
+
|
|
218
|
+
### Steps to finalize:
|
|
219
|
+
|
|
220
|
+
Place the manifest file at your project root.
|
|
221
|
+
Update your index.js to export your modules and include the new document model and editor.
|
|
222
|
+
|
|
223
|
+
### Final Thoughts
|
|
224
|
+
You've now successfully created a Document Model and its corresponding Editor using the Connect app! 🚀
|
|
225
|
+
|
|
226
|
+
Next Steps:
|
|
227
|
+
- Expand functionality: Add more operations or complex logic to your document model.
|
|
228
|
+
- Improve UX: Enhance the document editor for a smoother user experience.
|
|
229
|
+
- Integrate with other systems: Use APIs or GraphQL to connect your document model with external services.
|
|
@@ -0,0 +1,109 @@
|
|
|
1
|
+
# Build Document Editors
|
|
2
|
+
|
|
3
|
+
*Placeholder for a tutorial about building beautiful document editors.*
|
|
4
|
+
|
|
5
|
+
## Build with React on Powerhouse
|
|
6
|
+
|
|
7
|
+
At Powerhouse, frontend development follows a simple and familiar flow. Tailwind CSS is installed by default and fully managed by Connect Studio — you can use Tailwind classes freely, but you’re not required to. Regular CSS, inline styles, and any React-compatible styling method work exactly as you would expect in a standard React project. There is no need to manually configure or run Tailwind or build processes; **Connect Studio automatically handles everything during development.**
|
|
8
|
+
|
|
9
|
+
For component visualization and testing, **Connect Studio replaces the need for Storybook**. Please do not use Storybook by default — Connect Studio provides a dynamic, local environment where you can define and preview your document models and editors live. If you still wish to set up Storybook on your own, you may, but it is unsupported and discouraged.
|
|
10
|
+
|
|
11
|
+
During normal development, simply run Connect Studio with `ph connect`. Manual build commands are only needed when you publish a package, at which point the necessary build steps (including CSS generation) are handled automatically.
|
|
12
|
+
|
|
13
|
+
Powerhouse aims to keep your developer experience clean, familiar, and focused.
|
|
14
|
+
- Build React components as you would in any project.
|
|
15
|
+
- Use styling approaches you're comfortable with.
|
|
16
|
+
- Trust Connect Studio to handle the setup for you.
|
|
17
|
+
|
|
18
|
+
### Building with react hooks
|
|
19
|
+
|
|
20
|
+
What are React Hooks?
|
|
21
|
+
|
|
22
|
+
From the React docs:
|
|
23
|
+
|
|
24
|
+
"Hooks let you use different React features from your components. You can either use the built-in Hooks or combine them to build your own."
|
|
25
|
+
https://react.dev/reference/react/hooks
|
|
26
|
+
|
|
27
|
+
The "combine them to build your own" part is key here. A so-called "custom hook" is just a function that uses these built-in hooks.
|
|
28
|
+
|
|
29
|
+
There are several types of built-in hooks which are used to solve different problems.
|
|
30
|
+
|
|
31
|
+
For example:
|
|
32
|
+
|
|
33
|
+
State lets a component “remember” information like user input.
|
|
34
|
+
|
|
35
|
+
Effects let a component connect to and synchronize with external systems.
|
|
36
|
+
|
|
37
|
+
Context lets a component receive information from distant parents without passing it as props.
|
|
38
|
+
|
|
39
|
+
Details about custom hooks are provided here: https://react.dev/learn/reusing-logic-with-custom-hooks
|
|
40
|
+
|
|
41
|
+
In summary, there are three reasons to use custom hooks:
|
|
42
|
+
|
|
43
|
+
To re-use logic that calls multiple hooks.
|
|
44
|
+
To abstract away the complexity of multiple hooks.
|
|
45
|
+
To isolate the side effects of the useEffect hook.
|
|
46
|
+
|
|
47
|
+
Hook names must start with use followed by a capital letter, like useState (built-in) or useOnlineStatus (custom, like earlier on the page). Hooks may return arbitrary values.
|
|
48
|
+
|
|
49
|
+
https://react.dev/learn/reusing-logic-with-custom-hooks#hook-names-always-start-with-use
|
|
50
|
+
|
|
51
|
+
When you use any function that starts with "use", react will treat it as a hook and expect it to follow the rules of hooks.
|
|
52
|
+
|
|
53
|
+
Rules of Hooks
|
|
54
|
+
https://react.dev/reference/rules/rules-of-hooks
|
|
55
|
+
|
|
56
|
+
Hooks are defined using JavaScript functions, but they represent a special type of reusable UI logic with restrictions on where they can be called.
|
|
57
|
+
|
|
58
|
+
Only call Hooks at the top level
|
|
59
|
+
Only call Hooks from React functions
|
|
60
|
+
|
|
61
|
+
React needs these rules to ensure that the state is properly managed and that the component behaves as expected.
|
|
62
|
+
|
|
63
|
+
So it is indeed possible to create a "hook" like so:
|
|
64
|
+
|
|
65
|
+
```
|
|
66
|
+
function useCurrentTime() {
|
|
67
|
+
const currentTime = new Date().toLocaleTimeString();
|
|
68
|
+
|
|
69
|
+
return currentTime;
|
|
70
|
+
}
|
|
71
|
+
```
|
|
72
|
+
|
|
73
|
+
And this is technically a hook, but making it a hook is pointless because it doesn't use any of the built-in hooks.
|
|
74
|
+
|
|
75
|
+
There is no reason that this could not just be:
|
|
76
|
+
|
|
77
|
+
```
|
|
78
|
+
function getCurrentTime() {
|
|
79
|
+
return new Date().toLocaleTimeString();
|
|
80
|
+
}
|
|
81
|
+
```
|
|
82
|
+
|
|
83
|
+
Because in a component, both hooks and normal functions are called on every render.
|
|
84
|
+
|
|
85
|
+
So if your component looks like this:
|
|
86
|
+
|
|
87
|
+
```
|
|
88
|
+
function MyComponent() {
|
|
89
|
+
const currentTimeFromFunc = getCurrentTime();
|
|
90
|
+
}
|
|
91
|
+
```
|
|
92
|
+
|
|
93
|
+
or this:
|
|
94
|
+
|
|
95
|
+
```
|
|
96
|
+
function MyComponent() {
|
|
97
|
+
const currentTimeFromHook = useCurrentTime();
|
|
98
|
+
}
|
|
99
|
+
```
|
|
100
|
+
|
|
101
|
+
The end result would be the same. The function would be called on every render.
|
|
102
|
+
|
|
103
|
+
So in summary, the only reason a function should be a hook is if it uses one or more built-in hooks.
|
|
104
|
+
|
|
105
|
+
In general, you will not want to take a normal function and turn it into a hook, because your normal function should not have been trying to use react hooks in the first place.
|
|
106
|
+
|
|
107
|
+
## Powerhouse Component Library
|
|
108
|
+
|
|
109
|
+
TBD
|
|
@@ -0,0 +1,51 @@
|
|
|
1
|
+
# Configure a Drive
|
|
2
|
+
|
|
3
|
+
A drive in Powerhouse is a container for documents and data. This guide will walk you through the process of configuring and managing drives in your Powerhouse environment.
|
|
4
|
+
|
|
5
|
+
## Prerequisites
|
|
6
|
+
|
|
7
|
+
Before configuring drives, ensure you have:
|
|
8
|
+
- Powerhouse [CLI installed](/docs/academy/AdvancedTutorial/Create/BuilderTools)
|
|
9
|
+
- Access to a Powerhouse instance
|
|
10
|
+
- Appropriate permissions to create and manage drives
|
|
11
|
+
|
|
12
|
+
## Understanding Drives
|
|
13
|
+
|
|
14
|
+
### Local Drives
|
|
15
|
+
|
|
16
|
+
A local drive is a container for local documents and data, hosted on your local machine. Technically a drive is just another document with a list of the documents inside the drive. When you run connect locally with `ph connect` a local drive is automatically added. You can also create a new local drive by clicking 'add drive' in connect.
|
|
17
|
+
|
|
18
|
+
### Remote Drives vs. reactors
|
|
19
|
+
|
|
20
|
+
Remote drives in Powerhouse allow you to connect to and work with data stored in external systems or cloud services. These drives act as bridges between Powerhouse contributors and/or other data sources, enabling seamless data synchronization. Drives can exist in 3 category locations.
|
|
21
|
+
|
|
22
|
+
- **Local Storage**: For offline or on-device access.
|
|
23
|
+
- **Cloud Storage**: For centralized, scalable data management.
|
|
24
|
+
- **Decentralized Storage**: Such as Ceramic or IPFS, enabling distributed and blockchain-based storage options.
|
|
25
|
+
|
|
26
|
+
:::info
|
|
27
|
+
**Powerhouse Reactors** are the nodes in the network that store and synchronise documents & drives , resolve conflicts and rerun operations to verify document event histories.
|
|
28
|
+
Reactors can be configured for local storage, centralized cloud storage or on a decentralized storage network.
|
|
29
|
+
|
|
30
|
+
A reactor allows you to store multiple documents, but also host **drives** & Drive Explorers with different organisational purposes, users, access rights and more.
|
|
31
|
+
:::
|
|
32
|
+
|
|
33
|
+
A drive exists by making use of a reactor and the storagelayer that specific reactor is based on. A reactor is the lower level component that makes synchronisation of documents & drives possible.
|
|
34
|
+
|
|
35
|
+
### Drive Apps
|
|
36
|
+
|
|
37
|
+
Drive Explorers (also known as Drive Apps) are specialized interfaces that enhance how users interact with document models within a drive. As mentioned previously, technically a drive is just another document, with a list of the documents inside the drive. So it is obvious that you can create a custom editor for your drive-document. These customized editors are called Drive explorers or Drive Apps. They provide custom views, organization tools, and interactive features tailored to specific use cases. For example, a Drive Explorer might present data as a Kanban board, provide aggregated insights, or offer specialized widgets for data processing. To learn more about building and customizing Drive Explorers, check out our [Building a Drive Explorer](/docs/academy/AdvancedTutorial/BuildingUserExperiences/BuildingADriveExplorer) guide.
|
|
38
|
+
|
|
39
|
+
|
|
40
|
+
## Creating a New Drive
|
|
41
|
+
|
|
42
|
+

|
|
43
|
+
|
|
44
|
+
To create a new drive in Powerhouse, follow these steps:
|
|
45
|
+
1. Click on the "Create New Drive" button in the Connect interface or in the Connect sidebar on the (+) Icon.
|
|
46
|
+
2. In the modal that appears, enter a name for your drive in the "Drive Name" field.
|
|
47
|
+
3. Select the desired Drive App (such as the Generic Drive Explorer, or any other Drive App you've installed).
|
|
48
|
+
4. Choose the location for your drive: Local (only available to you), Cloud (available to people in this drive), or Public (available to everyone).
|
|
49
|
+
5. (Optional) Enable the "Make available offline" toggle if you want to keep a local backup of your drive.
|
|
50
|
+
6. Once all options are set, click the "Create new drive" button to finalize and create your drive.
|
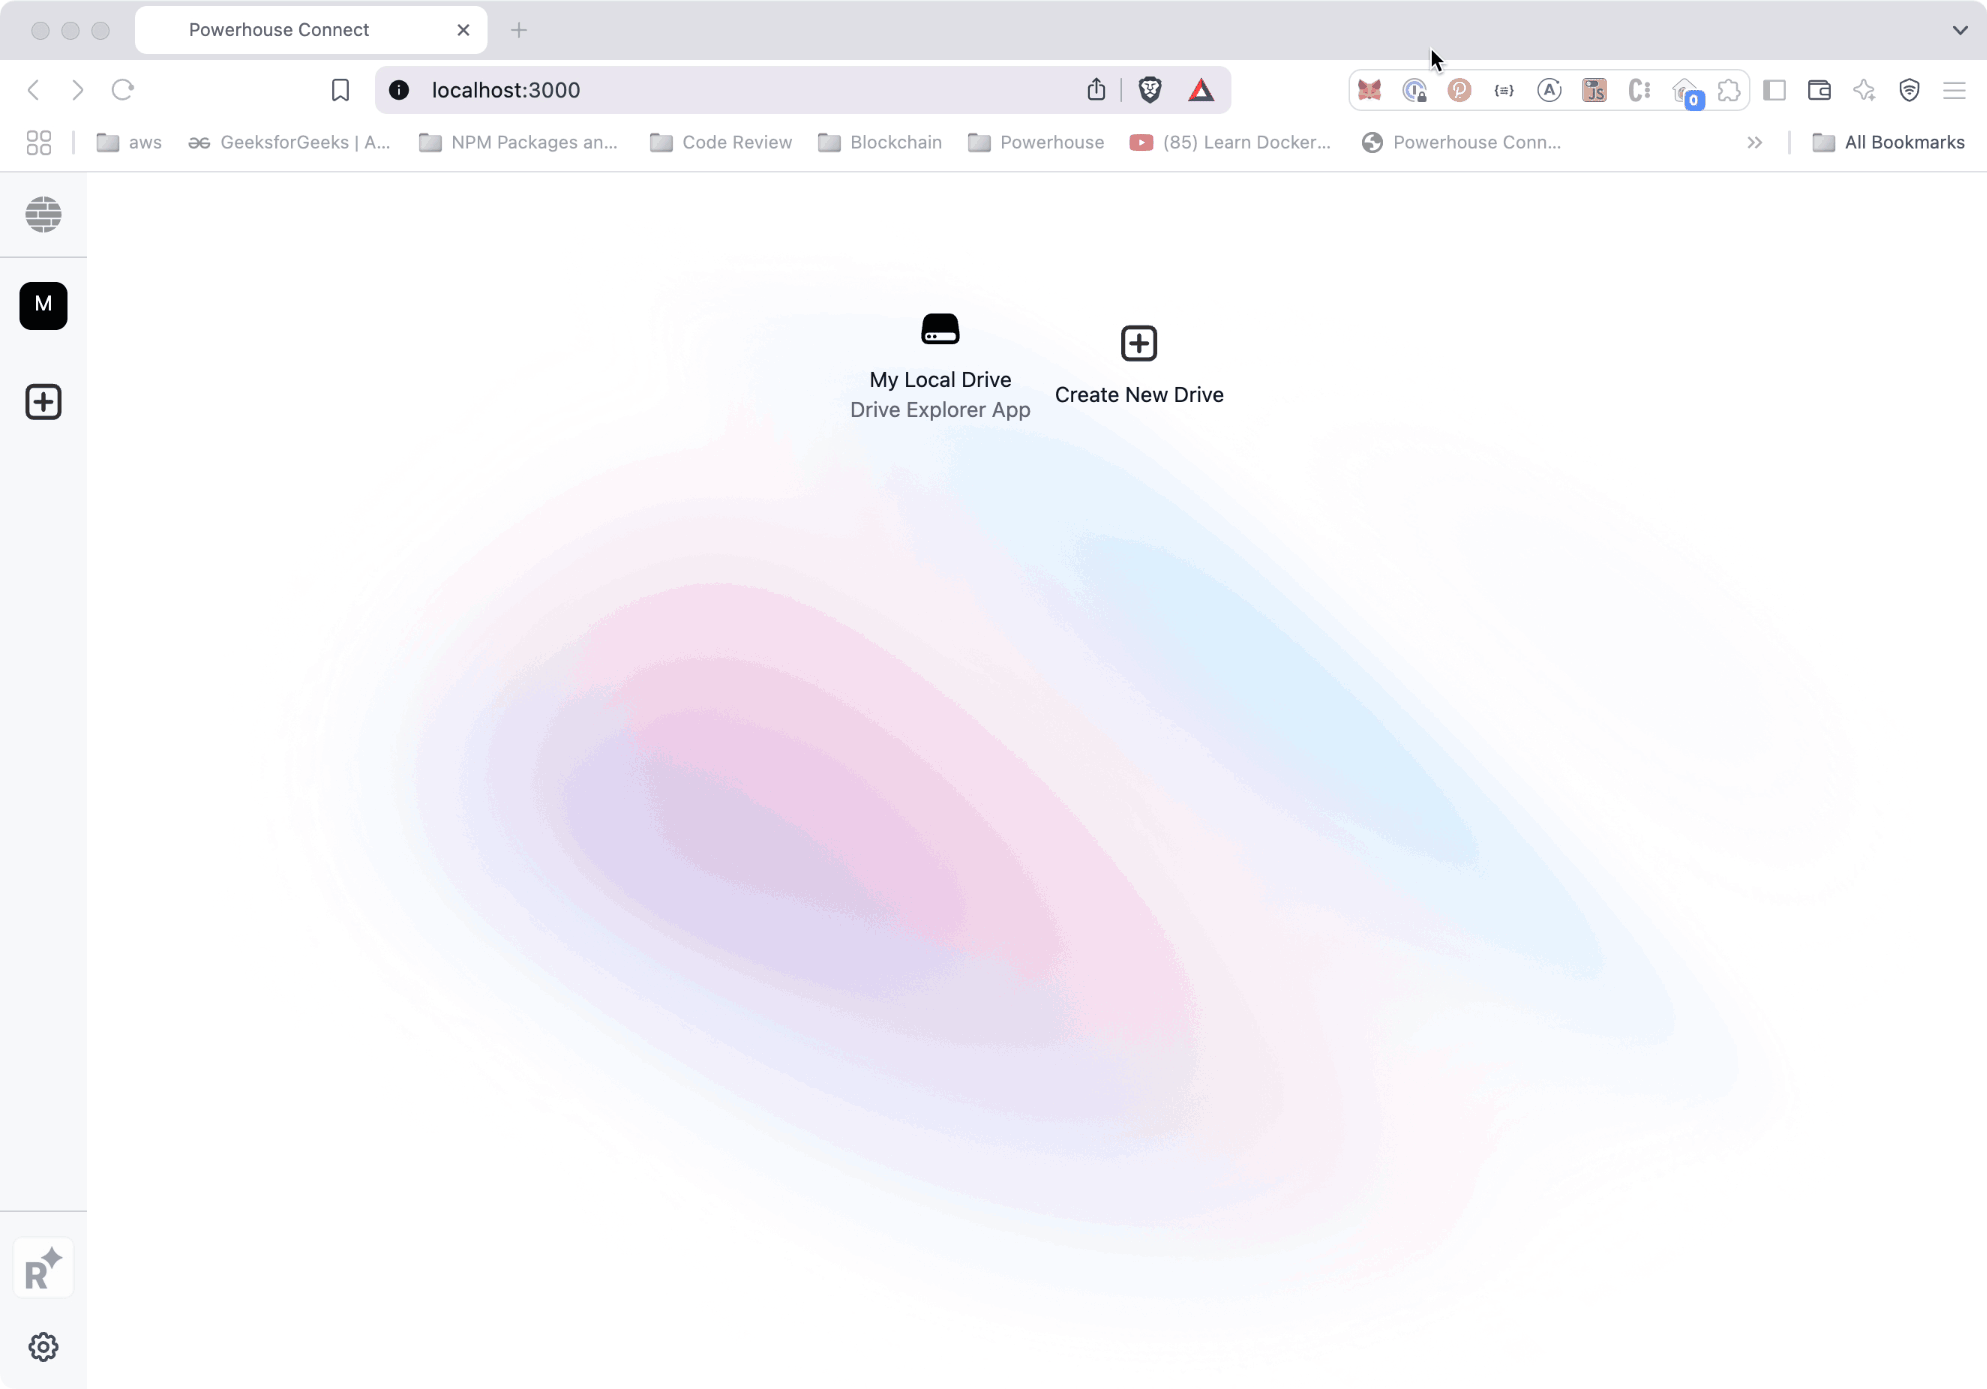
|
51
|
+
|
package/docs/academy/02-AdvancedTutorial/03-BuildingUserExperiences/03-BuildingADriveExplorer.md
ADDED
|
@@ -0,0 +1,174 @@
|
|
|
1
|
+
# Build a Drive Explorer
|
|
2
|
+
|
|
3
|
+
**Drive Explorers or Drive Apps** enhance how contributors and organizations interact with document models.
|
|
4
|
+
An 'app-like' experience is created by providing a **custom interface** for working with or exploring the contents of a drive.
|
|
5
|
+
:::tip
|
|
6
|
+
A 'Drive Explorer or Drive App' offers a tailored application designed around its document models.
|
|
7
|
+
Think of a Drive Explorer as a specialized lens—it offers **different ways to visualize, organize, and interact with** the data stored within a drive, making it more intuitive and efficient for specific use cases.
|
|
8
|
+
:::
|
|
9
|
+
|
|
10
|
+
### **Designed for Specific Use Cases**
|
|
11
|
+
|
|
12
|
+
Most Drive Explorers are built by organizations for specific purposes, aligning closely with a document model package or even being part of one. By integrating Drive Apps with document models, organizations can customize user experiences, streamline workflows, and maximize efficiency for their contributors.
|
|
13
|
+
|
|
14
|
+
Drive Explorers or Drive Apps **bridge the gap between raw data and usability**, unlocking the full potential of document models within the Powerhouse framework.
|
|
15
|
+
|
|
16
|
+
### **Key Features of Drive Apps**
|
|
17
|
+
|
|
18
|
+
- **Custom Views & Organization** – Drive Apps can present data in formats like Kanban boards, list views, or other structured layouts to suit different workflows.
|
|
19
|
+
- **Aggregated Insights** – They can provide high-level summaries of important details across document models, enabling quick decision-making.
|
|
20
|
+
- **Enhanced Interactivity** – Drive Apps can include widgets, data processors, or read models to process and display document data dynamically.
|
|
21
|
+
|
|
22
|
+
### **Building a Drive App**
|
|
23
|
+
|
|
24
|
+
#### The steps of our tutorial
|
|
25
|
+
|
|
26
|
+
Drive Apps provide custom interfaces for interacting with the contents of a drive.
|
|
27
|
+
Here is a **quick overview** of the 3 different steps towards building a Drive App **before we dive into the Todo List Drive App**
|
|
28
|
+
|
|
29
|
+
#### Step 1. Generate the scaffolding code
|
|
30
|
+
|
|
31
|
+
Use the `generate drive editor` command to create the basic template structure for your Drive App:
|
|
32
|
+
|
|
33
|
+
```bash
|
|
34
|
+
|
|
35
|
+
ph generate --drive-editor <Drive App>
|
|
36
|
+
```
|
|
37
|
+
|
|
38
|
+
#### Step 2. Update the manifest file
|
|
39
|
+
|
|
40
|
+
After creating your Drive App, update the `manifest.json` file with relevant information:
|
|
41
|
+
The manifest file identifies your project and its components within the Powerhouse ecosystem.
|
|
42
|
+
|
|
43
|
+
#### Step 3. Customize the Drive App
|
|
44
|
+
|
|
45
|
+
Review the generated template and modify it to better suit your document model:
|
|
46
|
+
|
|
47
|
+
1. Remove unnecessary files and components
|
|
48
|
+
2. Add custom views specific to your data model
|
|
49
|
+
3. Implement specialized interactions for your use case
|
|
50
|
+
|
|
51
|
+
### About the Drive App template
|
|
52
|
+
|
|
53
|
+
The default template provides a solid foundation. It contains:
|
|
54
|
+
- A tree structure navigation panel
|
|
55
|
+
- Basic file/folder operations
|
|
56
|
+
- Standard layout components
|
|
57
|
+
|
|
58
|
+
But the real power comes from tailoring the interface to your specific document models.
|
|
59
|
+
Now let's implement a specific example for a more complex todo-list then the one we've been working on.
|
|
60
|
+
|
|
61
|
+
### Implementation Example: Todo Drive Explorer
|
|
62
|
+
|
|
63
|
+
This example demonstrates how to create a Todo Drive Explorer application using the Powerhouse platform.
|
|
64
|
+
The application allows users to create and manage todo lists with a visual progress indicator.
|
|
65
|
+
|
|
66
|
+
**1. Create a Todo Document Model:**
|
|
67
|
+
- Initialize a new project with `ph init` and give it a project name.
|
|
68
|
+
|
|
69
|
+
- Start by running Connect locally with `ph connect`
|
|
70
|
+
|
|
71
|
+
:::warning
|
|
72
|
+
Since you've likely already run through the [document modeling process](/docs/academy/GetStarted/ToDoList/DefineToDoListDocumentModel) of a simplified todo list, we'll offer you a **slightly more advanced** todo list below!
|
|
73
|
+
:::
|
|
74
|
+
|
|
75
|
+
- Download [todo.phdm.zip](https://github.com/powerhouse-inc/todo-drive-explorer/blob/ee63786fa8ceed71de63cd9c52f1795ad11ac403/todo.phdm.zip) from our GitHub repo.
|
|
76
|
+
- Place it in the project root of your project
|
|
77
|
+
- Generate the document model:
|
|
78
|
+
|
|
79
|
+
```bash
|
|
80
|
+
ph generate todo.phdm.zip
|
|
81
|
+
```
|
|
82
|
+
|
|
83
|
+
**2. Add the reducers code:**
|
|
84
|
+
- Copy the code from [base-operations.ts](https://github.com/powerhouse-inc/todo-drive-explorer/blob/ee63786fa8ceed71de63cd9c52f1795ad11ac403/document-models/to-do/src/reducers/base-operations.ts)
|
|
85
|
+
- Paste it into `document-models/to-do/src/reducers/base-operations.ts`
|
|
86
|
+
|
|
87
|
+
**3. Generate a document editor:**
|
|
88
|
+
```bash
|
|
89
|
+
ph generate --editor ToDoList --document-types powerhouse/todo
|
|
90
|
+
```
|
|
91
|
+
|
|
92
|
+
**4. Add the editor code:**
|
|
93
|
+
- Copy the code from [editor.tsx](https://github.com/powerhouse-inc/todo-drive-explorer/blob/ee63786fa8ceed71de63cd9c52f1795ad11ac403/editors/to-do-list/editor.tsx)
|
|
94
|
+
- Paste it into `editors/to-do-list/editor.tsx`
|
|
95
|
+
|
|
96
|
+
**5. Generate a drive explorer app:**
|
|
97
|
+
```bash
|
|
98
|
+
ph generate --drive-editor todo-drive-explorer
|
|
99
|
+
```
|
|
100
|
+
|
|
101
|
+
**6. Update the `powerhouse.manifest.json` file to register your Drive App with all its modules.**
|
|
102
|
+
|
|
103
|
+
- The information of the manifest file is what the user of your package will see when installing the package:
|
|
104
|
+
|
|
105
|
+
```json
|
|
106
|
+
{
|
|
107
|
+
"name": "Todo List Package",
|
|
108
|
+
"description": "A simple todo list with a dedicated Drive Explorer App",
|
|
109
|
+
"category": "Productivity",
|
|
110
|
+
"publisher": {
|
|
111
|
+
"name": "Powerhouse",
|
|
112
|
+
"url": "https://www.powerhouse.inc/"
|
|
113
|
+
},
|
|
114
|
+
"documentModels": [],
|
|
115
|
+
"editors": [],
|
|
116
|
+
"apps": [
|
|
117
|
+
{
|
|
118
|
+
"id": "todo-drive-explorer",
|
|
119
|
+
"name": "Todo Drive App",
|
|
120
|
+
"driveEditor": "todo-drive-explorer"
|
|
121
|
+
}
|
|
122
|
+
],
|
|
123
|
+
"subgraphs": [],
|
|
124
|
+
"importScripts": []
|
|
125
|
+
}
|
|
126
|
+
```
|
|
127
|
+
|
|
128
|
+
### Customize the Drive Explorer App
|
|
129
|
+
|
|
130
|
+
**1. Remove unnecessary default components:**
|
|
131
|
+
|
|
132
|
+
- Remove default template files that won't be needed for our specific demo. If you'd like to see what the default template Drive App looks like, you can visualize it by running `ph connect`.
|
|
133
|
+
|
|
134
|
+
```bash
|
|
135
|
+
rm -rf editors/todo-drive-explorer/hooks
|
|
136
|
+
rm -rf editors/todo-drive-explorer/components/FileItemsGrid.tsx
|
|
137
|
+
rm -rf editors/todo-drive-explorer/components/FolderItemsGrid.tsx
|
|
138
|
+
rm -rf editors/todo-drive-explorer/components/FolderTree.tsx
|
|
139
|
+
```
|
|
140
|
+
|
|
141
|
+
**2. Create new custom components for you drive explorer app:**
|
|
142
|
+
|
|
143
|
+
- Create and populate the following files to create our types for the todos & our components to customize the Drive Explorer.
|
|
144
|
+
|
|
145
|
+
a. Create `editors/todo-drive-explorer/types/todo.ts`:
|
|
146
|
+
- Copy the code from [todo.ts](https://github.com/powerhouse-inc/todo-drive-explorer/blob/ee63786fa8ceed71de63cd9c52f1795ad11ac403/editors/todo-drive-explorer/types/todo.ts)
|
|
147
|
+
|
|
148
|
+
This type represents the specific data structure or state shape that the todo-drive-explorer component uses to manage or display To-Do items.
|
|
149
|
+
|
|
150
|
+
b. Create `editors/todo-drive-explorer/components/ProgressBar.tsx`:
|
|
151
|
+
- Copy the code from [ProgressBar.tsx](https://github.com/powerhouse-inc/todo-drive-explorer/blob/ee63786fa8ceed71de63cd9c52f1795ad11ac403/editors/todo-drive-explorer/components/ProgressBar.tsx)
|
|
152
|
+
|
|
153
|
+
c. Update `editors/todo-drive-explorer/components/DriveExplorer.tsx`:
|
|
154
|
+
- Copy the code from [DriveExplorer.tsx](https://github.com/powerhouse-inc/todo-drive-explorer/blob/ee63786fa8ceed71de63cd9c52f1795ad11ac403/editors/todo-drive-explorer/components/DriveExplorer.tsx)
|
|
155
|
+
|
|
156
|
+
d. Update `editors/todo-drive-explorer/components/EditorContainer.tsx`:
|
|
157
|
+
- Copy the code from [EditorContainer.tsx](https://github.com/powerhouse-inc/todo-drive-explorer/blob/ee63786fa8ceed71de63cd9c52f1795ad11ac403/editors/todo-drive-explorer/components/EditorContainer.tsx)
|
|
158
|
+
|
|
159
|
+
**3. Now that we've written the functional code for our Drive App it's time to run the application:**
|
|
160
|
+
```bash
|
|
161
|
+
ph connect
|
|
162
|
+
```
|
|
163
|
+
|
|
164
|
+
|
|
165
|
+
|
|
166
|
+
### **Start Building Your Own Drive Apps, Explorers or Experiences**
|
|
167
|
+
Congratulations on completing this tutorial! You've successfully built a custom Drive Explorer, enhancing the way users interact with document models.
|
|
168
|
+
|
|
169
|
+
Now, take a moment to think about the possibilities!
|
|
170
|
+
- What **unique Drive Experiences** could you create for your own projects?
|
|
171
|
+
- How can you tailor interfaces and streamline workflows to unlock the full potential of your document models?
|
|
172
|
+
|
|
173
|
+
The Powerhouse platform provides the tools. It's time to start building!
|
|
174
|
+
|
|
@@ -0,0 +1,67 @@
|
|
|
1
|
+
# Operations History
|
|
2
|
+
|
|
3
|
+
## What Is a Document Model?
|
|
4
|
+
A **document model** in Powerhouse is the core unit for managing business data. Each document (such as an invoice, contributor agreement, or scope of work) is created from a specific document model, which defines:
|
|
5
|
+
|
|
6
|
+
- **State schema:** What data the document contains
|
|
7
|
+
- **Operations:** What actions can modify that document
|
|
8
|
+
|
|
9
|
+
## What Is Operations History?
|
|
10
|
+
Every time a user edits a document, they do so by submitting a document operation (e.g., `ADD_LINE_ITEM`, `UPDATE_RECIPIENT`). These operations are:
|
|
11
|
+
|
|
12
|
+
- **Appended** to the document's history
|
|
13
|
+
- **Immutable** (you never overwrite; you always append)
|
|
14
|
+
- **Replayable** — the current document state is the result of applying all past operations in sequence
|
|
15
|
+
|
|
16
|
+
This design is based on **event sourcing** principles.
|
|
17
|
+
|
|
18
|
+
## Why Use an Operations History?
|
|
19
|
+
- **Auditability:** Inspect every change ever made to a document.
|
|
20
|
+
- **Transparency:** Contributors see what others have done.
|
|
21
|
+
- **Versioning:** Revert to any prior state or resolve conflicts using branching and merging.
|
|
22
|
+
- **Interoperability:** Operations are just data—they can be signed, stored on-chain, or synchronized across systems.
|
|
23
|
+
|
|
24
|
+
|
|
25
|
+
## Example: Invoice Document
|
|
26
|
+
Suppose you're editing a `powerhouse/invoice` document. Its operations history might look like this:
|
|
27
|
+
|
|
28
|
+
```plaintext
|
|
29
|
+
SET_RECIPIENT(name: "Acme Corp")
|
|
30
|
+
ADD_LINE_ITEM(description: "Design Work", unitCost: $500)
|
|
31
|
+
UPDATE_DUE_DATE(date: "2025-06-01")
|
|
32
|
+
```
|
|
33
|
+
|
|
34
|
+
The document's state at any time is the result of running those operations in order.
|
|
35
|
+
|
|
36
|
+
## Visualizing Operations History
|
|
37
|
+
|
|
38
|
+
### Revision List and Details
|
|
39
|
+
In Connect the Powerhouse UI displays a chronologic list of all applied modifications to the document, each with a unique event ID, state hash, and commit message. You can inspect each revision for signatures and errors.
|
|
40
|
+
|
|
41
|
+

|
|
42
|
+
|
|
43
|
+
|
|
44
|
+
### Viewing Revision Hashes and Event IDs
|
|
45
|
+
Hovering over a revision reveals its event ID and state hash, providing traceability for every change.
|
|
46
|
+
|
|
47
|
+

|
|
48
|
+
|
|
49
|
+
|
|
50
|
+
### Signature Verification
|
|
51
|
+
Clicking the signature badge shows signature details, including signer address, hash, and verification status. This ensures every operation is cryptographically auditable.
|
|
52
|
+
Read more about how we are using [Renown](/docs/renown/intro) for authentication & verification of signer data.
|
|
53
|
+
|
|
54
|
+

|
|
55
|
+
|
|
56
|
+
|
|
57
|
+
### Viewing Committer Addresses
|
|
58
|
+
You can also view the committer's address for each revision, supporting full transparency and accountability.
|
|
59
|
+
|
|
60
|
+

|
|
61
|
+
|
|
62
|
+
|
|
63
|
+
## Replay, Branch, and Merge (UNDER DEVELOPMENT)
|
|
64
|
+
- **Replay:** When you load a document, the system replays all operations to build its state.
|
|
65
|
+
- **Branch:** Create a parallel version of the document to test changes or handle conflicts.
|
|
66
|
+
- **Merge:** Combine branches intelligently based on operations, not just raw field values.
|
|
67
|
+
|