@aigne/doc-smith 0.8.3 → 0.8.5
This diff represents the content of publicly available package versions that have been released to one of the supported registries. The information contained in this diff is provided for informational purposes only and reflects changes between package versions as they appear in their respective public registries.
- package/.aigne/doc-smith/config.yaml +3 -3
- package/.aigne/doc-smith/preferences.yml +58 -12
- package/.aigne/doc-smith/upload-cache.yaml +600 -207
- package/CHANGELOG.md +22 -0
- package/README.md +77 -5
- package/agents/input-generator.mjs +12 -6
- package/agents/publish-docs.mjs +53 -4
- package/docs/_sidebar.md +1 -1
- package/docs/advanced-how-it-works.md +55 -60
- package/docs/advanced-how-it-works.zh.md +60 -65
- package/docs/advanced-quality-assurance.md +73 -38
- package/docs/advanced-quality-assurance.zh.md +73 -38
- package/docs/advanced.md +2 -14
- package/docs/advanced.zh.md +5 -17
- package/docs/changelog.md +41 -4
- package/docs/changelog.zh.md +77 -40
- package/docs/cli-reference.md +79 -13
- package/docs/cli-reference.zh.md +92 -26
- package/docs/configuration-interactive-setup.md +102 -49
- package/docs/configuration-interactive-setup.zh.md +102 -49
- package/docs/configuration-language-support.md +69 -39
- package/docs/configuration-language-support.zh.md +68 -38
- package/docs/configuration-llm-setup.md +25 -62
- package/docs/configuration-llm-setup.zh.md +25 -62
- package/docs/configuration-preferences.md +79 -67
- package/docs/configuration-preferences.zh.md +78 -67
- package/docs/configuration.md +122 -109
- package/docs/configuration.zh.md +130 -117
- package/docs/features-generate-documentation.md +44 -24
- package/docs/features-generate-documentation.zh.md +52 -32
- package/docs/features-publish-your-docs.md +41 -40
- package/docs/features-publish-your-docs.zh.md +50 -49
- package/docs/features-translate-documentation.md +73 -17
- package/docs/features-translate-documentation.zh.md +76 -20
- package/docs/features-update-and-refine.md +72 -21
- package/docs/features-update-and-refine.zh.md +80 -29
- package/docs/features.md +24 -28
- package/docs/features.zh.md +25 -29
- package/docs/getting-started.md +87 -38
- package/docs/getting-started.zh.md +88 -39
- package/docs/overview.md +17 -35
- package/docs/overview.zh.md +18 -36
- package/package.json +9 -8
- package/prompts/content-detail-generator.md +1 -0
- package/prompts/document/custom-code-block.md +101 -0
- package/prompts/document/d2-chart/rules.md +941 -1031
- package/prompts/document/detail-generator.md +7 -53
- package/tests/input-generator.test.mjs +2 -2
- package/tests/kroki-utils.test.mjs +88 -17
- package/utils/auth-utils.mjs +9 -2
- package/utils/blocklet.mjs +25 -6
- package/utils/constants.mjs +17 -1
- package/utils/deploy.mjs +404 -0
- package/utils/kroki-utils.mjs +22 -14
- package/utils/markdown-checker.mjs +1 -1
- package/utils/utils.mjs +3 -2
- package/prompts/document/d2-chart/diy-examples.md +0 -44
- package/prompts/document/d2-chart/shape-rules.md +0 -182
|
@@ -1,12 +1,8 @@
|
|
|
1
|
-
---
|
|
2
|
-
labels: ["Reference"]
|
|
3
|
-
---
|
|
4
|
-
|
|
5
1
|
# Generate Documentation
|
|
6
2
|
|
|
7
|
-
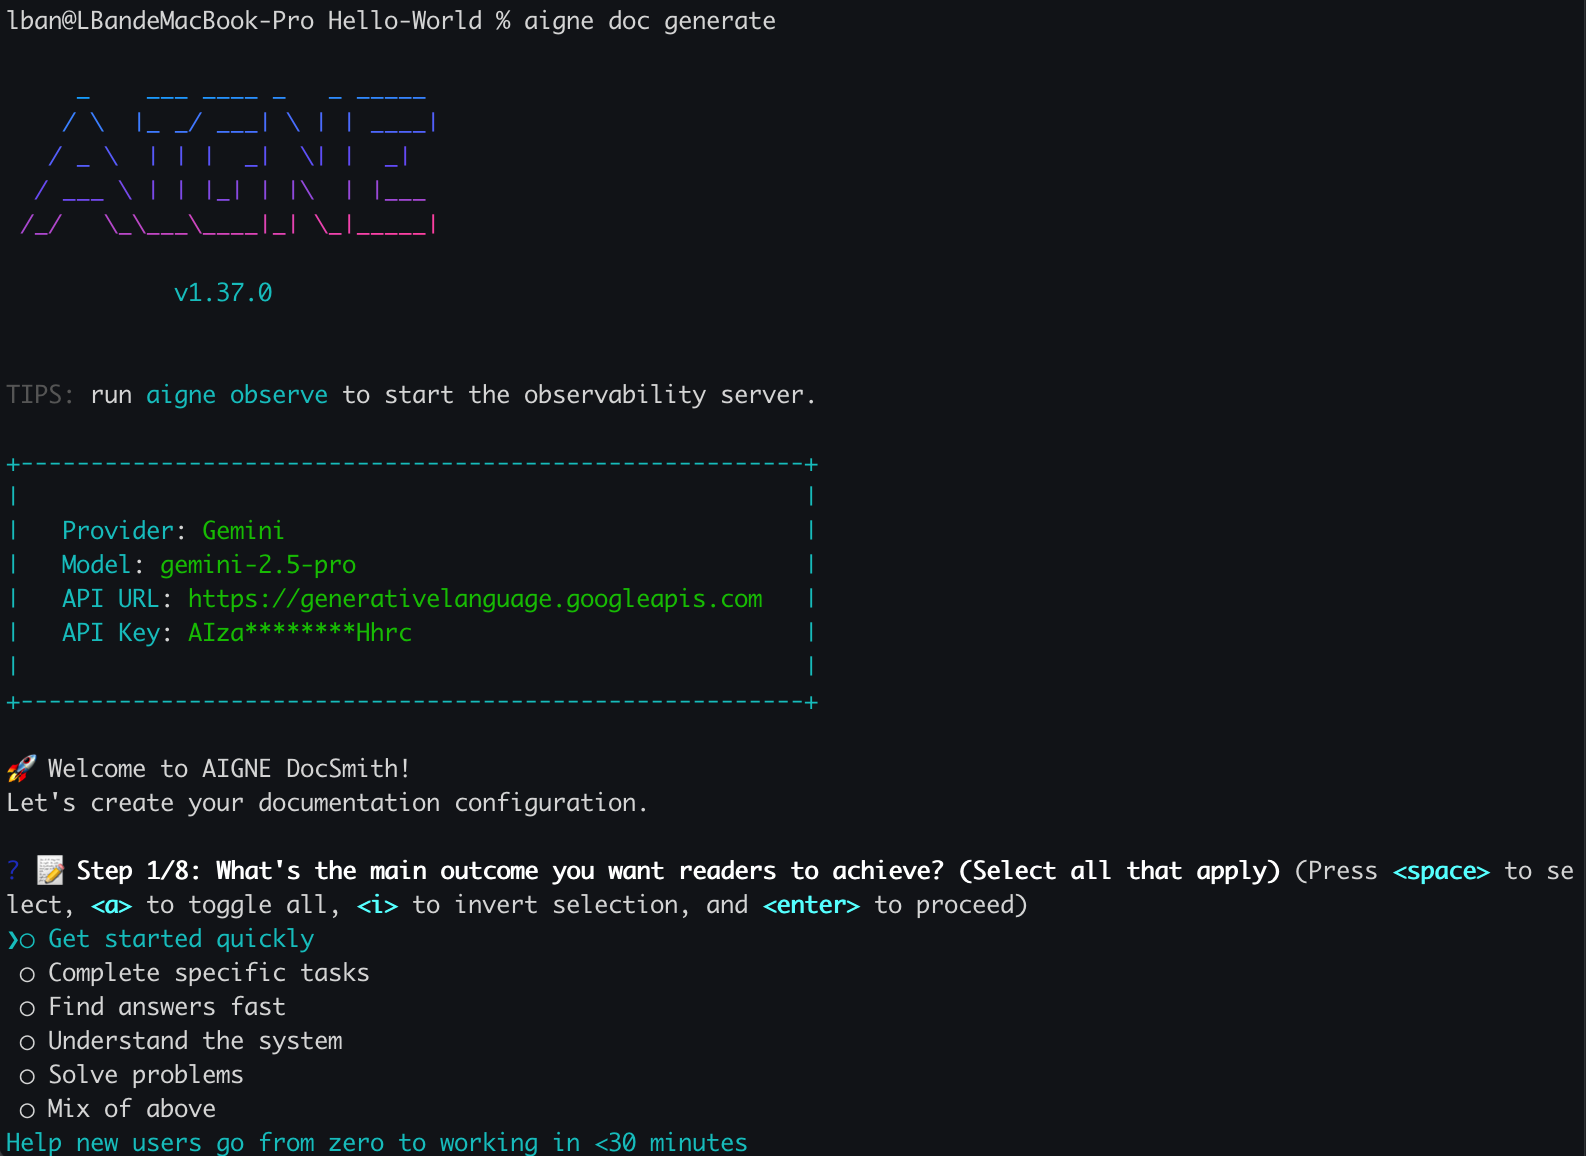
The `aigne doc generate` command is the core function of DocSmith, designed to transform your source code into a
|
|
3
|
+
The `aigne doc generate` command is the core function of DocSmith, designed to transform your source code into a structured documentation suite with a single command.
|
|
8
4
|
|
|
9
|
-
This process
|
|
5
|
+
This process analyzes your codebase, plans a logical document structure, and then generates content for each section. It's the primary way to create your documentation from scratch.
|
|
10
6
|
|
|
11
7
|
## Your First Generation
|
|
12
8
|
|
|
@@ -16,9 +12,9 @@ To begin, navigate to your project's root directory and run the following comman
|
|
|
16
12
|
aigne doc generate
|
|
17
13
|
```
|
|
18
14
|
|
|
19
|
-
###
|
|
15
|
+
### Automatic Configuration
|
|
20
16
|
|
|
21
|
-
If you're running this command for the first time in a project, DocSmith will
|
|
17
|
+
If you're running this command for the first time in a project, DocSmith will detect that no configuration exists. It will automatically launch an interactive setup wizard to guide you through the initial setup. This ensures you have a properly configured environment before generation begins.
|
|
22
18
|
|
|
23
19
|
|
|
24
20
|
|
|
@@ -40,43 +36,67 @@ Upon successful completion, your newly created documentation will be available i
|
|
|
40
36
|
|
|
41
37
|
## The Generation Process
|
|
42
38
|
|
|
43
|
-
The `generate` command follows
|
|
39
|
+
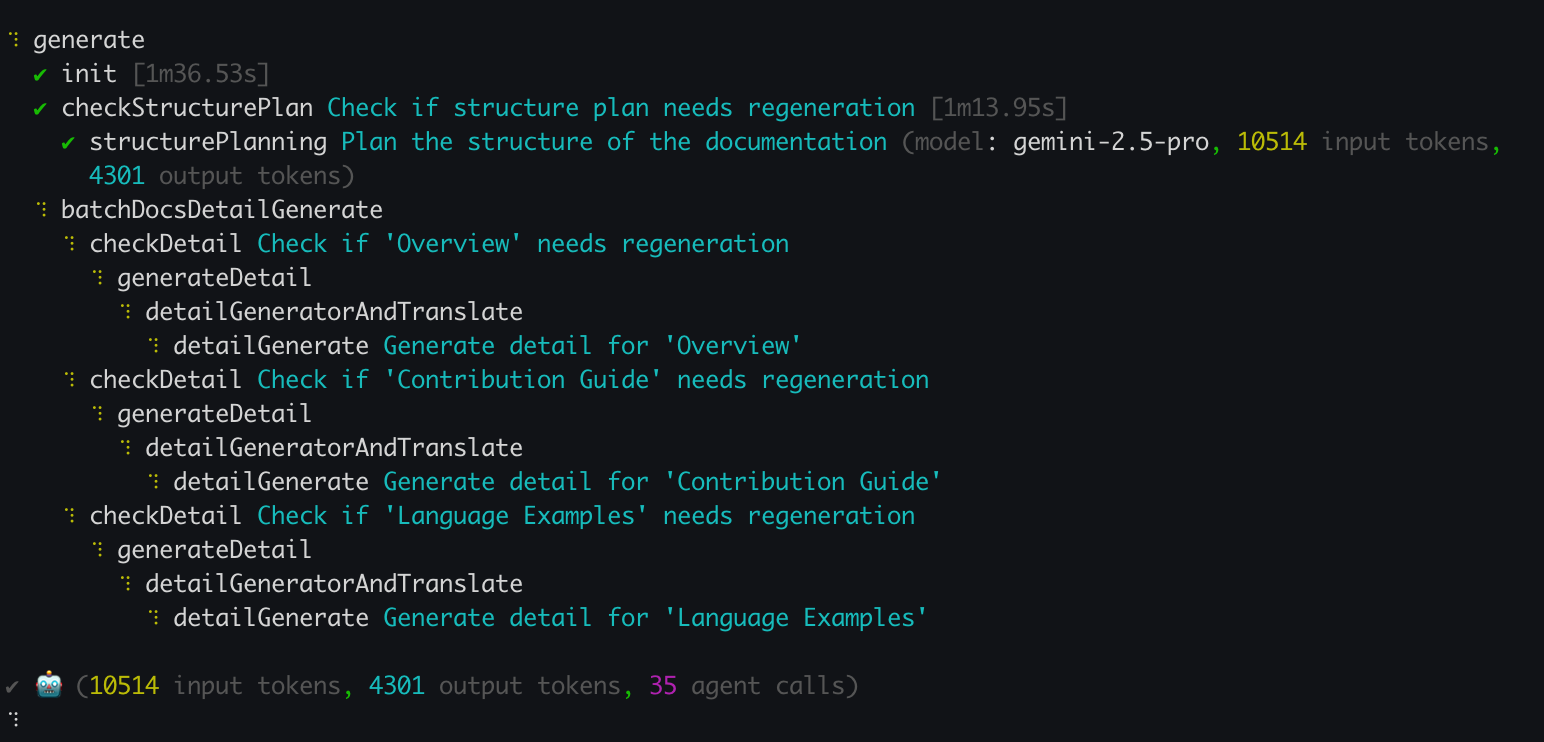
The `generate` command follows an automated workflow to ensure consistent results. The process can be visualized as follows:
|
|
44
40
|
|
|
45
41
|
```d2
|
|
46
42
|
direction: down
|
|
47
43
|
|
|
48
|
-
start: "Start"
|
|
49
|
-
|
|
50
|
-
|
|
44
|
+
start: "Start" {
|
|
45
|
+
shape: oval
|
|
46
|
+
}
|
|
47
|
+
|
|
48
|
+
run_cmd: "Run `aigne doc generate`" {
|
|
49
|
+
shape: rectangle
|
|
50
|
+
}
|
|
51
|
+
|
|
52
|
+
check_config: "Configuration Found?" {
|
|
51
53
|
shape: diamond
|
|
52
54
|
}
|
|
53
|
-
interactive_setup: "Interactive Setup Wizard"
|
|
54
|
-
plan_structure: "Analyze Code & Plan Structure"
|
|
55
|
-
gen_content: "Generate Document Content"
|
|
56
|
-
save_docs: "Save Documents to Output Directory"
|
|
57
|
-
end: "End"
|
|
58
55
|
|
|
59
|
-
|
|
56
|
+
interactive_setup: "Launch Interactive Setup Wizard" {
|
|
57
|
+
shape: rectangle
|
|
58
|
+
}
|
|
59
|
+
|
|
60
|
+
plan_structure: "1. Analyze Code & Plan Structure" {
|
|
61
|
+
shape: rectangle
|
|
62
|
+
}
|
|
63
|
+
|
|
64
|
+
gen_content: "2. Generate Document Content" {
|
|
65
|
+
shape: rectangle
|
|
66
|
+
}
|
|
67
|
+
|
|
68
|
+
save_docs: "3. Save Documents" {
|
|
69
|
+
shape: rectangle
|
|
70
|
+
}
|
|
71
|
+
|
|
72
|
+
end: "End" {
|
|
73
|
+
shape: oval
|
|
74
|
+
}
|
|
75
|
+
|
|
76
|
+
start -> run_cmd
|
|
77
|
+
run_cmd -> check_config
|
|
60
78
|
check_config -> interactive_setup: "No"
|
|
61
79
|
interactive_setup -> plan_structure
|
|
62
80
|
check_config -> plan_structure: "Yes"
|
|
63
|
-
plan_structure -> gen_content
|
|
81
|
+
plan_structure -> gen_content
|
|
82
|
+
gen_content -> save_docs
|
|
83
|
+
save_docs -> end
|
|
64
84
|
```
|
|
65
85
|
|
|
66
|
-
##
|
|
86
|
+
## Command Options
|
|
67
87
|
|
|
68
|
-
While the default `generate` command is sufficient for most use cases, you can use several options to control the generation process. These are
|
|
88
|
+
While the default `generate` command is sufficient for most use cases, you can use several options to control the generation process. These are useful for regenerating content or refining the document structure.
|
|
69
89
|
|
|
70
90
|
| Option | Description | Example |
|
|
71
91
|
|---------------------|------------------------------------------------------------------------------------------------------------------------------------------|----------------------------------------------------------------------|
|
|
72
92
|
| `--forceRegenerate` | Deletes all existing documents and regenerates them from scratch. Use this after making significant changes to your source code or configuration. | `aigne doc generate --forceRegenerate` |
|
|
73
93
|
| `--feedback` | Provides high-level feedback to refine the overall document structure plan, such as adding, removing, or reorganizing sections. | `aigne doc generate --feedback "Add an API Reference section"` |
|
|
74
|
-
| `--model` | Specifies a particular Large Language Model from AIGNE Hub to use for content generation, allowing you to switch between models
|
|
94
|
+
| `--model` | Specifies a particular Large Language Model from AIGNE Hub to use for content generation, allowing you to switch between models. | `aigne doc generate --model claude:claude-3-5-sonnet` |
|
|
75
95
|
|
|
76
96
|
## What's Next?
|
|
77
97
|
|
|
78
98
|
Now that you have generated your initial documentation, your project will continue to evolve. To keep your documents synchronized with your code, you will need to update them. Proceed to the next section to learn how to make targeted changes and regenerate specific files.
|
|
79
99
|
|
|
80
100
|
<x-card data-title="Update and Refine" data-icon="lucide:file-edit" data-href="/features/update-and-refine">
|
|
81
|
-
Discover how to
|
|
82
|
-
</x-card
|
|
101
|
+
Discover how to update documents when your code changes or make specific improvements using feedback.
|
|
102
|
+
</x-card>
|
|
@@ -1,28 +1,24 @@
|
|
|
1
|
-
---
|
|
2
|
-
labels: ["Reference"]
|
|
3
|
-
---
|
|
4
|
-
|
|
5
1
|
# 生成文档
|
|
6
2
|
|
|
7
|
-
`aigne doc generate` 命令是 DocSmith
|
|
3
|
+
`aigne doc generate` 命令是 DocSmith 的核心功能,旨在通过一个命令将您的源代码转换为结构化的文档套件。
|
|
8
4
|
|
|
9
|
-
|
|
5
|
+
该过程会分析您的代码库,规划逻辑文档结构,然后为每个部分生成内容。这是从零开始创建文档的主要方式。
|
|
10
6
|
|
|
11
7
|
## 首次生成
|
|
12
8
|
|
|
13
|
-
|
|
9
|
+
首先,请导航至您项目的根目录并运行以下命令:
|
|
14
10
|
|
|
15
11
|
```bash
|
|
16
12
|
aigne doc generate
|
|
17
13
|
```
|
|
18
14
|
|
|
19
|
-
###
|
|
15
|
+
### 自动配置
|
|
20
16
|
|
|
21
|
-
如果您首次在项目中运行此命令,DocSmith
|
|
17
|
+
如果您首次在项目中运行此命令,DocSmith 会检测到尚无配置。它将自动启动交互式设置向导,引导您完成初始设置。这可以确保您在生成开始前拥有一个正确配置的环境。
|
|
22
18
|
|
|
23
19
|

|
|
24
20
|
|
|
25
|
-
|
|
21
|
+
系统会询问您一系列问题,用于定义:
|
|
26
22
|
- 文档生成规则和风格
|
|
27
23
|
- 目标受众
|
|
28
24
|
- 主要语言和翻译语言
|
|
@@ -32,7 +28,7 @@ aigne doc generate
|
|
|
32
28
|
|
|
33
29
|
配置完成后,DocSmith 会继续进行文档生成。
|
|
34
30
|
|
|
35
|
-
|
|
36
32
|
|
|
37
33
|
成功完成后,您新创建的文档将位于您指定的输出目录中。
|
|
38
34
|
|
|
@@ -40,43 +36,67 @@ aigne doc generate
|
|
|
40
36
|
|
|
41
37
|
## 生成过程
|
|
42
38
|
|
|
43
|
-
`generate`
|
|
39
|
+
`generate` 命令遵循自动化工作流以确保结果的一致性。该过程可按如下方式可视化:
|
|
44
40
|
|
|
45
41
|
```d2
|
|
46
42
|
direction: down
|
|
47
43
|
|
|
48
|
-
start: "开始"
|
|
49
|
-
|
|
50
|
-
|
|
44
|
+
start: "开始" {
|
|
45
|
+
shape: oval
|
|
46
|
+
}
|
|
47
|
+
|
|
48
|
+
run_cmd: "运行 `aigne doc generate`" {
|
|
49
|
+
shape: rectangle
|
|
50
|
+
}
|
|
51
|
+
|
|
52
|
+
check_config: "找到配置?" {
|
|
51
53
|
shape: diamond
|
|
52
54
|
}
|
|
53
|
-
interactive_setup: "交互式设置向导"
|
|
54
|
-
plan_structure: "分析代码并规划结构"
|
|
55
|
-
gen_content: "生成文档内容"
|
|
56
|
-
save_docs: "将文档保存到输出目录"
|
|
57
|
-
end: "结束"
|
|
58
55
|
|
|
59
|
-
|
|
56
|
+
interactive_setup: "启动交互式设置向导" {
|
|
57
|
+
shape: rectangle
|
|
58
|
+
}
|
|
59
|
+
|
|
60
|
+
plan_structure: "1. 分析代码和规划结构" {
|
|
61
|
+
shape: rectangle
|
|
62
|
+
}
|
|
63
|
+
|
|
64
|
+
gen_content: "2. 生成文档内容" {
|
|
65
|
+
shape: rectangle
|
|
66
|
+
}
|
|
67
|
+
|
|
68
|
+
save_docs: "3. 保存文档" {
|
|
69
|
+
shape: rectangle
|
|
70
|
+
}
|
|
71
|
+
|
|
72
|
+
end: "结束" {
|
|
73
|
+
shape: oval
|
|
74
|
+
}
|
|
75
|
+
|
|
76
|
+
start -> run_cmd
|
|
77
|
+
run_cmd -> check_config
|
|
60
78
|
check_config -> interactive_setup: "否"
|
|
61
79
|
interactive_setup -> plan_structure
|
|
62
80
|
check_config -> plan_structure: "是"
|
|
63
|
-
plan_structure -> gen_content
|
|
81
|
+
plan_structure -> gen_content
|
|
82
|
+
gen_content -> save_docs
|
|
83
|
+
save_docs -> end
|
|
64
84
|
```
|
|
65
85
|
|
|
66
|
-
##
|
|
86
|
+
## 命令选项
|
|
67
87
|
|
|
68
|
-
虽然默认的 `generate`
|
|
88
|
+
虽然默认的 `generate` 命令足以满足大多数用例,但您可以使用多个选项来控制生成过程。这些选项对于重新生成内容或优化文档结构非常有用。
|
|
69
89
|
|
|
70
|
-
| 选项
|
|
90
|
+
| 选项 | 描述 | 示例 |
|
|
71
91
|
|---------------------|------------------------------------------------------------------------------------------------------------------------------------------|----------------------------------------------------------------------|
|
|
72
|
-
| `--forceRegenerate` | 删除所有现有文档并从头开始重新生成。在对源代码或配置进行重大更改后使用此选项。
|
|
73
|
-
| `--feedback` |
|
|
74
|
-
| `--model` | 指定 AIGNE Hub
|
|
92
|
+
| `--forceRegenerate` | 删除所有现有文档并从头开始重新生成。在对源代码或配置进行重大更改后使用此选项。 | `aigne doc generate --forceRegenerate` |
|
|
93
|
+
| `--feedback` | 提供高层级反馈以优化整体文档结构规划,例如添加、删除或重组部分。 | `aigne doc generate --feedback "添加一个 API 参考部分"` |
|
|
94
|
+
| `--model` | 指定 AIGNE Hub 中的特定大型语言模型用于内容生成,允许您在不同模型之间切换。 | `aigne doc generate --model claude:claude-3-5-sonnet` |
|
|
75
95
|
|
|
76
|
-
##
|
|
96
|
+
## 后续步骤
|
|
77
97
|
|
|
78
|
-
|
|
98
|
+
既然您已经生成了初始文档,您的项目将继续发展。为了使文档与代码保持同步,您需要更新它们。请继续阅读下一部分,了解如何进行有针对性的更改和重新生成特定文件。
|
|
79
99
|
|
|
80
100
|
<x-card data-title="更新和优化" data-icon="lucide:file-edit" data-href="/features/update-and-refine">
|
|
81
|
-
|
|
82
|
-
</x-card
|
|
101
|
+
了解当代码发生变化时如何更新文档,或使用反馈进行特定改进。
|
|
102
|
+
</x-card>
|
|
@@ -1,50 +1,50 @@
|
|
|
1
|
-
---
|
|
2
|
-
labels: ["Reference"]
|
|
3
|
-
---
|
|
4
|
-
|
|
5
1
|
# Publish Your Docs
|
|
6
2
|
|
|
7
|
-
Once your documentation is generated, the next step is to make it accessible online. AIGNE DocSmith simplifies this process with the `aigne doc publish` command, which uploads your content to a Discuss Kit platform, making it
|
|
3
|
+
Once your documentation is generated, the next step is to make it accessible online. AIGNE DocSmith simplifies this process with the `aigne doc publish` command, which uploads your content to a Discuss Kit platform, making it available to your audience.
|
|
8
4
|
|
|
9
|
-
This guide covers how to publish your documentation, whether you
|
|
5
|
+
This guide covers how to publish your documentation, whether you are using the official platform or your own website.
|
|
10
6
|
|
|
11
7
|
## The Publishing Process
|
|
12
8
|
|
|
13
9
|
The `aigne doc publish` command initiates an interactive process that guides you through the necessary steps. The diagram below shows the typical workflow for publishing your documentation for the first time.
|
|
14
10
|
|
|
15
11
|
```d2
|
|
12
|
+
direction: down
|
|
16
13
|
shape: sequence_diagram
|
|
17
14
|
|
|
18
|
-
User
|
|
19
|
-
|
|
20
|
-
|
|
21
|
-
|
|
22
|
-
|
|
23
|
-
|
|
24
|
-
|
|
25
|
-
|
|
26
|
-
|
|
27
|
-
|
|
28
|
-
CLI ->
|
|
29
|
-
|
|
30
|
-
|
|
31
|
-
|
|
32
|
-
|
|
33
|
-
|
|
15
|
+
User: { shape: c4-person }
|
|
16
|
+
CLI: { label: "AIGNE CLI" }
|
|
17
|
+
Browser: { label: "Browser" }
|
|
18
|
+
Platform: { label: "Discuss Kit Platform" }
|
|
19
|
+
|
|
20
|
+
User -> CLI: "aigne doc publish"
|
|
21
|
+
|
|
22
|
+
alt: "First-time publish or missing config" {
|
|
23
|
+
CLI -> User: "Select Platform\n(Official / Self-Hosted)"
|
|
24
|
+
User -> CLI: "Provides selection"
|
|
25
|
+
CLI -> Browser: "Opens authentication URL"
|
|
26
|
+
User -> Browser: "Logs in & authorizes"
|
|
27
|
+
Browser -> Platform: "Sends credentials"
|
|
28
|
+
Platform -> CLI: "Returns Access Token"
|
|
29
|
+
CLI -> CLI: "Saves Token for future use"
|
|
30
|
+
}
|
|
31
|
+
|
|
32
|
+
CLI -> Platform: "Uploads docs & media files"
|
|
33
|
+
Platform -> CLI: "Success response"
|
|
34
|
+
CLI -> User: "✅ Published Successfully!"
|
|
34
35
|
```
|
|
35
36
|
|
|
36
37
|
## Publishing Options
|
|
37
38
|
|
|
38
39
|
You have two primary options for hosting your documentation, catering to different needs for visibility and control.
|
|
39
40
|
|
|
40
|
-
|
|
41
|
-
|
|
42
|
-
|
|
43
|
-
|
|
44
|
-
|
|
45
|
-
|
|
46
|
-
|
|
47
|
-
</x-cards>
|
|
41
|
+
### Official Platform
|
|
42
|
+
|
|
43
|
+
Publish to [docsmith.aigne.io](https://docsmith.aigne.io), the official hosting platform. This option is free, makes your documentation publicly accessible, and is recommended for open-source projects.
|
|
44
|
+
|
|
45
|
+
### Your Own Website
|
|
46
|
+
|
|
47
|
+
Publish to your own website by running a Discuss Kit instance. This gives you full control over who can access your documentation, making it suitable for internal or private projects. You can get started with running your own Discuss Kit from the [official store](https://www.arcblock.io/store/z8iZhf67n368m2k5a9fXvCL778jAnf3e5n2b).
|
|
48
48
|
|
|
49
49
|
## Step-by-Step Guide
|
|
50
50
|
|
|
@@ -60,11 +60,11 @@ aigne doc publish
|
|
|
60
60
|
|
|
61
61
|
### 2. Choose Your Platform
|
|
62
62
|
|
|
63
|
-
If you
|
|
63
|
+
If you have not configured a publishing destination before, you will be prompted to choose between the official platform and a self-hosted one. Select the option that best suits your needs.
|
|
64
64
|
|
|
65
65
|

|
|
66
66
|
|
|
67
|
-
If you select
|
|
67
|
+
If you select your own website, you will be asked to enter the URL for your Discuss Kit instance.
|
|
68
68
|
|
|
69
69
|
### 3. Authenticate Your Account
|
|
70
70
|
|
|
@@ -82,17 +82,18 @@ Once the upload is complete, you will see a success message in your terminal, an
|
|
|
82
82
|
|
|
83
83
|
For automated workflows, you can bypass the interactive prompts by using command-line arguments or environment variables.
|
|
84
84
|
|
|
85
|
-
| Method
|
|
86
|
-
|
|
87
|
-
| **Argument** | `--appUrl`
|
|
88
|
-
| **Env Var**
|
|
89
|
-
| **Env Var**
|
|
85
|
+
| Method | Name | Description | Example |
|
|
86
|
+
| ---------- | ------------------------------ | ---------------------------------------------------------------------------------------- | ----------------------------------------------------------- |
|
|
87
|
+
| **Argument** | `--appUrl` | Specifies the URL of your Discuss Kit instance directly. | `aigne doc publish --appUrl https://docs.mycompany.com` |
|
|
88
|
+
| **Env Var** | `DOC_DISCUSS_KIT_URL` | Sets the target platform URL, overriding any other configuration. | `export DOC_DISCUSS_KIT_URL=...` |
|
|
89
|
+
| **Env Var** | `DOC_DISCUSS_KIT_ACCESS_TOKEN` | Provides the access token directly, skipping the interactive login. | `export DOC_DISCUSS_KIT_ACCESS_TOKEN=...` |
|
|
90
90
|
|
|
91
91
|
## Troubleshooting
|
|
92
92
|
|
|
93
93
|
If you encounter issues during the publishing process, here are some common causes and their solutions:
|
|
94
94
|
|
|
95
|
-
- **
|
|
96
|
-
- **
|
|
95
|
+
- **Connection Error**: This can happen if the provided URL for your own instance is incorrect or the server is not reachable. Check the URL and your network connection.
|
|
96
|
+
- **Invalid Website URL**: The provided URL is not a valid website on the ArcBlock platform. To host your documentation, you need a website running on this platform. You can start by visiting the [Discuss Kit Store](https://www.arcblock.io/store/z8iZhf67n368m2k5a9fXvCL778jAnf3e5n2b).
|
|
97
|
+
- **Missing Required Components**: The destination website must have the Discuss Kit component installed to host the documentation. If it is missing, the CLI will return an error with guidance on how to add the component. You can find instructions in the [Discuss Kit documentation](https://www.arcblock.io/docs/web3-kit/en/discuss-kit).
|
|
97
98
|
|
|
98
|
-
For a complete list of commands and options,
|
|
99
|
+
For a complete list of commands and options, refer to the [CLI Command Reference](./cli-reference.md).
|
|
@@ -1,50 +1,50 @@
|
|
|
1
|
-
|
|
2
|
-
labels: ["Reference"]
|
|
3
|
-
---
|
|
1
|
+
# 发布你的文档
|
|
4
2
|
|
|
5
|
-
|
|
3
|
+
文档生成后,下一步是使其可以在线访问。AIGNE DocSmith 通过 `aigne doc publish` 命令简化了这一过程,该命令会将你的内容上传到 Discuss Kit 平台,供你的受众访问。
|
|
6
4
|
|
|
7
|
-
|
|
8
|
-
|
|
9
|
-
本指南将介绍如何发布您的文档,无论您使用的是免费的官方平台还是自托管的实例。
|
|
5
|
+
本指南将介绍如何发布文档,无论你是使用官方平台还是自己的网站。
|
|
10
6
|
|
|
11
7
|
## 发布流程
|
|
12
8
|
|
|
13
|
-
`aigne doc publish`
|
|
9
|
+
`aigne doc publish` 命令会启动一个交互式流程,引导你完成必要的步骤。下图展示了首次发布文档的典型工作流程。
|
|
14
10
|
|
|
15
11
|
```d2
|
|
12
|
+
direction: down
|
|
16
13
|
shape: sequence_diagram
|
|
17
14
|
|
|
18
|
-
|
|
15
|
+
User: { shape: c4-person }
|
|
16
|
+
CLI: { label: "AIGNE CLI" }
|
|
17
|
+
Browser: { label: "Browser" }
|
|
18
|
+
Platform: { label: "Discuss Kit Platform" }
|
|
19
|
+
|
|
20
|
+
User -> CLI: "aigne doc publish"
|
|
21
|
+
|
|
22
|
+
alt: "首次发布或缺少配置" {
|
|
23
|
+
CLI -> User: "选择平台\n(官方/自托管)"
|
|
24
|
+
User -> CLI: "提供选择"
|
|
25
|
+
CLI -> Browser: "打开认证 URL"
|
|
26
|
+
User -> Browser: "登录并授权"
|
|
27
|
+
Browser -> Platform: "发送凭证"
|
|
28
|
+
Platform -> CLI: "返回访问令牌"
|
|
29
|
+
CLI -> CLI: "保存令牌以备将来使用"
|
|
30
|
+
}
|
|
31
|
+
|
|
32
|
+
CLI -> Platform: "上传文档和媒体文件"
|
|
33
|
+
Platform -> CLI: "成功响应"
|
|
34
|
+
CLI -> User: "✅ 发布成功!"
|
|
35
|
+
```
|
|
19
36
|
|
|
20
|
-
|
|
37
|
+
## 发布选项
|
|
21
38
|
|
|
22
|
-
|
|
23
|
-
CLI -> 用户: "提示:选择平台"
|
|
24
|
-
用户 -> CLI: "选择官方或自托管"
|
|
25
|
-
CLI -> 用户: "打开浏览器进行身份验证"
|
|
26
|
-
用户 -> "Discuss Kit 平台": "登录并授权"
|
|
27
|
-
"Discuss Kit 平台" -> CLI: "提供访问令牌"
|
|
28
|
-
CLI -> CLI: "保存令牌供将来使用"
|
|
29
|
-
end
|
|
39
|
+
你有两种主要选项来托管文档,以满足对可见性和控制的不同需求。
|
|
30
40
|
|
|
31
|
-
|
|
32
|
-
"Discuss Kit 平台" -> CLI: "确认成功"
|
|
33
|
-
CLI -> 用户: "✅ 文档发布成功!"
|
|
34
|
-
```
|
|
41
|
+
### 官方平台
|
|
35
42
|
|
|
36
|
-
|
|
43
|
+
发布到官方托管平台 [docsmith.aigne.io](https://docsmith.aigne.io)。此选项免费,可使你的文档公开访问,推荐用于开源项目。
|
|
37
44
|
|
|
38
|
-
|
|
45
|
+
### 你自己的网站
|
|
39
46
|
|
|
40
|
-
|
|
41
|
-
<x-card data-title="官方平台" data-icon="lucide:globe">
|
|
42
|
-
发布到官方托管平台 docsmith.aigne.io。该选项免费,非常适合开源项目,并能让您的文档公开访问。
|
|
43
|
-
</x-card>
|
|
44
|
-
<x-card data-title="自托管平台" data-icon="lucide:server">
|
|
45
|
-
发布到您自己的 Discuss Kit 私有实例。这使您可以完全控制谁可以访问您的文档,适合内部或私有项目。
|
|
46
|
-
</x-card>
|
|
47
|
-
</x-cards>
|
|
47
|
+
通过运行 Discuss Kit 实例发布到你自己的网站。这使你可以完全控制谁能访问你的文档,适合内部或私有项目。你可以从[官方商店](https://www.arcblock.io/store/z8iZhf67n368m2k5a9fXvCL778jAnf3e5n2b)开始运行你自己的 Discuss Kit。
|
|
48
48
|
|
|
49
49
|
## 分步指南
|
|
50
50
|
|
|
@@ -52,27 +52,27 @@ CLI -> 用户: "✅ 文档发布成功!"
|
|
|
52
52
|
|
|
53
53
|
### 1. 运行发布命令
|
|
54
54
|
|
|
55
|
-
|
|
55
|
+
在终端中导航到项目根目录,并运行以下命令:
|
|
56
56
|
|
|
57
57
|
```bash
|
|
58
58
|
aigne doc publish
|
|
59
59
|
```
|
|
60
60
|
|
|
61
|
-
### 2.
|
|
61
|
+
### 2. 选择你的平台
|
|
62
62
|
|
|
63
|
-
|
|
63
|
+
如果你之前没有配置过发布目的地,系统将提示你在官方平台和自托管平台之间进行选择。请选择最适合你需求的选项。
|
|
64
64
|
|
|
65
65
|

|
|
66
66
|
|
|
67
|
-
|
|
67
|
+
如果你选择自己的网站,系统将要求你输入 Discuss Kit 实例的 URL。
|
|
68
68
|
|
|
69
|
-
### 3.
|
|
69
|
+
### 3. 认证你的账户
|
|
70
70
|
|
|
71
|
-
首次连接到新平台时,DocSmith
|
|
71
|
+
首次连接到新平台时,DocSmith 会自动打开浏览器窗口,以便你登录并授权 CLI。这是一个一次性步骤;你的访问令牌将保存在本地,用于将来对该平台的所有发布操作。
|
|
72
72
|
|
|
73
73
|
### 4. 确认
|
|
74
74
|
|
|
75
|
-
|
|
75
|
+
上传完成后,你将在终端看到一条成功消息,你的文档即已上线。
|
|
76
76
|
|
|
77
77
|
```
|
|
78
78
|
✅ 文档发布成功!
|
|
@@ -80,19 +80,20 @@ aigne doc publish
|
|
|
80
80
|
|
|
81
81
|
## 在 CI/CD 环境中发布
|
|
82
82
|
|
|
83
|
-
|
|
83
|
+
对于自动化工作流,你可以使用命令行参数或环境变量来绕过交互式提示。
|
|
84
84
|
|
|
85
|
-
|
|
|
86
|
-
|
|
87
|
-
|
|
|
88
|
-
|
|
|
89
|
-
|
|
|
85
|
+
| Method | Name | Description | Example |
|
|
86
|
+
| ---------- | ------------------------------ | ---------------------------------------------------------------------------------------- | ----------------------------------------------------------- |
|
|
87
|
+
| **Argument** | `--appUrl` | 直接指定你的 Discuss Kit 实例的 URL。 | `aigne doc publish --appUrl https://docs.mycompany.com` |
|
|
88
|
+
| **Env Var** | `DOC_DISCUSS_KIT_URL` | 设置目标平台 URL,覆盖任何其他配置。 | `export DOC_DISCUSS_KIT_URL=...` |
|
|
89
|
+
| **Env Var** | `DOC_DISCUSS_KIT_ACCESS_TOKEN` | 直接提供访问令牌,跳过交互式登录。 | `export DOC_DISCUSS_KIT_ACCESS_TOKEN=...` |
|
|
90
90
|
|
|
91
91
|
## 故障排除
|
|
92
92
|
|
|
93
|
-
|
|
93
|
+
如果你在发布过程中遇到问题,以下是一些常见原因及其解决方案:
|
|
94
94
|
|
|
95
|
-
-
|
|
96
|
-
-
|
|
95
|
+
- **连接错误**:如果提供的自有实例 URL 不正确或服务器无法访问,可能会发生此问题。请检查 URL 和你的网络连接。
|
|
96
|
+
- **无效的网站 URL**:提供的 URL 不是 ArcBlock 平台上的有效网站。要托管你的文档,你需要一个在该平台上运行的网站。你可以从访问 [Discuss Kit 商店](https://www.arcblock.io/store/z8iZhf67n368m2k5a9fXvCL778jAnf3e5n2b) 开始。
|
|
97
|
+
- **缺少必需组件**:目标网站必须安装 Discuss Kit 组件才能托管文档。如果缺少该组件,CLI 将返回错误并提供有关如何添加该组件的指导。你可以在 [Discuss Kit 文档](https://www.arcblock.io/docs/web3-kit/en/discuss-kit) 中找到相关说明。
|
|
97
98
|
|
|
98
|
-
|
|
99
|
+
如需完整的命令和选项列表,请参阅 [CLI 命令参考](./cli-reference.md)。
|