@aigne/doc-smith 0.8.11-beta.6 → 0.8.11-beta.7
This diff represents the content of publicly available package versions that have been released to one of the supported registries. The information contained in this diff is provided for informational purposes only and reflects changes between package versions as they appear in their respective public registries.
- package/.aigne/doc-smith/config.yaml +2 -0
- package/.aigne/doc-smith/output/structure-plan.json +2 -2
- package/.aigne/doc-smith/preferences.yml +28 -20
- package/.aigne/doc-smith/upload-cache.yaml +702 -0
- package/.release-please-manifest.json +1 -1
- package/CHANGELOG.md +13 -0
- package/README.md +1 -1
- package/agents/generate/document-structure-tools/add-document.mjs +35 -10
- package/agents/generate/document-structure-tools/delete-document.mjs +35 -12
- package/agents/generate/document-structure-tools/move-document.mjs +43 -17
- package/agents/generate/document-structure-tools/update-document.mjs +37 -10
- package/agents/generate/update-document-structure.yaml +1 -7
- package/agents/generate/user-review-document-structure.mjs +5 -4
- package/agents/translate/translate-document.yaml +1 -9
- package/agents/update/check-update-is-single.mjs +2 -1
- package/agents/update/document-tools/update-document-content.mjs +24 -14
- package/agents/update/fs-tools/glob.mjs +184 -0
- package/agents/update/fs-tools/grep.mjs +317 -0
- package/agents/update/fs-tools/read-file.mjs +307 -0
- package/agents/update/generate-document.yaml +4 -7
- package/agents/update/update-document-detail.yaml +6 -10
- package/agents/update/user-review-document.mjs +13 -13
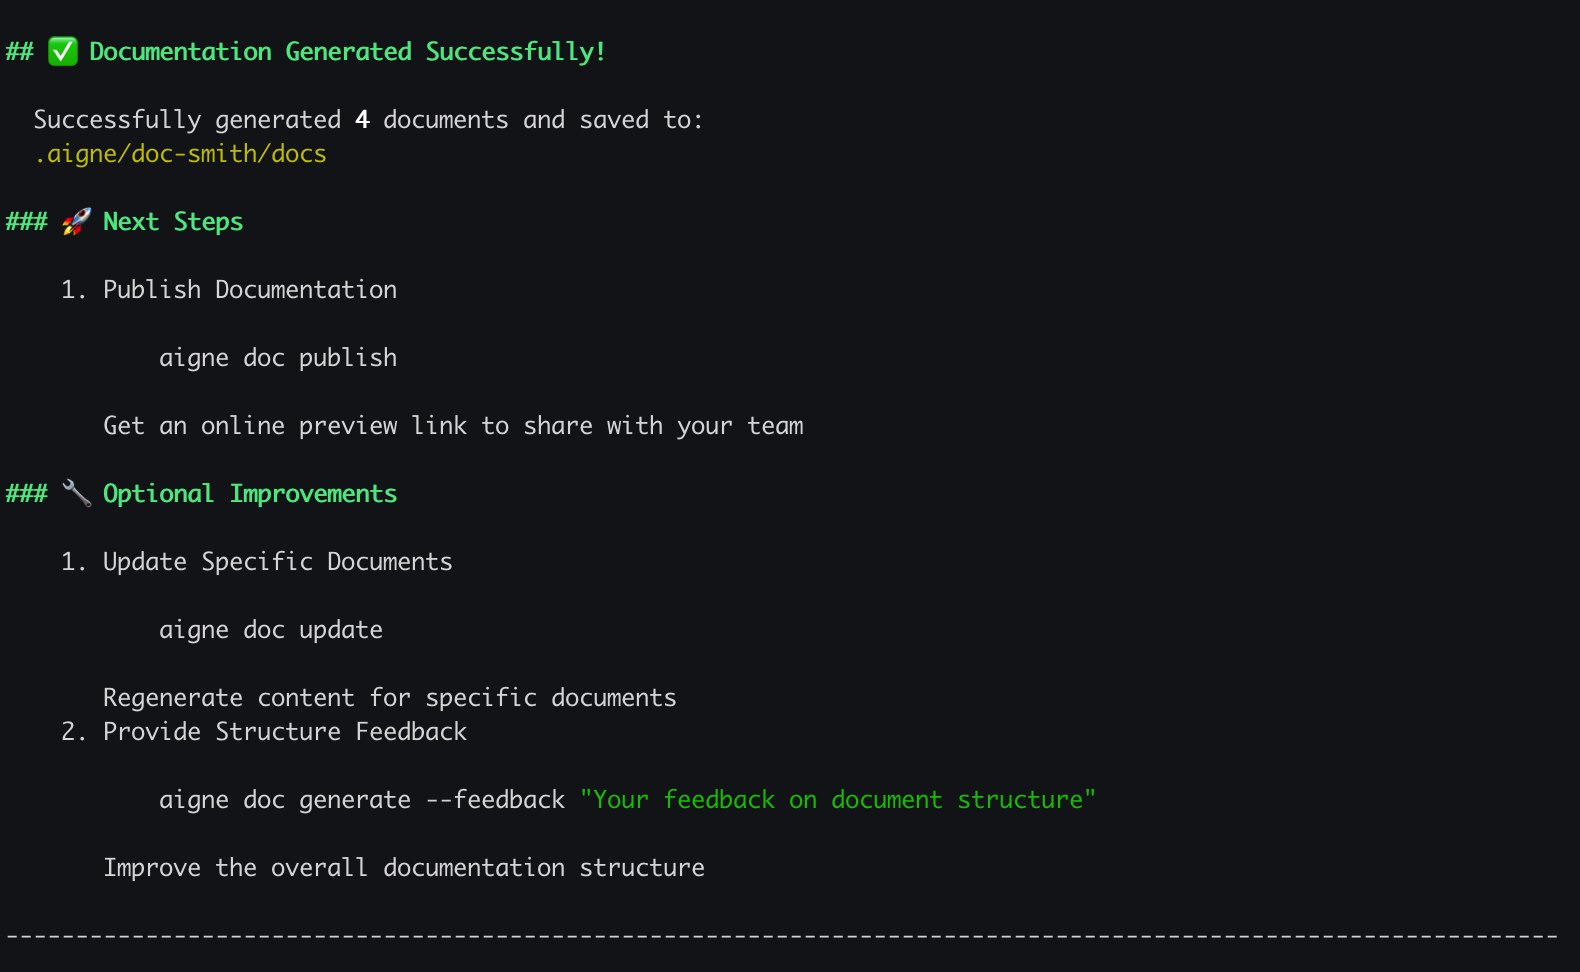
- package/assets/screenshots/doc-complete-setup.png +0 -0
- package/assets/screenshots/doc-generate-docs.png +0 -0
- package/assets/screenshots/doc-generate.png +0 -0
- package/assets/screenshots/doc-generated-successfully.png +0 -0
- package/assets/screenshots/doc-publish.png +0 -0
- package/assets/screenshots/doc-regenerate.png +0 -0
- package/assets/screenshots/doc-translate-langs.png +0 -0
- package/assets/screenshots/doc-translate.png +0 -0
- package/assets/screenshots/doc-update.png +0 -0
- package/docs/advanced-how-it-works.ja.md +31 -31
- package/docs/advanced-how-it-works.md +9 -9
- package/docs/advanced-how-it-works.zh-TW.md +24 -24
- package/docs/advanced-how-it-works.zh.md +20 -20
- package/docs/advanced-quality-assurance.ja.md +57 -61
- package/docs/advanced-quality-assurance.md +57 -61
- package/docs/advanced-quality-assurance.zh-TW.md +57 -61
- package/docs/advanced-quality-assurance.zh.md +57 -61
- package/docs/advanced.ja.md +8 -4
- package/docs/advanced.md +7 -3
- package/docs/advanced.zh-TW.md +9 -5
- package/docs/advanced.zh.md +9 -5
- package/docs/changelog.ja.md +206 -29
- package/docs/changelog.md +177 -0
- package/docs/changelog.zh-TW.md +229 -52
- package/docs/changelog.zh.md +204 -27
- package/docs/cli-reference.ja.md +82 -52
- package/docs/cli-reference.md +56 -26
- package/docs/cli-reference.zh-TW.md +82 -52
- package/docs/cli-reference.zh.md +70 -40
- package/docs/configuration-interactive-setup.ja.md +45 -42
- package/docs/configuration-interactive-setup.md +8 -5
- package/docs/configuration-interactive-setup.zh-TW.md +26 -23
- package/docs/configuration-interactive-setup.zh.md +25 -22
- package/docs/configuration-language-support.ja.md +33 -63
- package/docs/configuration-language-support.md +32 -62
- package/docs/configuration-language-support.zh-TW.md +35 -65
- package/docs/configuration-language-support.zh.md +32 -62
- package/docs/configuration-llm-setup.ja.md +25 -23
- package/docs/configuration-llm-setup.md +20 -18
- package/docs/configuration-llm-setup.zh-TW.md +21 -19
- package/docs/configuration-llm-setup.zh.md +20 -18
- package/docs/configuration-preferences.ja.md +67 -52
- package/docs/configuration-preferences.md +56 -41
- package/docs/configuration-preferences.zh-TW.md +69 -54
- package/docs/configuration-preferences.zh.md +68 -53
- package/docs/configuration.ja.md +65 -81
- package/docs/configuration.md +19 -35
- package/docs/configuration.zh-TW.md +62 -79
- package/docs/configuration.zh.md +50 -67
- package/docs/features-generate-documentation.ja.md +44 -69
- package/docs/features-generate-documentation.md +36 -61
- package/docs/features-generate-documentation.zh-TW.md +42 -67
- package/docs/features-generate-documentation.zh.md +41 -67
- package/docs/features-publish-your-docs.ja.md +36 -36
- package/docs/features-publish-your-docs.md +2 -2
- package/docs/features-publish-your-docs.zh-TW.md +21 -21
- package/docs/features-publish-your-docs.zh.md +23 -23
- package/docs/features-translate-documentation.ja.md +40 -31
- package/docs/features-translate-documentation.md +15 -6
- package/docs/features-translate-documentation.zh-TW.md +37 -28
- package/docs/features-translate-documentation.zh.md +23 -14
- package/docs/features-update-and-refine.ja.md +68 -118
- package/docs/features-update-and-refine.md +58 -108
- package/docs/features-update-and-refine.zh-TW.md +67 -116
- package/docs/features-update-and-refine.zh.md +64 -114
- package/docs/features.ja.md +29 -19
- package/docs/features.md +25 -15
- package/docs/features.zh-TW.md +28 -18
- package/docs/features.zh.md +31 -21
- package/docs/getting-started.ja.md +40 -43
- package/docs/getting-started.md +36 -39
- package/docs/getting-started.zh-TW.md +38 -41
- package/docs/getting-started.zh.md +45 -48
- package/docs/overview.ja.md +63 -11
- package/docs/overview.md +60 -8
- package/docs/overview.zh-TW.md +67 -15
- package/docs/overview.zh.md +62 -10
- package/media.md +9 -9
- package/package.json +1 -1
- package/prompts/detail/custom/custom-components.md +304 -188
- package/prompts/detail/document-rules.md +4 -4
- package/prompts/detail/generate-document.md +21 -8
- package/prompts/detail/update-document.md +8 -12
- package/prompts/structure/update-document-structure.md +12 -8
- package/prompts/utils/feedback-refiner.md +3 -3
- package/tests/agents/generate/document-structure-tools/move-document.test.mjs +9 -9
- package/tests/agents/generate/user-review-document-structure.test.mjs +29 -8
- package/tests/agents/update/document-tools/update-document-content.test.mjs +115 -112
- package/tests/agents/update/fs-tools/glob.test.mjs +438 -0
- package/tests/agents/update/fs-tools/grep.test.mjs +279 -0
- package/tests/agents/update/fs-tools/read-file.test.mjs +553 -0
- package/tests/agents/update/user-review-document.test.mjs +48 -27
- package/types/document-schema.mjs +5 -6
- package/types/document-structure-schema.mjs +20 -8
|
@@ -1,123 +1,120 @@
|
|
|
1
1
|
# はじめに
|
|
2
2
|
|
|
3
|
-
このガイドでは、AIGNE DocSmith
|
|
3
|
+
このガイドでは、AIGNE DocSmith をインストールし、プロジェクトを設定し、ソースコードから完全なドキュメント一式を数分で生成するための手順をステップバイステップで説明します。
|
|
4
4
|
|
|
5
5
|
## ステップ1:前提条件
|
|
6
6
|
|
|
7
|
-
始める前に、お使いのシステムにNode.js
|
|
7
|
+
始める前に、お使いのシステムに Node.js バージョン 20 以降がインストールされていることを確認してください。DocSmith は Node.js 環境で動作するコマンドラインツールです。インストールには、Node.js に付属している Node Package Manager (npm) の使用を推奨します。
|
|
8
8
|
|
|
9
|
-
|
|
10
|
-
|
|
11
|
-
以下に、さまざまなオペレーティングシステムにNode.jsをインストールするための簡単な手順を示します。
|
|
9
|
+
詳細なインストール手順については、公式の [Node.js ウェブサイト](https://nodejs.org/) を参照してください。一般的なオペレーティングシステム向けの簡単なガイドを以下に示します。
|
|
12
10
|
|
|
13
11
|
**Windows**
|
|
14
|
-
1.
|
|
15
|
-
2.
|
|
12
|
+
1. [Node.js ダウンロードページ](https://nodejs.org/en/download) から Windows インストーラー (`.msi`) をダウンロードします。
|
|
13
|
+
2. インストーラーを実行し、セットアップウィザードの指示に従います。
|
|
16
14
|
|
|
17
15
|
**macOS**
|
|
18
16
|
|
|
19
|
-
|
|
17
|
+
macOS のパッケージマネージャーである [Homebrew](https://brew.sh/) を使用したインストール方法を推奨します。
|
|
20
18
|
|
|
21
19
|
```bash Terminal icon=lucide:apple
|
|
22
|
-
# Homebrew
|
|
20
|
+
# Homebrew がまだインストールされていない場合はインストールします
|
|
23
21
|
/bin/bash -c "$(curl -fsSL https://raw.githubusercontent.com/Homebrew/install/HEAD/install.sh)"
|
|
24
22
|
|
|
25
|
-
# Node.jsをインストールします
|
|
23
|
+
# Node.js をインストールします
|
|
26
24
|
brew install node
|
|
27
25
|
```
|
|
28
26
|
|
|
29
|
-
または、[Node.jsウェブサイト](https://nodejs.org/)
|
|
27
|
+
または、[Node.js ウェブサイト](https://nodejs.org/) から直接 macOS インストーラー (`.pkg`) をダウンロードすることもできます。
|
|
30
28
|
|
|
31
29
|
**Linux**
|
|
32
30
|
|
|
33
|
-
Ubuntu
|
|
31
|
+
Debian および Ubuntu ベースのディストリビューションでは、次のコマンドを使用します。
|
|
34
32
|
|
|
35
33
|
```bash Terminal icon=lucide:laptop
|
|
36
|
-
sudo apt update
|
|
34
|
+
sudo apt-get update
|
|
35
|
+
sudo apt-get install -y ca-certificates curl gnupg
|
|
37
36
|
curl -fsSL https://deb.nodesource.com/setup_lts.x | sudo -E bash -
|
|
38
37
|
sudo apt-get install -y nodejs
|
|
39
38
|
```
|
|
40
39
|
|
|
41
|
-
CentOS
|
|
40
|
+
Red Hat、CentOS、および Fedora では、次のコマンドを使用します。
|
|
42
41
|
|
|
43
42
|
```bash Terminal icon=lucide:laptop
|
|
44
43
|
curl -fsSL https://rpm.nodesource.com/setup_lts.x | sudo bash -
|
|
45
44
|
sudo yum install nodejs
|
|
46
45
|
```
|
|
47
46
|
|
|
48
|
-
###
|
|
47
|
+
### インストールの確認
|
|
49
48
|
|
|
50
|
-
|
|
49
|
+
インストールが完了したら、ターミナルを開き、次のコマンドを実行して Node.js と npm が正しくインストールされていることを確認します。
|
|
51
50
|
|
|
52
51
|
```bash Terminal
|
|
53
52
|
node --version
|
|
54
53
|
npm --version
|
|
55
54
|
```
|
|
56
55
|
|
|
57
|
-
## ステップ2:AIGNE CLIのインストール
|
|
56
|
+
## ステップ2:AIGNE CLI のインストール
|
|
58
57
|
|
|
59
|
-
DocSmith
|
|
58
|
+
DocSmith ツールは、公式の AIGNE コマンドラインインターフェース (CLI) の一部として配布されています。npm を使用して、システムに CLI をグローバルにインストールします。
|
|
60
59
|
|
|
61
60
|
```bash Terminal icon=logos:npm
|
|
62
|
-
npm
|
|
61
|
+
npm install -g @aigne/cli
|
|
63
62
|
```
|
|
64
63
|
|
|
65
|
-
|
|
64
|
+
インストールが完了したら、ヘルプコマンドを実行して DocSmith が利用可能であることを確認します。
|
|
66
65
|
|
|
67
66
|
```bash Terminal
|
|
68
|
-
aigne doc
|
|
67
|
+
aigne doc --help
|
|
69
68
|
```
|
|
70
69
|
|
|
71
|
-
このコマンドを実行すると、DocSmith
|
|
70
|
+
このコマンドを実行すると、DocSmith のヘルプメニューが表示され、インストールが完了し、使用できる状態であることが確認できます。
|
|
72
71
|
|
|
73
72
|
## ステップ3:ドキュメントの生成
|
|
74
73
|
|
|
75
|
-
CLI
|
|
74
|
+
AIGNE CLI をインストールしたら、ドキュメントを生成できます。ターミナルでプロジェクトのルートディレクトリに移動し、次のコマンドを実行します。
|
|
76
75
|
|
|
77
76
|
```bash Terminal icon=lucide:sparkles
|
|
78
77
|
aigne doc generate
|
|
79
78
|
```
|
|
80
79
|
|
|
81
|
-
|
|
80
|
+

|
|
82
81
|
|
|
83
|
-
|
|
82
|
+
### 自動設定
|
|
84
83
|
|
|
85
|
-
|
|
84
|
+
新しいプロジェクトでこのコマンドを初めて実行すると、DocSmith は設定ファイルが存在しないことを検出し、プロセスをガイドするための対話型のセットアップウィザードを自動的に起動します。
|
|
86
85
|
|
|
87
|
-
|
|
86
|
+
ウィザードでは、ドキュメントの特性を定義するための一連の質問が表示されます。これには以下が含まれます。
|
|
88
87
|
|
|
89
|
-
|
|
90
|
-
|
|
91
|
-
|
|
92
|
-
|
|
93
|
-
|
|
88
|
+
* 主な目的とライティングスタイル。
|
|
89
|
+
* 対象読者(例:開発者、エンドユーザー)。
|
|
90
|
+
* 主要言語と翻訳用の追加言語。
|
|
91
|
+
* AI が分析するソースコードのパス。
|
|
92
|
+
* 生成されたドキュメントファイルの出力ディレクトリ。
|
|
94
93
|
|
|
95
|
-

|
|
96
95
|
|
|
97
|
-
|
|
96
|
+
プロンプトに回答すると、DocSmith は選択内容を設定ファイルに保存し、コードベースの分析を開始し、ドキュメント構造を計画し、コンテンツを生成します。
|
|
98
97
|
|
|
99
|
-

|
|
100
99
|
|
|
101
100
|
## ステップ4:出力の確認
|
|
102
101
|
|
|
103
|
-
|
|
104
|
-
|
|
105
|
-
|
|
102
|
+
生成プロセスが完了すると、ターミナルに確認メッセージが表示され、ドキュメントが正常に作成されたことが示されます。新しいドキュメントは、セットアップ時に指定した出力ディレクトリにあります。デフォルト設定を使用した場合は、`.aigne/doc-smith/docs` にあります。
|
|
106
103
|
|
|
107
|
-
|
|
104
|
+

|
|
108
105
|
|
|
109
106
|
## 次のステップ
|
|
110
107
|
|
|
111
|
-
|
|
108
|
+
最初のドキュメント一式が正常に生成されました。これで、より高度な機能やカスタマイズオプションを試す準備が整いました。
|
|
112
109
|
|
|
113
110
|
<x-cards>
|
|
114
111
|
<x-card data-title="コア機能" data-icon="lucide:box" data-href="/features">
|
|
115
|
-
|
|
112
|
+
ドキュメントの更新からオンラインでの公開まで、主要なコマンドと機能について学びます。
|
|
116
113
|
</x-card>
|
|
117
114
|
<x-card data-title="設定ガイド" data-icon="lucide:settings" data-href="/configuration">
|
|
118
|
-
|
|
115
|
+
設定ファイルを編集して、ドキュメントのスタイル、対象読者、言語を微調整する方法を学びます。
|
|
119
116
|
</x-card>
|
|
120
|
-
<x-card data-title="CLIコマンドリファレンス" data-icon="lucide:terminal" data-href="/cli-reference">
|
|
117
|
+
<x-card data-title="CLI コマンドリファレンス" data-icon="lucide:terminal" data-href="/cli-reference">
|
|
121
118
|
利用可能なすべての `aigne doc` コマンドとそのオプションの完全なリファレンスを取得します。
|
|
122
119
|
</x-card>
|
|
123
120
|
</x-cards>
|
package/docs/getting-started.md
CHANGED
|
@@ -1,53 +1,52 @@
|
|
|
1
1
|
# Getting Started
|
|
2
2
|
|
|
3
|
-
This guide provides a step-by-step walkthrough to install AIGNE DocSmith, configure a project, and generate a complete set of documentation from your source code.
|
|
3
|
+
This guide provides a step-by-step walkthrough to install AIGNE DocSmith, configure a project, and generate a complete set of documentation from your source code in minutes.
|
|
4
4
|
|
|
5
5
|
## Step 1: Prerequisites
|
|
6
6
|
|
|
7
|
-
Before you begin, ensure you have Node.js
|
|
7
|
+
Before you begin, ensure you have Node.js version 20 or higher installed on your system. DocSmith is a command-line tool that operates within the Node.js environment. We recommend using the Node Package Manager (npm), which is included with Node.js, for installation.
|
|
8
8
|
|
|
9
|
-
|
|
10
|
-
|
|
11
|
-
Here are brief instructions for installing Node.js on various operating systems.
|
|
9
|
+
For detailed installation instructions, please refer to the official [Node.js website](https://nodejs.org/). A brief guide for common operating systems is provided below.
|
|
12
10
|
|
|
13
11
|
**Windows**
|
|
14
|
-
1. Download the
|
|
15
|
-
2.
|
|
12
|
+
1. Download the Windows Installer (`.msi`) from the [Node.js downloads page](https://nodejs.org/en/download).
|
|
13
|
+
2. Execute the installer and follow the prompts in the setup wizard.
|
|
16
14
|
|
|
17
15
|
**macOS**
|
|
18
16
|
|
|
19
|
-
The recommended method is using [Homebrew](https://brew.sh/)
|
|
17
|
+
The recommended installation method is using [Homebrew](https://brew.sh/), a package manager for macOS.
|
|
20
18
|
|
|
21
19
|
```bash Terminal icon=lucide:apple
|
|
22
|
-
# Install Homebrew if
|
|
20
|
+
# Install Homebrew if it is not already installed
|
|
23
21
|
/bin/bash -c "$(curl -fsSL https://raw.githubusercontent.com/Homebrew/install/HEAD/install.sh)"
|
|
24
22
|
|
|
25
23
|
# Install Node.js
|
|
26
24
|
brew install node
|
|
27
25
|
```
|
|
28
26
|
|
|
29
|
-
Alternatively, you can download the `.pkg`
|
|
27
|
+
Alternatively, you can download the macOS Installer (`.pkg`) directly from the [Node.js website](https://nodejs.org/).
|
|
30
28
|
|
|
31
29
|
**Linux**
|
|
32
30
|
|
|
33
|
-
For Ubuntu
|
|
31
|
+
For Debian and Ubuntu-based distributions, use the following commands:
|
|
34
32
|
|
|
35
33
|
```bash Terminal icon=lucide:laptop
|
|
36
|
-
sudo apt update
|
|
34
|
+
sudo apt-get update
|
|
35
|
+
sudo apt-get install -y ca-certificates curl gnupg
|
|
37
36
|
curl -fsSL https://deb.nodesource.com/setup_lts.x | sudo -E bash -
|
|
38
37
|
sudo apt-get install -y nodejs
|
|
39
38
|
```
|
|
40
39
|
|
|
41
|
-
For CentOS
|
|
40
|
+
For Red Hat, CentOS, and Fedora, use the following commands:
|
|
42
41
|
|
|
43
42
|
```bash Terminal icon=lucide:laptop
|
|
44
43
|
curl -fsSL https://rpm.nodesource.com/setup_lts.x | sudo bash -
|
|
45
44
|
sudo yum install nodejs
|
|
46
45
|
```
|
|
47
46
|
|
|
48
|
-
###
|
|
47
|
+
### Verify Installation
|
|
49
48
|
|
|
50
|
-
After installation,
|
|
49
|
+
After the installation is complete, open your terminal and run the following commands to confirm that Node.js and npm are correctly installed:
|
|
51
50
|
|
|
52
51
|
```bash Terminal
|
|
53
52
|
node --version
|
|
@@ -56,66 +55,64 @@ npm --version
|
|
|
56
55
|
|
|
57
56
|
## Step 2: Install AIGNE CLI
|
|
58
57
|
|
|
59
|
-
The DocSmith tool is
|
|
58
|
+
The DocSmith tool is distributed as part of the official AIGNE Command Line Interface (CLI). Install the CLI globally on your system using npm:
|
|
60
59
|
|
|
61
60
|
```bash Terminal icon=logos:npm
|
|
62
|
-
npm
|
|
61
|
+
npm install -g @aigne/cli
|
|
63
62
|
```
|
|
64
63
|
|
|
65
|
-
|
|
64
|
+
Once the installation is finished, verify that DocSmith is available by running its help command:
|
|
66
65
|
|
|
67
66
|
```bash Terminal
|
|
68
|
-
aigne doc
|
|
67
|
+
aigne doc --help
|
|
69
68
|
```
|
|
70
69
|
|
|
71
|
-
This command
|
|
70
|
+
This command should display the help menu for DocSmith, confirming that it is installed and ready to use.
|
|
72
71
|
|
|
73
72
|
## Step 3: Generate Your Documentation
|
|
74
73
|
|
|
75
|
-
With the CLI installed, you can generate your
|
|
74
|
+
With the AIGNE CLI installed, you can now generate your documentation. Navigate to the root directory of your project in your terminal and execute the following command:
|
|
76
75
|
|
|
77
76
|
```bash Terminal icon=lucide:sparkles
|
|
78
77
|
aigne doc generate
|
|
79
78
|
```
|
|
80
79
|
|
|
81
|
-
|
|
80
|
+

|
|
82
81
|
|
|
83
|
-
|
|
82
|
+
### Automatic Configuration
|
|
84
83
|
|
|
85
|
-
|
|
84
|
+
The first time you run this command in a new project, DocSmith will detect that no configuration file exists and will automatically launch an interactive setup wizard to guide you through the process.
|
|
86
85
|
|
|
87
|
-
|
|
86
|
+
The wizard will ask a series of questions to define the characteristics of your documentation, including:
|
|
88
87
|
|
|
89
|
-
|
|
90
|
-
|
|
91
|
-
|
|
92
|
-
|
|
93
|
-
|
|
88
|
+
* The primary purpose and writing style.
|
|
89
|
+
* The intended target audience (e.g., developers, end-users).
|
|
90
|
+
* The primary language and any additional languages for translation.
|
|
91
|
+
* The source code paths for the AI to analyze.
|
|
92
|
+
* The output directory for the generated document files.
|
|
94
93
|
|
|
95
|
-

|
|
96
95
|
|
|
97
|
-
|
|
96
|
+
After you answer the prompts, DocSmith will save your choices to a configuration file, begin analyzing your codebase, plan the document structure, and generate the content.
|
|
98
97
|
|
|
99
|
-

|
|
100
99
|
|
|
101
100
|
## Step 4: Review Your Output
|
|
102
101
|
|
|
103
|
-
|
|
104
|
-
|
|
105
|
-

|
|
102
|
+
When the generation process is complete, a confirmation message will appear in your terminal, indicating the successful creation of your documents. Your new documentation is now located in the output directory you specified during setup. If you used the default setting, you can find it at `.aigne/doc-smith/docs`.
|
|
106
103
|
|
|
107
|
-
|
|
104
|
+

|
|
108
105
|
|
|
109
106
|
## What's Next?
|
|
110
107
|
|
|
111
|
-
|
|
108
|
+
You have successfully generated your first set of documents. Now you are ready to explore more advanced features and customization options.
|
|
112
109
|
|
|
113
110
|
<x-cards>
|
|
114
111
|
<x-card data-title="Core Features" data-icon="lucide:box" data-href="/features">
|
|
115
112
|
Explore the main commands and capabilities, from updating documents to publishing them online.
|
|
116
113
|
</x-card>
|
|
117
114
|
<x-card data-title="Configuration Guide" data-icon="lucide:settings" data-href="/configuration">
|
|
118
|
-
Learn how to fine-tune your documentation's style, audience, and languages by editing the
|
|
115
|
+
Learn how to fine-tune your documentation's style, audience, and languages by editing the configuration file.
|
|
119
116
|
</x-card>
|
|
120
117
|
<x-card data-title="CLI Command Reference" data-icon="lucide:terminal" data-href="/cli-reference">
|
|
121
118
|
Get a complete reference for all available `aigne doc` commands and their options.
|
|
@@ -1,53 +1,52 @@
|
|
|
1
|
-
#
|
|
1
|
+
# 開始使用
|
|
2
2
|
|
|
3
|
-
|
|
3
|
+
本指南提供逐步教學,引導您安裝 AIGNE DocSmith、設定專案,並在幾分鐘內從您的原始碼產生一套完整的文件。
|
|
4
4
|
|
|
5
|
-
## 步驟 1
|
|
5
|
+
## 步驟 1:前置準備
|
|
6
6
|
|
|
7
|
-
在開始之前,請確保您的系統上已安裝 Node.js
|
|
7
|
+
在開始之前,請確保您的系統上已安裝 Node.js 20 或更高版本。DocSmith 是一個在 Node.js 環境中運作的命令列工具。我們建議使用 Node.js 隨附的 Node Package Manager (npm) 進行安裝。
|
|
8
8
|
|
|
9
|
-
|
|
10
|
-
|
|
11
|
-
以下是在各種作業系統上安裝 Node.js 的簡要說明。
|
|
9
|
+
關於詳細的安裝說明,請參考官方的 [Node.js 網站](https://nodejs.org/)。以下為常見作業系統的簡要指南。
|
|
12
10
|
|
|
13
11
|
**Windows**
|
|
14
|
-
1.
|
|
15
|
-
2.
|
|
12
|
+
1. 從 [Node.js 下載頁面](https://nodejs.org/en/download) 下載 Windows 安裝程式 (`.msi`)。
|
|
13
|
+
2. 執行安裝程式並依照設定精靈中的提示操作。
|
|
16
14
|
|
|
17
15
|
**macOS**
|
|
18
16
|
|
|
19
|
-
|
|
17
|
+
建議的安裝方法是使用 [Homebrew](https://brew.sh/),這是一款適用於 macOS 的套件管理器。
|
|
20
18
|
|
|
21
19
|
```bash Terminal icon=lucide:apple
|
|
22
|
-
#
|
|
20
|
+
# 如果尚未安裝 Homebrew,請先安裝
|
|
23
21
|
/bin/bash -c "$(curl -fsSL https://raw.githubusercontent.com/Homebrew/install/HEAD/install.sh)"
|
|
24
22
|
|
|
25
23
|
# 安裝 Node.js
|
|
26
24
|
brew install node
|
|
27
25
|
```
|
|
28
26
|
|
|
29
|
-
|
|
27
|
+
或者,您也可以直接從 [Node.js 網站](https://nodejs.org/) 下載 macOS 安裝程式 (`.pkg`)。
|
|
30
28
|
|
|
31
29
|
**Linux**
|
|
32
30
|
|
|
33
|
-
|
|
31
|
+
對於 Debian 和基於 Ubuntu 的發行版,請使用以下指令:
|
|
34
32
|
|
|
35
33
|
```bash Terminal icon=lucide:laptop
|
|
36
|
-
sudo apt update
|
|
34
|
+
sudo apt-get update
|
|
35
|
+
sudo apt-get install -y ca-certificates curl gnupg
|
|
37
36
|
curl -fsSL https://deb.nodesource.com/setup_lts.x | sudo -E bash -
|
|
38
37
|
sudo apt-get install -y nodejs
|
|
39
38
|
```
|
|
40
39
|
|
|
41
|
-
對於 CentOS
|
|
40
|
+
對於 Red Hat、CentOS 和 Fedora,請使用以下指令:
|
|
42
41
|
|
|
43
42
|
```bash Terminal icon=lucide:laptop
|
|
44
43
|
curl -fsSL https://rpm.nodesource.com/setup_lts.x | sudo bash -
|
|
45
44
|
sudo yum install nodejs
|
|
46
45
|
```
|
|
47
46
|
|
|
48
|
-
###
|
|
47
|
+
### 驗證安裝
|
|
49
48
|
|
|
50
|
-
|
|
49
|
+
安裝完成後,開啟您的終端機並執行以下指令,以確認 Node.js 和 npm 已正確安裝:
|
|
51
50
|
|
|
52
51
|
```bash Terminal
|
|
53
52
|
node --version
|
|
@@ -56,68 +55,66 @@ npm --version
|
|
|
56
55
|
|
|
57
56
|
## 步驟 2:安裝 AIGNE CLI
|
|
58
57
|
|
|
59
|
-
DocSmith
|
|
58
|
+
DocSmith 工具是作為官方 AIGNE 命令列介面 (CLI) 的一部分發行的。請使用 npm 在您的系統上全域安裝 CLI:
|
|
60
59
|
|
|
61
60
|
```bash Terminal icon=logos:npm
|
|
62
|
-
npm
|
|
61
|
+
npm install -g @aigne/cli
|
|
63
62
|
```
|
|
64
63
|
|
|
65
|
-
|
|
64
|
+
安裝完成後,執行其幫助指令來驗證 DocSmith 是否可用:
|
|
66
65
|
|
|
67
66
|
```bash Terminal
|
|
68
|
-
aigne doc
|
|
67
|
+
aigne doc --help
|
|
69
68
|
```
|
|
70
69
|
|
|
71
|
-
|
|
70
|
+
此指令應顯示 DocSmith 的幫助選單,確認其已安裝並可供使用。
|
|
72
71
|
|
|
73
72
|
## 步驟 3:產生您的文件
|
|
74
73
|
|
|
75
|
-
安裝 CLI
|
|
74
|
+
安裝 AIGNE CLI 後,您現在可以產生您的文件了。在您的終端機中,導覽至專案的根目錄並執行以下指令:
|
|
76
75
|
|
|
77
76
|
```bash Terminal icon=lucide:sparkles
|
|
78
77
|
aigne doc generate
|
|
79
78
|
```
|
|
80
79
|
|
|
80
|
+
|
|
81
|
+
|
|
81
82
|
### 自動設定
|
|
82
83
|
|
|
83
|
-
|
|
84
|
+
當您首次在新專案中執行此指令時,DocSmith 會偵測到沒有設定檔存在,並會自動啟動一個互動式設定精靈來引導您完成整個過程。
|
|
85
|
+
|
|
86
|
+
該精靈會詢問一系列問題來定義您文件的特性,包括:
|
|
84
87
|
|
|
85
|
-
|
|
88
|
+
* 主要目的與寫作風格。
|
|
89
|
+
* 預期的目標受眾(例如,開發者、終端使用者)。
|
|
90
|
+
* 主要語言以及任何用於翻譯的其他語言。
|
|
91
|
+
* 供 AI 分析的原始碼路徑。
|
|
92
|
+
* 產生文件檔案的輸出目錄。
|
|
86
93
|
|
|
87
|
-
系統將會提示您回答一系列問題,以定義文件的特性,包括:
|
|
88
94
|
|
|
89
|
-
- 主要目的與風格。
|
|
90
|
-
- 預期的目標讀者。
|
|
91
|
-
- 主要語言以及任何用於翻譯的其他語言。
|
|
92
|
-
- 供 AI 分析的原始碼路徑。
|
|
93
|
-
- 產生文件的輸出目錄。
|
|
94
95
|
|
|
95
|
-
|
|
96
|
+
在您回答完提示後,DocSmith 會將您的選擇儲存到一個設定檔中,開始分析您的程式碼庫、規劃文件結構,並產生內容。
|
|
96
97
|
|
|
97
|
-
設定完成後,DocSmith 將會開始分析您的原始碼、規劃文件結構並產生內容。
|
|
98
98
|
|
|
99
|
-
|
|
100
99
|
|
|
101
100
|
## 步驟 4:檢視您的產出
|
|
102
101
|
|
|
103
|
-
|
|
102
|
+
當產生過程完成後,您的終端機中會出現一則確認訊息,表示您的文件已成功建立。您的新文件現在位於您在設定過程中指定的輸出目錄中。如果您使用預設設定,可以在 `.aigne/doc-smith/docs` 中找到它。
|
|
104
103
|
|
|
105
|
-

|
|
106
104
|
|
|
107
|
-
您的新文件現在位於您在設定過程中指定的輸出目錄中。預設位置為 `.aigne/doc-smith/docs`。
|
|
108
105
|
|
|
109
|
-
##
|
|
106
|
+
## 下一步?
|
|
110
107
|
|
|
111
|
-
|
|
108
|
+
您已成功產生第一套文件。現在,您可以開始探索更進階的功能和自訂選項。
|
|
112
109
|
|
|
113
110
|
<x-cards>
|
|
114
111
|
<x-card data-title="核心功能" data-icon="lucide:box" data-href="/features">
|
|
115
112
|
探索主要指令與功能,從更新文件到線上發佈。
|
|
116
113
|
</x-card>
|
|
117
114
|
<x-card data-title="設定指南" data-icon="lucide:settings" data-href="/configuration">
|
|
118
|
-
|
|
115
|
+
學習如何透過編輯設定檔來微調文件的風格、受眾和語言。
|
|
119
116
|
</x-card>
|
|
120
117
|
<x-card data-title="CLI 指令參考" data-icon="lucide:terminal" data-href="/cli-reference">
|
|
121
|
-
|
|
118
|
+
取得所有可用 `aigne doc` 指令及其選項的完整參考。
|
|
122
119
|
</x-card>
|
|
123
120
|
</x-cards>
|