optexity 0.1.0__tar.gz
This diff represents the content of publicly available package versions that have been released to one of the supported registries. The information contained in this diff is provided for informational purposes only and reflects changes between package versions as they appear in their respective public registries.
- optexity-0.1.0/LICENSE +21 -0
- optexity-0.1.0/PKG-INFO +313 -0
- optexity-0.1.0/README.md +288 -0
- optexity-0.1.0/optexity/__init__.py +14 -0
- optexity-0.1.0/optexity/cli.py +82 -0
- optexity-0.1.0/optexity/exceptions.py +6 -0
- optexity-0.1.0/optexity/onepassword_integration.py +33 -0
- optexity-0.1.0/optexity/test.py +88 -0
- optexity-0.1.0/optexity.egg-info/PKG-INFO +313 -0
- optexity-0.1.0/optexity.egg-info/SOURCES.txt +14 -0
- optexity-0.1.0/optexity.egg-info/dependency_links.txt +1 -0
- optexity-0.1.0/optexity.egg-info/entry_points.txt +2 -0
- optexity-0.1.0/optexity.egg-info/requires.txt +16 -0
- optexity-0.1.0/optexity.egg-info/top_level.txt +1 -0
- optexity-0.1.0/pyproject.toml +56 -0
- optexity-0.1.0/setup.cfg +4 -0
optexity-0.1.0/LICENSE
ADDED
|
@@ -0,0 +1,21 @@
|
|
|
1
|
+
MIT License
|
|
2
|
+
|
|
3
|
+
Copyright (c) 2025 Optexity
|
|
4
|
+
|
|
5
|
+
Permission is hereby granted, free of charge, to any person obtaining a copy
|
|
6
|
+
of this software and associated documentation files (the "Software"), to deal
|
|
7
|
+
in the Software without restriction, including without limitation the rights
|
|
8
|
+
to use, copy, modify, merge, publish, distribute, sublicense, and/or sell
|
|
9
|
+
copies of the Software, and to permit persons to whom the Software is
|
|
10
|
+
furnished to do so, subject to the following conditions:
|
|
11
|
+
|
|
12
|
+
The above copyright notice and this permission notice shall be included in all
|
|
13
|
+
copies or substantial portions of the Software.
|
|
14
|
+
|
|
15
|
+
THE SOFTWARE IS PROVIDED "AS IS", WITHOUT WARRANTY OF ANY KIND, EXPRESS OR
|
|
16
|
+
IMPLIED, INCLUDING BUT NOT LIMITED TO THE WARRANTIES OF MERCHANTABILITY,
|
|
17
|
+
FITNESS FOR A PARTICULAR PURPOSE AND NONINFRINGEMENT. IN NO EVENT SHALL THE
|
|
18
|
+
AUTHORS OR COPYRIGHT HOLDERS BE LIABLE FOR ANY CLAIM, DAMAGES OR OTHER
|
|
19
|
+
LIABILITY, WHETHER IN AN ACTION OF CONTRACT, TORT OR OTHERWISE, ARISING FROM,
|
|
20
|
+
OUT OF OR IN CONNECTION WITH THE SOFTWARE OR THE USE OR OTHER DEALINGS IN THE
|
|
21
|
+
SOFTWARE.
|
optexity-0.1.0/PKG-INFO
ADDED
|
@@ -0,0 +1,313 @@
|
|
|
1
|
+
Metadata-Version: 2.4
|
|
2
|
+
Name: optexity
|
|
3
|
+
Version: 0.1.0
|
|
4
|
+
Summary: Optexity is a platform for building and running browser and computer agents.
|
|
5
|
+
Author-email: Optexity <support@optexity.com>
|
|
6
|
+
Requires-Python: >=3.11
|
|
7
|
+
Description-Content-Type: text/markdown
|
|
8
|
+
License-File: LICENSE
|
|
9
|
+
Requires-Dist: pydantic>=2
|
|
10
|
+
Requires-Dist: pydantic-settings
|
|
11
|
+
Requires-Dist: optexity-browser-use>=0.9.5
|
|
12
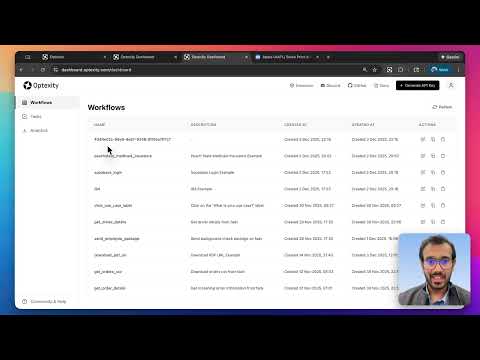
|
+
Requires-Dist: fastapi
|
|
13
|
+
Requires-Dist: httpx
|
|
14
|
+
Requires-Dist: aiofiles
|
|
15
|
+
Requires-Dist: async-lru
|
|
16
|
+
Requires-Dist: playwright
|
|
17
|
+
Requires-Dist: patchright
|
|
18
|
+
Requires-Dist: tokencost
|
|
19
|
+
Requires-Dist: onepassword-sdk
|
|
20
|
+
Provides-Extra: dev
|
|
21
|
+
Requires-Dist: black; extra == "dev"
|
|
22
|
+
Requires-Dist: isort; extra == "dev"
|
|
23
|
+
Requires-Dist: pre-commit; extra == "dev"
|
|
24
|
+
Dynamic: license-file
|
|
25
|
+
|
|
26
|
+
# Optexity
|
|
27
|
+
|
|
28
|
+
**Build custom browser agents** with AI-powered automation. Record browser interactions, extract data, and run complex workflows via a simple API. You can extract data from websites, fill out forms, do QA testing, and more.
|
|
29
|
+
|
|
30
|
+
## Features
|
|
31
|
+
|
|
32
|
+
- 🎯 **Visual Recording**: Record browser interactions with the Optexity Recorder Chrome extension
|
|
33
|
+
- 🤖 **AI-Powered**: Uses LLMs to handle dynamic content and find elements intelligently
|
|
34
|
+
- 📊 **Data Extraction**: Extract structured data from web pages using LLM-based extraction
|
|
35
|
+
- 🔄 **Workflow Automation**: Chain multiple actions together for complex browser workflows
|
|
36
|
+
- 🚀 **API-First**: Run automations via REST API with simple JSON requests
|
|
37
|
+
- 🎨 **Dashboard**: Manage and monitor your automations through the Optexity dashboard
|
|
38
|
+
|
|
39
|
+
## Quick Start
|
|
40
|
+
|
|
41
|
+
### 1. Create an Account
|
|
42
|
+
|
|
43
|
+
Head to [dashboard.optexity.com](https://dashboard.optexity.com) and sign up for a free account.
|
|
44
|
+
|
|
45
|
+
### 2. Get Your API Key
|
|
46
|
+
|
|
47
|
+
Once logged in, navigate to the **API Keys** section in your dashboard and create a new key.
|
|
48
|
+
|
|
49
|
+
### 3. Install the Recorder Extension
|
|
50
|
+
|
|
51
|
+
Install the **Optexity Recorder** extension from the [Chrome Web Store](https://chromewebstore.google.com/detail/optexity-recorder/pbaganbicadeoacahamnbgohafchgakp). This extension captures your browser interactions and converts them into automation workflows.
|
|
52
|
+
|
|
53
|
+
## Installation
|
|
54
|
+
|
|
55
|
+
### Prerequisites
|
|
56
|
+
|
|
57
|
+
- Python 3.11+
|
|
58
|
+
- Node.js 18+ (included with Conda option)
|
|
59
|
+
- Git
|
|
60
|
+
|
|
61
|
+
### Step 1: Clone the Repository
|
|
62
|
+
|
|
63
|
+
```bash
|
|
64
|
+
git clone git@github.com:Optexity/optexity.git
|
|
65
|
+
cd optexity
|
|
66
|
+
./update_submodule.sh
|
|
67
|
+
```
|
|
68
|
+
|
|
69
|
+
### Step 2: Create and Activate a Python Environment
|
|
70
|
+
|
|
71
|
+
Choose **one** of the options below.
|
|
72
|
+
|
|
73
|
+
#### Option A – Conda (includes Python 3.11 and Node.js)
|
|
74
|
+
|
|
75
|
+
```bash
|
|
76
|
+
conda create -n optexity python=3.11 nodejs
|
|
77
|
+
conda activate optexity
|
|
78
|
+
```
|
|
79
|
+
|
|
80
|
+
Install miniconda here: https://docs.conda.io/projects/conda/en/stable/user-guide/install/index.html#installing-in-silent-mode
|
|
81
|
+
|
|
82
|
+
#### Option B – Python `venv`
|
|
83
|
+
|
|
84
|
+
```bash
|
|
85
|
+
python3 -m venv .venv
|
|
86
|
+
source .venv/bin/activate
|
|
87
|
+
```
|
|
88
|
+
|
|
89
|
+
> If you pick `venv`, ensure Node.js 18+ is already available on your machine before continuing.
|
|
90
|
+
|
|
91
|
+
### Step 3: Install Dependencies
|
|
92
|
+
|
|
93
|
+
Run everything from the repository root:
|
|
94
|
+
|
|
95
|
+
```bash
|
|
96
|
+
pip install -e "external/browser-use"
|
|
97
|
+
pip install -e .
|
|
98
|
+
playwright install --with-deps chromium chrome
|
|
99
|
+
patchright install chromium chrome
|
|
100
|
+
pre-commit install --install-hooks
|
|
101
|
+
pre-commit install --hook-type pre-push
|
|
102
|
+
```
|
|
103
|
+
|
|
104
|
+
### Step 4: Configure Your Environment
|
|
105
|
+
|
|
106
|
+
Optexity reads configuration from a standard `.env` file via the `ENV_PATH` environment variable.
|
|
107
|
+
|
|
108
|
+
Create a `.env` file in the repo root:
|
|
109
|
+
|
|
110
|
+
```bash
|
|
111
|
+
touch .env
|
|
112
|
+
```
|
|
113
|
+
|
|
114
|
+
Add the required values:
|
|
115
|
+
|
|
116
|
+
```bash
|
|
117
|
+
API_KEY=YOUR_OPTEXITY_API_KEY # API key used for authenticated requests
|
|
118
|
+
GOOGLE_API_KEY=YOUR_GOOGLE_API_KEY # API key used for Google Gemini
|
|
119
|
+
DEPLOYMENT=dev # or "prod" in production
|
|
120
|
+
```
|
|
121
|
+
|
|
122
|
+
You can get your free Google Gemini API key from the [Google AI Studio Console](https://aistudio.google.com).
|
|
123
|
+
|
|
124
|
+
Then export `ENV_PATH` when running processes that rely on these settings:
|
|
125
|
+
|
|
126
|
+
```bash
|
|
127
|
+
export ENV_PATH=.env
|
|
128
|
+
```
|
|
129
|
+
|
|
130
|
+
> If `ENV_PATH` is not set, the inference server will try to start with defaults and log a warning. For normal usage you should always point `ENV_PATH` at a real `.env` file.
|
|
131
|
+
|
|
132
|
+
## Recording Your First Automation
|
|
133
|
+
|
|
134
|
+
The fastest way to create an automation is by recording your actions directly in the browser.
|
|
135
|
+
|
|
136
|
+
### Steps
|
|
137
|
+
|
|
138
|
+
1. **Navigate to the target website**: Open Chrome and go to the website you want to automate (e.g., `https://stockanalysis.com/`)
|
|
139
|
+
|
|
140
|
+
2. **Start capturing**: Click the Optexity Recorder extension icon and hit **Start Capture**
|
|
141
|
+
|
|
142
|
+
3. **Perform your actions**:
|
|
143
|
+
- Click on the "Search" button
|
|
144
|
+
- Enter the stock symbol in the search bar
|
|
145
|
+
- Click on the first result in the search results
|
|
146
|
+
|
|
147
|
+
4. **Stop and save**: When finished, click **Complete Capture**. The automation is automatically saved to your dashboard as a JSON file.
|
|
148
|
+
|
|
149
|
+
### Recording Tips
|
|
150
|
+
|
|
151
|
+
- Perform actions slowly and deliberately for better accuracy
|
|
152
|
+
- Avoid unnecessary scrolling or hovering
|
|
153
|
+
- The recorder captures clicks, text input, and form selections
|
|
154
|
+
|
|
155
|
+
## Running Your Automation
|
|
156
|
+
|
|
157
|
+
### Start the Inference Server
|
|
158
|
+
|
|
159
|
+
The primary way to run browser automations locally is via the inference child process server.
|
|
160
|
+
|
|
161
|
+
From the repository root:
|
|
162
|
+
|
|
163
|
+
```bash
|
|
164
|
+
ENV_PATH=.env python optexity/inference/child_process.py --port 9000 --child_process_id 0
|
|
165
|
+
```
|
|
166
|
+
|
|
167
|
+
Key parameters:
|
|
168
|
+
|
|
169
|
+
- **`--port`**: HTTP port the local inference server listens on (e.g. `9000`).
|
|
170
|
+
- **`--child_process_id`**: Integer identifier for this worker. Use different IDs if you run multiple workers in parallel.
|
|
171
|
+
|
|
172
|
+
When this process starts, it exposes:
|
|
173
|
+
|
|
174
|
+
- `GET /health` – health and queue status
|
|
175
|
+
- `GET /is_task_running` – whether a task is currently executing
|
|
176
|
+
- `POST /inference` – main endpoint to allocate and execute tasks
|
|
177
|
+
|
|
178
|
+
### Call the `/inference` Endpoint
|
|
179
|
+
|
|
180
|
+
With the server running on `http://localhost:9000`, you can allocate a task by sending an `InferenceRequest` to `/inference`.
|
|
181
|
+
|
|
182
|
+
#### Request Schema
|
|
183
|
+
|
|
184
|
+
- **`endpoint_name`**: Name of the automation endpoint to execute. This must match a recording/automation defined in the Optexity dashboard.
|
|
185
|
+
- **`input_parameters`**: `dict[str, list[str]]` – all input values for the automation, as lists of strings.
|
|
186
|
+
- **`unique_parameter_names`**: `list[str]` – subset of keys from `input_parameters` that uniquely identify this task (used for deduplication and validation). Only one task with the same `unique_parameter_names` will be allocated. If no `unique_parameter_names` are provided, the task will be allocated immediately.
|
|
187
|
+
|
|
188
|
+
#### Example `curl` Request
|
|
189
|
+
|
|
190
|
+
```bash
|
|
191
|
+
curl -X POST http://localhost:9000/inference \
|
|
192
|
+
-H "Content-Type: application/json" \
|
|
193
|
+
-d '{
|
|
194
|
+
"endpoint_name": "extract_stock_price",
|
|
195
|
+
"input_parameters": {
|
|
196
|
+
"search_term": ["NVDA"]
|
|
197
|
+
},
|
|
198
|
+
"unique_parameter_names": []
|
|
199
|
+
}'
|
|
200
|
+
```
|
|
201
|
+
|
|
202
|
+
On success, the inference server:
|
|
203
|
+
|
|
204
|
+
1. Forwards the request to your control plane at `api.optexity.com` using `INFERENCE_ENDPOINT` (defaults to `api/v1/inference`).
|
|
205
|
+
2. Receives a serialized `Task` object from the control plane.
|
|
206
|
+
3. Enqueues that `Task` locally and starts processing it in the background.
|
|
207
|
+
4. Returns a `202 Accepted` response:
|
|
208
|
+
|
|
209
|
+
```json
|
|
210
|
+
{
|
|
211
|
+
"success": true,
|
|
212
|
+
"message": "Task has been allocated"
|
|
213
|
+
}
|
|
214
|
+
```
|
|
215
|
+
|
|
216
|
+
> Task execution (browser automation, screenshots, outputs, etc.) happens asynchronously in the background worker. You can see it running locally in your browser.
|
|
217
|
+
|
|
218
|
+
### Monitor Execution
|
|
219
|
+
|
|
220
|
+
You can monitor the task on the dashboard. It will show the status, errors, outputs, and all the downloaded files.
|
|
221
|
+
|
|
222
|
+
## Video Tutorial
|
|
223
|
+
|
|
224
|
+
[](https://www.youtube.com/watch?v=q51r3idYtxo)
|
|
225
|
+
|
|
226
|
+
## Documentation
|
|
227
|
+
|
|
228
|
+
For detailed documentation, visit our [documentation site](https://docs.optexity.com):
|
|
229
|
+
|
|
230
|
+
- [Recording First Automation](https://docs.optexity.com/docs/getting_started/recording-first-inference)
|
|
231
|
+
- [Running First Inference](https://docs.optexity.com/docs/getting_started/running-first-inference)
|
|
232
|
+
- [Local Setup](https://docs.optexity.com/docs/building-automations/local-setup)
|
|
233
|
+
- [Building Automations](https://docs.optexity.com/docs/building-automations/quickstart)
|
|
234
|
+
- [API Reference](https://docs.optexity.com/docs/api-reference/introduction)
|
|
235
|
+
|
|
236
|
+
## Roadmap
|
|
237
|
+
|
|
238
|
+
We're actively working on improving Optexity. Here's what's coming:
|
|
239
|
+
|
|
240
|
+
- 🔜 **Self Improvement**: Agent adaption using self exploration
|
|
241
|
+
- 🔜 **More Action Types**: Additional interaction and extraction capabilities
|
|
242
|
+
- 🔜 **Performance Optimizations**: Faster execution and reduced resource usage
|
|
243
|
+
- 🔜 **Advanced Scheduling**: Built-in task scheduling and cron support
|
|
244
|
+
- 🔜 **Cloud Deployment**: Simplified cloud deployment options
|
|
245
|
+
|
|
246
|
+
Have ideas or feature requests? [Open an issue](https://github.com/Optexity/optexity/issues) or [join our Discord](https://discord.gg/VsRSAZSw7m) to discuss!
|
|
247
|
+
|
|
248
|
+
## Contributing
|
|
249
|
+
|
|
250
|
+
We welcome contributions! Here's how you can help:
|
|
251
|
+
|
|
252
|
+
### Reporting Issues
|
|
253
|
+
|
|
254
|
+
Found a bug or have a feature request? Please [open an issue](https://github.com/Optexity/optexity/issues) on GitHub. Include:
|
|
255
|
+
|
|
256
|
+
- A clear description of the problem
|
|
257
|
+
- Steps to reproduce
|
|
258
|
+
- Expected vs actual behavior
|
|
259
|
+
- Environment details (OS, Python version, etc.)
|
|
260
|
+
|
|
261
|
+
### Discussions
|
|
262
|
+
|
|
263
|
+
Have questions, ideas, or want to discuss the project? Use [GitHub Discussions](https://github.com/Optexity/optexity/discussions) to:
|
|
264
|
+
|
|
265
|
+
- Ask questions
|
|
266
|
+
- Share ideas
|
|
267
|
+
- Discuss best practices
|
|
268
|
+
- Get help from the community
|
|
269
|
+
|
|
270
|
+
### Community
|
|
271
|
+
|
|
272
|
+
Join our Discord community to:
|
|
273
|
+
|
|
274
|
+
- Chat with the founders directly
|
|
275
|
+
- Get real-time support
|
|
276
|
+
- Share your automations
|
|
277
|
+
- Connect with other users
|
|
278
|
+
|
|
279
|
+
[**Join Discord →**](https://discord.gg/VsRSAZSw7m)
|
|
280
|
+
|
|
281
|
+
### Development Setup
|
|
282
|
+
|
|
283
|
+
1. Fork the repository
|
|
284
|
+
2. Create a feature branch (`git checkout -b feature/amazing-feature`)
|
|
285
|
+
3. Make your changes
|
|
286
|
+
4. Run pre-commit checks: `pre-commit run --all-files`
|
|
287
|
+
5. Commit your changes (`git commit -m 'Add some amazing feature'`)
|
|
288
|
+
6. Push to the branch (`git push origin feature/amazing-feature`)
|
|
289
|
+
7. Open a Pull Request
|
|
290
|
+
|
|
291
|
+
## Examples
|
|
292
|
+
|
|
293
|
+
Check out our examples directory for sample automations:
|
|
294
|
+
|
|
295
|
+
- [I94 extraction](https://docs.optexity.com/examples/data_extraction/i94)
|
|
296
|
+
- [Healthcare Form Automation](https://docs.optexity.com/examples/healthcare/peachstate-medicaid)
|
|
297
|
+
- [QA Testing](https://docs.optexity.com/examples/qa_testing/supabase-login)
|
|
298
|
+
|
|
299
|
+
## License
|
|
300
|
+
|
|
301
|
+
This project is licensed under the terms specified in the [LICENSE](LICENSE) file.
|
|
302
|
+
|
|
303
|
+
## Support
|
|
304
|
+
|
|
305
|
+
- 📖 [Documentation](https://docs.optexity.com)
|
|
306
|
+
- 💬 [Discord Community](https://discord.gg/VsRSAZSw7m)
|
|
307
|
+
- 🐛 [Report Issues](https://github.com/Optexity/optexity/issues)
|
|
308
|
+
- 💭 [Discussions](https://github.com/Optexity/optexity/discussions)
|
|
309
|
+
- 📧 [Email Support](mailto:founders@optexity.com)
|
|
310
|
+
|
|
311
|
+
---
|
|
312
|
+
|
|
313
|
+
Made with ❤️ by the Optexity team
|
optexity-0.1.0/README.md
ADDED
|
@@ -0,0 +1,288 @@
|
|
|
1
|
+
# Optexity
|
|
2
|
+
|
|
3
|
+
**Build custom browser agents** with AI-powered automation. Record browser interactions, extract data, and run complex workflows via a simple API. You can extract data from websites, fill out forms, do QA testing, and more.
|
|
4
|
+
|
|
5
|
+
## Features
|
|
6
|
+
|
|
7
|
+
- 🎯 **Visual Recording**: Record browser interactions with the Optexity Recorder Chrome extension
|
|
8
|
+
- 🤖 **AI-Powered**: Uses LLMs to handle dynamic content and find elements intelligently
|
|
9
|
+
- 📊 **Data Extraction**: Extract structured data from web pages using LLM-based extraction
|
|
10
|
+
- 🔄 **Workflow Automation**: Chain multiple actions together for complex browser workflows
|
|
11
|
+
- 🚀 **API-First**: Run automations via REST API with simple JSON requests
|
|
12
|
+
- 🎨 **Dashboard**: Manage and monitor your automations through the Optexity dashboard
|
|
13
|
+
|
|
14
|
+
## Quick Start
|
|
15
|
+
|
|
16
|
+
### 1. Create an Account
|
|
17
|
+
|
|
18
|
+
Head to [dashboard.optexity.com](https://dashboard.optexity.com) and sign up for a free account.
|
|
19
|
+
|
|
20
|
+
### 2. Get Your API Key
|
|
21
|
+
|
|
22
|
+
Once logged in, navigate to the **API Keys** section in your dashboard and create a new key.
|
|
23
|
+
|
|
24
|
+
### 3. Install the Recorder Extension
|
|
25
|
+
|
|
26
|
+
Install the **Optexity Recorder** extension from the [Chrome Web Store](https://chromewebstore.google.com/detail/optexity-recorder/pbaganbicadeoacahamnbgohafchgakp). This extension captures your browser interactions and converts them into automation workflows.
|
|
27
|
+
|
|
28
|
+
## Installation
|
|
29
|
+
|
|
30
|
+
### Prerequisites
|
|
31
|
+
|
|
32
|
+
- Python 3.11+
|
|
33
|
+
- Node.js 18+ (included with Conda option)
|
|
34
|
+
- Git
|
|
35
|
+
|
|
36
|
+
### Step 1: Clone the Repository
|
|
37
|
+
|
|
38
|
+
```bash
|
|
39
|
+
git clone git@github.com:Optexity/optexity.git
|
|
40
|
+
cd optexity
|
|
41
|
+
./update_submodule.sh
|
|
42
|
+
```
|
|
43
|
+
|
|
44
|
+
### Step 2: Create and Activate a Python Environment
|
|
45
|
+
|
|
46
|
+
Choose **one** of the options below.
|
|
47
|
+
|
|
48
|
+
#### Option A – Conda (includes Python 3.11 and Node.js)
|
|
49
|
+
|
|
50
|
+
```bash
|
|
51
|
+
conda create -n optexity python=3.11 nodejs
|
|
52
|
+
conda activate optexity
|
|
53
|
+
```
|
|
54
|
+
|
|
55
|
+
Install miniconda here: https://docs.conda.io/projects/conda/en/stable/user-guide/install/index.html#installing-in-silent-mode
|
|
56
|
+
|
|
57
|
+
#### Option B – Python `venv`
|
|
58
|
+
|
|
59
|
+
```bash
|
|
60
|
+
python3 -m venv .venv
|
|
61
|
+
source .venv/bin/activate
|
|
62
|
+
```
|
|
63
|
+
|
|
64
|
+
> If you pick `venv`, ensure Node.js 18+ is already available on your machine before continuing.
|
|
65
|
+
|
|
66
|
+
### Step 3: Install Dependencies
|
|
67
|
+
|
|
68
|
+
Run everything from the repository root:
|
|
69
|
+
|
|
70
|
+
```bash
|
|
71
|
+
pip install -e "external/browser-use"
|
|
72
|
+
pip install -e .
|
|
73
|
+
playwright install --with-deps chromium chrome
|
|
74
|
+
patchright install chromium chrome
|
|
75
|
+
pre-commit install --install-hooks
|
|
76
|
+
pre-commit install --hook-type pre-push
|
|
77
|
+
```
|
|
78
|
+
|
|
79
|
+
### Step 4: Configure Your Environment
|
|
80
|
+
|
|
81
|
+
Optexity reads configuration from a standard `.env` file via the `ENV_PATH` environment variable.
|
|
82
|
+
|
|
83
|
+
Create a `.env` file in the repo root:
|
|
84
|
+
|
|
85
|
+
```bash
|
|
86
|
+
touch .env
|
|
87
|
+
```
|
|
88
|
+
|
|
89
|
+
Add the required values:
|
|
90
|
+
|
|
91
|
+
```bash
|
|
92
|
+
API_KEY=YOUR_OPTEXITY_API_KEY # API key used for authenticated requests
|
|
93
|
+
GOOGLE_API_KEY=YOUR_GOOGLE_API_KEY # API key used for Google Gemini
|
|
94
|
+
DEPLOYMENT=dev # or "prod" in production
|
|
95
|
+
```
|
|
96
|
+
|
|
97
|
+
You can get your free Google Gemini API key from the [Google AI Studio Console](https://aistudio.google.com).
|
|
98
|
+
|
|
99
|
+
Then export `ENV_PATH` when running processes that rely on these settings:
|
|
100
|
+
|
|
101
|
+
```bash
|
|
102
|
+
export ENV_PATH=.env
|
|
103
|
+
```
|
|
104
|
+
|
|
105
|
+
> If `ENV_PATH` is not set, the inference server will try to start with defaults and log a warning. For normal usage you should always point `ENV_PATH` at a real `.env` file.
|
|
106
|
+
|
|
107
|
+
## Recording Your First Automation
|
|
108
|
+
|
|
109
|
+
The fastest way to create an automation is by recording your actions directly in the browser.
|
|
110
|
+
|
|
111
|
+
### Steps
|
|
112
|
+
|
|
113
|
+
1. **Navigate to the target website**: Open Chrome and go to the website you want to automate (e.g., `https://stockanalysis.com/`)
|
|
114
|
+
|
|
115
|
+
2. **Start capturing**: Click the Optexity Recorder extension icon and hit **Start Capture**
|
|
116
|
+
|
|
117
|
+
3. **Perform your actions**:
|
|
118
|
+
- Click on the "Search" button
|
|
119
|
+
- Enter the stock symbol in the search bar
|
|
120
|
+
- Click on the first result in the search results
|
|
121
|
+
|
|
122
|
+
4. **Stop and save**: When finished, click **Complete Capture**. The automation is automatically saved to your dashboard as a JSON file.
|
|
123
|
+
|
|
124
|
+
### Recording Tips
|
|
125
|
+
|
|
126
|
+
- Perform actions slowly and deliberately for better accuracy
|
|
127
|
+
- Avoid unnecessary scrolling or hovering
|
|
128
|
+
- The recorder captures clicks, text input, and form selections
|
|
129
|
+
|
|
130
|
+
## Running Your Automation
|
|
131
|
+
|
|
132
|
+
### Start the Inference Server
|
|
133
|
+
|
|
134
|
+
The primary way to run browser automations locally is via the inference child process server.
|
|
135
|
+
|
|
136
|
+
From the repository root:
|
|
137
|
+
|
|
138
|
+
```bash
|
|
139
|
+
ENV_PATH=.env python optexity/inference/child_process.py --port 9000 --child_process_id 0
|
|
140
|
+
```
|
|
141
|
+
|
|
142
|
+
Key parameters:
|
|
143
|
+
|
|
144
|
+
- **`--port`**: HTTP port the local inference server listens on (e.g. `9000`).
|
|
145
|
+
- **`--child_process_id`**: Integer identifier for this worker. Use different IDs if you run multiple workers in parallel.
|
|
146
|
+
|
|
147
|
+
When this process starts, it exposes:
|
|
148
|
+
|
|
149
|
+
- `GET /health` – health and queue status
|
|
150
|
+
- `GET /is_task_running` – whether a task is currently executing
|
|
151
|
+
- `POST /inference` – main endpoint to allocate and execute tasks
|
|
152
|
+
|
|
153
|
+
### Call the `/inference` Endpoint
|
|
154
|
+
|
|
155
|
+
With the server running on `http://localhost:9000`, you can allocate a task by sending an `InferenceRequest` to `/inference`.
|
|
156
|
+
|
|
157
|
+
#### Request Schema
|
|
158
|
+
|
|
159
|
+
- **`endpoint_name`**: Name of the automation endpoint to execute. This must match a recording/automation defined in the Optexity dashboard.
|
|
160
|
+
- **`input_parameters`**: `dict[str, list[str]]` – all input values for the automation, as lists of strings.
|
|
161
|
+
- **`unique_parameter_names`**: `list[str]` – subset of keys from `input_parameters` that uniquely identify this task (used for deduplication and validation). Only one task with the same `unique_parameter_names` will be allocated. If no `unique_parameter_names` are provided, the task will be allocated immediately.
|
|
162
|
+
|
|
163
|
+
#### Example `curl` Request
|
|
164
|
+
|
|
165
|
+
```bash
|
|
166
|
+
curl -X POST http://localhost:9000/inference \
|
|
167
|
+
-H "Content-Type: application/json" \
|
|
168
|
+
-d '{
|
|
169
|
+
"endpoint_name": "extract_stock_price",
|
|
170
|
+
"input_parameters": {
|
|
171
|
+
"search_term": ["NVDA"]
|
|
172
|
+
},
|
|
173
|
+
"unique_parameter_names": []
|
|
174
|
+
}'
|
|
175
|
+
```
|
|
176
|
+
|
|
177
|
+
On success, the inference server:
|
|
178
|
+
|
|
179
|
+
1. Forwards the request to your control plane at `api.optexity.com` using `INFERENCE_ENDPOINT` (defaults to `api/v1/inference`).
|
|
180
|
+
2. Receives a serialized `Task` object from the control plane.
|
|
181
|
+
3. Enqueues that `Task` locally and starts processing it in the background.
|
|
182
|
+
4. Returns a `202 Accepted` response:
|
|
183
|
+
|
|
184
|
+
```json
|
|
185
|
+
{
|
|
186
|
+
"success": true,
|
|
187
|
+
"message": "Task has been allocated"
|
|
188
|
+
}
|
|
189
|
+
```
|
|
190
|
+
|
|
191
|
+
> Task execution (browser automation, screenshots, outputs, etc.) happens asynchronously in the background worker. You can see it running locally in your browser.
|
|
192
|
+
|
|
193
|
+
### Monitor Execution
|
|
194
|
+
|
|
195
|
+
You can monitor the task on the dashboard. It will show the status, errors, outputs, and all the downloaded files.
|
|
196
|
+
|
|
197
|
+
## Video Tutorial
|
|
198
|
+
|
|
199
|
+
[](https://www.youtube.com/watch?v=q51r3idYtxo)
|
|
200
|
+
|
|
201
|
+
## Documentation
|
|
202
|
+
|
|
203
|
+
For detailed documentation, visit our [documentation site](https://docs.optexity.com):
|
|
204
|
+
|
|
205
|
+
- [Recording First Automation](https://docs.optexity.com/docs/getting_started/recording-first-inference)
|
|
206
|
+
- [Running First Inference](https://docs.optexity.com/docs/getting_started/running-first-inference)
|
|
207
|
+
- [Local Setup](https://docs.optexity.com/docs/building-automations/local-setup)
|
|
208
|
+
- [Building Automations](https://docs.optexity.com/docs/building-automations/quickstart)
|
|
209
|
+
- [API Reference](https://docs.optexity.com/docs/api-reference/introduction)
|
|
210
|
+
|
|
211
|
+
## Roadmap
|
|
212
|
+
|
|
213
|
+
We're actively working on improving Optexity. Here's what's coming:
|
|
214
|
+
|
|
215
|
+
- 🔜 **Self Improvement**: Agent adaption using self exploration
|
|
216
|
+
- 🔜 **More Action Types**: Additional interaction and extraction capabilities
|
|
217
|
+
- 🔜 **Performance Optimizations**: Faster execution and reduced resource usage
|
|
218
|
+
- 🔜 **Advanced Scheduling**: Built-in task scheduling and cron support
|
|
219
|
+
- 🔜 **Cloud Deployment**: Simplified cloud deployment options
|
|
220
|
+
|
|
221
|
+
Have ideas or feature requests? [Open an issue](https://github.com/Optexity/optexity/issues) or [join our Discord](https://discord.gg/VsRSAZSw7m) to discuss!
|
|
222
|
+
|
|
223
|
+
## Contributing
|
|
224
|
+
|
|
225
|
+
We welcome contributions! Here's how you can help:
|
|
226
|
+
|
|
227
|
+
### Reporting Issues
|
|
228
|
+
|
|
229
|
+
Found a bug or have a feature request? Please [open an issue](https://github.com/Optexity/optexity/issues) on GitHub. Include:
|
|
230
|
+
|
|
231
|
+
- A clear description of the problem
|
|
232
|
+
- Steps to reproduce
|
|
233
|
+
- Expected vs actual behavior
|
|
234
|
+
- Environment details (OS, Python version, etc.)
|
|
235
|
+
|
|
236
|
+
### Discussions
|
|
237
|
+
|
|
238
|
+
Have questions, ideas, or want to discuss the project? Use [GitHub Discussions](https://github.com/Optexity/optexity/discussions) to:
|
|
239
|
+
|
|
240
|
+
- Ask questions
|
|
241
|
+
- Share ideas
|
|
242
|
+
- Discuss best practices
|
|
243
|
+
- Get help from the community
|
|
244
|
+
|
|
245
|
+
### Community
|
|
246
|
+
|
|
247
|
+
Join our Discord community to:
|
|
248
|
+
|
|
249
|
+
- Chat with the founders directly
|
|
250
|
+
- Get real-time support
|
|
251
|
+
- Share your automations
|
|
252
|
+
- Connect with other users
|
|
253
|
+
|
|
254
|
+
[**Join Discord →**](https://discord.gg/VsRSAZSw7m)
|
|
255
|
+
|
|
256
|
+
### Development Setup
|
|
257
|
+
|
|
258
|
+
1. Fork the repository
|
|
259
|
+
2. Create a feature branch (`git checkout -b feature/amazing-feature`)
|
|
260
|
+
3. Make your changes
|
|
261
|
+
4. Run pre-commit checks: `pre-commit run --all-files`
|
|
262
|
+
5. Commit your changes (`git commit -m 'Add some amazing feature'`)
|
|
263
|
+
6. Push to the branch (`git push origin feature/amazing-feature`)
|
|
264
|
+
7. Open a Pull Request
|
|
265
|
+
|
|
266
|
+
## Examples
|
|
267
|
+
|
|
268
|
+
Check out our examples directory for sample automations:
|
|
269
|
+
|
|
270
|
+
- [I94 extraction](https://docs.optexity.com/examples/data_extraction/i94)
|
|
271
|
+
- [Healthcare Form Automation](https://docs.optexity.com/examples/healthcare/peachstate-medicaid)
|
|
272
|
+
- [QA Testing](https://docs.optexity.com/examples/qa_testing/supabase-login)
|
|
273
|
+
|
|
274
|
+
## License
|
|
275
|
+
|
|
276
|
+
This project is licensed under the terms specified in the [LICENSE](LICENSE) file.
|
|
277
|
+
|
|
278
|
+
## Support
|
|
279
|
+
|
|
280
|
+
- 📖 [Documentation](https://docs.optexity.com)
|
|
281
|
+
- 💬 [Discord Community](https://discord.gg/VsRSAZSw7m)
|
|
282
|
+
- 🐛 [Report Issues](https://github.com/Optexity/optexity/issues)
|
|
283
|
+
- 💭 [Discussions](https://github.com/Optexity/optexity/discussions)
|
|
284
|
+
- 📧 [Email Support](mailto:founders@optexity.com)
|
|
285
|
+
|
|
286
|
+
---
|
|
287
|
+
|
|
288
|
+
Made with ❤️ by the Optexity team
|
|
@@ -0,0 +1,14 @@
|
|
|
1
|
+
import logging
|
|
2
|
+
import sys
|
|
3
|
+
from pathlib import Path
|
|
4
|
+
|
|
5
|
+
logging.basicConfig(
|
|
6
|
+
level=logging.WARNING, # Default level for root logger
|
|
7
|
+
format="%(asctime)s [%(levelname)s] %(name)s.%(funcName)s: %(message)s",
|
|
8
|
+
handlers=[
|
|
9
|
+
logging.StreamHandler(sys.stdout),
|
|
10
|
+
logging.FileHandler(Path("/tmp/optexity.log")),
|
|
11
|
+
],
|
|
12
|
+
)
|
|
13
|
+
current_module = __name__.split(".")[0] # top-level module/package
|
|
14
|
+
logging.getLogger(current_module).setLevel(logging.DEBUG)
|
|
@@ -0,0 +1,82 @@
|
|
|
1
|
+
import argparse
|
|
2
|
+
import logging
|
|
3
|
+
import os
|
|
4
|
+
import subprocess
|
|
5
|
+
import sys
|
|
6
|
+
|
|
7
|
+
from dotenv import load_dotenv
|
|
8
|
+
from uvicorn import run
|
|
9
|
+
|
|
10
|
+
logger = logging.getLogger(__name__)
|
|
11
|
+
|
|
12
|
+
env_path = os.getenv("ENV_PATH")
|
|
13
|
+
if not env_path:
|
|
14
|
+
logger.warning("ENV_PATH is not set, using default values")
|
|
15
|
+
else:
|
|
16
|
+
load_dotenv(env_path)
|
|
17
|
+
|
|
18
|
+
|
|
19
|
+
def install_browsers() -> None:
|
|
20
|
+
"""Install Playwright + Patchright browsers."""
|
|
21
|
+
try:
|
|
22
|
+
subprocess.run(
|
|
23
|
+
["playwright", "install", "--with-deps", "chromium", "chrome"],
|
|
24
|
+
check=True,
|
|
25
|
+
)
|
|
26
|
+
subprocess.run(
|
|
27
|
+
["patchright", "install", "chromium", "chrome"],
|
|
28
|
+
check=True,
|
|
29
|
+
)
|
|
30
|
+
except subprocess.CalledProcessError as e:
|
|
31
|
+
print("❌ Failed to install browsers", file=sys.stderr)
|
|
32
|
+
sys.exit(e.returncode)
|
|
33
|
+
|
|
34
|
+
|
|
35
|
+
def run_inference(args: argparse.Namespace) -> None:
|
|
36
|
+
from optexity.inference.child_process import get_app_with_endpoints
|
|
37
|
+
|
|
38
|
+
app = get_app_with_endpoints(is_aws=args.is_aws)
|
|
39
|
+
run(
|
|
40
|
+
app,
|
|
41
|
+
host=args.host,
|
|
42
|
+
port=args.port,
|
|
43
|
+
)
|
|
44
|
+
|
|
45
|
+
|
|
46
|
+
def main() -> None:
|
|
47
|
+
parser = argparse.ArgumentParser(prog="optexity")
|
|
48
|
+
subparsers = parser.add_subparsers(dest="command", required=True)
|
|
49
|
+
|
|
50
|
+
# ---------------------------
|
|
51
|
+
# install-browsers
|
|
52
|
+
# ---------------------------
|
|
53
|
+
install_cmd = subparsers.add_parser(
|
|
54
|
+
"install_browsers",
|
|
55
|
+
help="Install required browsers for Optexity",
|
|
56
|
+
aliases=["install-browsers"],
|
|
57
|
+
)
|
|
58
|
+
install_cmd.set_defaults(func=lambda _: install_browsers())
|
|
59
|
+
|
|
60
|
+
# ---------------------------
|
|
61
|
+
# inference
|
|
62
|
+
# ---------------------------
|
|
63
|
+
inference_cmd = subparsers.add_parser(
|
|
64
|
+
"inference", help="Run Optexity inference server"
|
|
65
|
+
)
|
|
66
|
+
inference_cmd.add_argument("--host", default="0.0.0.0")
|
|
67
|
+
inference_cmd.add_argument("--port", type=int, required=True)
|
|
68
|
+
inference_cmd.add_argument(
|
|
69
|
+
"--child_process_id", "--child-process-id", type=int, default=0
|
|
70
|
+
)
|
|
71
|
+
inference_cmd.add_argument(
|
|
72
|
+
"--is_aws", "--is-aws", action="store_true", default=False
|
|
73
|
+
)
|
|
74
|
+
|
|
75
|
+
inference_cmd.set_defaults(func=run_inference)
|
|
76
|
+
|
|
77
|
+
args = parser.parse_args()
|
|
78
|
+
args.func(args)
|
|
79
|
+
|
|
80
|
+
|
|
81
|
+
if __name__ == "__main__":
|
|
82
|
+
main()
|
|
@@ -0,0 +1,33 @@
|
|
|
1
|
+
import asyncio
|
|
2
|
+
import os
|
|
3
|
+
|
|
4
|
+
from onepassword import Client
|
|
5
|
+
|
|
6
|
+
|
|
7
|
+
async def main():
|
|
8
|
+
# Gets your service account token from the OP_SERVICE_ACCOUNT_TOKEN environment variable.
|
|
9
|
+
token = os.getenv("OP_SERVICE_ACCOUNT_TOKEN")
|
|
10
|
+
|
|
11
|
+
# Connects to 1Password. Fill in your own integration name and version.
|
|
12
|
+
client = await Client.authenticate(
|
|
13
|
+
auth=token,
|
|
14
|
+
integration_name="My 1Password Integration",
|
|
15
|
+
integration_version="v1.0.0",
|
|
16
|
+
)
|
|
17
|
+
|
|
18
|
+
# Retrieves a secret from 1Password. Takes a secret reference as input and returns the secret to which it points.
|
|
19
|
+
value = await client.secrets.resolve(
|
|
20
|
+
"op://optexity_automation/Password112/username"
|
|
21
|
+
)
|
|
22
|
+
# value = await client.secrets.resolve("op://optexity_automation/Password11/username")
|
|
23
|
+
# use value here
|
|
24
|
+
print(value)
|
|
25
|
+
value = await client.secrets.resolve(
|
|
26
|
+
"op://optexity_automation/Password112/password"
|
|
27
|
+
)
|
|
28
|
+
value = await client.secrets.resolve("op://vault/item/field")
|
|
29
|
+
print(value)
|
|
30
|
+
|
|
31
|
+
|
|
32
|
+
if __name__ == "__main__":
|
|
33
|
+
asyncio.run(main())
|
|
@@ -0,0 +1,88 @@
|
|
|
1
|
+
import asyncio
|
|
2
|
+
import json
|
|
3
|
+
import traceback
|
|
4
|
+
|
|
5
|
+
from browser_use.dom.serializer.serializer import DOMTreeSerializer
|
|
6
|
+
|
|
7
|
+
from optexity.inference.core.interaction.handle_select import select_option_index
|
|
8
|
+
from optexity.inference.core.interaction.handle_select_utils import (
|
|
9
|
+
SelectOptionValue,
|
|
10
|
+
smart_select,
|
|
11
|
+
)
|
|
12
|
+
from optexity.inference.infra.browser import Browser
|
|
13
|
+
from optexity.schema.actions.interaction_action import SelectOptionAction
|
|
14
|
+
from optexity.schema.memory import BrowserState, Memory
|
|
15
|
+
|
|
16
|
+
|
|
17
|
+
async def main():
|
|
18
|
+
memory = Memory()
|
|
19
|
+
browser = Browser(
|
|
20
|
+
memory=memory,
|
|
21
|
+
headless=False,
|
|
22
|
+
channel="chromium",
|
|
23
|
+
debug_port=9222,
|
|
24
|
+
use_proxy=False,
|
|
25
|
+
)
|
|
26
|
+
try:
|
|
27
|
+
await browser.start()
|
|
28
|
+
await browser.go_to_url("https://practice.expandtesting.com/dropdown")
|
|
29
|
+
|
|
30
|
+
# await asyncio.to_thread(input, "Press Enter to continue...")
|
|
31
|
+
|
|
32
|
+
browser_state_summary = await browser.get_browser_state_summary()
|
|
33
|
+
browser_state = BrowserState(
|
|
34
|
+
url=browser_state_summary.url,
|
|
35
|
+
screenshot=browser_state_summary.screenshot,
|
|
36
|
+
title=browser_state_summary.title,
|
|
37
|
+
axtree=browser_state_summary.dom_state.llm_representation(),
|
|
38
|
+
)
|
|
39
|
+
|
|
40
|
+
with open("/tmp/axtree.txt", "w") as f:
|
|
41
|
+
f.write(browser_state.axtree)
|
|
42
|
+
|
|
43
|
+
index = await asyncio.to_thread(input, "Enter index: ")
|
|
44
|
+
print(f"Index: {index}")
|
|
45
|
+
node = await browser.backend_agent.browser_session.get_element_by_index(
|
|
46
|
+
int(index)
|
|
47
|
+
)
|
|
48
|
+
if node is None:
|
|
49
|
+
print("Node not found")
|
|
50
|
+
return
|
|
51
|
+
|
|
52
|
+
select_option_values = DOMTreeSerializer(node)._extract_select_options(node)
|
|
53
|
+
print("Select option values:")
|
|
54
|
+
print(json.dumps(select_option_values["all_options"], indent=4))
|
|
55
|
+
|
|
56
|
+
all_options = [
|
|
57
|
+
SelectOptionValue(value=o["value"], label=o["text"])
|
|
58
|
+
for o in select_option_values["all_options"]
|
|
59
|
+
]
|
|
60
|
+
|
|
61
|
+
while True:
|
|
62
|
+
patterns = await asyncio.to_thread(input, "Enter patterns (exit to exit): ")
|
|
63
|
+
|
|
64
|
+
if patterns.startswith("exit"):
|
|
65
|
+
return
|
|
66
|
+
|
|
67
|
+
patterns = patterns.split(",")
|
|
68
|
+
|
|
69
|
+
matched_values = await smart_select(all_options, patterns, memory)
|
|
70
|
+
|
|
71
|
+
print(f"Matched values: {matched_values}")
|
|
72
|
+
|
|
73
|
+
select_option_action = SelectOptionAction(
|
|
74
|
+
select_values=patterns,
|
|
75
|
+
prompt_instructions=f"Select the option that matches the patterns: {patterns}",
|
|
76
|
+
)
|
|
77
|
+
|
|
78
|
+
await select_option_index(select_option_action, browser, memory, None)
|
|
79
|
+
|
|
80
|
+
except Exception as e:
|
|
81
|
+
print(f"Error: {e}")
|
|
82
|
+
print(traceback.format_exc())
|
|
83
|
+
finally:
|
|
84
|
+
await browser.stop()
|
|
85
|
+
|
|
86
|
+
|
|
87
|
+
if __name__ == "__main__":
|
|
88
|
+
asyncio.run(main())
|
|
@@ -0,0 +1,313 @@
|
|
|
1
|
+
Metadata-Version: 2.4
|
|
2
|
+
Name: optexity
|
|
3
|
+
Version: 0.1.0
|
|
4
|
+
Summary: Optexity is a platform for building and running browser and computer agents.
|
|
5
|
+
Author-email: Optexity <support@optexity.com>
|
|
6
|
+
Requires-Python: >=3.11
|
|
7
|
+
Description-Content-Type: text/markdown
|
|
8
|
+
License-File: LICENSE
|
|
9
|
+
Requires-Dist: pydantic>=2
|
|
10
|
+
Requires-Dist: pydantic-settings
|
|
11
|
+
Requires-Dist: optexity-browser-use>=0.9.5
|
|
12
|
+
Requires-Dist: fastapi
|
|
13
|
+
Requires-Dist: httpx
|
|
14
|
+
Requires-Dist: aiofiles
|
|
15
|
+
Requires-Dist: async-lru
|
|
16
|
+
Requires-Dist: playwright
|
|
17
|
+
Requires-Dist: patchright
|
|
18
|
+
Requires-Dist: tokencost
|
|
19
|
+
Requires-Dist: onepassword-sdk
|
|
20
|
+
Provides-Extra: dev
|
|
21
|
+
Requires-Dist: black; extra == "dev"
|
|
22
|
+
Requires-Dist: isort; extra == "dev"
|
|
23
|
+
Requires-Dist: pre-commit; extra == "dev"
|
|
24
|
+
Dynamic: license-file
|
|
25
|
+
|
|
26
|
+
# Optexity
|
|
27
|
+
|
|
28
|
+
**Build custom browser agents** with AI-powered automation. Record browser interactions, extract data, and run complex workflows via a simple API. You can extract data from websites, fill out forms, do QA testing, and more.
|
|
29
|
+
|
|
30
|
+
## Features
|
|
31
|
+
|
|
32
|
+
- 🎯 **Visual Recording**: Record browser interactions with the Optexity Recorder Chrome extension
|
|
33
|
+
- 🤖 **AI-Powered**: Uses LLMs to handle dynamic content and find elements intelligently
|
|
34
|
+
- 📊 **Data Extraction**: Extract structured data from web pages using LLM-based extraction
|
|
35
|
+
- 🔄 **Workflow Automation**: Chain multiple actions together for complex browser workflows
|
|
36
|
+
- 🚀 **API-First**: Run automations via REST API with simple JSON requests
|
|
37
|
+
- 🎨 **Dashboard**: Manage and monitor your automations through the Optexity dashboard
|
|
38
|
+
|
|
39
|
+
## Quick Start
|
|
40
|
+
|
|
41
|
+
### 1. Create an Account
|
|
42
|
+
|
|
43
|
+
Head to [dashboard.optexity.com](https://dashboard.optexity.com) and sign up for a free account.
|
|
44
|
+
|
|
45
|
+
### 2. Get Your API Key
|
|
46
|
+
|
|
47
|
+
Once logged in, navigate to the **API Keys** section in your dashboard and create a new key.
|
|
48
|
+
|
|
49
|
+
### 3. Install the Recorder Extension
|
|
50
|
+
|
|
51
|
+
Install the **Optexity Recorder** extension from the [Chrome Web Store](https://chromewebstore.google.com/detail/optexity-recorder/pbaganbicadeoacahamnbgohafchgakp). This extension captures your browser interactions and converts them into automation workflows.
|
|
52
|
+
|
|
53
|
+
## Installation
|
|
54
|
+
|
|
55
|
+
### Prerequisites
|
|
56
|
+
|
|
57
|
+
- Python 3.11+
|
|
58
|
+
- Node.js 18+ (included with Conda option)
|
|
59
|
+
- Git
|
|
60
|
+
|
|
61
|
+
### Step 1: Clone the Repository
|
|
62
|
+
|
|
63
|
+
```bash
|
|
64
|
+
git clone git@github.com:Optexity/optexity.git
|
|
65
|
+
cd optexity
|
|
66
|
+
./update_submodule.sh
|
|
67
|
+
```
|
|
68
|
+
|
|
69
|
+
### Step 2: Create and Activate a Python Environment
|
|
70
|
+
|
|
71
|
+
Choose **one** of the options below.
|
|
72
|
+
|
|
73
|
+
#### Option A – Conda (includes Python 3.11 and Node.js)
|
|
74
|
+
|
|
75
|
+
```bash
|
|
76
|
+
conda create -n optexity python=3.11 nodejs
|
|
77
|
+
conda activate optexity
|
|
78
|
+
```
|
|
79
|
+
|
|
80
|
+
Install miniconda here: https://docs.conda.io/projects/conda/en/stable/user-guide/install/index.html#installing-in-silent-mode
|
|
81
|
+
|
|
82
|
+
#### Option B – Python `venv`
|
|
83
|
+
|
|
84
|
+
```bash
|
|
85
|
+
python3 -m venv .venv
|
|
86
|
+
source .venv/bin/activate
|
|
87
|
+
```
|
|
88
|
+
|
|
89
|
+
> If you pick `venv`, ensure Node.js 18+ is already available on your machine before continuing.
|
|
90
|
+
|
|
91
|
+
### Step 3: Install Dependencies
|
|
92
|
+
|
|
93
|
+
Run everything from the repository root:
|
|
94
|
+
|
|
95
|
+
```bash
|
|
96
|
+
pip install -e "external/browser-use"
|
|
97
|
+
pip install -e .
|
|
98
|
+
playwright install --with-deps chromium chrome
|
|
99
|
+
patchright install chromium chrome
|
|
100
|
+
pre-commit install --install-hooks
|
|
101
|
+
pre-commit install --hook-type pre-push
|
|
102
|
+
```
|
|
103
|
+
|
|
104
|
+
### Step 4: Configure Your Environment
|
|
105
|
+
|
|
106
|
+
Optexity reads configuration from a standard `.env` file via the `ENV_PATH` environment variable.
|
|
107
|
+
|
|
108
|
+
Create a `.env` file in the repo root:
|
|
109
|
+
|
|
110
|
+
```bash
|
|
111
|
+
touch .env
|
|
112
|
+
```
|
|
113
|
+
|
|
114
|
+
Add the required values:
|
|
115
|
+
|
|
116
|
+
```bash
|
|
117
|
+
API_KEY=YOUR_OPTEXITY_API_KEY # API key used for authenticated requests
|
|
118
|
+
GOOGLE_API_KEY=YOUR_GOOGLE_API_KEY # API key used for Google Gemini
|
|
119
|
+
DEPLOYMENT=dev # or "prod" in production
|
|
120
|
+
```
|
|
121
|
+
|
|
122
|
+
You can get your free Google Gemini API key from the [Google AI Studio Console](https://aistudio.google.com).
|
|
123
|
+
|
|
124
|
+
Then export `ENV_PATH` when running processes that rely on these settings:
|
|
125
|
+
|
|
126
|
+
```bash
|
|
127
|
+
export ENV_PATH=.env
|
|
128
|
+
```
|
|
129
|
+
|
|
130
|
+
> If `ENV_PATH` is not set, the inference server will try to start with defaults and log a warning. For normal usage you should always point `ENV_PATH` at a real `.env` file.
|
|
131
|
+
|
|
132
|
+
## Recording Your First Automation
|
|
133
|
+
|
|
134
|
+
The fastest way to create an automation is by recording your actions directly in the browser.
|
|
135
|
+
|
|
136
|
+
### Steps
|
|
137
|
+
|
|
138
|
+
1. **Navigate to the target website**: Open Chrome and go to the website you want to automate (e.g., `https://stockanalysis.com/`)
|
|
139
|
+
|
|
140
|
+
2. **Start capturing**: Click the Optexity Recorder extension icon and hit **Start Capture**
|
|
141
|
+
|
|
142
|
+
3. **Perform your actions**:
|
|
143
|
+
- Click on the "Search" button
|
|
144
|
+
- Enter the stock symbol in the search bar
|
|
145
|
+
- Click on the first result in the search results
|
|
146
|
+
|
|
147
|
+
4. **Stop and save**: When finished, click **Complete Capture**. The automation is automatically saved to your dashboard as a JSON file.
|
|
148
|
+
|
|
149
|
+
### Recording Tips
|
|
150
|
+
|
|
151
|
+
- Perform actions slowly and deliberately for better accuracy
|
|
152
|
+
- Avoid unnecessary scrolling or hovering
|
|
153
|
+
- The recorder captures clicks, text input, and form selections
|
|
154
|
+
|
|
155
|
+
## Running Your Automation
|
|
156
|
+
|
|
157
|
+
### Start the Inference Server
|
|
158
|
+
|
|
159
|
+
The primary way to run browser automations locally is via the inference child process server.
|
|
160
|
+
|
|
161
|
+
From the repository root:
|
|
162
|
+
|
|
163
|
+
```bash
|
|
164
|
+
ENV_PATH=.env python optexity/inference/child_process.py --port 9000 --child_process_id 0
|
|
165
|
+
```
|
|
166
|
+
|
|
167
|
+
Key parameters:
|
|
168
|
+
|
|
169
|
+
- **`--port`**: HTTP port the local inference server listens on (e.g. `9000`).
|
|
170
|
+
- **`--child_process_id`**: Integer identifier for this worker. Use different IDs if you run multiple workers in parallel.
|
|
171
|
+
|
|
172
|
+
When this process starts, it exposes:
|
|
173
|
+
|
|
174
|
+
- `GET /health` – health and queue status
|
|
175
|
+
- `GET /is_task_running` – whether a task is currently executing
|
|
176
|
+
- `POST /inference` – main endpoint to allocate and execute tasks
|
|
177
|
+
|
|
178
|
+
### Call the `/inference` Endpoint
|
|
179
|
+
|
|
180
|
+
With the server running on `http://localhost:9000`, you can allocate a task by sending an `InferenceRequest` to `/inference`.
|
|
181
|
+
|
|
182
|
+
#### Request Schema
|
|
183
|
+
|
|
184
|
+
- **`endpoint_name`**: Name of the automation endpoint to execute. This must match a recording/automation defined in the Optexity dashboard.
|
|
185
|
+
- **`input_parameters`**: `dict[str, list[str]]` – all input values for the automation, as lists of strings.
|
|
186
|
+
- **`unique_parameter_names`**: `list[str]` – subset of keys from `input_parameters` that uniquely identify this task (used for deduplication and validation). Only one task with the same `unique_parameter_names` will be allocated. If no `unique_parameter_names` are provided, the task will be allocated immediately.
|
|
187
|
+
|
|
188
|
+
#### Example `curl` Request
|
|
189
|
+
|
|
190
|
+
```bash
|
|
191
|
+
curl -X POST http://localhost:9000/inference \
|
|
192
|
+
-H "Content-Type: application/json" \
|
|
193
|
+
-d '{
|
|
194
|
+
"endpoint_name": "extract_stock_price",
|
|
195
|
+
"input_parameters": {
|
|
196
|
+
"search_term": ["NVDA"]
|
|
197
|
+
},
|
|
198
|
+
"unique_parameter_names": []
|
|
199
|
+
}'
|
|
200
|
+
```
|
|
201
|
+
|
|
202
|
+
On success, the inference server:
|
|
203
|
+
|
|
204
|
+
1. Forwards the request to your control plane at `api.optexity.com` using `INFERENCE_ENDPOINT` (defaults to `api/v1/inference`).
|
|
205
|
+
2. Receives a serialized `Task` object from the control plane.
|
|
206
|
+
3. Enqueues that `Task` locally and starts processing it in the background.
|
|
207
|
+
4. Returns a `202 Accepted` response:
|
|
208
|
+
|
|
209
|
+
```json
|
|
210
|
+
{
|
|
211
|
+
"success": true,
|
|
212
|
+
"message": "Task has been allocated"
|
|
213
|
+
}
|
|
214
|
+
```
|
|
215
|
+
|
|
216
|
+
> Task execution (browser automation, screenshots, outputs, etc.) happens asynchronously in the background worker. You can see it running locally in your browser.
|
|
217
|
+
|
|
218
|
+
### Monitor Execution
|
|
219
|
+
|
|
220
|
+
You can monitor the task on the dashboard. It will show the status, errors, outputs, and all the downloaded files.
|
|
221
|
+
|
|
222
|
+
## Video Tutorial
|
|
223
|
+
|
|
224
|
+
[](https://www.youtube.com/watch?v=q51r3idYtxo)
|
|
225
|
+
|
|
226
|
+
## Documentation
|
|
227
|
+
|
|
228
|
+
For detailed documentation, visit our [documentation site](https://docs.optexity.com):
|
|
229
|
+
|
|
230
|
+
- [Recording First Automation](https://docs.optexity.com/docs/getting_started/recording-first-inference)
|
|
231
|
+
- [Running First Inference](https://docs.optexity.com/docs/getting_started/running-first-inference)
|
|
232
|
+
- [Local Setup](https://docs.optexity.com/docs/building-automations/local-setup)
|
|
233
|
+
- [Building Automations](https://docs.optexity.com/docs/building-automations/quickstart)
|
|
234
|
+
- [API Reference](https://docs.optexity.com/docs/api-reference/introduction)
|
|
235
|
+
|
|
236
|
+
## Roadmap
|
|
237
|
+
|
|
238
|
+
We're actively working on improving Optexity. Here's what's coming:
|
|
239
|
+
|
|
240
|
+
- 🔜 **Self Improvement**: Agent adaption using self exploration
|
|
241
|
+
- 🔜 **More Action Types**: Additional interaction and extraction capabilities
|
|
242
|
+
- 🔜 **Performance Optimizations**: Faster execution and reduced resource usage
|
|
243
|
+
- 🔜 **Advanced Scheduling**: Built-in task scheduling and cron support
|
|
244
|
+
- 🔜 **Cloud Deployment**: Simplified cloud deployment options
|
|
245
|
+
|
|
246
|
+
Have ideas or feature requests? [Open an issue](https://github.com/Optexity/optexity/issues) or [join our Discord](https://discord.gg/VsRSAZSw7m) to discuss!
|
|
247
|
+
|
|
248
|
+
## Contributing
|
|
249
|
+
|
|
250
|
+
We welcome contributions! Here's how you can help:
|
|
251
|
+
|
|
252
|
+
### Reporting Issues
|
|
253
|
+
|
|
254
|
+
Found a bug or have a feature request? Please [open an issue](https://github.com/Optexity/optexity/issues) on GitHub. Include:
|
|
255
|
+
|
|
256
|
+
- A clear description of the problem
|
|
257
|
+
- Steps to reproduce
|
|
258
|
+
- Expected vs actual behavior
|
|
259
|
+
- Environment details (OS, Python version, etc.)
|
|
260
|
+
|
|
261
|
+
### Discussions
|
|
262
|
+
|
|
263
|
+
Have questions, ideas, or want to discuss the project? Use [GitHub Discussions](https://github.com/Optexity/optexity/discussions) to:
|
|
264
|
+
|
|
265
|
+
- Ask questions
|
|
266
|
+
- Share ideas
|
|
267
|
+
- Discuss best practices
|
|
268
|
+
- Get help from the community
|
|
269
|
+
|
|
270
|
+
### Community
|
|
271
|
+
|
|
272
|
+
Join our Discord community to:
|
|
273
|
+
|
|
274
|
+
- Chat with the founders directly
|
|
275
|
+
- Get real-time support
|
|
276
|
+
- Share your automations
|
|
277
|
+
- Connect with other users
|
|
278
|
+
|
|
279
|
+
[**Join Discord →**](https://discord.gg/VsRSAZSw7m)
|
|
280
|
+
|
|
281
|
+
### Development Setup
|
|
282
|
+
|
|
283
|
+
1. Fork the repository
|
|
284
|
+
2. Create a feature branch (`git checkout -b feature/amazing-feature`)
|
|
285
|
+
3. Make your changes
|
|
286
|
+
4. Run pre-commit checks: `pre-commit run --all-files`
|
|
287
|
+
5. Commit your changes (`git commit -m 'Add some amazing feature'`)
|
|
288
|
+
6. Push to the branch (`git push origin feature/amazing-feature`)
|
|
289
|
+
7. Open a Pull Request
|
|
290
|
+
|
|
291
|
+
## Examples
|
|
292
|
+
|
|
293
|
+
Check out our examples directory for sample automations:
|
|
294
|
+
|
|
295
|
+
- [I94 extraction](https://docs.optexity.com/examples/data_extraction/i94)
|
|
296
|
+
- [Healthcare Form Automation](https://docs.optexity.com/examples/healthcare/peachstate-medicaid)
|
|
297
|
+
- [QA Testing](https://docs.optexity.com/examples/qa_testing/supabase-login)
|
|
298
|
+
|
|
299
|
+
## License
|
|
300
|
+
|
|
301
|
+
This project is licensed under the terms specified in the [LICENSE](LICENSE) file.
|
|
302
|
+
|
|
303
|
+
## Support
|
|
304
|
+
|
|
305
|
+
- 📖 [Documentation](https://docs.optexity.com)
|
|
306
|
+
- 💬 [Discord Community](https://discord.gg/VsRSAZSw7m)
|
|
307
|
+
- 🐛 [Report Issues](https://github.com/Optexity/optexity/issues)
|
|
308
|
+
- 💭 [Discussions](https://github.com/Optexity/optexity/discussions)
|
|
309
|
+
- 📧 [Email Support](mailto:founders@optexity.com)
|
|
310
|
+
|
|
311
|
+
---
|
|
312
|
+
|
|
313
|
+
Made with ❤️ by the Optexity team
|
|
@@ -0,0 +1,14 @@
|
|
|
1
|
+
LICENSE
|
|
2
|
+
README.md
|
|
3
|
+
pyproject.toml
|
|
4
|
+
optexity/__init__.py
|
|
5
|
+
optexity/cli.py
|
|
6
|
+
optexity/exceptions.py
|
|
7
|
+
optexity/onepassword_integration.py
|
|
8
|
+
optexity/test.py
|
|
9
|
+
optexity.egg-info/PKG-INFO
|
|
10
|
+
optexity.egg-info/SOURCES.txt
|
|
11
|
+
optexity.egg-info/dependency_links.txt
|
|
12
|
+
optexity.egg-info/entry_points.txt
|
|
13
|
+
optexity.egg-info/requires.txt
|
|
14
|
+
optexity.egg-info/top_level.txt
|
|
@@ -0,0 +1 @@
|
|
|
1
|
+
|
|
@@ -0,0 +1 @@
|
|
|
1
|
+
optexity
|
|
@@ -0,0 +1,56 @@
|
|
|
1
|
+
[build-system]
|
|
2
|
+
requires = ["setuptools>=68", "wheel"]
|
|
3
|
+
build-backend = "setuptools.build_meta"
|
|
4
|
+
|
|
5
|
+
[project]
|
|
6
|
+
name = "optexity"
|
|
7
|
+
version = "0.1.0"
|
|
8
|
+
readme = "README.md"
|
|
9
|
+
description = "Optexity is a platform for building and running browser and computer agents."
|
|
10
|
+
authors = [{ name = "Optexity", email = "support@optexity.com" }]
|
|
11
|
+
requires-python = ">=3.11"
|
|
12
|
+
|
|
13
|
+
dependencies = [
|
|
14
|
+
# core
|
|
15
|
+
"pydantic>=2",
|
|
16
|
+
"pydantic-settings",
|
|
17
|
+
|
|
18
|
+
# optexity forked dependency
|
|
19
|
+
"optexity-browser-use>=0.9.5",
|
|
20
|
+
|
|
21
|
+
# web / infra
|
|
22
|
+
"fastapi",
|
|
23
|
+
"httpx",
|
|
24
|
+
"aiofiles",
|
|
25
|
+
"async-lru",
|
|
26
|
+
|
|
27
|
+
# browser tooling (runtime)
|
|
28
|
+
"playwright",
|
|
29
|
+
"patchright",
|
|
30
|
+
|
|
31
|
+
# misc runtime deps
|
|
32
|
+
"tokencost",
|
|
33
|
+
"onepassword-sdk",
|
|
34
|
+
]
|
|
35
|
+
|
|
36
|
+
[project.optional-dependencies]
|
|
37
|
+
dev = [
|
|
38
|
+
"black",
|
|
39
|
+
"isort",
|
|
40
|
+
"pre-commit",
|
|
41
|
+
]
|
|
42
|
+
|
|
43
|
+
[project.scripts]
|
|
44
|
+
optexity = "optexity.cli:main"
|
|
45
|
+
|
|
46
|
+
[tool.setuptools.packages.find]
|
|
47
|
+
where = ["."]
|
|
48
|
+
include = ["optexity"]
|
|
49
|
+
|
|
50
|
+
[tool.black]
|
|
51
|
+
line-length = 88
|
|
52
|
+
target-version = ["py311"]
|
|
53
|
+
|
|
54
|
+
[tool.isort]
|
|
55
|
+
profile = "black"
|
|
56
|
+
line_length = 88
|
optexity-0.1.0/setup.cfg
ADDED